The use of front and back-end separate development involves Vue+ElementUI+Axios. As a professional white whoring party and a complete white, we must learn and practice while learning. First, let's have some learning materials:
The most important and critical learning materials must be the official website:
Vue official website
ElemetnUI official website
Axios official website
If you don't understand anything on the official website, you can check and fill in the following courses. Codewy's video has part of the project structure and specifications
<[bad programmer] ElementUI tutorial for back-end programmers, combined with the case of SpringBoot project, is over!!!>
<The latest Vue and Vuejs tutorials, from getting started to mastering>
Project construction and directory
Referring to the course of codeWhy, the project creation process and directory settings are as follows:
(1) Create project
vue init webpack webPro
? Project name web
? Project description test
? Author XXX
? Vue build standalone
? Install vue-router? Yes
? Use ESLint to lint your code? Yes
? Pick an ESLint preset Standard
? Set up unit tests Yes
? Pick a test runner jest
? Setup e2e tests with Nightwatch? No
? Should we run `npm install` for you after the project has been created? (recommended) npm
(2) Create project catalog
First create the directory structure without any operation,
src The directory under is
	assets   //Pictures and other resources
		css
		img
	components  // assembly
		common   //Common component
		content
	network    // Front and rear end interaction
		utils

	router     // route
	store     //
	view   //page
(3) Introducing ElementUI
Refer to the chapter from ElementUI official website - > installation and quick start. Be sure to introduce the index.css of element UI, otherwise the style will not take effect.
npm i element-ui -S
 stay main.js The following content is introduced in
import ElementUI from 'element-ui';
import 'element-ui/lib/theme-chalk/index.css';
import App from './App.vue';

Vue.use(ElementUI);
(4) Introducing Axios and basic packages
npm install axios --save-dev
Vue encapsulates Axios, referring to coderWhy and a great God Packaging process
Create http.js and request.js in the / network/utils directory. You can view the great God's blog for the specific code.
Basic verification
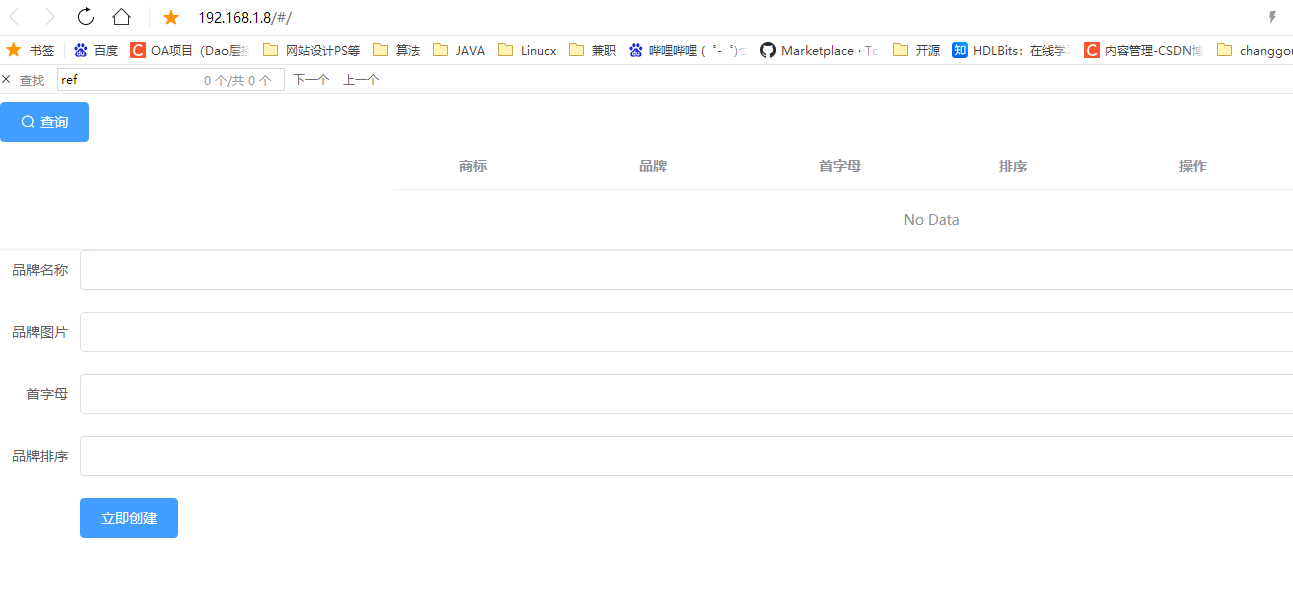
The goods service has been built in the background to realize the addition, deletion, modification and query of brand. The query and addition of brand are used for a simple verification. The verification style is ElementUI tables and forms

brands.vue is created as follows. The code is very ugly, and the sequence is optimized.
<template>
  <div class="brands">
    <el-button type="primary" icon="el-icon-search" @click="getAllbrands">query</el-button>
    <el-table
      :data="brandsList"
      style="width: 100%"
      align="center"
      highlight-current-row
      :row-class-name="tableRowClassName">
      <el-table-column type="selected" width="55"></el-table-column>
      <el-table-column
        prop="image"
        label="trademark"
        width="180">
      </el-table-column>
      <el-table-column
        prop="name"
        label="brand"
        width="180">
      </el-table-column>
      <el-table-column
        prop="letter"
        label="Initials"
        width="180">
      </el-table-column>
      <el-table-column
        prop="seq"
        label="sort"
        width="180">
      </el-table-column>
      <el-table-column
        prop="operation"
        label="operation"
        width="300">
        <template slot-scope="scope">
          <el-button type="info" icon="el-icon-delete" @click="deleteUser(scope.row.phone)"></el-button>
        </template>
      </el-table-column>
    </el-table>

    <el-form ref="brandForm" :model="brandForm" label-width="80px">
      <el-form-item label="Brand name">
        <el-input v-model="brandForm.name"></el-input>
      </el-form-item>
      <el-form-item label="Brand picture">
        <el-input v-model="brandForm.img"></el-input>
      </el-form-item>
      <el-form-item label="Initials">
        <el-input v-model="brandForm.letter"></el-input>
      </el-form-item>
      <el-form-item label="Brand ranking">
        <el-input v-model="brandForm.seq"></el-input>
      </el-form-item>
      <el-form-item>
        <el-button type="primary" @click="addBrands(brandForm)">Create now</el-button>
      </el-form-item>
    </el-form>
  </div>
</template>

<style>
  .el-table .warning-row {
    background: oldlace;
  }

  .el-table .success-row {
    background: #f0f9eb;
  }
</style>

<script>
  import {getGoodsListAllAPI,addBrandAPI} from '@/network/goods'

  export default {
    name: "goods",
    methods: {
      tableRowClassName({row, rowIndex}) {
        if (rowIndex === 1) {
          return 'warning-row';
        } else if (rowIndex === 3) {
          return 'success-row';
        }
        return '';
      },
      getAllbrands() {
        getGoodsListAllAPI().then(res => {
          let brands = []
          if (res.status == "200") {
            brands = res.data.data;
            console.log(brands)
          }
          this.brandsList = brands;
          console.log(this.brandsList)
        }).catch(
          err => console.log(err)
        )
      },
      addBrands(brandForm){
        console.log(brandForm)
        addBrandAPI(brandForm).then(res => console.log(res)).catch(e => console.log(e));
      }
    },
    data() {
      return {
        brandsList: [],
        brandForm:{
          name:'',
          img:'',
          letter:'',
          seq:''
        }
      }
    }
  }
</script>
Deployment validation
When npm run build is executed, the static files of the foreground will appear in the dist directory, and nginx will be installed in the linux virtual machine
wget http://nginx.org/download/nginx-1.13.7.tar.gz
 tar -xvf nginx-1.13.7.tar.gz
 ./configure
 make
 make install
 whereis nginx  // View the installation directory of nginx
After nginx installation is completed, the remote viewing website is as follows:

Put the static file into the html directory. After restarting nginx, the view page is as follows:

After verification, the discovery can take effect.
FAQ
(1) The index.css style of ElementUI is not introduced, resulting in incorrect components and styles of ElementUI
(2) div must be added to the template in the new vue, otherwise an error that requires the same root will be reported when multiple tags are created
(3) The model attribute of ElementUI is a data object and has not been verified with rules

(4) Axios has configured BaseURL and timeout, which can be used directly. In case of postMan, it can be called, but in case of token verification, it cannot be called. Therefore, the token part of request.js is removed first