[root@RHEL7 expect]# . ssh.exp
bash: spawn: command not found...
couldn't read file "{": no such file or directory
bash: yes/no: No such file or directory
Key point: first, let's talk about the root cause of the problem.
1. Make sure that expect's dependent tcl is installed
2. Make sure expect is installed
Root cause of the problem: when executing the script, use #. File.exp instead of #. / file.exp. The problem is with the slash.
1, shell review
Types of shell execution methods:
The first uses absolute path execution
The second method uses relative path execution, such as. / mode
The third is to use the sh command to execute the format. The sh script name does not need the execution permission - x parameter (display the execution process)
The fourth way is to use the (space) script name without execution permission. a.sh
The fifth way is to use the source script name without execution permission (mainly used for effective configuration files)
If expect in the case is executed by the fourth method (space), an error will be reported:
[root@RHEL7 expect]# . ssh.exp
bash: spawn: command not found...
couldn't read file "{": no such file or directory
bash: yes/no: No such file or directory
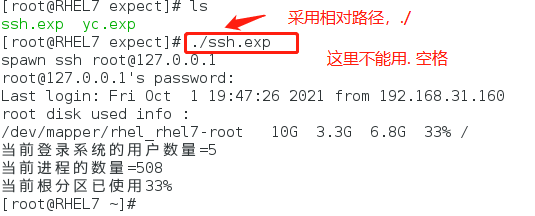
The second way is to execute relative paths.
Note: for ordinary bash shell, the above five execution methods can be used. expect is not so easy to use. The second method is preferred!
Special note: so far, the problem has been solved. You still have valuable time to continue. If you are busy, you can skip the following content!
2, expect installation + problem restore
1. Install expect dependent tcl
1. Download dependent packages
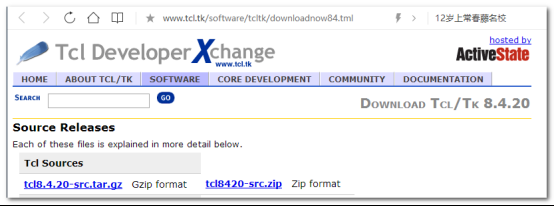
http://www.tcl.tk/software/tcltk/downloadnow84.tml
Select: tcl8.4.20-src.tar.gz
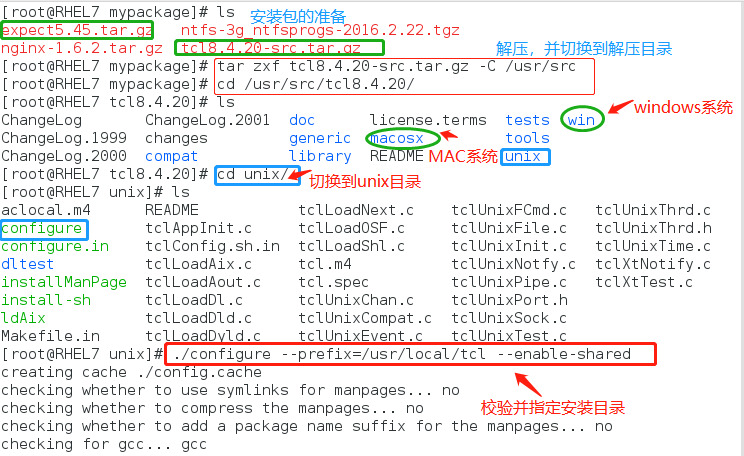
2. Installation dependency
#tar zxf tcl8.4.20-src.tar.gz -C /usr/src/

#cd /usr/src/tcl8.4.20

#ls can see that after decompression, the tool supports a variety of systems

#CD / enter unix system

#. / configure -- prefix = / usr / local / TCL -- enable shared enable sharing

#make -j 4

#make install
2. Install expect
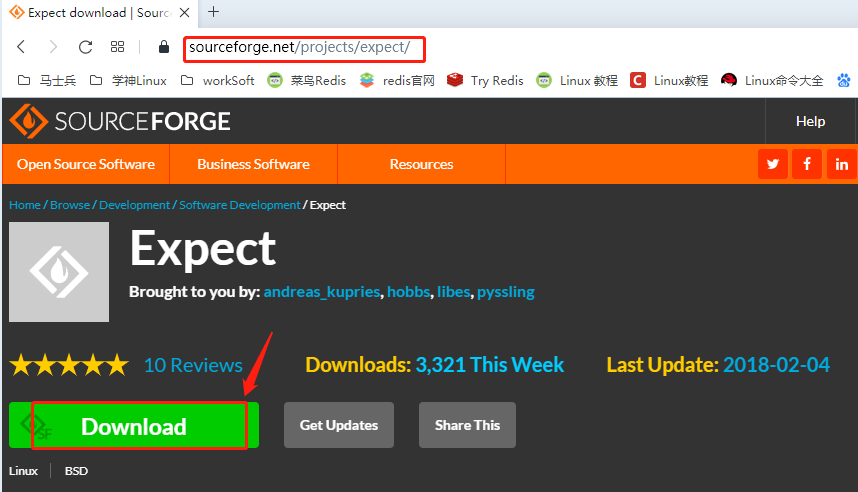
1. Download the installation package
Download address:
expect5.45.tar.gz
https://sourceforge.net/projects/expect/files/latest/download
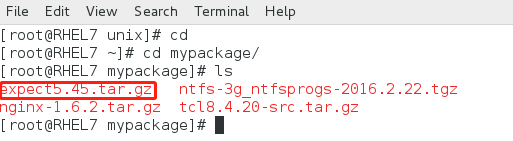
#cd
#cd mypackage switches to the compressed package storage location
2. Install expect
#tar zxf expect5.45.tar.gz -C /usr/src unzip to the specified location
#cd /usr/src/expect5.45/ switch to the decompression directory
#./configure --prefix=/usr/local/expect --with-tcl=/usr/local/tcl/lib  --with-tclinclude=/usr/src/tcl8.4.20/generic/
#make -j 4
#make install
Note: prefix specifies the installation path; with adds support for tcl and specifies the address of tcl lib library; Refer to the tcl configuration file to associate the two.
3. Configure tcl and expect (create soft link)
1. Copy the tcl configuration file to the upper level directory folder
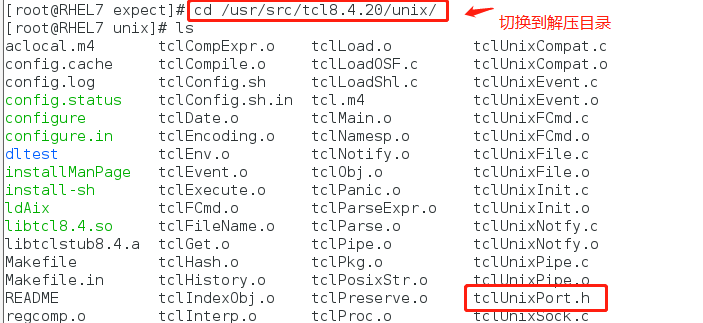
#cd /usr/src/tcl8.4.20/unix/ note: TCL itself supports windows and mac. You need to switch directories
#ls
#CP tclunixport. H.. / generic / copy a copy of the configuration file to the folder of the parent directory (to be used later)
2. Create a soft link for expect (easy to remember and use)
#ln -s /usr/local/tcl/bin/expect  /usr/local/expect/bin/expect
#Ln - S / usr / local / TCL / bin / expect / bin / expect can also be connected to the directory under bin and / bin/bash
#Ln - S / usr / local / TCL / bin / expect / usr / bin / expect as soft link (easy to use)
Note: the expect command is actually in the Tcl package, not in the expect package.
Therefore, you need to make a soft link to the expect command in tcl and link it to the expect package.
Note: the above is manual installation. Of course, you can also use yum to install. yum can automatically solve the dependency problem.
#yum -y install expect
4. Script
#vim ssh.exp
#!/usr/bin/expect -f  #Note: - f here is not required
set timeout 30
spawn ssh root@127.0.0.1
expect {   #Note: there is a space between keywords and braces
"yes/no"  {send "yes\r" ; exp_continue }
"password:" {send "root\r" }
}
interact
5. Problem reduction and handling
#chmod +x ssh.exp add execution permission to the script
#. ssh.exp note: there is a space after the dot. This is the fourth execution method of the shell (expet is the wrong method)
[root@RHEL7 expect]# . ssh.exp
bash: spawn: command not found...
couldn't read file "{": no such file or directory
bash: yes/no: No such file or directory
It's this mistake. All kinds of questions can't find the right answer. This is a detailed question.
The execution of expect is different from that of bash shell in both syntax and execution mode.
When you run expect, you need to use the second method, which is executed by the current path #. /,
3, expect in-depth explanation
1.expect details
expect is an automated interactive suite, which is mainly used when executing commands and programs. The system requires the input of specified strings in the form of interaction to realize interactive communication.
expect automatic interaction process:
spawn starts the specified process -- expect to get the specified keyword -- send to send the specified character to the specified program -- execute and exit
2.expect common commands
spawn The interactive program starts with a command or a specified program
expect Wait for the feedback from a process to obtain the matching information. If the matching is successful, execute the program action after expect
send exp_send Used to send the specified string information
exp_continue You need to use multiple matches in expect
send_user Used to print out the equivalent of echo in the shell
exit Exit expect script
eof expect execution end exit
set Define variables
puts Output variable
set timeout Set timeout
interact exits automation and begins to allow user interaction
3. In the case, each line of code is explained in detail
1. [#!/usr/bin/expect]
This line tells the operating system which shell the code in the script uses to execute. In fact, expect here is similar to bash under linux and cmd under windows.
Note: this line needs to be in the first line of the script.
2. [set timeout 30]
Set the timeout. Now you just remember that the timing unit is seconds
Note: if set to - 1, no timeout is allowed
3. [spawn ssh root@127.0.0.1]
Spawn is an internal command of expect that can be executed only after entering the expect environment. If expect is not installed or executed directly under the default SHELL, the spawn command cannot be found. So don't use commands like "which spawn" to find the spawn command. Its main function is to add a SHELL to the ssh running process to pass interactive instructions.
4. [expect "password:"]
expect {"yes/no" { send "yes\r" ;exp_continue}"password:" { send "123456\r"}}
Expect here is also an internal command of expect. The shell command of expect is the same as the internal command, but it is not a function. Just get used to it.
This command means to judge whether the last output result contains a "yes/no" string. If yes, it will immediately return a value through send. If yes, it will continue to judge whether it contains a password string. If yes, it will return a value through send. Otherwise, it will return after waiting for a period of time. The waiting time is the previously set 30 seconds
5. [send "root\r"]
Here is the interactive action, which is equivalent to the action of manually entering the password.
Warm tip: don't forget to add "\ r" at the end of the command string. If there is an abnormal waiting state, you can check it.
6. [interact]
After execution, keep the interactive state and hand over the control to the console. At this time, you can operate manually. If there is no such sentence, you will exit after login, rather than stay on the remote terminal.
4, expect exquisite case
1. Write a simplified version of remote login
#vim 1.exp
#!/usr/bin/expect
spawn ssh saneri@192.168.56.103 df -Th
expect "*password"
send "123456\n"
expect eof
2. Write an expect script and execute multiple commands
#vim 2.exp
#!/usr/bin/expect -f
set timeout 10
spawn sudo su - root
expect "*password*"
send "123456\r"
expect "#*"
send "ls\r"
expect "#*"
send "df -Th\r"
send "exit\r"
expect eof
3. Remote login of internal custom parameters
#vim 3.exp
#!/usr/tcl/bin/expect
set timeout 30
set host "101.200.241.109"
set username "root"
set password "123456"

spawn ssh $username@$host
expect "*password*" {send "$password\r"}
interact
4.expect number of external parameters and access to external parameters
#vim 4.exp
#!/usr/tcl/bin/expect
if {$argc < 3} {
    puts "Usage:cmd <host> <username> <password>"
    exit 1
}
set timeout -1
set host [lindex $argv 0]
set username [lindex $argv 1]
set password [lindex $argv 2]
spawn ssh $username@$host
expect "*password*" {send "$password\r"}
interact
In expect, $argc represents the number of parameters, and the parameter values are stored in $argv,
For example, the first parameter is [lindex $argv 0], and so on.