total tips:
1. There is no need to install the graphics card driver first. CUDA toolkit comes with a driver. Install first, but report various errors
2 cudaToolKit must select runFile instead of deb, otherwise an error will be reported and the configuration cannot be selected during installation
3 install gcc. Ubuntu 18.04 installs version 7.3 by default. You cannot make during cuda and cudnn installation tests. You need to downgrade gcc, such as 5.5
background konwledge
1, Introduction to graphics card driver, CUDA and cuDNN
Graphics card driver
The graphics card driver is a program encapsulated into software, and the hardware manufacturer writes the configuration file according to the operating system. After successful installation, it becomes a small piece of code in the operating system. It is the software corresponding to the hardware. With it, the computer can communicate with the graphics card and drive it to work. If there is no graphics card driver, the graphics card will not work.
CUDA
introduction: it is a parallel computing platform and programming model invented by NVIDIA, which can significantly improve the computing performance of GPU.
introduction link on the official website: https://docs.nvidia.com/cuda/cuda-installation-guide-microsoft-windows/index.html
cuDNN
Official website overview: NVIDIA cuDNN is a GPU acceleration library for deep neural network computing, which provides highly optimized implementations for standard routines, such as forward and backward convolution, pooling, normalization and activation layers. It is part of the NVIDIA Deep Learning SDK.
Official website overview link: https://docs.nvidia.com/deeplearning/sdk/cudnn-install/
A metaphor can more vividly explain the relationship between CUDA and cuDNN: CUDA is regarded as a workbench with many tools, such as hammer, screwdriver, etc. cuDNN is a CUDA based deep learning GPU acceleration library. With it, we can complete the calculation of deep learning on GPU. It is equivalent to a working tool. For example, it is a wrench. But when CUDA bought this workbench, it didn't send a wrench. To run the deep neural network on CUDA, you need to install cuDNN, just as you need to buy a wrench if you want to screw a nut. In this way, GPU can work in deep neural network, and its working speed is much faster than that of CPU.
Metaphor from: https://www.jianshu.com/p/622f47f94784
change source
sudo gedit /etc/apt/sources.list
deb https://mirrors.ustc.edu.cn/ubuntu/ bionic main restricted universe multiverse
deb-src https://mirrors.ustc.edu.cn/ubuntu/ bionic main restricted universe multiverse
deb https://mirrors.ustc.edu.cn/ubuntu/ bionic-updates main restricted universe multiverse
deb-src https://mirrors.ustc.edu.cn/ubuntu/ bionic-updates main restricted universe multiverse
deb https://mirrors.ustc.edu.cn/ubuntu/ bionic-backports main restricted universe multiverse
deb-src https://mirrors.ustc.edu.cn/ubuntu/ bionic-backports main restricted universe multiverse
deb https://mirrors.ustc.edu.cn/ubuntu/ bionic-security main restricted universe multiverse
deb-src https://mirrors.ustc.edu.cn/ubuntu/ bionic-security main restricted universe multiverse
deb https://mirrors.ustc.edu.cn/ubuntu/ bionic-proposed main restricted universe multiverse
deb-src https://mirrors.ustc.edu.cn/ubuntu/ bionic-proposed main restricted universe multiverse
sudo apt update
Reduce kernel version
If you do not drop the kernel and install cuda directly, the effect is like this
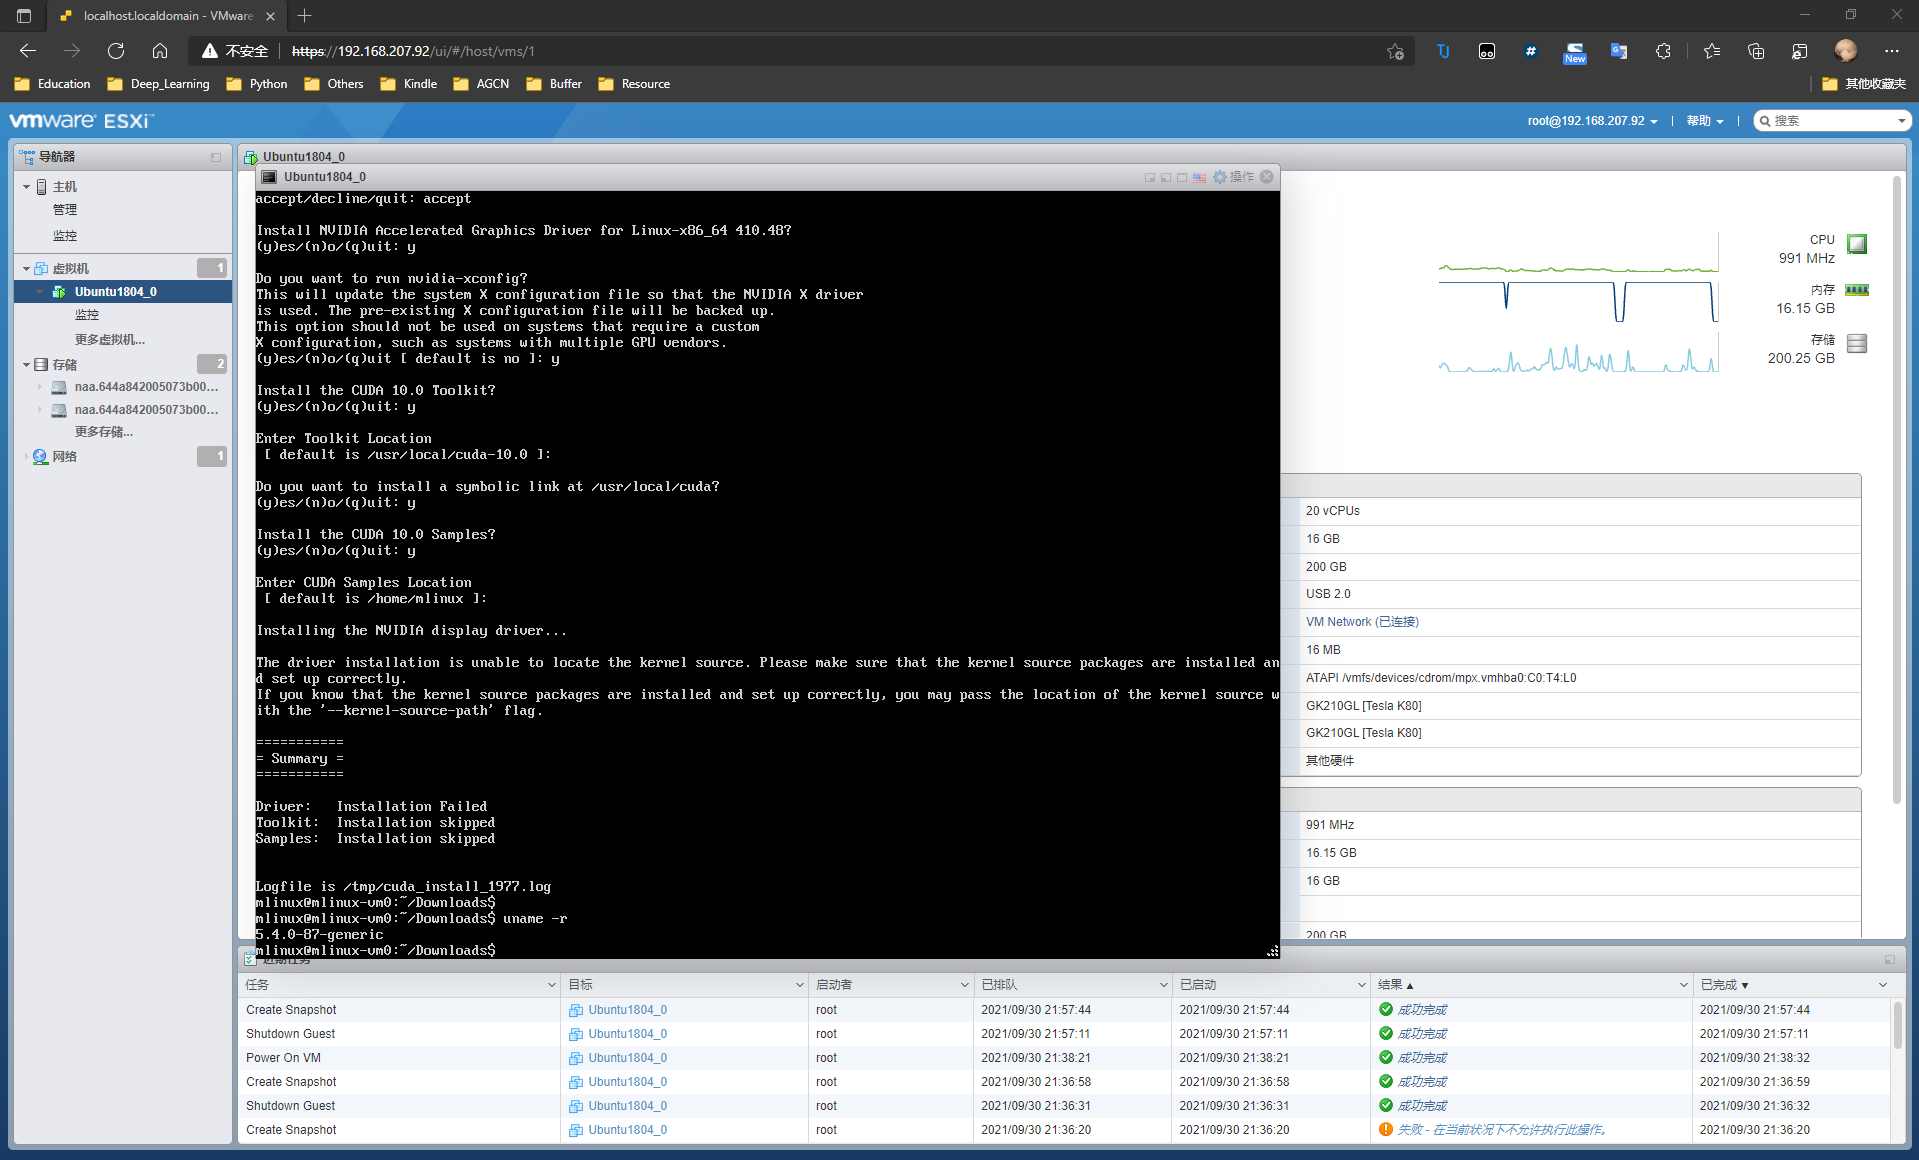
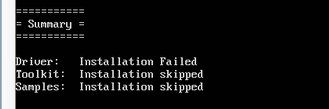
You can see that the installation failed because:
 So we need to replace the kernel
Step 1: check
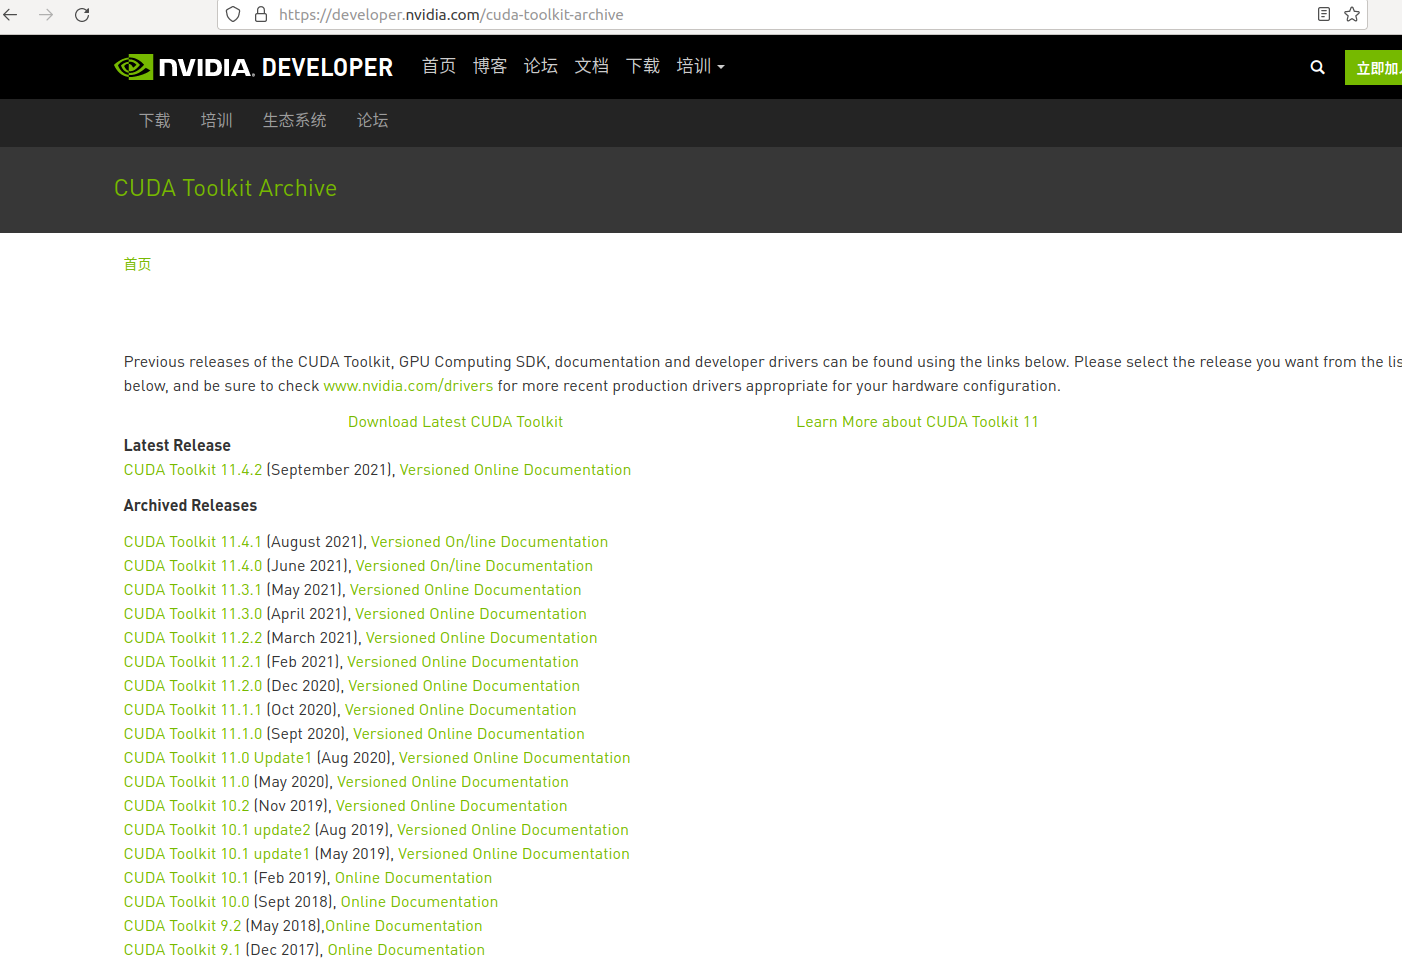
https://developer.nvidia.com/cuda-toolkit-archive
Find the online document of cuda you want to install (mine is 10.0)
https://docs.nvidia.com/cuda/archive/10.0/cuda-installation-guide-linux/index.html
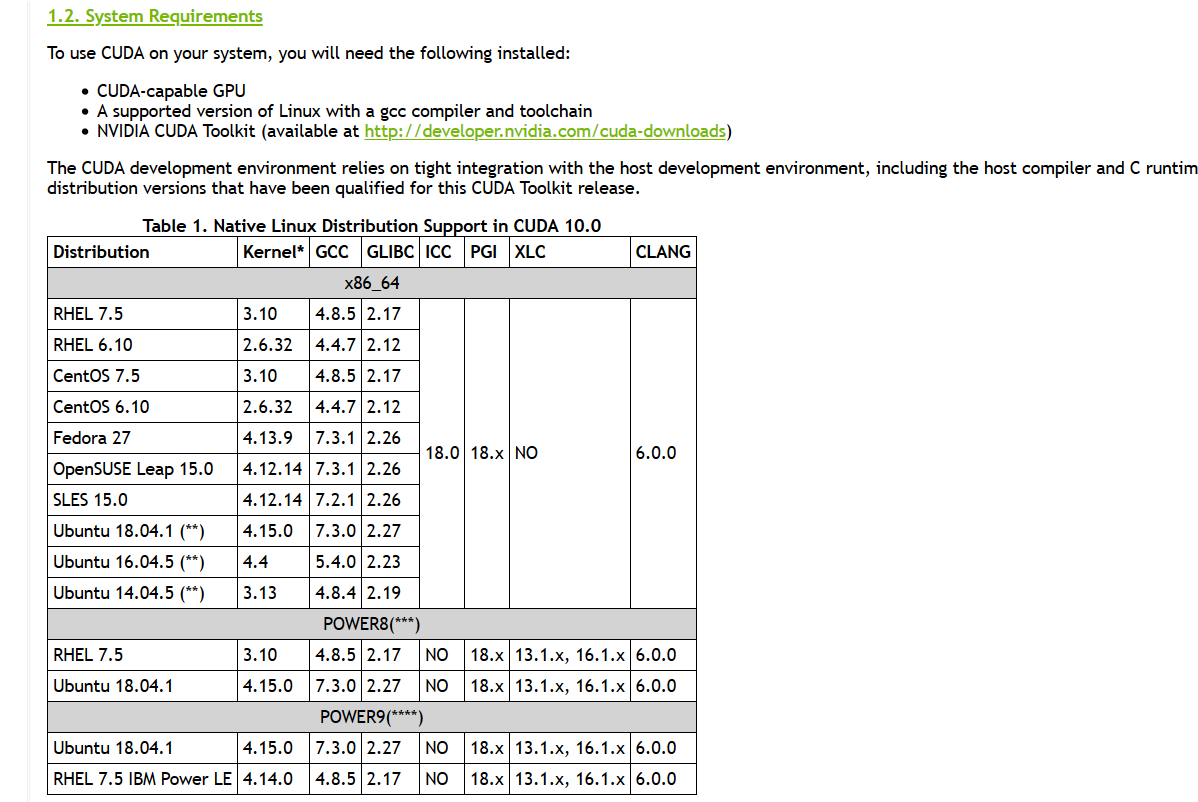
You can see that the kernel is 4.15.0 and gcc is 7.3, but the default kernel of 18.04 is 5.4.0, so you need to reduce the kernel.
PS: lowering the kernel is risky. Please be careful before operation
Reference address:
https://www.cnblogs.com/leeqizhi/p/11469309.html
https://www.jianshu.com/p/f284bc90944f
Step 2: installation
sudo apt-get install linux-headers-x.x.x-x-generic linux-image-x.x.x-x-generic
x.x.x-x = 4.15.0-38
step3: Change
Modify GRUB and use the new kernel to enter the system
Edit grub in / etc/default/grub file_ DEFAULT
The default is GRUB_DEFAULT=0, change to the following code
?????????????? Also insert timeout!!!!!!!!!!!!!!!!!!!!!
GRUB_DEFAULT="Advanced options for Ubuntu > Ubuntu, with Linux 4.15.0-38-generic"
3. Update GRUB and restart
sudo update-grub
reboot
4. Restart the selected kernel
During the restart process, you need to enter [Ubuntu advanced options], select Linux 4.15.0 generic to start the kernel just installed, otherwise you cannot enter the system
After the system starts, use uname -a to check the kernel version to see if it is successful.
step4: delete
View all kernels
dpkg --get-selections | grep linux
To remove a redundant kernel:
Kill all the kernels unrelated to 4.15.0-38
sudo apt-get remove XXXXX
Recheck after uninstall:
dpkg --get-selections | grep linux
If the status is deinstall, it has been uninstalled. If you feel uncomfortable, you can use purge to completely delete it from the configuration file and clean up the kernel list
sudo apt-get purge XXXX
Update system boot
After deleting the kernel, you need to update grub to remove the invalid boot entry
sudo update-grub
After this operation, the kernel degradation operation is completed
Install driver cuda and cudnn
1st Step: change gcc version (if necessary)
sudo apt install software-properties-common
sudo add-apt-repository ppa:ubuntu-toolchain-r/test
sudo apt-get update
sudo apt install gcc-5 g++-5 gcc-7 g++-7 gcc-8 g++-8 gcc-9 g++-9
sudo update-alternatives --install /usr/bin/gcc gcc /usr/bin/gcc-9 90 --slave /usr/bin/g++ g++ /usr/bin/g++-9 --slave /usr/bin/gcov gcov /usr/bin/gcov-9
sudo update-alternatives --install /usr/bin/gcc gcc /usr/bin/gcc-7 30
sudo update-alternatives --install /usr/bin/gcc gcc /usr/bin/gcc-6 40
sudo update-alternatives --install /usr/bin/gcc gcc /usr/bin/gcc-5 50


sudo update-alternatives --install /usr/bin/g++ g++ /usr/bin/g++-7 30
sudo update-alternatives --install /usr/bin/g++ g++ /usr/bin/g++-6 40
sudo update-alternatives --install /usr/bin/g++ gc++/usr/bin/g++-5 50
sudo update-alternatives --config gcc
gcc --version
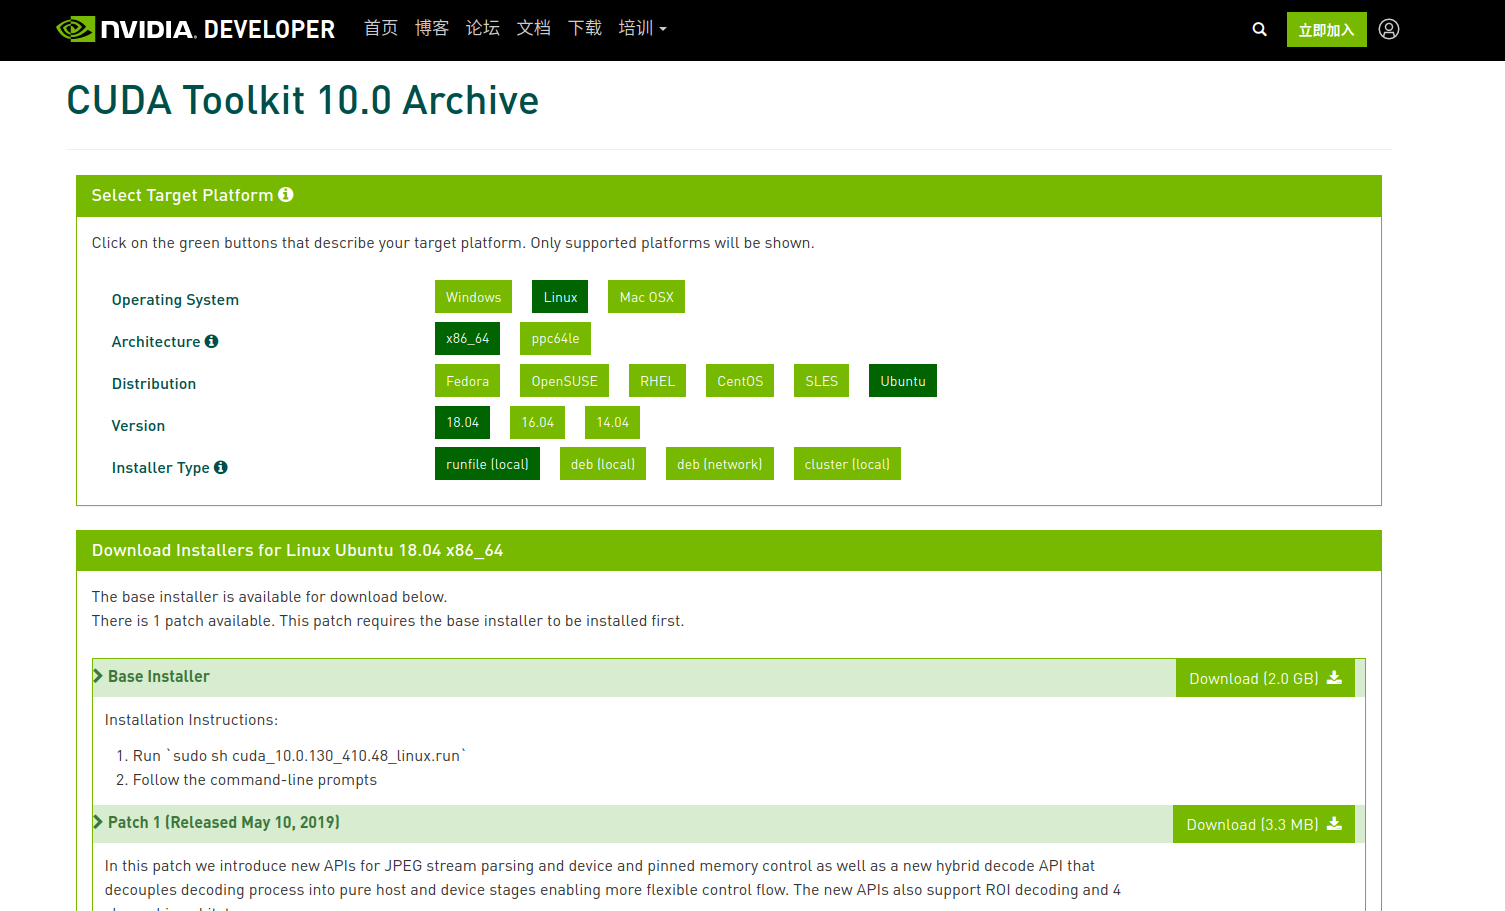
2nd Step:Download cuda
card - driver
https://developer.nvidia.com/cuda-toolkit-archive
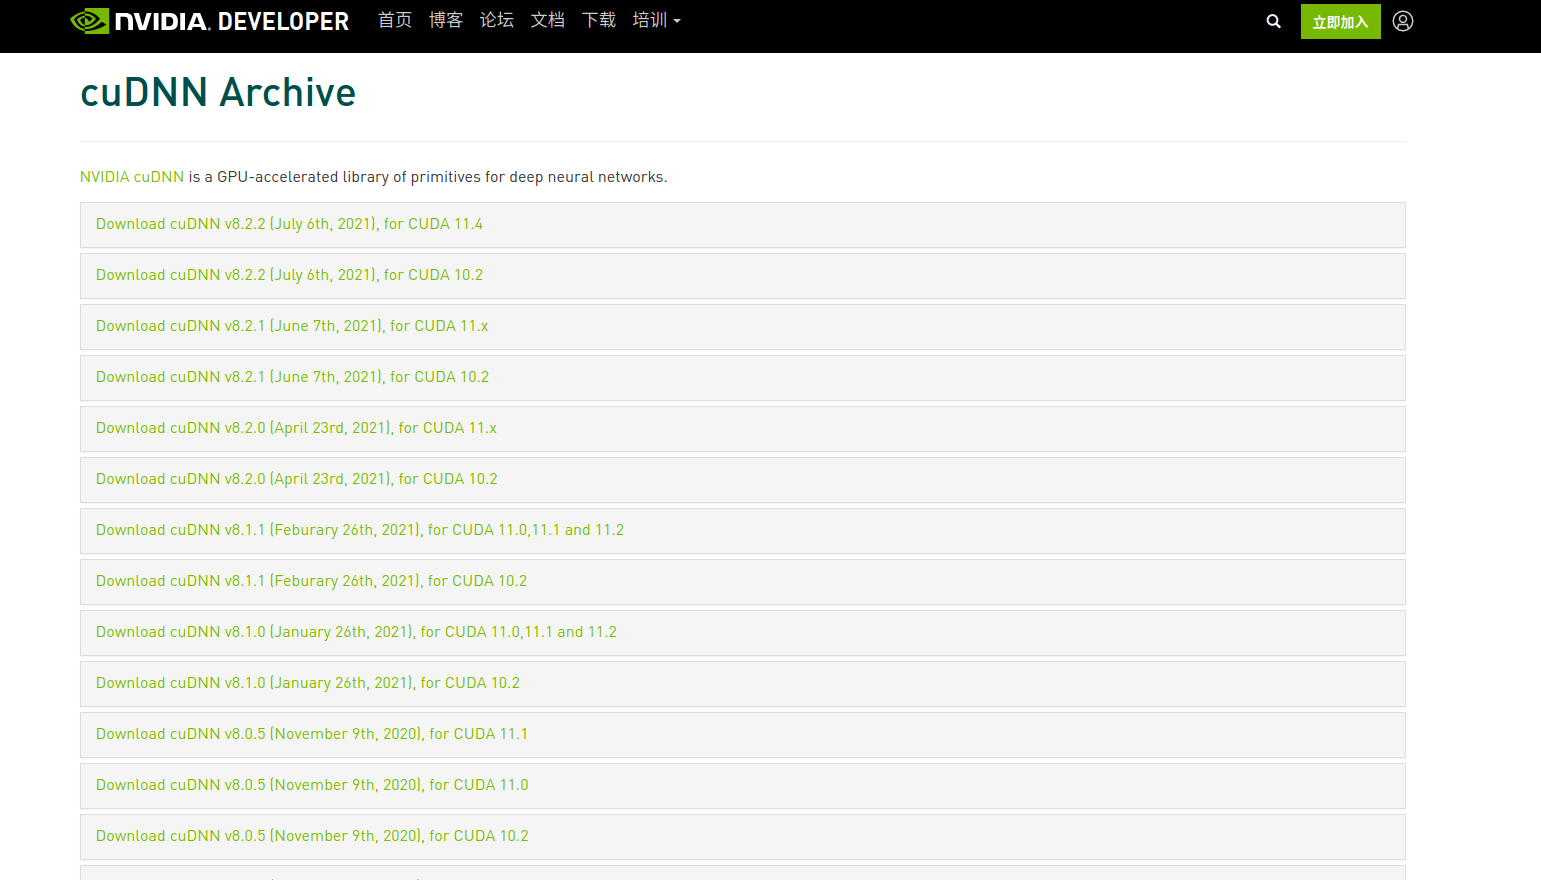
3rd Step:Download cudnn
https://developer.nvidia.com/rdp/cudnn-archive
4th Step: Install cuda
1 disable nouvea graphics driver
sudo nano /etc/modprobe.d/blacklist-nouveau.conf
Add at the end
blacklist nouveau
Then execute
 sudo update-initramfs -u
 sudo reboot
Execute after restart:
lsmod | grep nouveau
No output is shielded
2 close the graphical interface (note that it is closed, not switching), restart and select to enter the command line interface
Close the graphical interface:
sudo systemctl set-default multi-user.target
sudo reboot
Open graphical interface
sudo systemctl set-default graphical.target
sudo reboot
3. First completely delete the original nvidia driver
sudo apt-get remove --purge nvidia*
4 install cuda10, and the – no OpenGL LIBS parameter must be if wanna remove cudnn:
Plus, notice the '–' before no
./cuda_10.0.130_410.48_linux.run --no-opengl-libs
The installation effect is as follows:
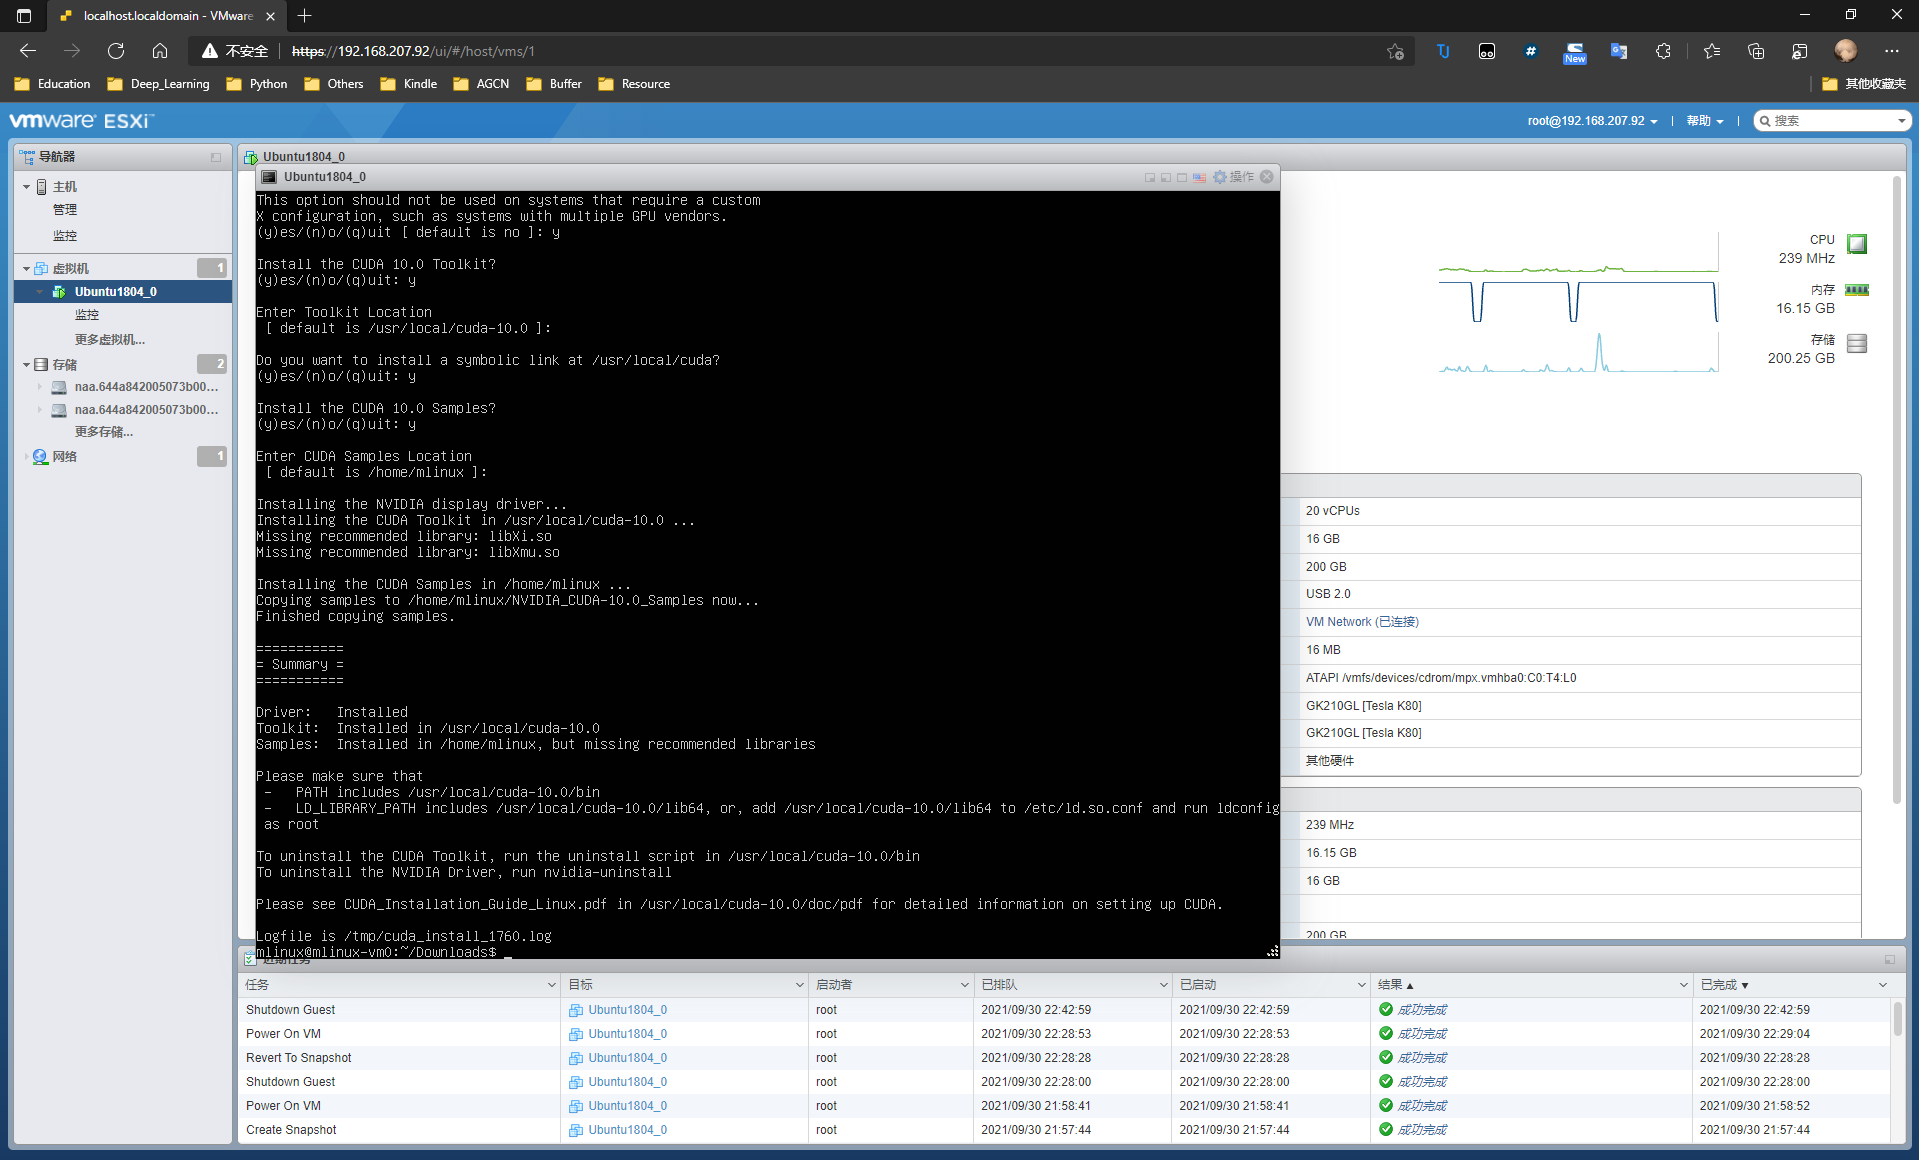
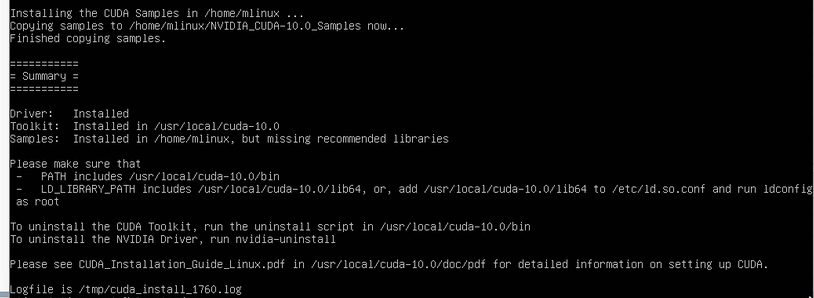 As you can see, the installation succeeded.
5. Setting environment variables
sudo vim .bashrc
in the end of this file ,add this several lines:
PATH=/usr/local/cuda/bin:$PATH
LD_LIBRARY_PATH=/usr/local/cuda/lib64:$LD_LIBRARY_PATH
export PATH
export LD_LIBRARY_PATH
sudo su #Switch to root account
echo "/usr/local/cuda/lib64" > /etc/ld.so.conf.d/cuda.conf
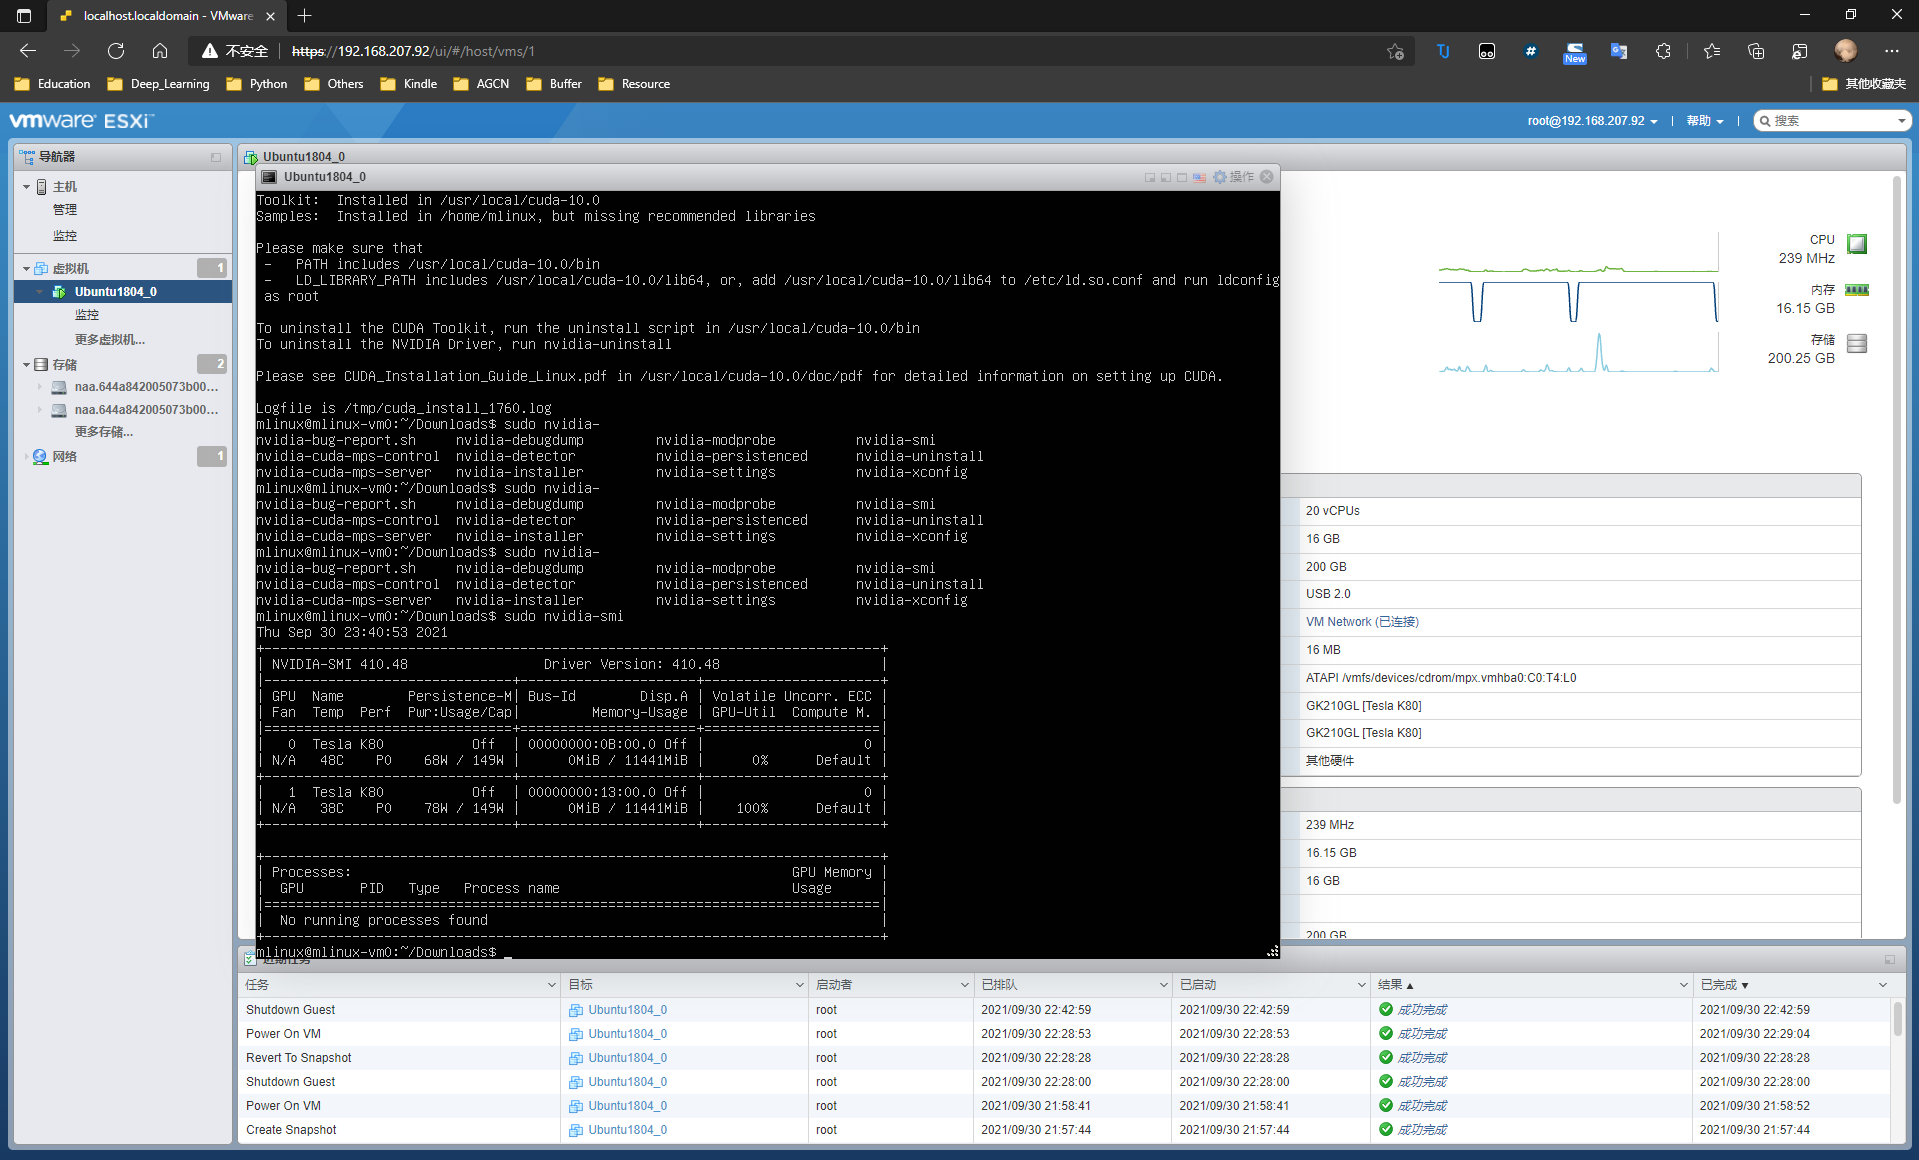
6.reboot and have a look at nvidia-smi :
sudo reboot
nvidia-smi
dmesg | grep NVRM
If there is no problem, you can move on.
5th Step: install cudnn
sudo dpkg -i libcudnn7_7.4.1.5-1+cuda10.0_amd64.deb
sudo dpkg -i libcudnn7-dev_7.4.1.5-1+cuda10.0_amd64.deb
sudo dpkg -i libcudnn7-doc_7.4.1.5-1+cuda10.0_amd64.deb
If you want to remove cudnn:
sudo dpkg -i libcudnn7-samples
sudo dpkg -i libcudnn7-dev
sudo dpkg -r libcudnn8
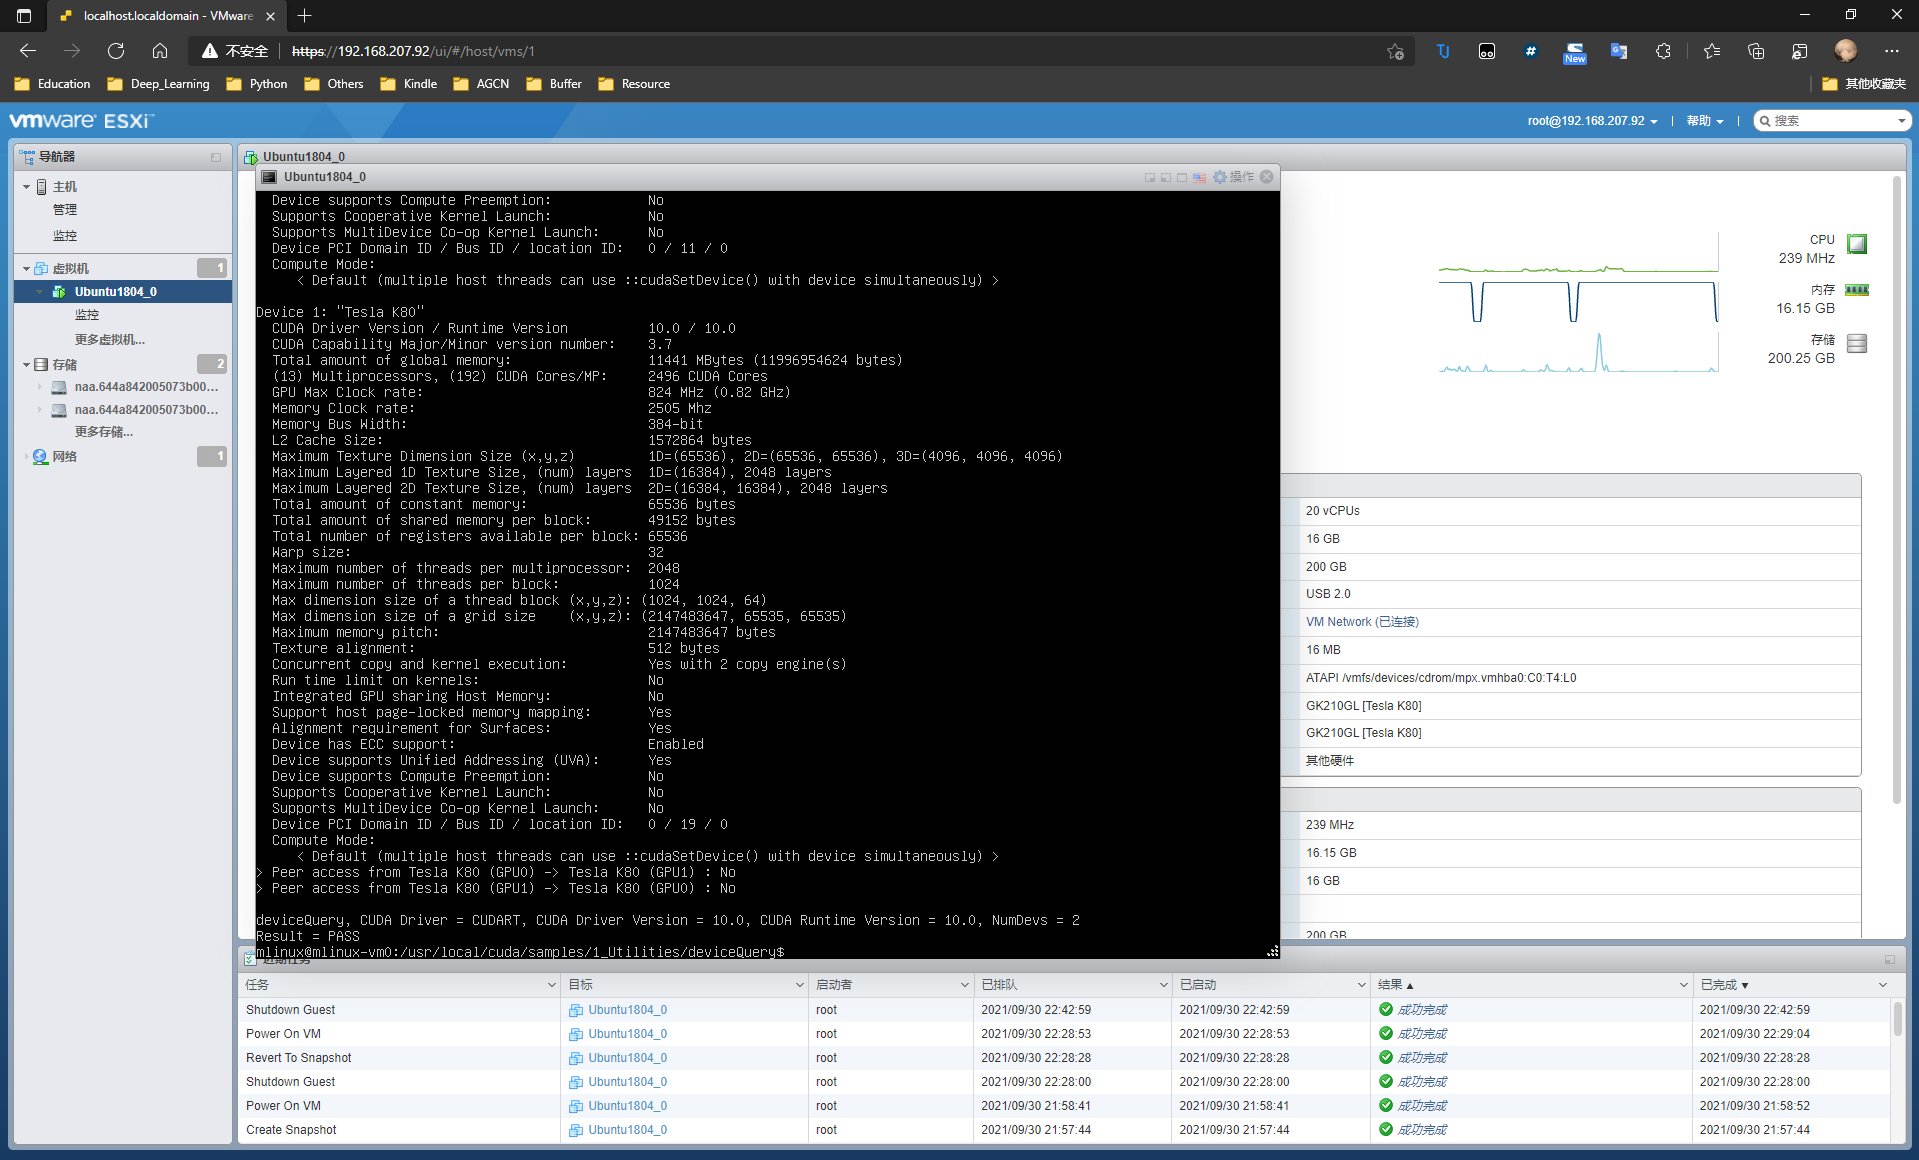
6th Step: test cuda and cudnn
Test cuda
cd /usr/local/cuda/samples/1_Utilities/deviceQuery #Determined by your computer directory
sudo make
sudo ./deviceQuery
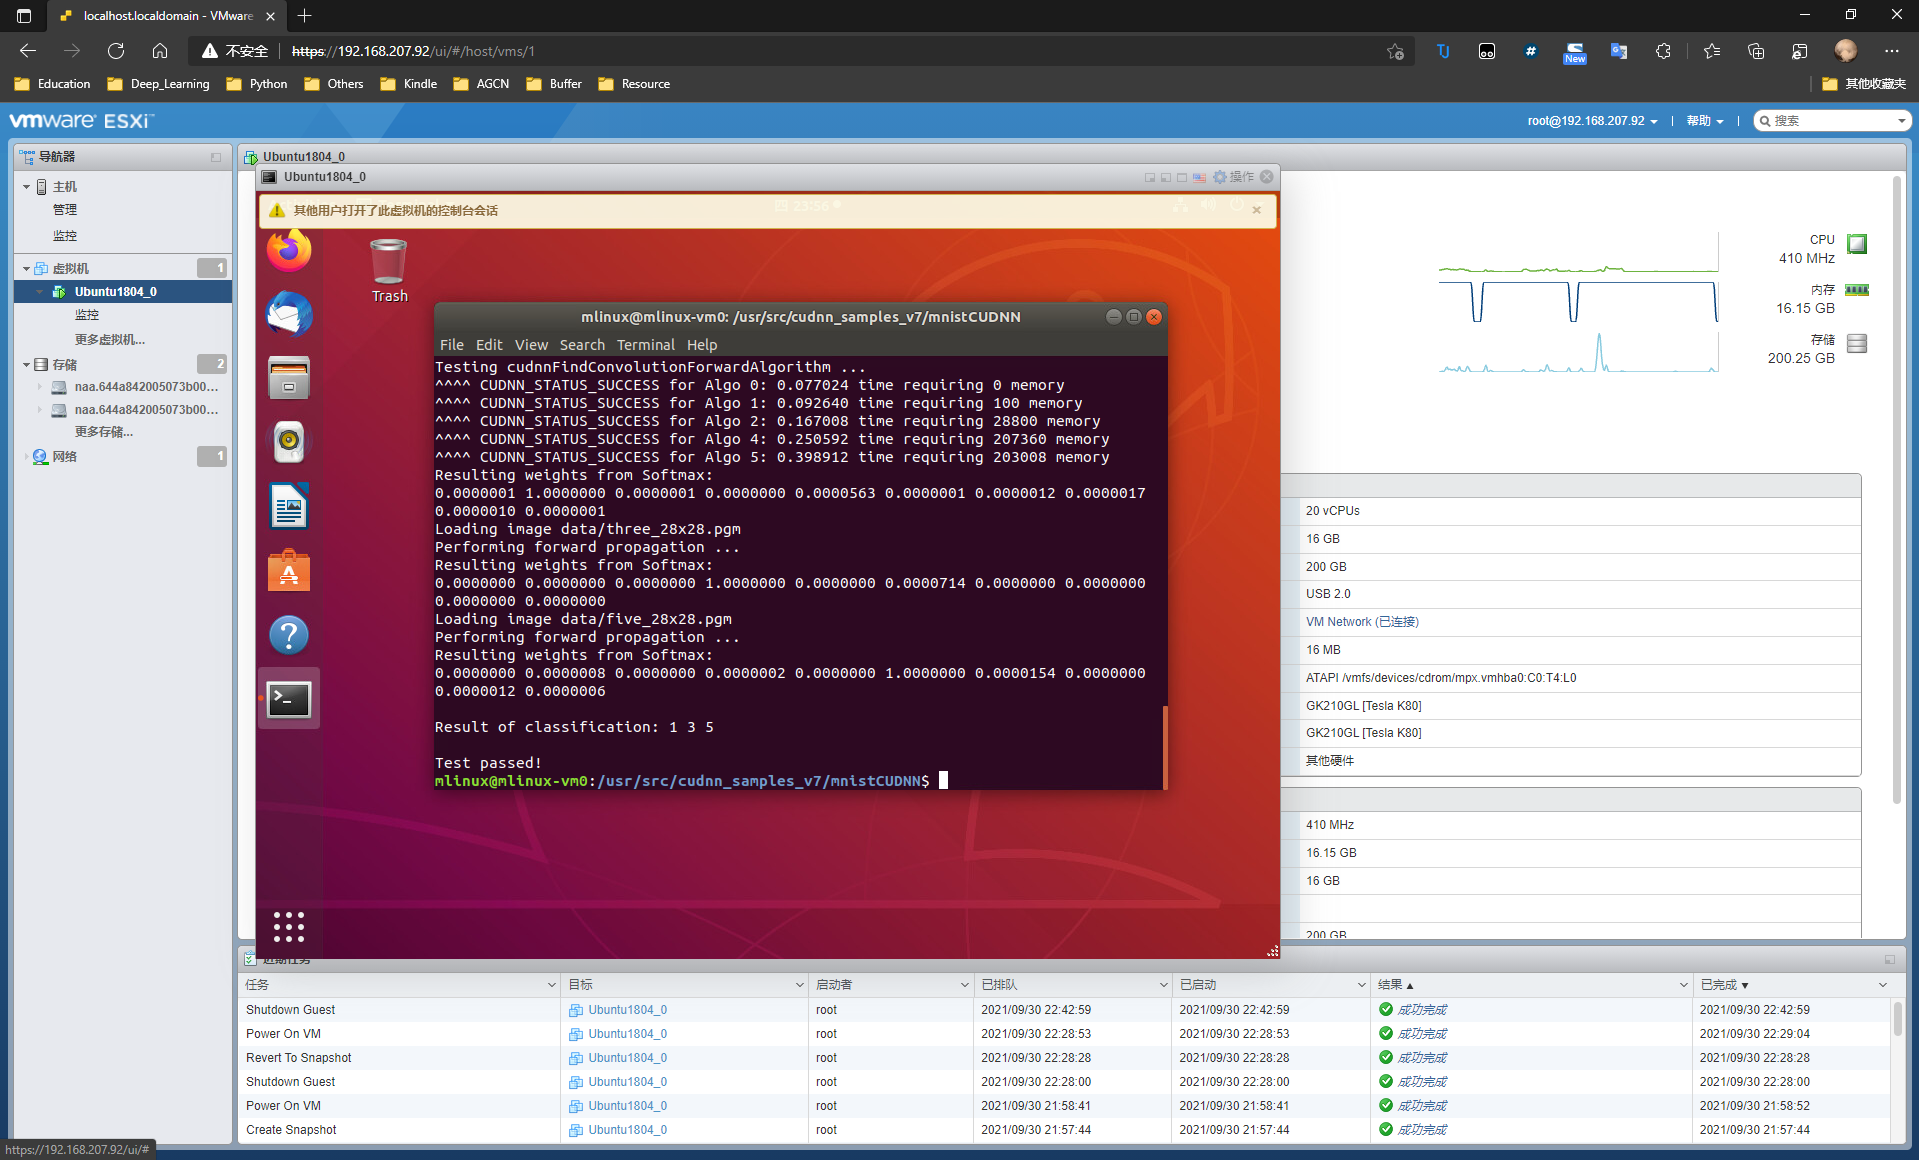
Test cudnn
cd /usr/src/cudnn_samples_v7/mnistCUDNN
sudo make clean
sudo make
./mnistCUDNN