This article is published by the public account [development pigeon]! Welcome to pay attention!!!
Old rules - sister town building:

1. Production of win7 system qcow2 format image
(1) Overview
For image acquisition in qcow2 format, you can directly download the corresponding system image from the network or make it yourself.
Use qemu to create a virtual machine through ISO image, create a qcow2 format disk and install the virtual machine system. After installation, the qcow2 format disk is the image file of a virtual machine.
(2) - failed - install ISO image to qcow2 disk.
Install the virt win driver. Most of the reasons why OpenStack cannot be directly used to install the ISO image of windows to the volume are that Windows cannot directly use the virtio format hard disk and needs a driver.
yum -y install wget
wget https://fedorapeople.org/groups/virt/virtio-win/virtio-win.repo -O /etc/yum.repos.d/virtio-win.repo
yum -y install virtio-win
RPM package contents after installation
/usr/share/virtio-win/*.iso:   ISO Mirror, including all drives.
/usr/share/virtio-win/*.vfd:   be used for Windows XP Lower VFD Floppy drive image
/usr/share/virtio-win/drivers: from VFD Files extracted from floppy drive image
/usr/share/guest-agent/*.msi:  QEMU Guest Agent 32bit And 64 bit Installation package
Preparing to mirror to folder / image

Create a qcow2 format disk with a specified size of 100G. The disk file is placed in the / vhost directory.
mkdir /vhost
qemu-img  create -f qcow2 /vhost/win7_xshell.qcow2 100G
To view disk information:
qemu-img info /vhost/win7_xshell.qcow2
Modify permissions for both directories
chmod 777 /image/*
chmod 777 /vhost/*
Start to install the image in iso format into the file in qcow2 format just created:
virt-install --name=win7_xshell --ram=2048 --vcpus=2 --network network=default,model=virtio --cdrom=/image/cn_windows_7_ultimate_with_sp1_x64_dvd_u_677408.iso --boot menu=on --disk=/vhost/win7_xshell.qcow2,format=qcow2,bus=virtio --disk=/image/virtio-win-0.1.171.iso,device=cdrom --graphics vnc,listen=0.0.0.0,port=5901 --os-type=windows --os-variant=win7 --force
Note:
Do not set cdrom and disk in / root to prevent unauthorized access;
There are two disk settings, one is the virtual machine address in qcow2 format, and the other is the address of virtio win driver;
OS variant needs to be set to the system version win7;
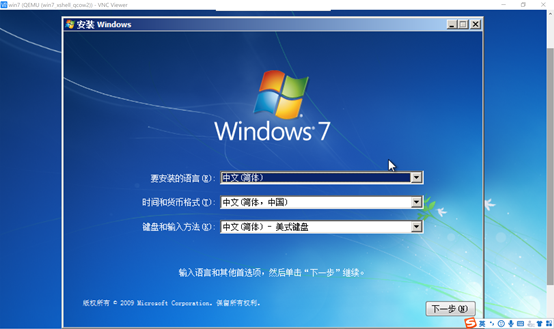
Connect the virtual machine vnc through vnc viewer to install the Win7 operating system.
A graphical system that can be remotely connected to the CentOS7 server host is required, such as windows mac, installing vnc viewer software, and connecting to the corresponding port of the server to install and set the virtual machine system.
sudo virt-install --connect qemu:///system -n win7 \
--vcpus=1 -r 2048 \
--disk path=/home/win7.img,format=qcow2,device=disk,size=64,bus=virtio,cache=none \
--disk path=/home/cn_windows_7_ultimate_with_sp1_x64_dvd_u_677408.iso,device=cdrom,perms=rw  \
--vnc --vnclisten=0.0.0.0  \
--os-type windows --os-variant=win7 \
--accelerate --network=default,model=virtio  \
--disk path=/home/virtio-win-0.1.110.iso,device=cdrom,perms=rw \
--disk=/home/virtio-win-0.1.110_amd64.vfd,device=floppy
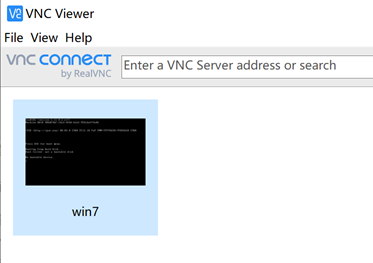
(3) vnc viewer connected to virtual machine
After the vnc viewer is installed on the PC, it is used to connect to the vnc server. The vnc server is deployed on the Controller node. We previously installed the qcow2 virtual machine through virt install, and the port is set to 5901. Therefore, we can directly connect to the vnc server through the vnc viewer.
After opening the connection, the following situations may occur:
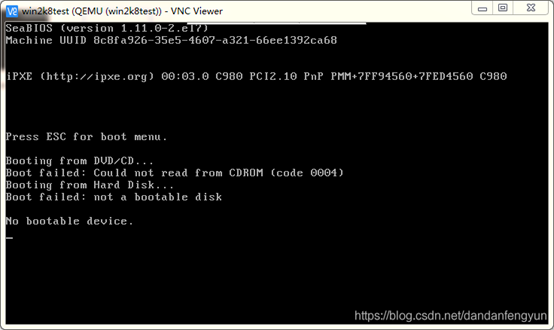
If it is determined that the ISO file has no errors. It may be that the boot boot selected the wrong ISO, which needs to be selected manually. Right click VNC Viewer and select send Ctrl+Alt+Del. Then reconnect.
Or a boot error. Ctrl+Alt+Del again. This time, you won't exit the interface. Hurry up. Press esc when you see the Press ESC for boot menu. You will then be asked to manually select the boot disk. (if the hand speed is slow or missed, it will fail to guide automatically. Enter the interface, and you can repeat Ctrl+Alt+Del)
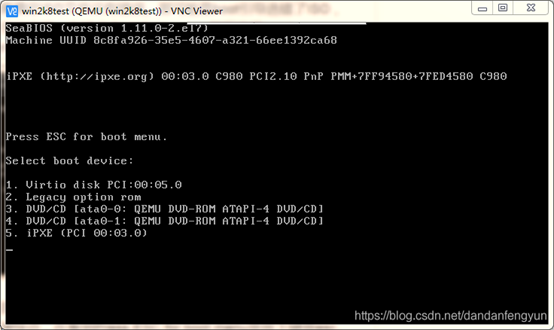
Choose 3 or 4. Enter the boot installation interface (select 4 correctly and Ctrl+Alt+De again if it is wrong)
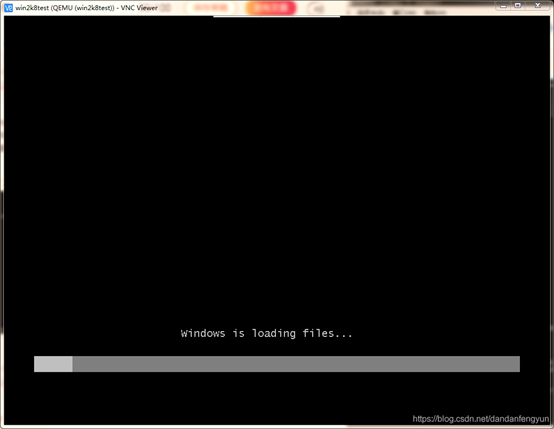
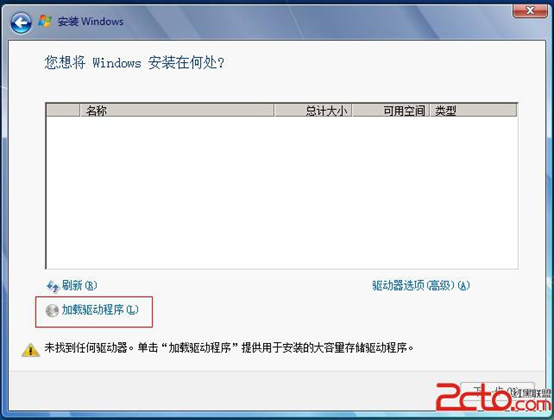
Complete the system installation steps normally until the hard disk drive cannot be loaded interface appears
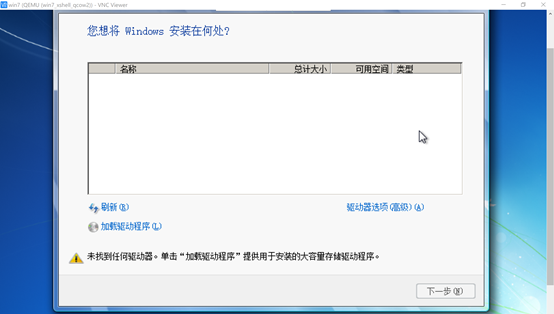
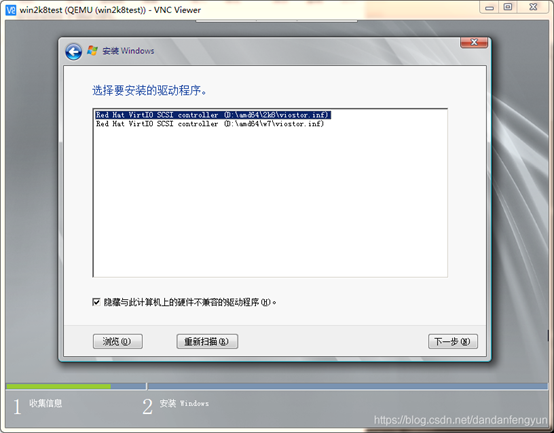
Select Load Driver auto scan, and then select win7 driver.

After the driver installation is completed, you can select the disk, but it will be stuck on the installation driver every time. Why? As follows:

(4) Centos installation graphical interface
It feels like it is caused by the parameter setting problem of virt install, so try to create the virtual machine directly through the virt manager graphical interface;
So try installing a graphical interface for centos:
yum groupinstall -y "GNOME Desktop"
Enter init 5 to enter the graphical desktop
(5) Virtual machine creation with virt Manager
Check whether virtualization is supported: cat /proc/cpuinfo | grep -E 'vmx|svm' (skippable). Since it is a newly created virtual machine, virtualization needs to be enabled in VMware;
To see if kvm's driver is loaded:
lsmod | grep kvm((skippable)
If the kvm driver is not loaded, use the command to load the driver
modprobe -a kvm
modprobe -a kvm_intel
Installing QEMU KVM
yum install -y qemu-kvm
Install libvirt:
yum install -y libvirt
service libvirtd restart
Verify that libvirt starts normally
virsh version
Installing the virt manager tool
yum install -y virt-manager
Close the xshell, reconnect, and enter the command: virt manager to automatically pop up the kvm management software
Install a Win7 virtual machine through the virt manager graphical interface
First, transfer the image image to the current virtual machine, including win7.iso image and virtio image;

First, create a qcow2 format disk, and specify the virtual disk size of 100G. The disk file is placed in the / vhost directory.
mkdir /vhost
qemu-img  create -f qcow2 /vhost/win7_xshell.qcow2 100G
To view disk information:
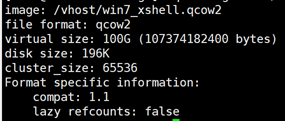
qemu-img info /vhost/win7_xshell.qcow2
You can see that the current actual disk size is 196k and the virtual disk size is 100G:
Modify permissions for both directories
chmod 777 /image/*
chmod 777 /vhost/*
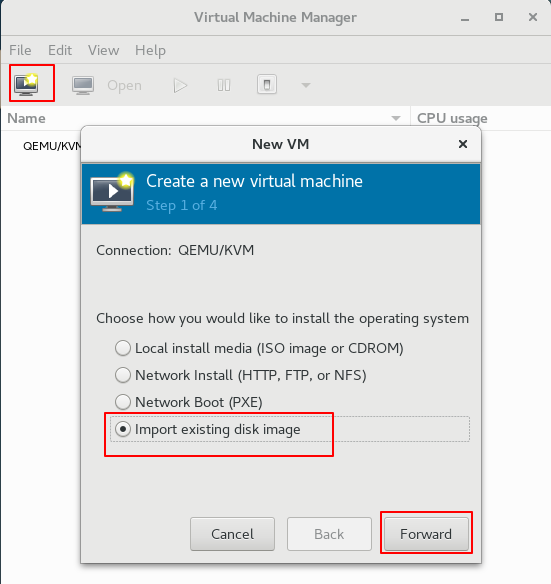
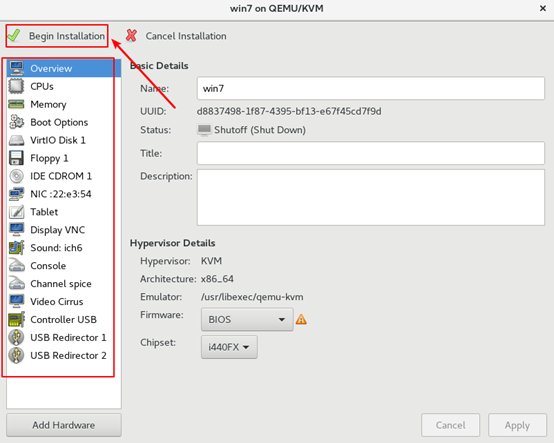
Start creating virtual machines through the virt manager graphical interface:
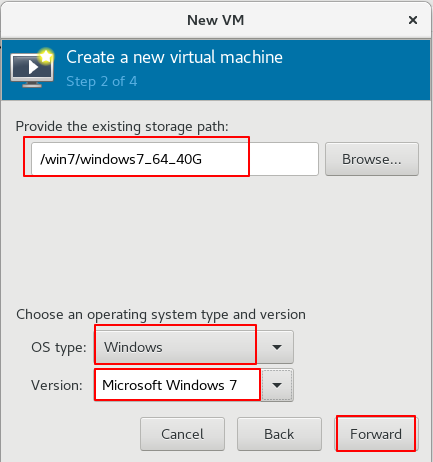
Import from the existing disk image, where the corresponding is / Vhost / win7 just created_ xshell.qcow2
Select qcow2 format disk and set Win7
Set the core and memory size as large as possible, because the minimum configuration of Win7 is 2GB of memory and 2 cores. At the same time, it should also be carried out in a host as large as possible. The previous card has been stuck in the process of installing virtio driver because of insufficient memory and core settings. Therefore, an 8G, 6 core is newly built, 100G new Centos virtual machine is used to create virtual machine.
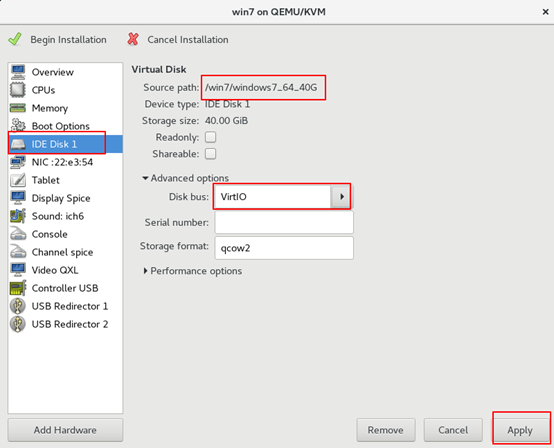
Setting requires custom configuration

The bus type of the qcow2 formatted disk is virtio:
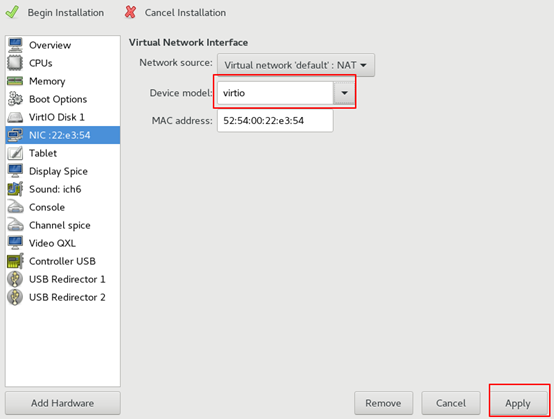
Set the virtual network device type to virtio:
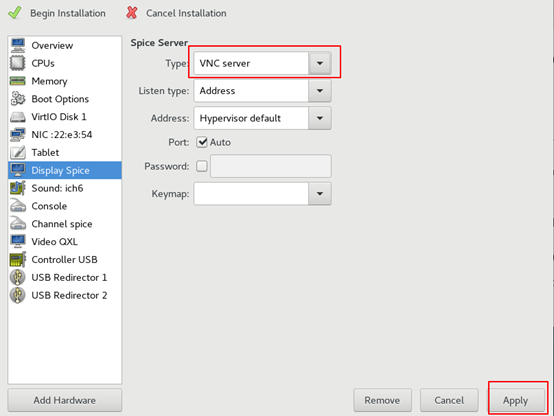
Set up virtual machine connection via vnc:
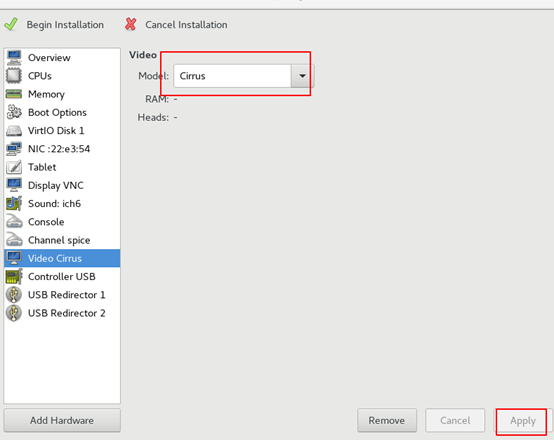
Set the graphics card type to cirrus:
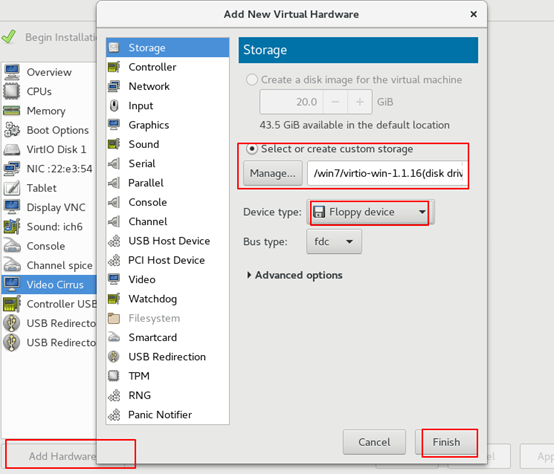
Add virtio_amd64.vfd to the virtual machine in floppy disk format:
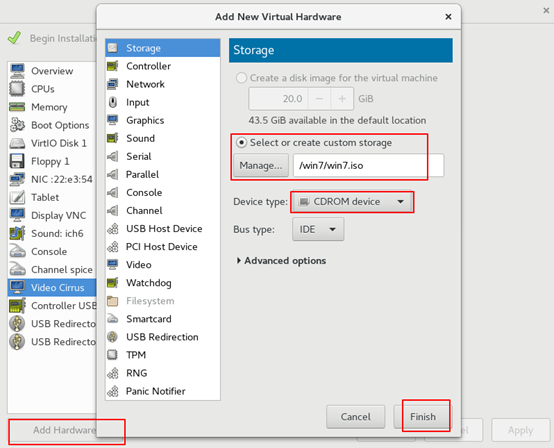
Add the win7.iso image in cdrom format to the virtual machine:
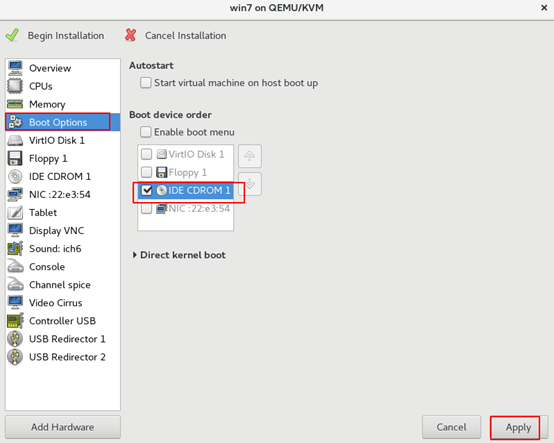
Set the system boot order to cdrom disk:
Start installing win7 system:
The next step is to quickly enter the win7 installation interface and cry. The reason why the win7 system was installed very slowly before is that the capacity of the host computer is too small. Remember ah, remember ah!!!
When the driver needs to be loaded, you need to select the virtio floppy disk previously mounted:
Select the driver in amd64 format of win7:
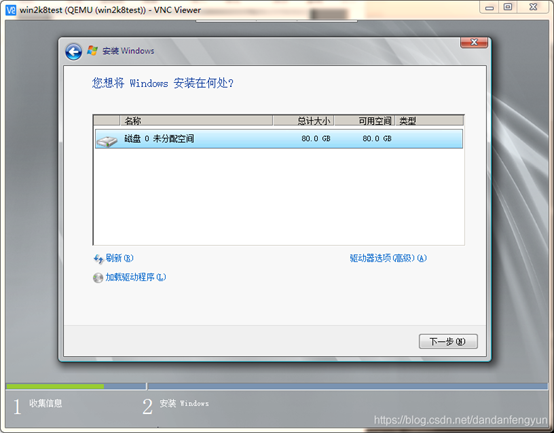
Instead of getting stuck this time, the driver is directly installed, and then the disk is displayed, which is the qcow2 format disk we created
The following is the process of installing Win7 system
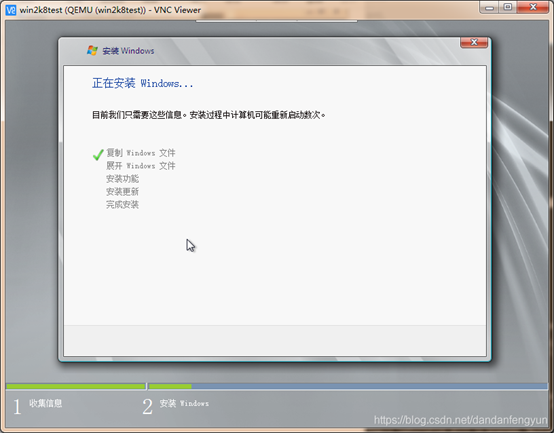
Win7 system installed successfully
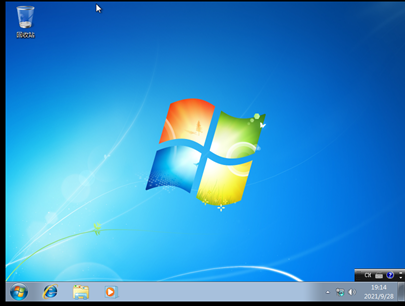
Create a document in the virtual machine, indicating that it is a graphical interface as a distinction.
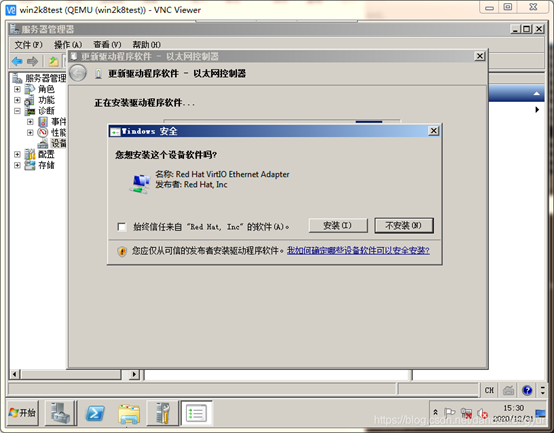
Then set the network card driver. At this time, there is no network driver and it needs to be installed manually. Click the service manager to the right of the start icon

Select the Ethernet controller update driver to find the driver manually

Select the driver under win7 for installation
After installing the network card driver of virtio win, use the virtio network to check the network status of the current virtual machine:

It can be seen that the IP address is set to 192.168.122.142. At the same time, try to ping with the host. It is found that you can also ping.
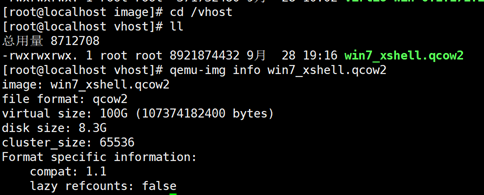
View the current qcow2 format of Win7 virtual machine image information:
You can see that the current qcow2 format image size is 8.3G, and the original iso image size is 3.4G
Note: only when KVM virtual machine is configured, libvirt will generate an xml file corresponding to the operating system, which records the status of KVM virtual machine. The path is as follows: / etc/libvirt/qemu
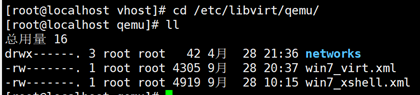
Note: this file can only be modified by the "virsh edit" command
(6) The virt install command creates a virtual machine
Create a qcow2 format disk with a specified size of 100G. The disk file is placed in the / vhost directory.
mkdir /vhost
qemu-img  create -f qcow2 /vhost/win7_virt.qcow2 100G
To view information about this qcow2 format disk:
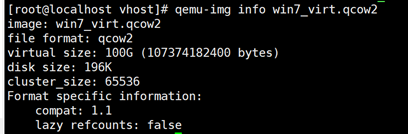
Start to install the image in iso format into the file in qcow2 format just created:
virt-install --name=win7_virt --vcpus=3 --ram 4096 --disk path=/vhost/win7_virt.qcow2,format=qcow2,device=disk,bus=virtio --disk path=/image/cn_windows_7_ultimate_with_sp1_x64_dvd_u_677408.iso,device=cdrom,perms=rw --vnc --vnclisten=0.0.0.0 --os-type windows --os-variant=win7 --accelerate --network=default,model=virtio --disk=/image/virtio-win-0.1.171_amd64.vfd,device=floppy --video cirrus --boot=cdrom --check path_in_use=off
Note:
Do not set cdrom and disk in / root to prevent unauthorized access;
There are two disk settings, one is the virtual machine address in qcow2 format, and the other is the address of virtio win driver;
OS variant needs to be set to the system version win7;
Add parameters completely according to the graphical interface to install win7 system;
Use the same iso image and set not to check the iso image path;
Connect the virtual machine vnc through vnc viewer to install the Win7 operating system.
A graphical system that can be remotely connected to the CentOS7 server host is required, such as windows mac, installing vnc viewer software, and connecting to the corresponding port of the server to install and set the virtual machine system.
To connect the virtual machine, you need to execute a command to view the port information of the newly created virtual machine
[root@compute ~]# netstat -lntup |grep kvm

However, even if the correct IP address is set, it cannot be connected. Considering that it may be the problem of the firewall, the self startup of the firewall is turned off:
systemctl stop firewalld
systemctl disable firewalld
Connect to the virtual machine through vnc server again:
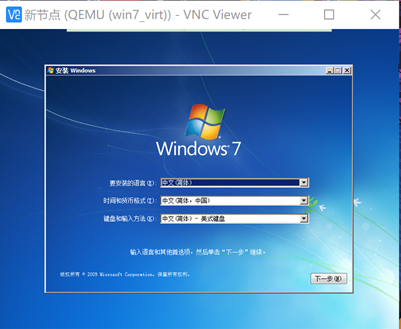
The next step is the normal installation process of win7 system;
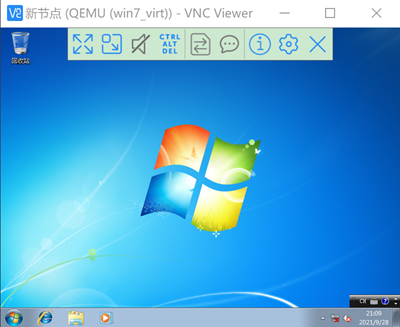
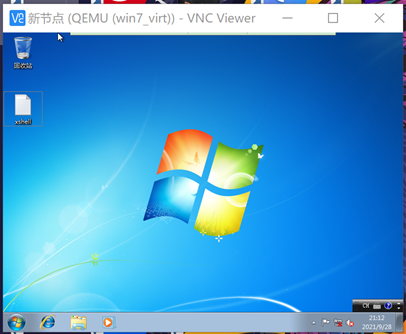
It can be seen that this is a new win7 virtual machine. It is not the same because it is created through the same win7 iso image, which means that the iso image is public, and the qcow2 format images created through the iso image are different from each other. Create a document in the virtual machine again, identifying that the virtual machine was created by the xshell command:
Then set the network card driver. At this time, there is no network driver and it needs to be installed manually. Click the service manager to the right of the start icon
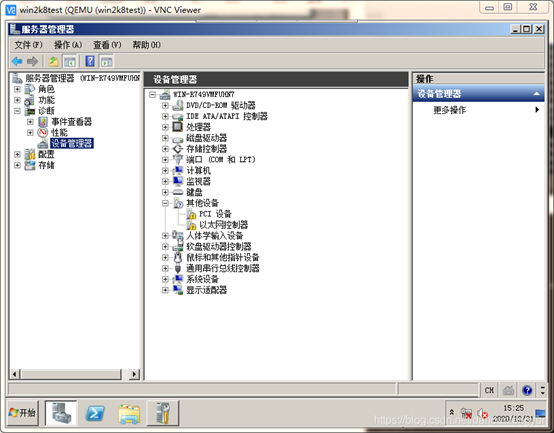
Select the Ethernet controller update driver to find the driver manually
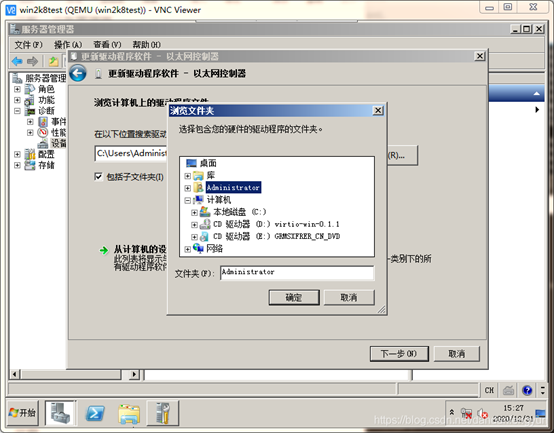
Select the driver under win7 for installation

After installing the network card driver of virtio win, use the virtio network to check the network status of the current virtual machine:
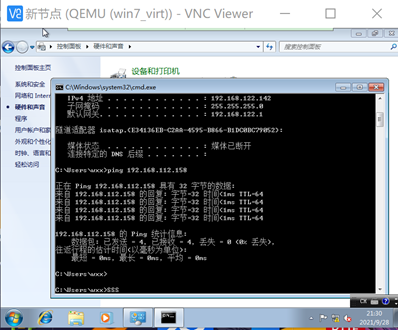
It can be seen that the IP address is set to 192.168.122.142. At the same time, try to ping with the host. It is found that you can also ping.
(7) qcow2 format image space compression
You can compress the mirror space directly by:
qemu-img convert -O qcow2 win7.qcow2 win7_new.qcow2
(8) Virt install command parameter description
Description of common parameters of virt install (writing method of new version)
--name      Specify the virtual machine name
--ram       Virtual machine memory size in MB Unit
--vcpus     distribution CPU Number of cores, maximum and physical machines CPU Same number of cores
--network   Virtual machine network configuration
--os-type	Type of system, such as linux windows
--os-variant	Operating system type, more detailed description. Can use osinfo-query os Command lists optional systems
--disk Specify the disk storage location of the virtual machine, size,Initial disk size in GB In.

--location Specify the installation media path, such as the file path of the CD image.
--graphics Graphical display configuration. There may be many interactive operations during the new installation of virtual machine, such as setting language and initialization root Passwords, etc. graphics Option is used to configure the graphical interaction mode, which can be used vnc(A remote desktop software). If you use the command line to install, set it to none,But to pass --extra-args Option to specify terminal information so that interactive information during installation can be output to the current console.
--extra-args Set different additional options according to different installation methods
--cdrom To be installed ISO Mirroring can also be used--location
--boot Guidance mode. set up menu=on Indicates that the boot disk can be selected manually. set up--boot=cdrom,Direct guide through cdrom Start.
--graphics set up vnc Port for. linsten=0.0.0.0 Allow host connections other than native.
optional arguments:
  -h, --help            show this help message and exit
  --version             show program's version number and exit
  --connect URI         adopt libvirt URI Connect to hypervisor
General options:
  -n NAME, --name NAME  Client instance name
  --memory MEMORY       Configure guest memory allocation. Ex:
                        --memory 1024 (in MiB)
                        --memory 512,maxmemory=1024
                        --memory 512,maxmemory=1024,hotplugmemorymax=2048,hotplugmemoryslots=2
  --vcpus VCPUS         Number of vcpus to configure for your guest. Ex:
                        --vcpus 5
                        --vcpus 5,maxvcpus=10,cpuset=1-4,6,8
                        --vcpus sockets=2,cores=4,threads=2
  --cpu CPU             CPU model and features. Ex:
                        --cpu coreduo,+x2apic
                        --cpu host-passthrough
                        --cpu host
  --metadata METADATA   Configure client metadata. For example:
                        --metadata name=foo,title="My pretty title",uuid=...
                        --metadata description="My nice long description"
Installation method options:
  --cdrom CDROM         Optical drive installation media
  -l LOCATION, --location LOCATION
                        Installation source (For example: nfs:host:/path, http://host/path,
                        ftp://host/path)
  --pxe                 use PXE Protocol boot from network
  --import              Building a client from an existing disk image
  --livecd              Treat optical drive media as Live CD
  -x EXTRA_ARGS, --extra-args EXTRA_ARGS
                        Add additional parameters to --location
                        Booted kernel
  --initrd-inject INITRD_INJECT
                        Add the specified file to the --location designated initrd
                        In the root
  --os-variant DISTRO_VARIANT
                        The operating system installed on the client, for example:'fedor
                        a18','rhel6','winxp' Wait.
  --boot BOOT           Configure client boot settings. For example:
                        --boot hd,cdrom,menu=on
                        --boot init=/sbin/init (For containers)
  --idmap IDMAP         by LXC The container enables user namespaces. For example:
                        --idmap uid_start=0,uid_target=1000,uid_count=10
Device options:
  --disk DISK           Specify various options for storage. For example:
                        --disk size=10 (Create 10 in default location GiB image)
                        --disk /my/existing/disk,cache=none
                        --disk device=cdrom,bus=scsi
                        --disk=?
  -w NETWORK, --network NETWORK
                        Configure the client network interface. For example:
                        --network bridge=mybr0
                        --network network=my_libvirt_virtual_net
                        --network network=mynet,model=virtio,mac=00:11...
                        --network none
                        --network help
  --graphics GRAPHICS   Configure client display settings. For example:
                        --graphics vnc
                        --graphics spice,port=5901,tlsport=5902
                        --graphics none
                        --graphics vnc,password=foobar,port=5910,keymap=ja
  --controller CONTROLLER
                        Configure the client controller device. For example:
                        --controller type=usb,model=ich9-ehci1
  --input INPUT         Configure the client input device. For example:
                        --input tablet
                        --input keyboard,bus=usb
  --serial SERIAL       Configure client serial port device
  --parallel PARALLEL   Configure client parallel port device
  --channel CHANNEL     Configure client communication channel
  --console CONSOLE     Configure text console to connect host and client
  --hostdev HOSTDEV     Configure physical USB/PCI And other host devices are shared with clients
  --filesystem FILESYSTEM
                        Pass the host directory to the client. For example:
                        --filesystem /my/source/dir,/dir/in/guest
                        --filesystem template_name,/,type=template
  --sound [SOUND]       Configure client sound device emulation
  --watchdog WATCHDOG   Configure client watchdog equipment
  --video VIDEO         Configure the client video hardware.
  --smartcard SMARTCARD
                        Configure the client smart card device. For example:
                        --smartcard mode=passthrough
  --redirdev REDIRDEV   Configure the client redirection device. For example:
                        --redirdev usb,type=tcp,server=192.168.1.1:4000
  --memballoon MEMBALLOON
                        Configure client memballoon Equipment. For example:
                        --memballoon model=virtio
  --tpm TPM             Configure client TPM Equipment. For example:
                        --tpm /dev/tpm
  --rng RNG             Configure a guest RNG device. Ex:
                        --rng /dev/urandom
  --panic PANIC         Configure client panic Equipment. For example:
                        --panic default
  --memdev MEMDEV       Configure a guest memory device. Ex:
                        --memdev dimm,target_size=1024
Client configuration options:
  --security SECURITY   Set the domain security driver configuration.
  --cputune CPUTUNE     Tune CPU parameters for the domain process.
  --numatune NUMATUNE   Tuning for domain processes NUMA Strategy.
  --memtune MEMTUNE     Adjust the memory policy for domain processes.
  --blkiotune BLKIOTUNE
                        Tuning for domain processes blkio Strategy.
  --memorybacking MEMORYBACKING
                        Set the memory fallback policy for domain processes. For example:
                        --memorybacking hugepages=on
  --features FEATURES   Set domain <features> XML. For example:
                        --features acpi=off
                        --features apic=on,eoi=on
  --clock CLOCK         Set domain <clock> XML. For example:
                        --clock offset=localtime,rtc_tickpolicy=catchup
  --pm PM               to configure VM Power management function
  --events EVENTS       to configure VM Lifecycle management strategy
  --resource RESOURCE   to configure VM Resource partition(cgroups)
  --sysinfo SYSINFO     Configure SMBIOS System Information. Ex:
                        --sysinfo emulate
                        --sysinfo host
                        --sysinfo bios_vendor=Vendor_Inc.,bios_version=1.2.3-abc,...
                        --sysinfo system_manufacturer=System_Corp.,system_product=Computer,...
                        --sysinfo baseBoard_manufacturer=Baseboard_Corp.,baseBoard_product=Motherboard,...
  --qemu-commandline QEMU_COMMANDLINE
                        Pass arguments directly to the qemu emulator. Ex:
                        --qemu-commandline='-display gtk,gl=on'
                        --qemu-commandline env=DISPLAY=:0.1
Virtualization platform options:
  -v, --hvm             This client should be a fully virtualized client
  -p, --paravirt        This client should be a semi virtualized client
  --container           This client should be a container client
  --virt-type HV_TYPE   Name of the hypervisor to use (kvm, qemu, xen, ...)
  --arch ARCH           simulation CPU framework
  --machine MACHINE     The machine type is simulation type
Other options:
  --autostart           Automatically start the domain when the host starts.
  --transient           Create a transient domain.
  --wait WAIT           Please wait a few minutes for the installation to complete.
  --noautoconsole       Do not automatically attempt to connect to the client console
  --noreboot            Do not start the client after the installation is complete.
  --print-xml [XMLONLY]
                        Print generated XML Domain instead of creating a client.
  --dry-run             Run setup without creating devices or defining customers
                        Machine.
  --check CHECK         Enables or disables validation checks. For example:
                        --check path_in_use=off
                        --check all=off
  -q, --quiet           Suppress non error output
  -d, --debug           Enter troubleshooting information
(9) virsh command
The virtual machine is created through virt install above. You can view it through the virsh command:
virsh common commands:
virsh start x                   Startup name is x Inactive virtual machine
virsh list   --all                 List virtual machines
virsh create x.xml           Create a virtual machine (after creation, the virtual machine executes immediately and becomes the active host)
virsh suspend x              Pause virtual machine
virsh resume x               Starting a paused virtual machine
virsh shutdown x           Shut down the virtual machine normally
virsh destroy x               Force shutdown of virtual machine
virsh undefine x          Delete virtual machine
virsh dominfo x                 Displays basic information about the virtual machine
virsh domname 2               display id Virtual machine name with number 2
virsh domid x                    Show virtual machines id number
virsh domuuid x                 Displays the of the virtual machine uuid
virsh domstate x                Displays the current state of the virtual machine
virsh dumpxml x                 Displays the current configuration file of the virtual machine (which may be different from the configuration when defining the virtual machine, because the virtual machine needs to be assigned when it starts id No uuid,vnc Port number, etc.)
virsh setmem x 512000       Set memory size for inactive virtual machines
virsh edit x                        Edit the configuration file (usually just after defining the virtual machine)