preface
In the first two chapters, I took you to learn the core API of Spring Security on authentication and authorization, as well as the execution process and underlying principle of authentication and authorization. After mastering these, we not only know what it is, but also know why it is!
In the current job hunting environment, it is not enough to only know the usage of a certain skill point. The interviewer will ask us to study the underlying implementation principle of a certain technology. Therefore, although it is difficult to master the contents of the previous two chapters, I still hope you can study it carefully in combination with the source code, so that you can go further and higher on the road of programming!
It is difficult for us beginners to always study the bottom layer, which will also affect our learning enthusiasm. Therefore, starting from this article, we will continue to learn other uses of Spring Security. For example, we will learn how to add a self-defined filter in Spring Security to realize the verification code verification function.
1, Introduction to verification code
Before the implementation of verification code coding, Yige first introduces the concept and function of verification code to you.
Captcha: the full name is fully automated Public Turing test to tell computers and humans apart, which translates into "Turing test to automatically distinguish computers and humans". Generally speaking, verification code is a protective measure set to prevent malicious users from using violent retry attacks. When registering, logging in, or posting on the forum, we can use the verification code to intercept and restrict the infinite retry initiated by some malicious users using the computer.
Next, in the Spring Security environment, we can use the following two schemes to implement the graphic verification code:
- Implement graphic verification code based on user-defined filter;
- Implement graphic verification code based on user-defined authenticator.
In this article, Yige first uses the first scheme, that is, the method based on custom filters, to teach you how to implement graphic verification codes. Please continue to read.
2, Implementation of graphic verification code based on filter
1. Implementation overview
In Spring Security, there are many ways to implement verification code verification, among which the simplest way is to implement graphic verification code based on Filter. Small partners may ask, how does the Filter realize the verification code verification function? Based on what principle? This is actually very simple. The process principle is that we first customize a Filter to handle the verification logic of the verification code, and then add the Filter to an appropriate position in the Spring Security Filter chain. When the login request is matched, the Filter will verify the verification code. If it is successful, it will be released. If it fails, it will end the current verification request.
After understanding the implementation process and principle, we will implement the code of verification code function on the basis of previous projects.
2. Create a new module
We can create a new project model. The creation process is the same as before, which is omitted here.
3. Add dependent packages
In this case, we use the open source verification code solution kaptcha on github, so we need to add the dependency package of kaptcha on the basis of the original project.
<dependencies>
        <dependency>
            <groupId>org.springframework.boot</groupId>
            <artifactId>spring-boot-starter-web</artifactId>
        </dependency>

        <dependency>
            <groupId>org.springframework.boot</groupId>
            <artifactId>spring-boot-starter-security</artifactId>
        </dependency>

        <dependency>
            <groupId>org.mybatis.spring.boot</groupId>
            <artifactId>mybatis-spring-boot-starter</artifactId>
            <version>1.3.1</version>
        </dependency

        <dependency>
            <groupId>mysql</groupId>
            <artifactId>mysql-connector-java</artifactId>
            <scope>runtime</scope>
        </dependency>

        <dependency>
            <groupId>com.github.penggle</groupId>
            <artifactId>kaptcha</artifactId>
            <version>2.3.2</version>
        </dependency>

        <dependency>
            <groupId>org.springframework.security</groupId>
            <artifactId>spring-security-test</artifactId>
            <scope>test</scope>
        </dependency>
    </dependencies>
4. Create Producer object
After the dependency package is ready, we will create a CaptchaConfig configuration class. In this class, we will create a Producer object to configure the verification code object, such as setting the width and height of the verification code background box, the character set of the verification code, the number of verification codes, etc.
@Configuration
public class CaptchaConfig {

    @Bean
    public Producer captcha() {
        // Configure basic parameters of graphic verification code
        Properties properties = new Properties();
        // image width
        properties.setProperty("kaptcha.image.width", "150");
        // Picture length
        properties.setProperty("kaptcha.image.height", "50");
        // character set
        properties.setProperty("kaptcha.textproducer.char.string", "0123456789");
        // Character length
        properties.setProperty("kaptcha.textproducer.char.length", "4");
        Config config = new Config(properties);
        // Use the default graphic verification code to implement, of course, you can also customize the implementation
        DefaultKaptcha defaultKaptcha = new DefaultKaptcha();
        defaultKaptcha.setConfig(config);
        return defaultKaptcha;
    }

}
5. Create an interface for generating verification code
After creating the Producer object above, we will then create an interface to generate the verification code, which is responsible for generating the verification code picture, and remember to store the generated verification code in the session so that the verification code can be compared when launching the login request later.
@Controller
public class CaptchaController {

    @Autowired
    private Producer captchaProducer;

    @GetMapping("/captcha.jpg")
    public void getCaptcha(HttpServletRequest request, HttpServletResponse response) throws IOException {
        // Set content type
        response.setContentType("image/jpeg");
        // Create verification code text
        String capText = captchaProducer.createText();

        // Set the verification code text to session
        request.getSession().setAttribute("captcha", capText);

        // Create verification code picture
        BufferedImage bi = captchaProducer.createImage(capText);
        // Get response output stream
        ServletOutputStream out = response.getOutputStream();
        // Write the picture verification code data to the response output stream
        ImageIO.write(bi, "jpg", out);

        // Push and close the response output stream
        try {
            out.flush();
        } finally {
            out.close();
        }
    }

}
6. Custom exception
We can customize a runtime exception to handle the exception prompt when the verification code fails. Of course, this is not necessary.
public class VerificationCodeException extends AuthenticationException {

    public VerificationCodeException () {
        super("Verification of graphic verification code failed");
    }

}
7. Create a filter to intercept the verification code
After the verification code is created and saved to the session, another important task is to compare whether the verification code passed by the user from the front end is the same. This comparison is implemented in the custom filter. So then we create a filter to intercept and verify the verification code sent by the user to see whether the verification code passed in the request is consistent with the verification code generated and saved in the session.
/**
 * The verification function of graphic verification code based on filter belongs to Servlet level, which is simple and easy to understand
 */
public class VerificationCodeFilter extends OncePerRequestFilter {

    private AuthenticationFailureHandler authenticationFailureHandler = new SecurityAuthenticationFailureHandler();

    @Override
    protected void doFilterInternal(HttpServletRequest httpServletRequest, HttpServletResponse httpServletResponse, FilterChain filterChain) throws ServletException, IOException {
        // Non login requests do not check the verification code and are released directly
        if (!"/login".equals(httpServletRequest.getRequestURI())) {
            filterChain.doFilter(httpServletRequest, httpServletResponse);
        } else {
            try {
                //Verification code
                verificationCode(httpServletRequest);

                //After the verification code passes, the request is released
                filterChain.doFilter(httpServletRequest, httpServletResponse);
            } catch (VerificationCodeException e) {
                authenticationFailureHandler.onAuthenticationFailure(httpServletRequest, httpServletResponse, e);
            }
        }
    }

    public void verificationCode (HttpServletRequest httpServletRequest) throws VerificationCodeException {
        HttpSession session = httpServletRequest.getSession();
        String savedCode = (String) session.getAttribute("captcha");
        if (!StringUtils.isEmpty(savedCode)) {
            // Clear the verification code casually, whether it is failure or success, so the client should refresh the verification code when login fails
            session.removeAttribute("captcha");
        }

        String requestCode = httpServletRequest.getParameter("captcha");
        // If the verification fails, an exception is thrown
        if (StringUtils.isEmpty(requestCode) || StringUtils.isEmpty(savedCode) || !requestCode.equals(savedCode)) {
            throw new VerificationCodeException();
        }
    }

}
8. Write SecurityConfig
Next, we need to write a SecurityConfig configuration class. In this configuration class, the verification code filter we wrote earlier is added before the default UsernamePasswordAuthenticationFilter. It can be implemented by using the http.addFilterBefore() method.
Can you remember the UsernamePasswordAuthenticationFilter filter? If you can't remember, please look at my previous article, which has a detailed explanation!
/**
 * @Author: One brother
 * Add graphic verification code function
 */
@EnableWebSecurity(debug = true)
public class SecurityConfig extends WebSecurityConfigurerAdapter {

    @Override
    protected void configure(HttpSecurity http) throws Exception {
        http.authorizeRequests()
                .antMatchers("/admin/api/**")
                .hasRole("ADMIN")
                .antMatchers("/user/api/**")
                .hasRole("USER")
                .antMatchers("/app/api/**", "/captcha.jpg")
                .permitAll()
                .anyRequest()
                .authenticated()
                .and()
                .formLogin()
                .failureHandler(new SecurityAuthenticationFailureHandler())
                .successHandler(new SecurityAuthenticationSuccessHandler())
                .loginPage("/myLogin.html")
                .loginProcessingUrl("/login")
                .permitAll()
                .and()
                .csrf()
                .disable();

        //Add filter before UsernamePasswordAuthenticationFilter
        http.addFilterBefore(new VerificationCodeFilter(), UsernamePasswordAuthenticationFilter.class);
    }

    @Bean
    public PasswordEncoder passwordEncoder() {
        return NoOpPasswordEncoder.getInstance();
    }

}
Here, we add the user-defined verification code verification filter verificationcode filter to the UsernamePasswordAuthenticationFilter of Spring Security.
Note:
For the web interface we tested, database configuration, authentication success, Handler processor in case of failure, please refer to the previous case of security processing scheme when front and rear ends are separated, which is omitted here.
9. Write test page
Since we want to realize the function of verification code, in order to facilitate the test, we need to write a user-defined login page, add a reference to the verification code interface here, and list the core code of the html page here.
<body>
<div class="login">
<h2>Access Form</h2>
<div class="login-top">
<h1>validate logon</h1>
<form action="/login" method="post">
<input type="text" name="username" placeholder="username" />
<input type="password" name="password" placeholder="password" />
<div style="display: flex;">
<!-- Input box of new graphic verification code -->
<input type="text" name="captcha" placeholder="captcha" />
<!-- Picture pointing to graphic verification code API -->
<img src="/captcha.jpg" alt="captcha" height="50px" width="150px" style="margin-left: 20px;">
</div>
<div class="forgot">
<a href="#"> forgot password</a>
<input type="submit" value="Sign in" >
</div>
</form>
</div>
<div class="login-bottom">
<h3>new user <a href="#"> note & nbsp; Book</a></h3>
</div>
</div>
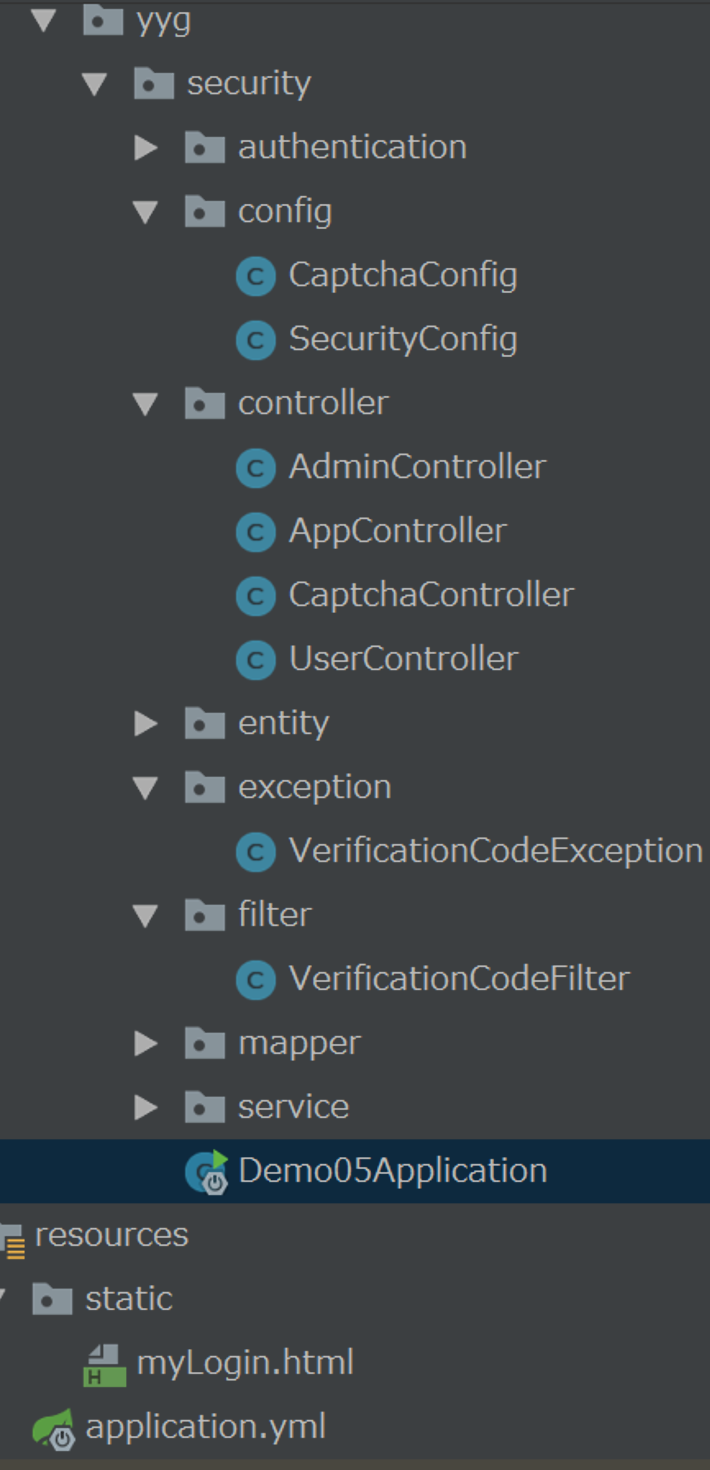
</body>10. Code structure
The code structure of the whole project is as follows. Please refer to the following figure for implementation.
11. Start project testing
Next, we start the project. When accessing the restricted interface, we will redirect to the myLogin.html login page. You can see that our verification code effect has been displayed.
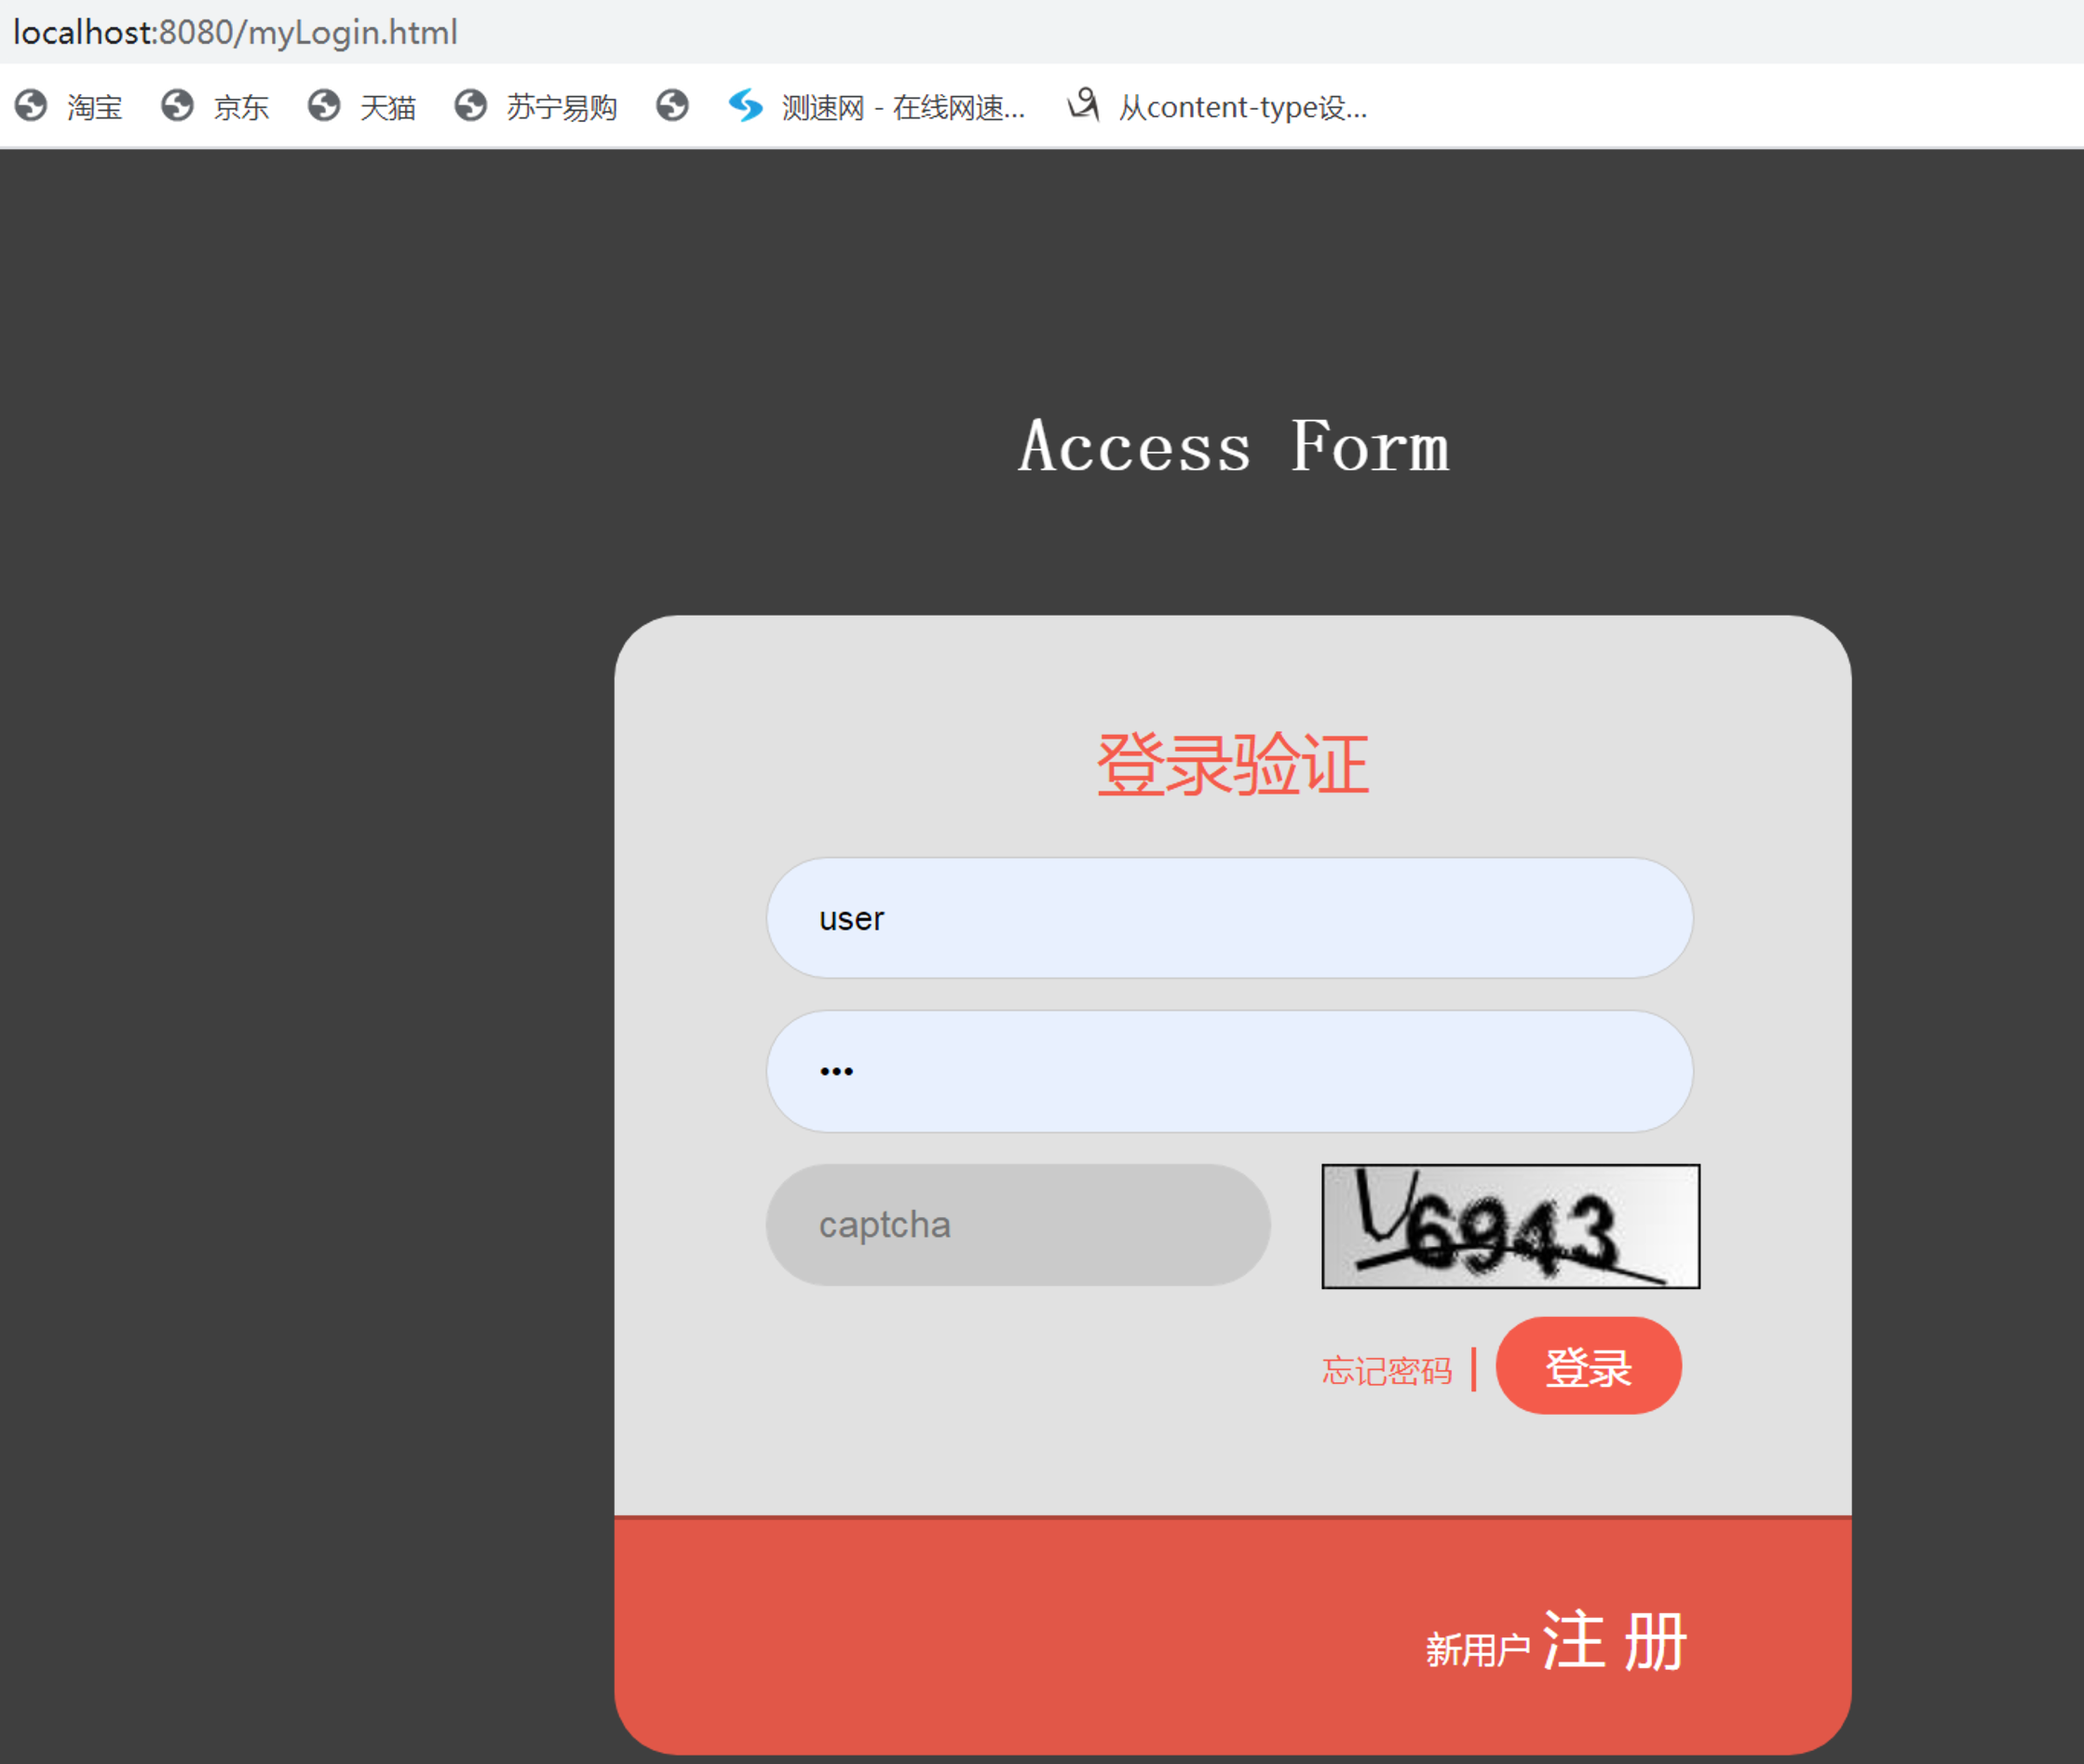
Next, after entering the correct user name, password and verification code, we can successfully log in and access the web interface.
So far, the verification code function based on the user-defined filter has been implemented with you. Have you learned it? If you have any questions, you can leave a message in the comment area.