Article catalog
🔥 2. Project structure analysis
🔥 5. Previous good articles recommended
🔥 1. Foreword
Hello, I'm a paper plane. If every day is endless knowledge, such learning must be very boring. Today, I'll bring you something with a sense of achievement: Node.js+ws module to make a simple chat room! There is a code address at the end of the text.
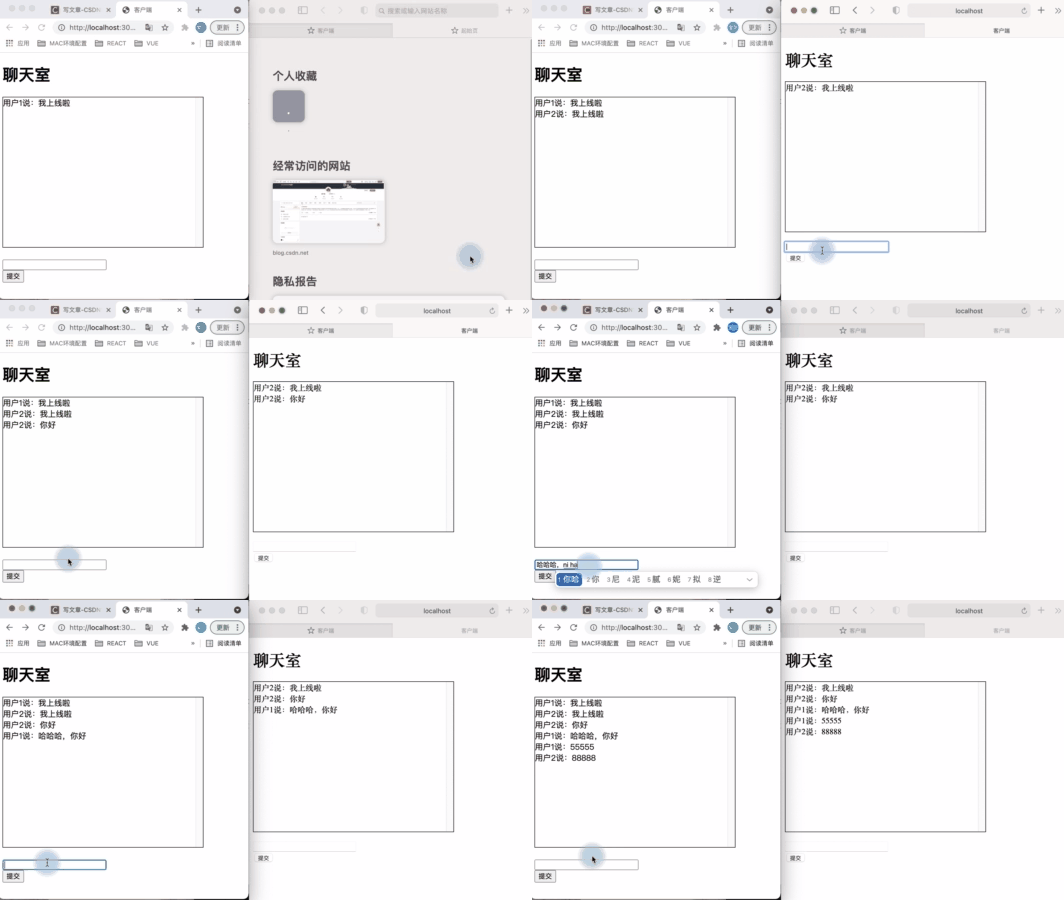
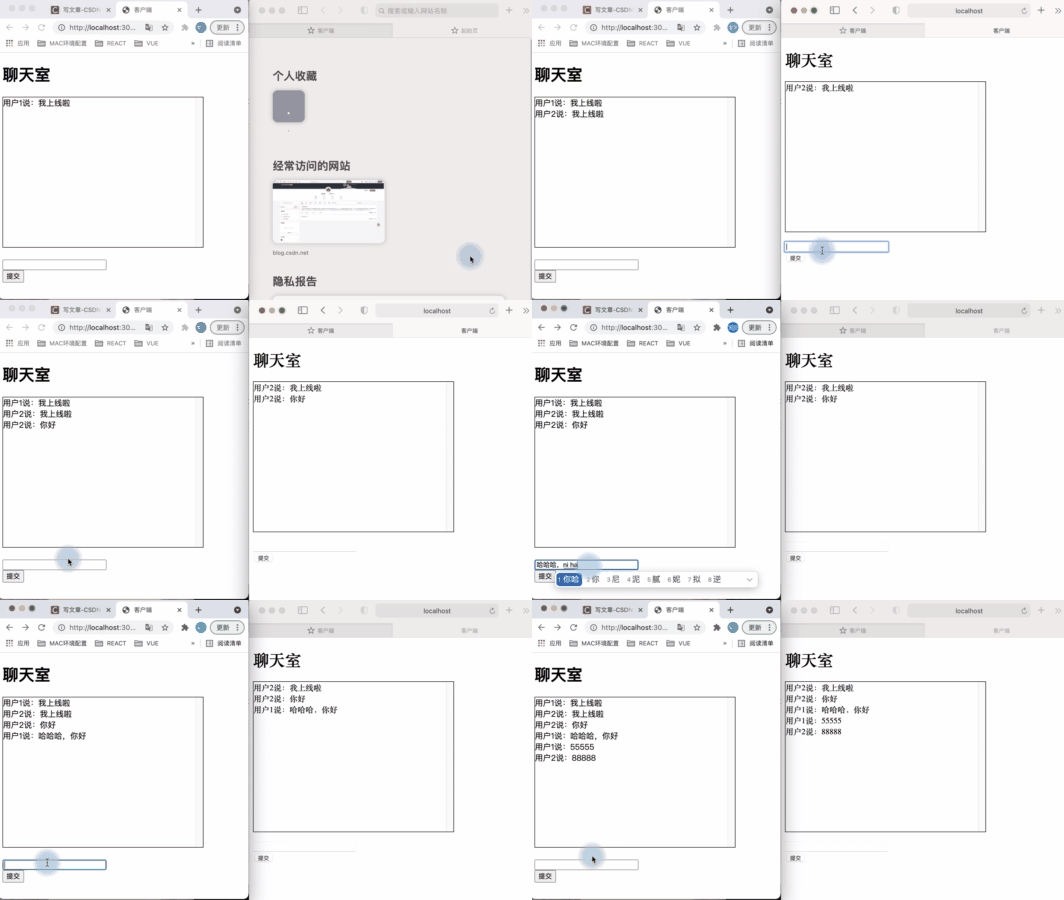
 design sketch
After seeing the effect, are you curious about the implementation method? Next, I'll explain to you one by one:
🔥 2. Project structure analysis

Project catalog disassembly:
- Client folder: client configuration
- server.js: static server for client
- WebSocketServer.js: server configuration file
With the overall structure, next, hey hey.

🔥 3. Operation steps
get ready:
package.json can be obtained by executing the following commands:
npm init -y
Two dependent packages are required:
npm install ws --save-dev
npm install express --save-dev
Step 1: build the server (WebSocketServer.js)
const webSocket = require("ws"); //Introducing ws server module

const ws = new webSocket.Server({ port: 8000 }); //Create a server with port 8000
let clients = {};
let clientNum = 0;
ws.on("connection", (client) => {
  //Connect client

  //Number the client, that is, the users participating in the chat
  client.name = ++clientNum;
  clients[client.name] = client;

  // Chat information of users
  client.on("message", (msg) => {
    console.log("user" + client.name + "say:" + msg);
    //Broadcast data transmission and output
    broadcast(client, msg);
  });
  //Error message
  client.on("error", (err) => {
    if (err) {
      console.log(err);
    }
  });
  // Offline
  client.on("close", () => {
    delete clients[client.name];
    console.log("user" + client.name + "Offline~~");
  });
});

//Broadcasting method
function broadcast(client, msg) {
  for (var key in clients) {
    clients[key].send("user" + client.name + "Say:" + msg);
  }
}
Step 2: client static server construction (server.js)
const express = require("express"); //Introducing express module
const path = require("path"); //Introducing disk path module
const app = express();
const port = 3000; //port
const host = "127.0.0.1"; //host
app.use(express.static(path.resolve(__dirname, "./client"))); //Set the path to open the service

app.listen(port, host, () => {
  //Listener Service
  console.log(`Client server is:http://${host}:${port}`);
});
Step 3: client page construction (index.html)
<!DOCTYPE html>
<html lang="en">

<head>
    <meta charset="UTF-8">
    <meta name="viewport" content="width=device-width, initial-scale=1.0">
    <meta http-equiv="X-UA-Compatible" content="ie=edge">
    <title>client</title>
</head>

<body>
    <h1>chat room</h1>
    <div id="content" name="name" style="overflow-y: scroll; width: 400px; height: 300px; border: solid 1px #000"></div>
    <br />
    <div>
        <input type="text" id="msg" style="width: 200px;">
    </div>
    <button id="submit">Submit</button>
    <script src="WSClient.js" charset="utf-8"></script>
    <script>
        document.querySelector('#submit').addEventListener('click', function () {
            var msg2 = msg.value
            ws.send(msg2)
            msg.value = ''
        }, false)
    </script>
</body>

</html>
Step 4: connect the client to the server configuration (WSClient.js)
const ws = new WebSocket("ws://127.0.0.1:8000 "); / / connect to the client

//go online
ws.onopen = () => {
  ws.send("I'm online");
};
//Send message
ws.onmessage = (msg) => {
  const content = document.getElementById("content");
  content.innerHTML += msg.data + "<br>";
};
//report errors
ws.onerror = (err) => {
  console.log(err);
};

//Offline
ws.onclose = () => {
  console.log("close");
};
It's done here.
Step 5: start websocketserver.js and server.js respectively
node WebSocketServer.js

node server.js

The above means that the startup is successful. Next, let's test locally. Students who want to play online can also upload and play by themselves.
🔥 4. View effect
Open localhost:3000 with two browsers to view the effect:

Code download address: https://codechina.csdn.net/qq_32442973/websocket.git
Little question: what should I do when websocket is disconnected (heartbeat)? (an article will be published later)
🔥 5. Previous good articles recommended
- How did the package from npm install come from? No wonder there are such libraries on npmjs! I'll teach you to build your own npm component library!
- Why does wechat WeixinJSBridge.invoke fail to jump after successful payment? It also closes my page! This article will tell you What should I do!
- Let's talk about macro tasks and micro tasks in js!
- 2021 front end interview js topic summary, you might as well see if there is a question that belongs to you
- Front end asynchronous solutions latest version (version 2021) paper aircraft blog
- Using Docker to deploy the front-end project practical tutorial, I've stepped on all the pits for you! Paper aircraft blog - CSDN blog