[digital image processing learning notes] i. installation, reading, displaying and storing images
Follow the link above:
4. Window destruction function
Two common window destruction functions
① Definition: cv2.destroyWindow(windows_name) # destroys a single specific window

② cv2.destroyAllWindows() # destroy all windows without parameters
for instance:
import cv2 as cv
readPicture = cv.imread('img/destination.jpg', 1)
cv.imshow("picture", readPicture)
cv.imshow("aaa", readPicture)
if cv.waitKey(0) == 27:
    cv.destroyWindow("picture")
Note: I should have pressed 0 to stop the picture window, but I pressed ESC to close it all. Here is a question, because this step is equivalent to the function of destroyAllWindows().
For the destroyAllWindows() function, the experimental example only needs to change the last sentence in the above example to cv.destroyAllWindows().
*Also mentioned is the waitKey function of cv2
Definition: cv2.waitKey(time_of_milliseconds)
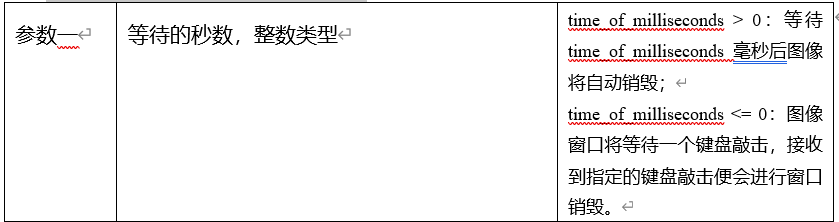
For time_ of_ Milliseconds > 0, for example:
import cv2 as cv
readPicture = cv.imread('img/destination.jpg', 1)
cv.imshow("picture", readPicture)
cv.imshow("aaa", readPicture)
if cv.waitKey(3000):
    cv.destroyAllWindows()
After 3s, all windows will close automatically.
The method of waiting for keys has been used previously, as follows:
if cv.waitKey(0) == 27: #Press ESC to execute the following statement
cv.destroyWindow('picture')
Or
if cv.waitKey(0) == ord('A'): #Press the A key to execute the following statement
    cv.destroyWindow('picture')
Explain the ord() function. The ord() function is a pairing function of chr() function (for 8-bit ascii string) or unichr() function (for Unicode object). It takes a character (string with length of 1) as a parameter and returns the corresponding ASCII value or Unicode value. If the given Unicode character exceeds the scope of your Python definition, An exception of TypeError will be thrown.
3, Image color space transformation function cv2.cvtColor
Definition: cv2.cvtColor(input_image, flag)
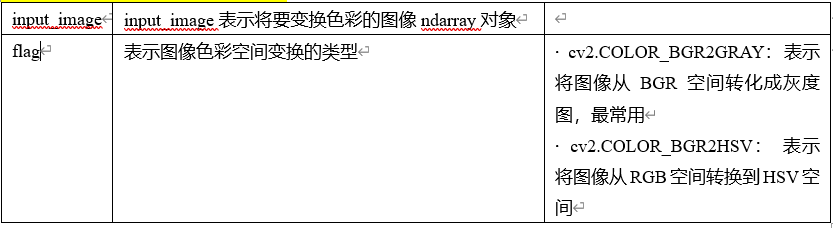
If you want to view all types of the parameter flag, execute the following program to view, there are 274 space conversion types in total:
import cv2
flags = [i for i in dir(cv2) if i.startswith('COLOR_')]
print(flags)
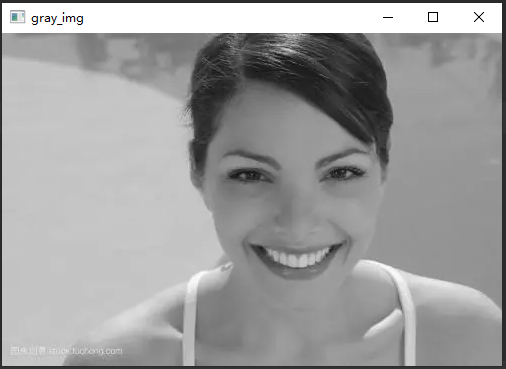
For example, use this function
import cv2 as cv
rgb_img = cv.imread("img/testImg.jpg", 1)
gray_img = cv.cvtColor(rgb_img, cv.COLOR_BGR2GRAY)
cv.imshow("gray_img", gray_img)
if cv.waitKey(0) == 27:
    cv.destroyAllWindows()
The results are as follows:
Here is a quote from looking at other people's notes:
In the later image feature extraction and recognition learning, we often use to convert color images into gray images. Here we explain why I always process gray images to enhance my understanding of future image processing operations
The color of the image is mainly due to the different color information generated by the influence of external light, and the images of the same background produce different color effects under the irradiation of different light sources. Therefore, when we do the image feature extraction and recognition process, we want the gradient information of the image, that is, the essential content of the image, The color information will cause some interference to our gradient information extraction, so we will convert the image into gray image before image feature extraction and recognition, which also reduces the amount of processed data and enhances the processing effect.
4, Draw custom digital images
1. Some basic knowledge
For an RGB color image whose length and width are w and h respectively, each pixel value is composed of a tuple of (B, G and R). In opencv python, the order of the three values of each pixel is B, G and R. for a gray-scale image, each pixel corresponds to only an integer. If you want to scale the pixels to 0 and 1, the gray-scale image is a binary image, and 0 is black, 1 is white. Use the following example to understand
import cv2 as cv
rgb_img = cv.imread("img/testImg.jpg", 1);
print(rgb_img.shape)
print(rgb_img[0, 0])
print(rgb_img[0, 0, 0])

gray_img = cv.cvtColor(rgb_img, cv.COLOR_BGR2GRAY)
print(gray_img.shape)
print(gray_img[0, 0])
The running results of the above program are as follows:
(333, 500, 3)
[224 179 109]
224
(333, 500)
163
From the operation results, it can be seen that:
① The height of the color image is 333, the width is 500, and the number of channels is 3 (as can be seen from the first result (333500,3))
② The value of pixel (0,0) is (224179109), that is, B=224, G=179, R=109. It is single channel for gray image
(0,0,0) represents a black pixel, while (255255255) represents a white pixel. In this way, when B = 0, g = 0 and R = 0, it is equivalent to closing the color channel, which is equivalent to entering without light, so the whole image is black, and (255255255) is equivalent to opening all channels of B, G and R, light enters, so it is white
With this understanding, we can draw any color image and gray image
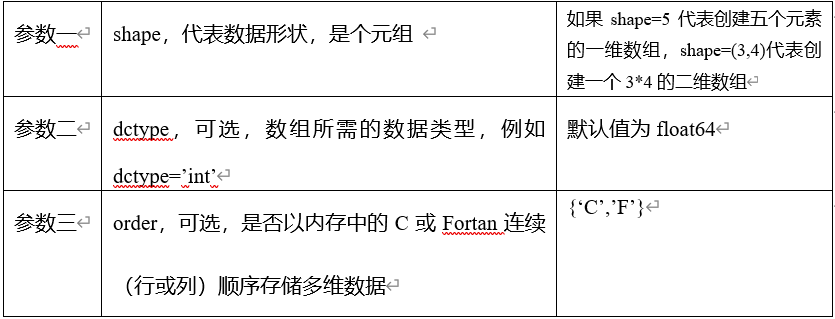
*Before you start, explain a function: the ones function in the numpy library. This function returns an array of a given shape and type and fills in 1
Definition: numpy.ones(shape,[dctype],[order])
Try two examples:
Example 1:
import numpy as np
white_img = np.ones((3, 3, 2))
print(white_img)
The results are as follows:
[
[ [1. 1.] [1. 1.] [1. 1.] ]
[ [1. 1.] [1. 1.] [1. 1.] ]
[ [1. 1.] [1. 1.] [1. 1.] ]
]
It generates an array of three rows and three columns, each containing two elements. The default value of this code dctype is float64
Another example:
import numpy as np
white_img = np.ones((3, 3, 3),dctype=int)
print(white_img)
The results are as follows:
[
[ [1 1 1] [1 1 1] [1 1 1] ]
[ [1 1 1] [1 1 1] [1 1 1] ]
[ [1 1 1] [1 1 1] [1 1 1] ]
]
It's just that there are three elements in each one. Because we set the value of dctype to int, the elements shown here are slightly different from those above.
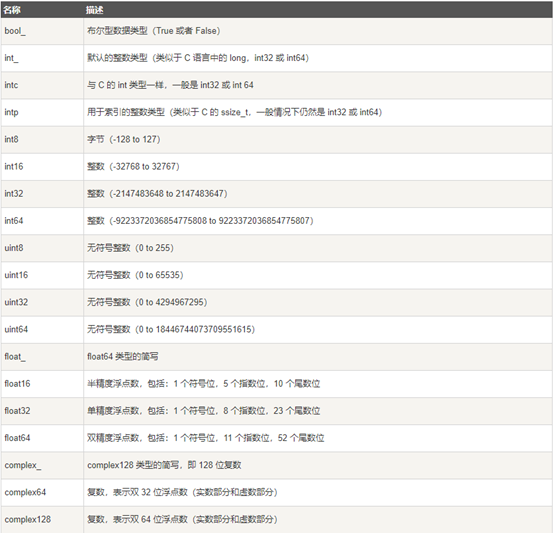
You also need to explain the NumPy data type. You can understand this by directly looking at the table in the rookie tutorial
Next, let's start to draw a white diagram. Let's take a look at this Code:
import numpy as np
white_img = np.ones((3, 3, 3), np.uint8)
white_img = 255 * white_img
print(white_img)
Here are some explanations:
In the second line, np.unit8 is just a data type of numpy - unsigned integer (0 to 255), which doesn't need to be complicated.
According to the numpy.ones() function mentioned earlier, we can know that this generates a three row and three column array, and each array contains three elements. Therefore, we can know that the result obtained after the second step should be as follows:
[
[ [1 1 1] [1 1 1] [1 1 1] ]
[ [1 1 1] [1 1 1] [1 1 1] ]
[ [1 1 1] [1 1 1] [1 1 1] ]
]
What does the third line mean? In fact, it is the multiplication of numbers and matrices in linear algebra
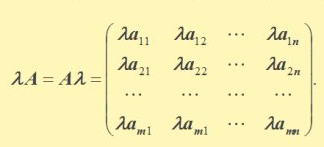
It is not difficult to understand that it is actually multiplying 255 by the matrix, so we can get the printed result:
[
[ [255 255 255] [255 255 255] [255 255 255] ]
[ [255 255 255] [255 255 255] [255 255 255] ]
[ [255 255 255] [255 255 255] [255 255 255] ]
]
Next, expand the number of rows and columns of the array, for example, to 500. As you can see earlier, [255] is nothing more than a pixel. If you don't remember, you can take a look at the example at the beginning of this example and the following description.
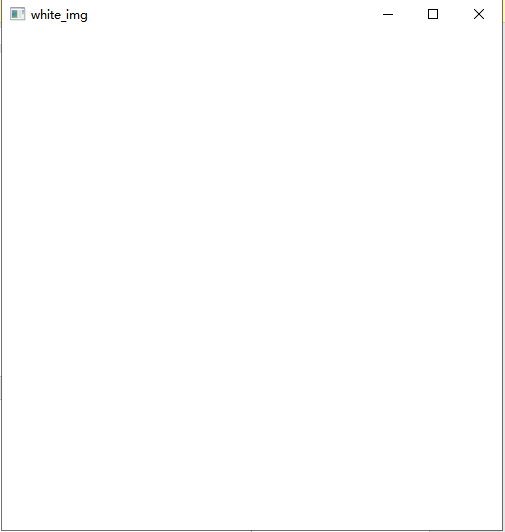
We mentioned earlier that [255] is a white pixel, so we can show this matrix as a graph. The complete code is as follows:
import cv2 as cv
import numpy as np
white_img = np.ones((500, 500, 3), np.uint8)
white_img = 255 * white_img
cv.imshow("white_img", white_img)
if cv.waitKey(0) == 27:
    cv.destroyAllWindows()
The results are as follows:
If you change 255 to 150, it is a gray between black and white, as follows

2. Draw simple images
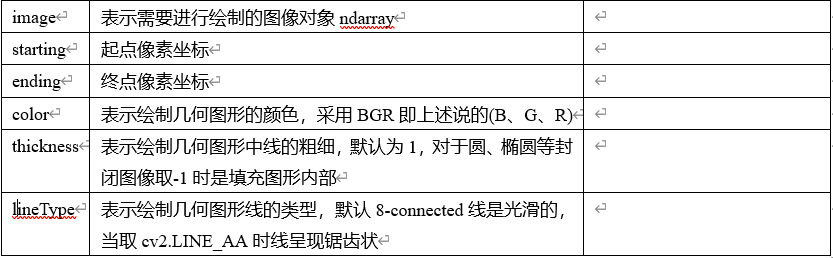
First, let's get familiar with some basic drawing functions of simple geometric images in opencv. Then, we try to add new image objects on the above white images. Next, we introduce the set image drawing functions such as straight line cv2.line, rectangle cv2.rectangle, circle cv2.circle, ellipse cv2.ellipse, polygon cv2.polygons, etc.
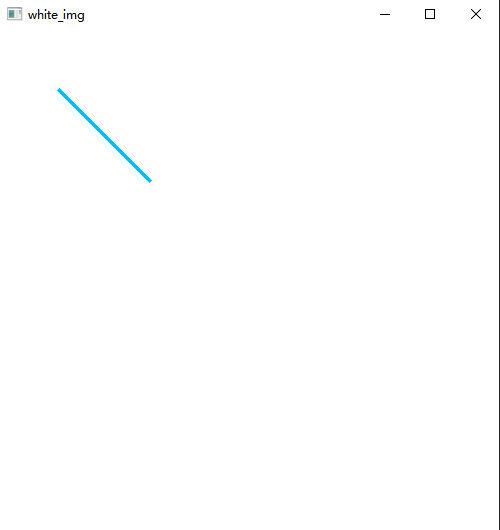
(1) cv2.line function
Definition: cv2.line(image, starting, ending, color, thickness, lineType)
Combine the above code and write a line of code to test:
import cv2 as cv
import numpy as np
white_img = np.ones((500, 500, 3), np.uint8)
white_img = 255 * white_img
cv.line(white_img, (60, 60), (150, 150), (255, 191, 0), 3)
cv.imshow("white_img", white_img)
if cv.waitKey(0) == 27:
    cv.destroyAllWindows()
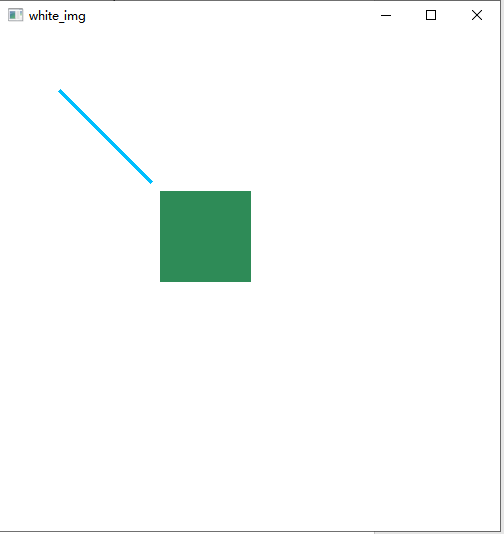
(2) cv2.rectangle function
<mark>definition: cv2.rectangle(image, top-left, bottom-right, color, thickness, lineType)</mark>
Because the parameters are basically the same as those in (1), only two different parameters are introduced

The complete code is omitted here. Just add the following under the cv.line(...) part of the (1) code: (incidentally, test the thickness function = - 1)
cv.rectangle(white_img, (160, 160), (250, 250), (87, 139, 46), -1)
The results are as follows:
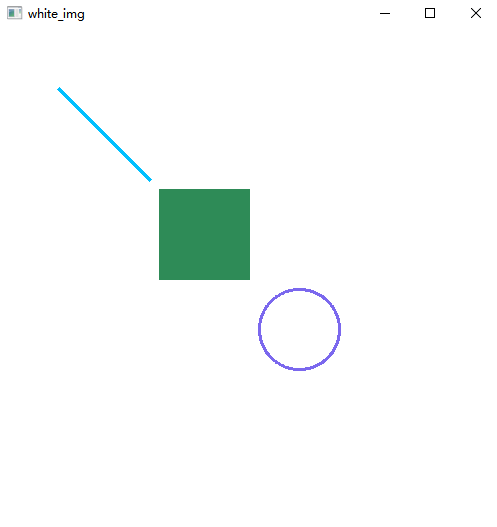
(3) cv2.circle function
<mark>definition: cv2.circle(image, center, radius, color, thickness, lineType)</mark>

The test code is as follows:
cv.circle(white_img, (300, 300), 40,(238, 104, 123), 2)
(4) cv2.ellipse function
Definition: CV2. Circle (image, center, (major axis length, minor axis length), angle, startangle, endangle, color, thickness, linetype)
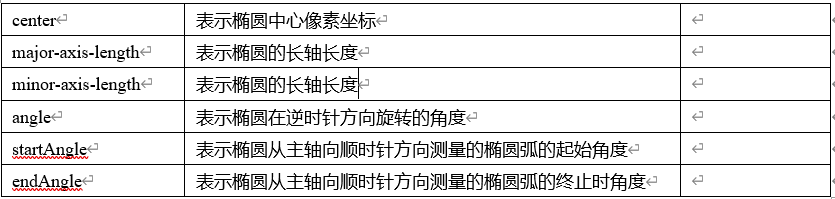
The test code is as follows:
cv.ellipse(white_img, (80, 320), (100, 50), 0, 0, 360, (127, 255, 0), 4)

(5) cv2.polylines function
Definition: CV2. Polylines (image, [point set], flag, color, thickness, linetype)

The test code is as follows:
pts = np.array([[20, 30], [25, 31], [67, 32], [53, 24]], np.int32)
cv.polylines(white_img, [pts], True, (0, 0, 0), 2)
The results are as follows:
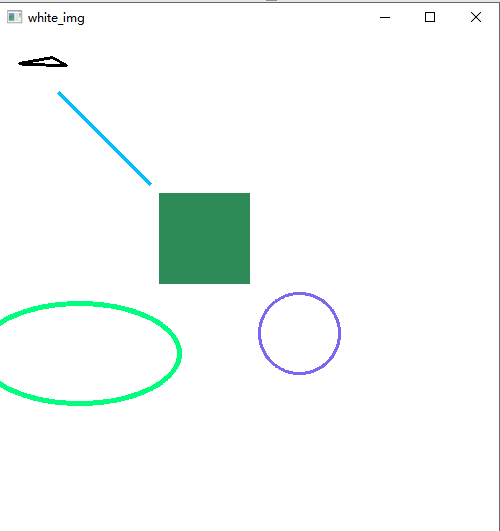
Post a complete code:
import cv2 as cv
import numpy as np

white_img = np.ones((500, 500, 3), np.uint8)
white_img = 255 * white_img
cv.line(white_img, (60, 60), (150, 150), (255, 191, 0), 3)
cv.rectangle(white_img, (160, 160), (250, 250), (87, 139, 46), -1)
cv.circle(white_img, (300, 300), 40,(238, 104, 123), 2)
cv.ellipse(white_img, (80, 320), (100, 50), 0, 0, 360, (127, 255, 0), 4)

pts = np.array([[20, 30], [25, 31], [67, 32], [53, 24]], np.int32)
cv.polylines(white_img, [pts], True, (0, 0, 0), 2)

cv.imshow("white_img", white_img)
if cv.waitKey(0) == 27:
    cv.destroyAllWindows()