- Introduction
- Angular JS controls page elements
1. introduction
In this blog, we mainly introduce the instructions related to page control, including ng-repeat instructions, ng-include instructions, ng-show instructions, ng-switch instructions, ng-if instructions, ng-bind-html instructions, ng-non-bindable instructions, which will enrich our pages. Next, let's see how these instructions control our pages. Element.
2. Angular JS controls page elements
2.1 ng-if instruction control page
2.1.1 Code Example
- First introduce Angular JS function library (abbreviated)
- Scope of creating our Angular JS
<html ng-app="myApp">
    <head>
        <script src="js/angular.js"></script>
        <meta charset="utf-8">
    </head>
    <body>
    </body>
</html>- Using ng-if instructions to control pages
    <div ng-controller="firstController">
        <div ng-click="click();">clickdiv</div>
        <div ng-if="flag">divdisplay</div>
</div>- Write our controller
        var app=angular.module("myApp",[])
        app.controller("firstController",function($scope){
            $scope.flag=true;
            $scope.click= function () {
                $scope.flag=!$scope.flag;
            }
})- Running results (when clicking div, div will not be displayed and the div tag is deleted)
(disappeared div)
(div does not disappear)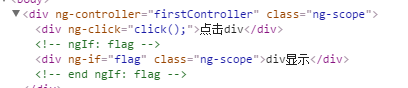
2.2 ng-repeat instruction control page
Using the ng-repeat instruction, we can output our array on the page, and the ng-repeat instruction also provides parameters for us to use, including: $index,$first,$middle,$last,$even, $odd. Now let's see how this instruction should be used.
2.2.1 Code Implementation
- Introduction of Angular JS Function Library (abbreviated)
- Specify Angular JS scope
<html ng-app="myApp">
    <head>
        <script src="js/angular.js"></script>
        <meta charset="utf-8">
    </head>
    <body>
    </body>
</html>- Create a controller and add an array variable
var app=angular.module("myApp",[])
app.controller("firstController",function($scope){
$scope.arr=["Zhang San","Li Si","Wang Wu"]
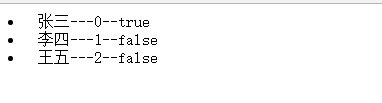
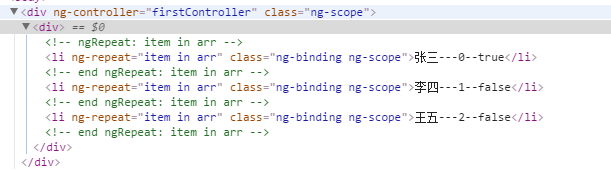
})- Output our array using the ng-repeat instruction (and look at the parameters that the instruction provides us)
<div ng-controller="firstController">
        <div>
            <li ng-repeat="item in arr">{{item}}---{{$index}}--{{$first}}</li>
        </div>
</div>- Operation result
2.3 ng-switch instruction control page
Through the ng-switch instruction, we can generate DOM tree according to the corresponding requirements, and ng-switch and ng-switch-when and ng-switch-default instructions are used together. Next, let's look at the use of the instruction.
2.3.1 Code Implementation
- Create Controller
        var app=angular.module("myApp",[])
        app.controller("firstController",function($scope){
            $scope.test="settings"
})- Create html fragments
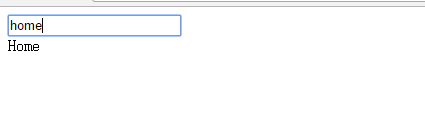
    <div ng-controller="firstController">
        <input ng-model="test" type="text">
        <div ng-switch on="test">
            <div ng-switch-when="settings">settings</div>
            <div ng-switch-when="home">Home</div>
            <div ng-switch-default>default</div>
        </div>
</div>- Operation result


2.4 ng-show instruction control page
The ng-show instruction controls whether a label is displayed or not.
2.4.1 Code Implementation
- html tag implementation
    <div>
        <input ng-model="test" type="checkbox">
        <div ng-show="test">ng-show Example</div>
</div>- Running results (Note: The tag disappeared not by deletion, but by adding a style)


2.5 ng-include instruction control page
Through ng-include instructions, we can include external page code, ng-include instructions can contain an external html page, as well as an html template. Next, we will demonstrate the use of this command separately.
2.5.1 ng-include contains pages
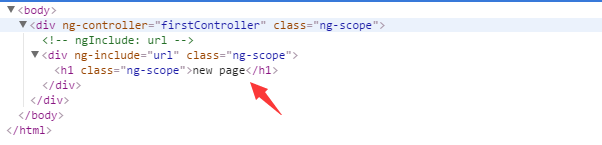
- First, we create an HTML called: test.html, which contains
<h1>new page</h1>- Use ng-include instructions in the main page (note: url is a variable)
<div ng-controller="firstController">
        <div ng-include="url"></div>
</div>- Create our controller
        var app=angular.module("myApp",[])
        app.controller("firstController",function($scope){
            $scope.url="test.html"
})- Operation result
2.5.2 ng-include includes template
- First we create templates. (Note that templates must be in the scope of angular js)
<script type="text/ng-template" id="mytemplate">
        <h1>new template</h1>
</script>- Create our html
 <div ng-controller="firstController">
        <div ng-include="url"></div>
</div>- Create our controller
 var app=angular.module("myApp",[])
        app.controller("firstController",function($scope){
            //Here is our template id
            $scope.url="mytemplate"
        })
2.5.3 ng-include
In real development, ng-include instructions are not used so much. We usually use routing to load our external pages. Singular routing also has its own shortcomings.
2.6 ng-bind-html instruction control page
As for the use of ng-bind-html instructions, we need some special settings. When we see ng-bind-html instructions, we may think of ng-bind instructions. ng-bind instructions can output text to pages. Similarly, ng-bind-html instructions also output information to pages. So what's the difference between them? Next, let's illustrate with an example, assuming that there is a text in our controller: $scope. text="<h1>hello world</h1>", then we use ng-bind to output it.
- code implementation
<html ng-app="myApp">
<head>
    <script src="js/angular.js"></script>
    <meta charset="utf-8">
    <script>
        var app=angular.module("myApp",[])
        app.controller("firstController",function($scope){
            $scope.text="<h1>hello world</h1>"
        })
    </script>
</head>
<body>
    <div ng-controller="firstController">
        <div ng-bind="text"></div>
    </div>
</body>
</html>- Operation result
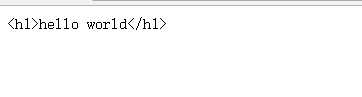
It seems that this is not the result we need. We want to parse the < H1 > tag. What should we do? This depends on our ng-bind-html instructions.
2.6.1 Code Implementation
- Introduce our Angular JS library (omitted)
- To use ng-bind-html instructions, we use a plug-in called ng Sanitize, so we first introduce our plug-in:
<script src="js/angular-sanitize.js"></script>- Indicate the scope of our Angular JS
<html ng-app="myApp">
    <head>
        <script src="js/angular.js"></script>
        <script src="js/angular-sanitize.js"></script>
        <meta charset="utf-8">
    </head>
    <body>
    </body>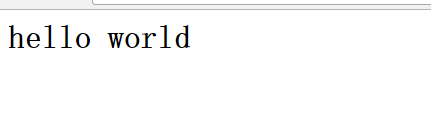
</html>- Create our html fragment
    <div ng-controller="firstController">
        <div ng-bind-html="text"></div>
</div>- Write our controller (note our module dependencies)
    //Note that the modules here depend on ngSanitize
        var app=angular.module("myApp",["ngSanitize"])
        app.controller("firstController",function($scope){
            $scope.text="<h1>hello world</h1>"
})- Operation result
2.7 ng-non-bindable instruction control page
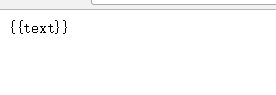
When writing a page with Angular JS, suppose we want to output a {{}}? We don't want to parse {}} into an expression, so we need to use the ng-non-bindable instruction. Next we'll look at the effect of this instruction.
2.7.1 Code Implementation
- Our html page
<html ng-app="myApp">
<head>
    <script src="js/angular.js"></script>
    <meta charset="utf-8">
    <script>
        var app=angular.module("myApp",[])
        app.controller("firstController",function($scope){
            $scope.text="hello world</h1>"
        })
    </script>
</head>
<body>
    <div ng-controller="firstController">
        <div ng-non-bindable>{{text}}</div>
    </div>
</body>
</html>- Running results (without resolving {}} to our expression)