Note: This article is from the course of direct division of network architecture division of MOOC
Environmental preparation:
Three virtual machines: linux (centos7 64 bit);
** 192.168.237.128;**
192.168.237.129;
** 192.168.237.130;**
1, Building three tomcat clusters with nginx
1. Install nginx
1.1 installation base environment;
-
To install the c + + environment:
Enter directorycd /opt/basic/gcc_g++/c++
to grant authorization
chmod +x install.sh
implement
./install
-
Install gcc environment
Enter directory
cd /opt/basic/gcc_g++/gcc
to grant authorization
chmod +x installimplement
./install
-
Install zlib package
decompressiontar -zxvf zlib-1.2.11.tar.gz
Enter directory
cd zlib-1.2.11/
to configure
./configure
Build install
make && make install
-
Install pcre package
decompressiontar -zxvf pcre-8.42.tar.gz
Enter directory
cd pcre-8.42/
to configure
./configure
Build install
make && make install
-
Install openssl (may be a little slow)
decompressiontar -zxvf openssl-1.1.0h.tar.gz
to configure
./config
compile
make
install
make install
1.2 installing nginx
The version used is self-determined. Here is just a simple installation procedure. There may be problems in different environments. You can baidu yourself or leave a message to me
-
decompression
tar -zxvf nginx-1.14.0.tar.gz
-
Enter the unzip directory
cd nginx-1.14...
-
to configure
--prefix=/usr/local/nginx \
--pid-path=/var/run/nginx/nginx.pid \
--lock-path=/var/lock/nginx.lock \
--error-log-path=/var/log/nginx/error.log \
--http-log-path=/var/log/nginx/access.log \
--with-http_gzip_static_module \
--http-client-body-temp-path=/var/temp/nginx/client \
--http-proxy-temp-path=/var/temp/nginx/proxy \
--http-fastcgi-temp-path=/var/temp/nginx/fastcgi \
--http-uwsgi-temp-path=/var/temp/nginx/uwsgi \
--http-scgi-temp-path=/var/temp/nginx/scgi
-
compile
make
-
install
make install
-
After successful installation, the / usr/local/nginx directory will be generated, as follows]

-
start-up
Enter sbin directory./nginx
-
Start successfully, visit IP plus port to see nginx page
ps -ef |grep nginx

-
If start error nginx.pid Unable to find. Please create your own file
mkdir /var/run/nginx -p
touch /var/run/nginx/nginx.pid
On restart
2. Install tomcat
tomcat installation is not detailed. For the convenience of differentiation, please modify the code of the default tomcat page during installation and make a good identification of each one
My IP distribution after installation
nginx   192.168.9.128:80
tomcat1 192.168.9.128:8080
tomcat1 192.168.9.129:8080
tomcat1 192.168.9.130:8080
3. Configure nginx
- Enter profile directory
cd /usr/local/nginx/conf
- edit nginx.conf file
vim nginx.conf
Add the following configuration at the following location: two steps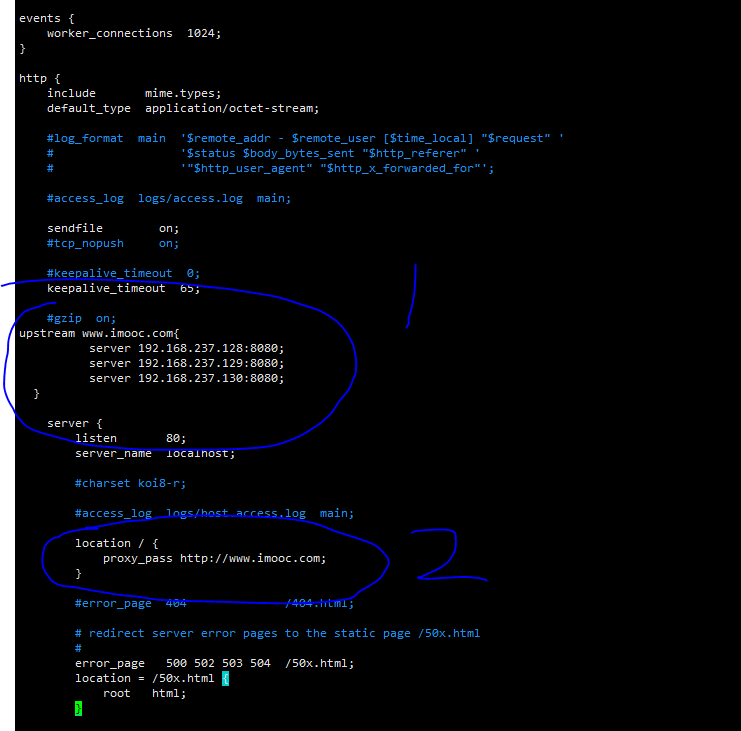
upstream www.imooc.com{
         server 192.168.237.128:8080;
         server 192.168.237.129:8080;
         server 192.168.237.130:8080;
}
 location / {
      proxy_pass http://www.imooc.com;
 }
- So far, it's configured
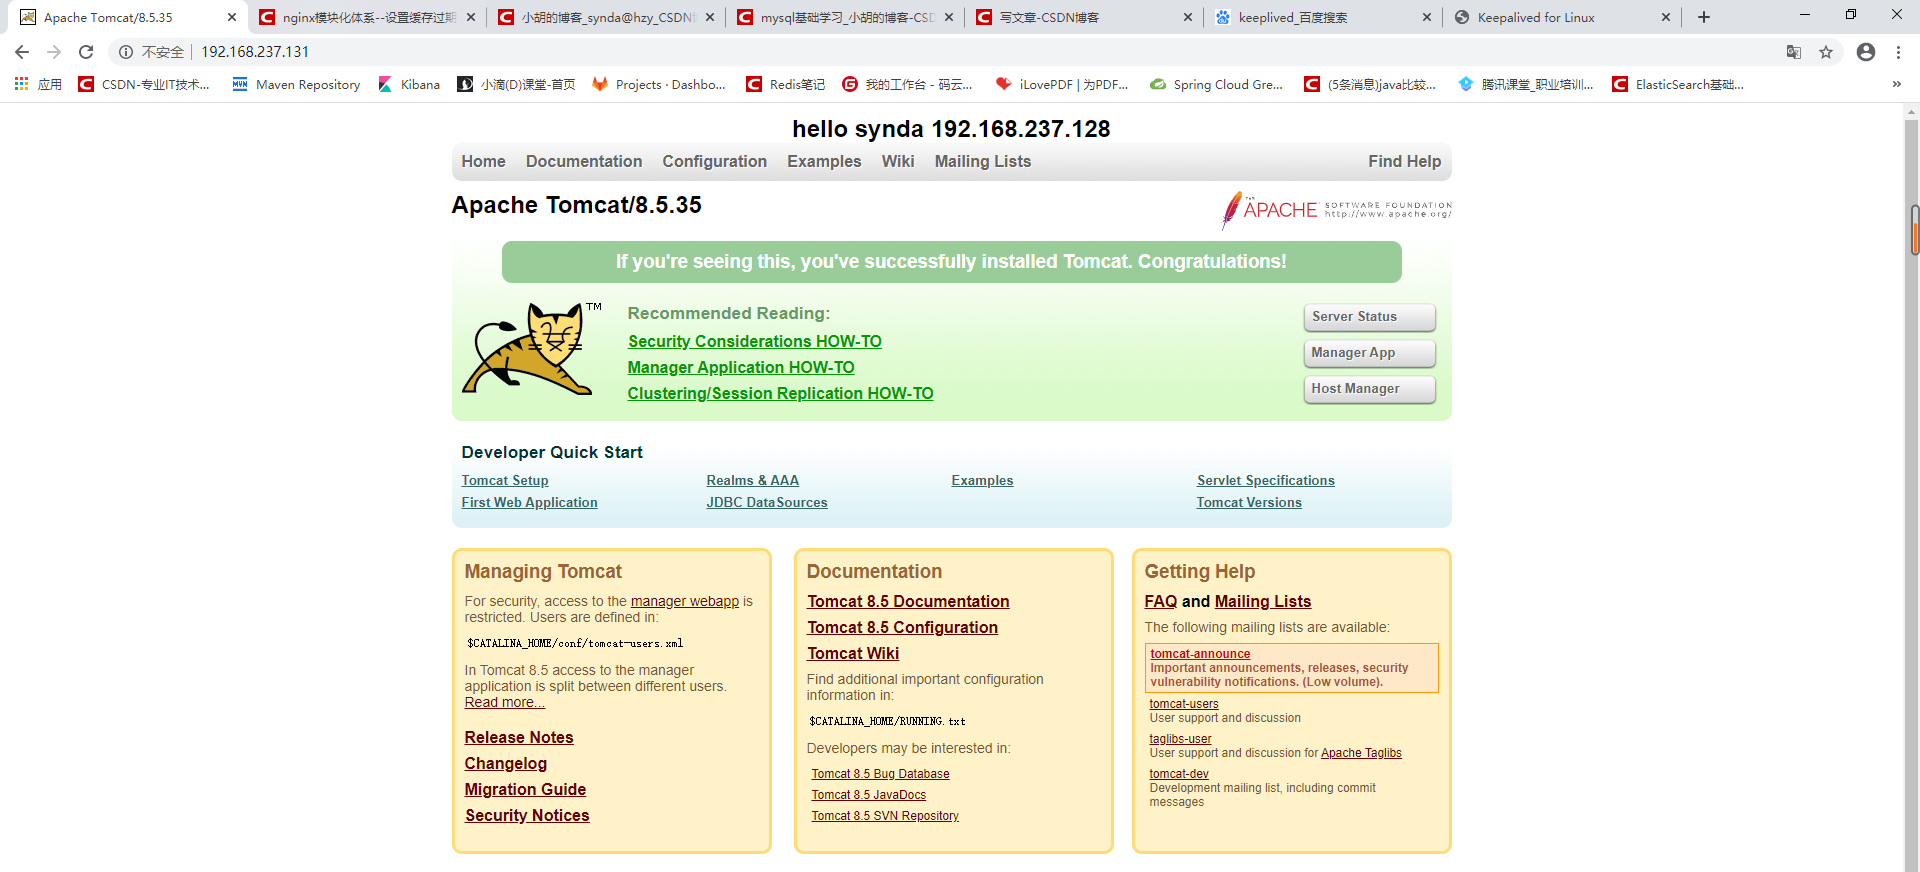
Visit nginx, you can see the following page, and nginx adopts polling load configuration by default. Each visit will go to a different tomcat

- Note: if there is no error in the middle, but the access is not available, please check whether the firewall is closed or whether the port is open
systemctl status firewalld  # inspect
systemctl stop firewalld  # close
systemctl start firewalld  #open
#Open firewall port
systemctl-cmd --zone=public --add-port=80/tcp --permanent
systemctl-cmd --zone=public --add-port=8080/tcp --permanent
systemctl-cmd --reload
# Check port listening
netstat -ntlp
2, Set up nginx + maintained double click the active / standby high availability cluster
Here, we need two nginx. Please follow the steps above to install nginx on the virtual machine 129, and the configuration needs to be the same
1. Install keepalived
- download
keepalived official website
Select the required version to download
- Upload the downloaded package to the server, unzip it, and enter the unzip directory
- Configuration, specify the installation directory and configuration file directory (the configuration file directory is better under etc, otherwise there will be problems)
./configure --prefix=/usr/local/keepalived --sysconf=/etc
At this time, the following warning may appear, because the libnl package is missing, so you can install it
***** WARNING - this will not support IPVS with ipv6...........
yum -y install libnl libnl-devel
Configuration in progress
compile
make && make install
- After installation, it will be generated under / usr/local/keepalived

etc
Installation is now complete
2. Configure maintained (primary)
- modify keepalived.conf configuration file
vim /etc/keepalived/keepalived.conf
Here, we only need the following configuration. The redundant ones can be deleted or kept
! Configuration File for keepalived

global_defs {
   router_id LVS_DEVEL_128  #Step 1
}
vrrp_instance VI_1 {
    state MASTER  # Step 2
    interface ens33 # Step 3, please note that it must be consistent with the host, otherwise it cannot be started and no error is reported
    virtual_router_id 51
    priority 100
    advert_int 1
    authentication {
        auth_type PASS
        auth_pass 1111
    }
    virtual_ipaddress {
        192.168.237.131 #Step 4: set virtual IP
    }
}
Configuration description
3. Configure maintained (standby)
Same modification profile
! Configuration File for keepalived

global_defs {
   router_id LVS_DEVEL_129 #Step 1: the value should be globally unique
}

vrrp_instance VI_1 {
    state BACKUP # The second step is to identify him as a standby node
    interface ens33 # Step three. Set up network card
    virtual_router_id 51 # Check is the same as the host
    priority 80 #Step 4: set the weight, because it is a standby node, so it is lower than the primary node. This value is the basis for selecting the master node when the host node is down in the cluster
    advert_int 1
    authentication {
        auth_type PASS
        auth_pass 1111
    }
    virtual_ipaddress {
        192.168.237.131 #Step 5: virtual IP, consistent with master
    }
}
4. Start
At this point, the configuration is complete and you can start
-
Enter the startup directory
cd /usr/local/keepalived/sbin/

Direct start./keepalived
-
Start check
ps -ef | grep keepa

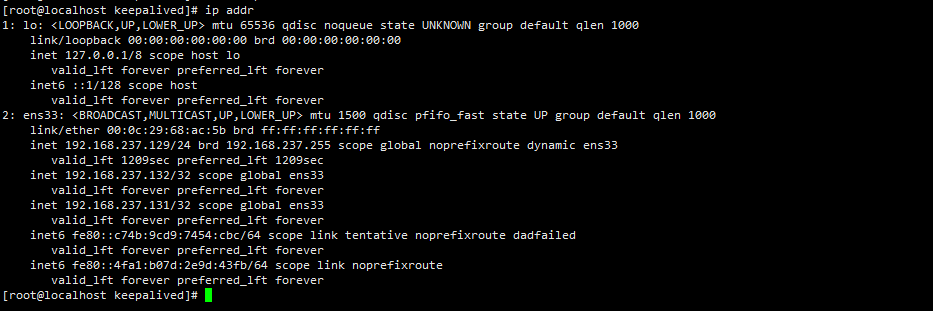
Check the virtual IP address. The master node should have 131 IP addresses, while the backup node does not have 131 IP addresses because it is standby
ip addr
Only 131 IP is needed here, because the virtual IP we just configured is 192.168.9.131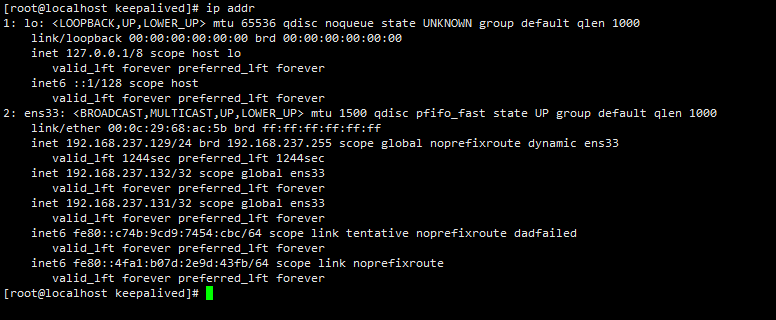
- At this time, access the virtual IP successfully
- Verification: at this time, we stop the 128 preserved node and check the IP addr of the backuo node again. At this time, we will find that the virtual IP 131 has appeared in the backup node. When we visit 192.168.237.131 again, we can still access tomcat, which means that the high availability cluster has been built successfully.
3, Build dual primary hot standby high availability cluster
There's not much to say about the principle here (mainly the talent and learning are afraid of saying wrong). The reason for building a dual active hot standby is that if the active standby machine has no problem, then the traffic will always be on the host machine and will not switch to the standby machine, resulting in a waste of resources on the standby machine (for now, that's how it is understood)
If you don't want to talk about it, you can configure it directly. The original host is 128, and the standby is 129
- Host configuration (128)
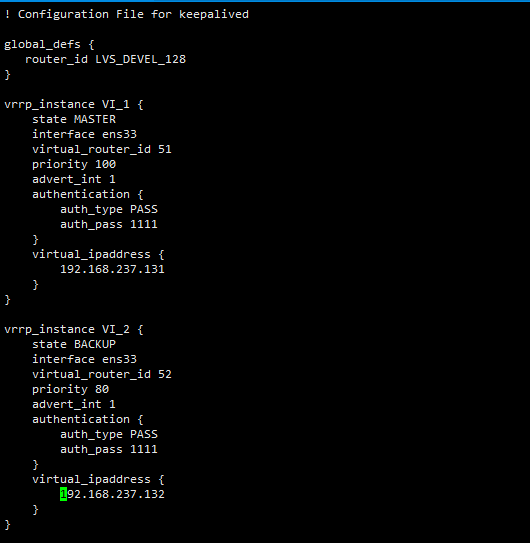
! Configuration File for keepalived

global_defs {
   router_id LVS_DEVEL_128
}
# Front active standby configuration
vrrp_instance VI_1 {
    state MASTER
    interface ens33
    virtual_router_id 51
    priority 100
    advert_int 1
    authentication {
        auth_type PASS
        auth_pass 1111
    }
    virtual_ipaddress {
        192.168.237.131
    }
}
# New configuration, configure this node as a standby node
vrrp_instance VI_2 {
    state BACKUP # 1
    interface ens33
    virtual_router_id 52
    priority 80
    advert_int 1
    authentication {
        auth_type PASS
        auth_pass 1111
    }
    virtual_ipaddress {
        192.168.237.132 #Add a new virtual IP
    }
}
- Standby configuration (129)
! Configuration File for keepalived

global_defs {
   router_id LVS_DEVEL_129
}

vrrp_instance VI_1 {
    state BACKUP
    interface ens33
    virtual_router_id 51
    priority 80
    advert_int 1
    authentication {
        auth_type PASS
        auth_pass 1111
    }
    virtual_ipaddress {
        192.168.237.131
    }
}
#New configuration
vrrp_instance VI_2 {
    state MASTER # Change to nmaster node
    interface ens33
    virtual_router_id 52
    priority 100
    advert_int 1
    authentication {
        auth_type PASS
        auth_pass 1111
    }
    virtual_ipaddress {
        192.168.237.132 # Set virtual IP
    }
}
Configuration complete
ip 192.168.237.131 host (128) standby (129)
ip 192.168.237.132 host (129) standby (128)
If you look at IP again, two virtual IPS will appear