As mentioned in the last article Variables and operation principle in Nginx , here is a module that mainly provides variables and modifies the values of variables, that is, the anti-theft chain module we want to talk about: the referer module.
Simple and effective means of anti-theft chain
scene
If you have ever been a classmate of your own site, you may encounter the situation that someone else steals the link of your site resources, which is the stealing chain. When it comes to stealing chain, we need to talk about the head of HTTP protocol and the head of referer. When other websites refer to your page through the URL, and users click the URL on the browser, the HTTP request header will bring the URL of the current page of the website through the referer header, telling the server who initiated the request.
For example, search Google for Nginx and click on the link:
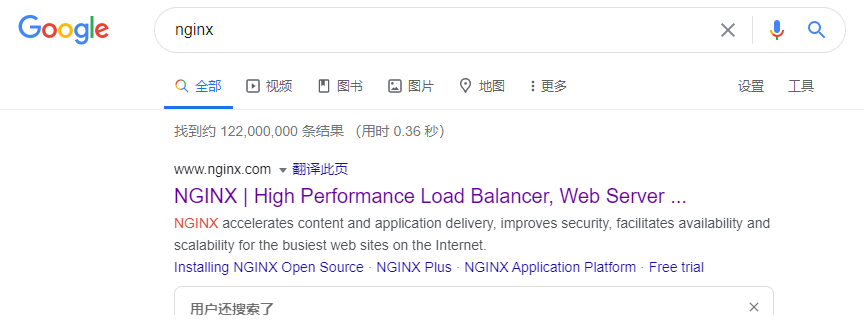
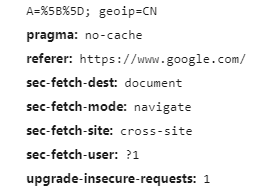
Looking at the request header in the new page that opens, you will find that the request header contains the referer header and the value is https://www.google.com/.
We allow it like Google, but when some other websites want to quote the resources of our own websites, they need to do some control, otherwise everyone can get the links.
objective
In fact, the purpose here is very clear, that is to refuse the abnormal website to visit our site resources.
thinking
- invalid_referer variable
- Referer provides this variable, which can be used to configure which referer headers are legal, that is, which websites you allow to refer to your resources.
referer module
To achieve the above purpose, the referer module needs to count the first number. Let's see how to use the referer module together.
- By default, it is compiled into Nginx through -- without http_ referer_ Module disabled
The referer module has three instructions. Let's see.
Syntax: valid_referers none | blocked | server_names | string ...;
Default: —
Context: server, location

Syntax: referer_hash_bucket_size size;
Default: referer_hash_bucket_size 64;
Context: server, location

Syntax: referer_hash_max_size size;
Default: referer_hash_max_size 2048;
Context: server, location
- valid_ The referers directive, which configures whether the referer header is allowed and which referer access is allowed.
- referer_hash_bucket_size indicates that the values of these configurations are placed in the hash table, and specifies the size of the hash table.
- referer_hash_max_size indicates the maximum size of the hash table.
The most important thing is valid_ The references instruction needs to be highlighted.
valid_ References instruction
Multiple parameters can be carried at the same time, indicating that multiple referer headers are effective.
Parameter value
- none
- Allow request access without a referer header
- block: allows request access without a corresponding value in the referer header. For example, it may pass through reverse proxy or firewall
- server_names: if the site domain name and server in the referer_ If the local domain name in name matches, the request is allowed to access
- String: a string indicating the domain name and URL. The domain name can contain * wildcard in the prefix or suffix. If the value of the referer header matches the string, access is allowed
- Regular expression: if the value of the referer header matches regular, access is allowed
invalid_referer variable
- Variable value is empty when access is allowed
- Variable value is 1 when access is not allowed
actual combat
Let's look at a configuration file.
server {
    server_name referer.ziyang.com;
    listen 80;

    error_log logs/myerror.log debug;
    root html;
    location /{
        valid_referers none blocked server_names
                       *.ziyang.com www.ziyang.org.cn/nginx/
                       ~\.google\.;
        if ($invalid_referer) {
                return 403;
        }
        return 200 'valid\n';
    }
}
Which of the following requests will be rejected for this profile?
curl -H 'referer: http://www.ziyang.org.cn/ttt' referer.ziyang.com/
curl -H 'referer: http://www.ziyang.com/ttt' referer.ziyang.com/
curl -H 'referer: ' referer.ziyang.com/
curl referer.ziyang.com/
curl -H 'referer: http://www.ziyang.com' referer.ziyang.com/
curl -H 'referer: http://referer.ziyang.com' referer.ziyang.com/
curl -H 'referer: http://image.baidu.com/search/detail' referer.ziyang.com/
curl -H 'referer: http://image.google.com/search/detail' referer.ziyang.com/
We need to parse this configuration file first. valid_ What values are configured for the references directive?
 valid_referers none blocked server_names
        *.ziyang.com www.ziyang.org.cn/nginx/
~\.google\.;- none: no referer can access
- blocked: indicates that the referer has no value to access
- server_names: indicates the local server_name is referer.ziyang.com Accessible
- *. ziyang.com : matches regular accessible
- www.ziyang.org.cn/nginx/ : the request initiated by this page can be accessed
- ~\. google \.: regular matching before and after google
The following is the actual response:
# Return 403, no matching to any rule
➜  ~ curl -H 'referer: http://www.ziyang.org.cn/ttt' referer.ziyang.com/
<html>
<head><title>403 Forbidden</title></head>
<body>
<center><h1>403 Forbidden</h1></center>
<hr><center>nginx/1.17.8</center>
</body>
</html>
➜  ~ curl -H 'referer: http://image.baidu.com/search/detail' referer.ziyang.com/
<html>
<head><title>403 Forbidden</title></head>
<body>
<center><h1>403 Forbidden</h1></center>
<hr><center>nginx/1.17.8</center>
</body>
</html>
# Match to * ziyang.com
➜  ~ curl -H 'referer: http://www.ziyang.com/ttt' referer.ziyang.com/
valid
➜  ~ curl -H 'referer: http://www.ziyang.com' referer.ziyang.com/
valid
# Matched to server name
➜  ~ curl -H 'referer: http://referer.ziyang.com' referer.ziyang.com/
valid
# Matched to blocked
➜  ~ curl -H 'referer: ' referer.ziyang.com/
valid
# It matches none
➜  ~ curl referer.ziyang.com/
valid
# It matches ~ \. google \
➜  ~ curl -H 'referer: http://image.google.com/search/detail' referer.ziyang.com/
valid
Another solution of anti-theft chain: secure_link module
The referer module is a simple means of anti-theft chain, which can only be effective if it relies on the browser to initiate a request. If the attacker forges the referer header, this method will fail.
secure_ The link module is another solution.
Its main principle is to verify the hash value in the URL in the way of anti-theft chain.
The basic process is as follows:
- The encrypted secure link URL is generated by the server (either Nginx or other Web servers) and returned to the client
- The client uses the secure URL to access Nginx, which is controlled by the security of Nginx_ Link variable validation passed
The principle is as follows:
- Hash algorithm is irreversible
- The client can only get the URL that has executed the hash algorithm
- Only the server generating the URL and verifying whether the URL is a secure Nginx can save the original string
- The original string is usually composed of the following parts in order:
- Resource location. For example, specify the URI of the resource in HTTP to prevent the attacker from accessing any resource after getting a security URI
- User information. If the user's IP address, restrict other users to steal the URL
- Time stamp. Expire security URL s in a timely manner
- Key. Only on the server side, making it more difficult for attackers to guess the original string
modular:
- ngx_http_secure_link_module
- Not compiled into Nginx, need to pass -- with http_ secure_ link_ Module add
- variable
- secure_link
- secure_link_expires
Syntax: secure_link expression;
Default: —
Context: http, server, location

Syntax: secure_link_md5 expression;
Default: —
Context: http, server, location

Syntax: secure_link_secret word;
Default: —
Context: location
Variable value and configuration example with expiration time
- secure_link
- Value is empty string: validation failed
- Value 0: URL expired
- Value 1: verification passed
- secure_link_expires
- Value of time stamp
Command line build secure link
- Generate md5
echo -n 'time stamp URL client IP secret key' | openssl md5 -binary | openssl base64 | tr +/ - | tr -d =
- Construct request URL
/test1.txt?md5=md5 generate value & expires = timestamp (such as 2147483647)
Nginx configuration
- secure_link $arg_md5,$arg_expires;
- secure_link must be followed by two values, one is md5 in the parameter, and the other is timestamp
- secure_link_md5 "$secure_link_expires$uri$remote_addr secret";
- In what order to construct the original string
actual combat
Here is a real configuration file. I won't do the demonstration here. You can do the experiment yourself if you are interested.
server {
    server_name securelink.ziyang.com;
    listen 80;
    error_log  logs/myerror.log  info;
    default_type text/plain;
    location /{
        secure_link $arg_md5,$arg_expires;
        secure_link_md5 "$secure_link_expires$uri$remote_addr secret";

        if ($secure_link = "") {
            return 403;
        }

        if ($secure_link = "0") {
            return 410;
        }

        return 200 '$secure_link:$secure_link_expires\n';
    }

    location /p/ {
        secure_link_secret mysecret2;

        if ($secure_link = "") {
            return 403;
        }

        rewrite ^ /secure/$secure_link;
    }

    location /secure/ {
        alias html/;
        internal;
    }
}
A simple way to hash only URI s
In addition to the above relatively complex anti-theft chain, there is a relatively simple anti-theft chain mode, which only hashes the URI, so that when the URI is passed
- Divide the request URL into three parts: / prefix/hash/link
- Hash generation method: md5 hash for "link key"
- Using secure_link_secret secret; configure key
Command line build secure link
- Original request
- link
- Generated security requests
- /prefix/md5/link
- Generate md5
- echo -n 'linksecret' | openssl md5 –hex
Nginx configuration
- secure_link_secret secret;
This method of anti-theft chain is relatively simple, so how to use it? Everyone has downloaded resources on the Internet, right? No matter it's e-books or software, when you click to download many websites, another page will pop up to download. This new page is actually the requested security URL generated by Nginx. If the URL is obtained, it can still be used, so you need to update the key frequently to ensure that the URL will not be stolen.
Today's article details the specific usage of the anti-theft chain. These two recent articles are about the existing variable usage. The next article will talk about how to generate new variables.
This article starts from my personal blog: iziyang.github.io , all configuration files I have Nginx profile , you can take it yourself.