VS2015+OpenCV4.1.2 complete and detailed once and for all configuration mode
1, Environment variable configuration
1. User variable settings
Add user variable: opencv_ Pathj (my name is OpenCV_PATHhj)
User variable value:
D:\Program Files\OpenCV\opencv4.1.2\opencv\build
D:\Program Files\OpenCV\opencv4.1.2\opencv\build\x64\vc15\bin
(which version of OpenCV is used to configure which version, or multiple versions can be configured. Seamless switching between versions)
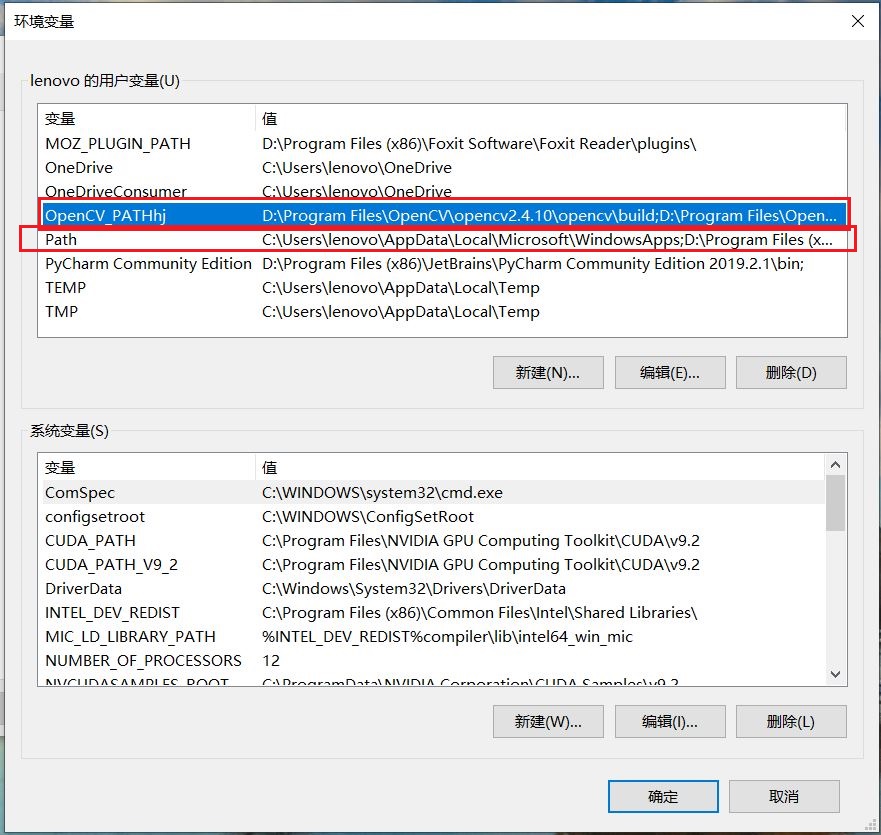

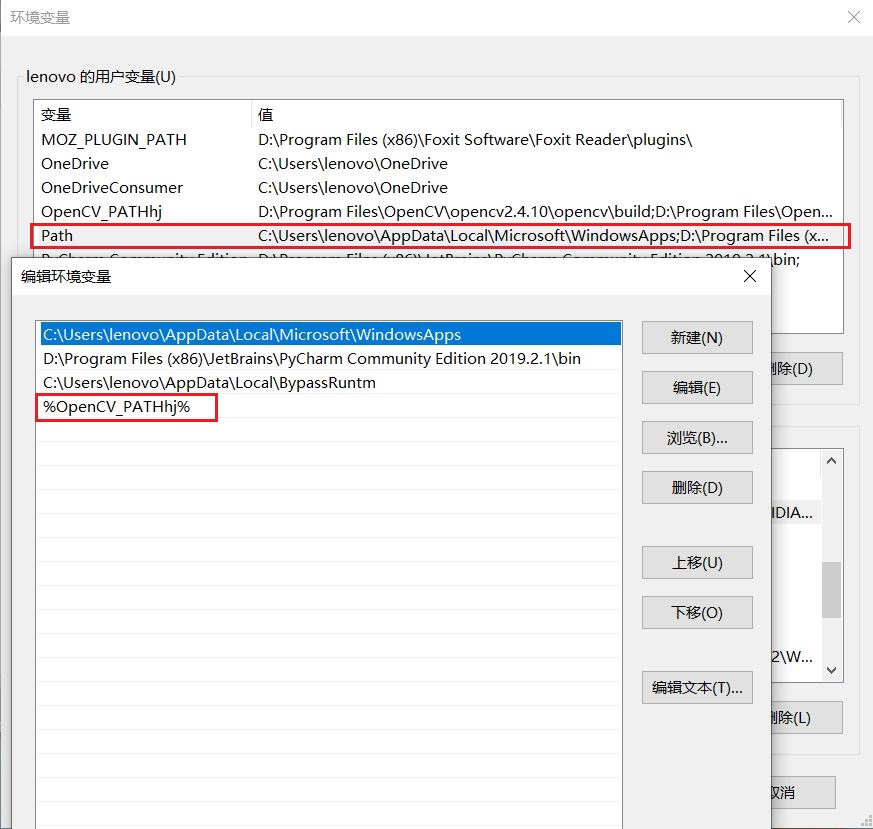
Apply the added user variable to PATH;% OpenCV_PATHhj%
You can also add the following variable values directly after PATH:
D:\Program Files\OpenCV\opencv4.1.2\opencv\build
D:\Program Files\OpenCV\opencv4.1.2\opencv\build\x64\vc15\bin
Note: vc10 indicates VS is 2010, vc11 corresponds to VS2012, vc12 corresponds to VS2013, vc14 corresponds to VS2015, VC15 corresponds to VS2017
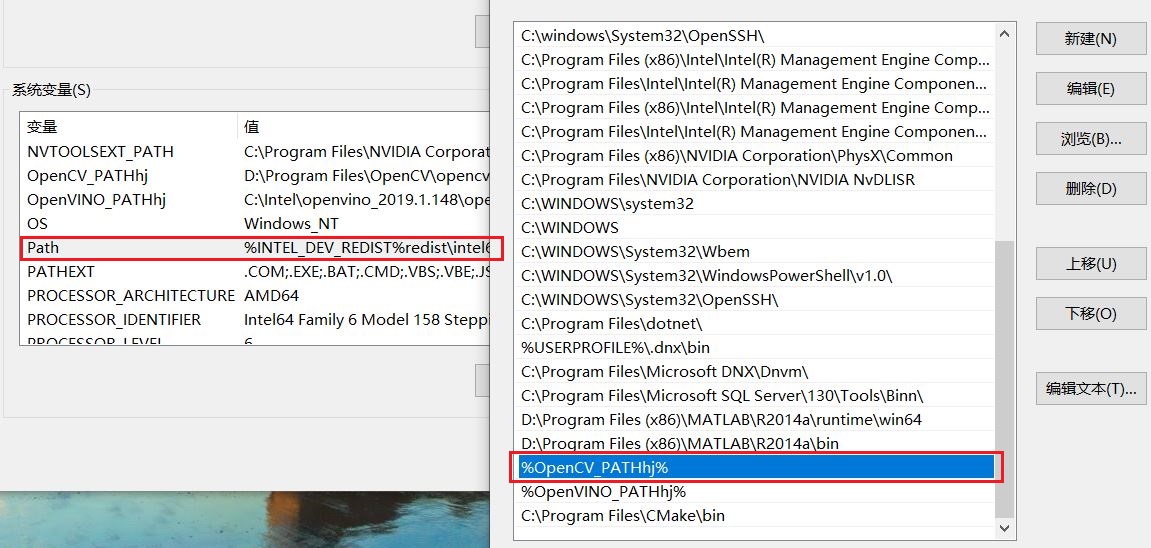
2. System variable settings
Add system variable:
(1) You can add the following variable values directly after PATH, separated by:
D:\Program Files\OpenCV\opencv4.1.2\opencv\build\x64\vc15\bin
(2) If you want to add more variable values, you can also add a variable value pair, and then add the variable name to the Path of the system variable. (I used the second one)
Create a new system variable, enter the variable name: opencv_ Pathj (my name is OpenCV_PATHhj)
Input variable value: D:\Program Files\OpenCV\opencv4.1.2\opencv\build\x64\vc15\bin
Add after system variable Path:% OpenCV_PATHhj%

After the above configuration, the environment variables of OpenCV are configured. (it's said that it will take effect only after restart, but I didn't restart it. It's OK to find out.)
2, Configure property sheet
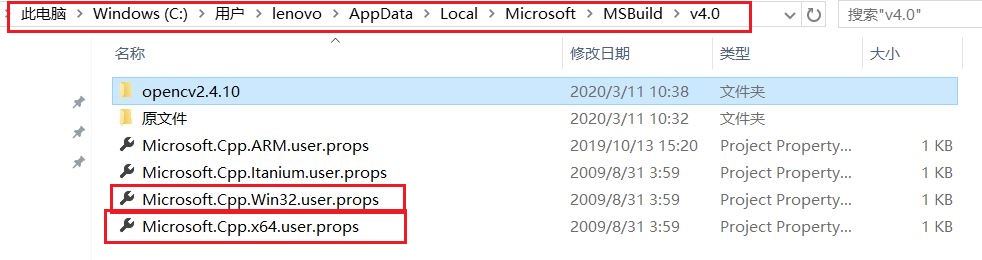
The default property sheet of the system is generally located in: C:\Users \ user name \ AppData\Local\Microsoft\MSBuild\v4.0
My address is: C:\Users\lenovo\AppData\Local\Microsoft\MSBuild\v4.0
Property sheet name: Microsoft.Cpp.Win32.user.props (x86 property sheet)
Microsoft.Cpp.x64.user.props (x64 property sheet)
It is recommended that you back up a copy of the property sheet before you change it (in case you make a mistake).
Open the property sheet file as Notepad and add the following to: Microsoft.Cpp.x64.user.props in
<?xml version="1.0" encoding="utf-8"?>
<Project DefaultTargets="Build" ToolsVersion="4.0" xmlns="http://schemas.microsoft.com/developer/msbuild/2003">
  <PropertyGroup>
    <IncludePath>D:\Program Files\OpenCV\opencv4.1.2\opencv\build\include\opencv2;D:\Program Files\OpenCV\opencv4.1.2\opencv\build\include;$(IncludePath)</IncludePath>
    <LibraryPath>D:\Program Files\OpenCV\opencv4.1.2\opencv\build\x64\vc14\lib;D:\Program Files\OpenCV\opencv4.1.2\opencv\build\x64\vc15\lib;$(LibraryPath)</LibraryPath>
  </PropertyGroup>
  <ItemDefinitionGroup>
    <Link>
      <AdditionalDependencies>opencv_world412.lib;%(AdditionalDependencies)</AdditionalDependencies>
    </Link>
  </ItemDefinitionGroup>
</Project>
3, Verify configuration succeeded
1. New win32 console project

Next step -- > next step -- > finish
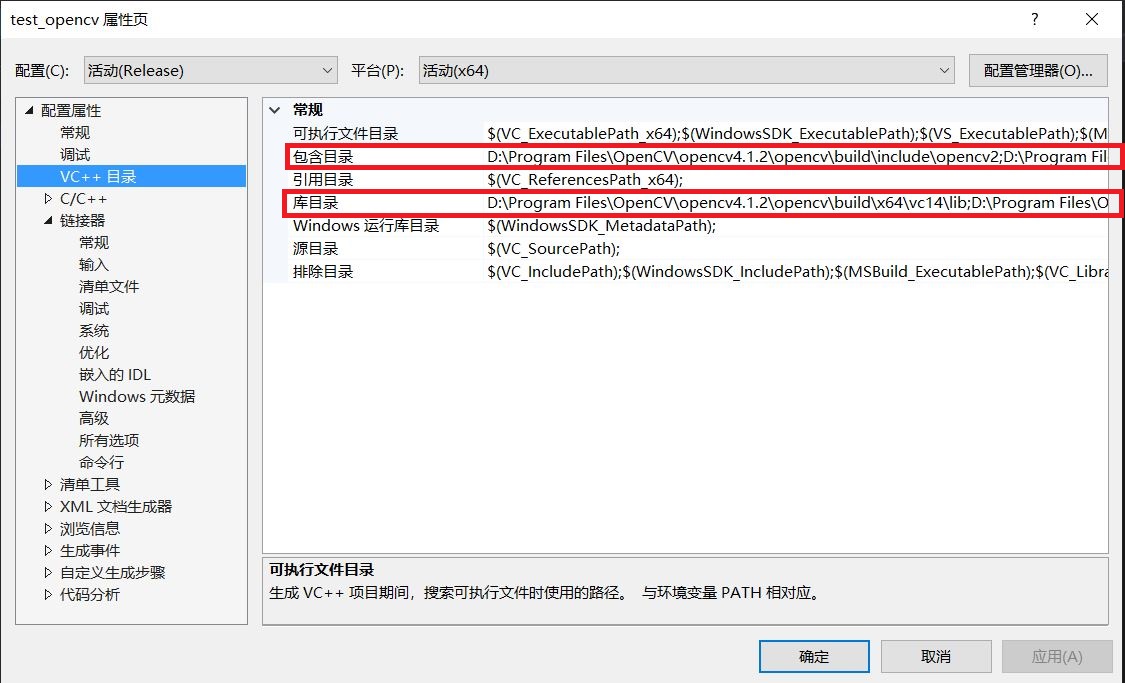
Right click the project name - > properties - > configure properties - > VC + + directory
The include directory contains the following:
D:\Program Files\OpenCV\opencv4.1.2\opencv\build\include\opencv2
D:\Program Files\OpenCV\opencv4.1.2\opencv\build\include
The library directory contains the following:
D:\Program Files\OpenCV\opencv4.1.2\opencv\build\x64\vc15\lib
Right click on the project name > Properties > configure Properties > linker > Enter
Additional dependencies: opencv_world412.lib
If there is such content, it indicates that the property sheet configuration is successful.
2. Verify that all configurations are configured successfully
Add the following code to the main function of the project project:
// test_opencv.cpp : defines the entry point for the console application.
//
#include "stdafx.h"
#include <opencv2\core\core.hpp>
#include <opencv2\highgui\highgui.hpp>
#include <opencv2\imgproc\imgproc.hpp>
using namespace cv;
#include <iostream>
using namespace std;
int main()
{
Mat src;
src = imread("D:\\E_data\\MyTest\\_MyWork\\test_opencv\\dog.bmp");
namedWindow("source", 0);
imshow("source", src);
waitKey(0);
return 0;
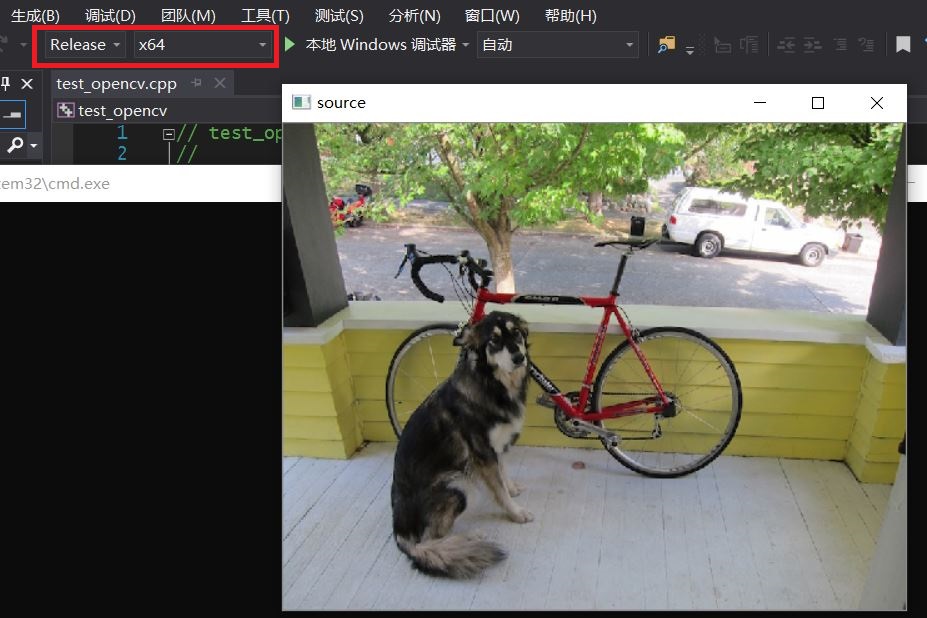
}Generate the solution, and the following image will appear after running the program, indicating that all configurations of OpenCV are successful. In the next project reconstruction, there is no need to reconfigure the environment. The default is the environment of OpenCV4.1.2.
Operation mode: Release x64
Now another configuration method is introduced to realize seamless switching between OpenCV versions:
1, Environment variable configuration
Basically the same as above, how many environment variables should be added to Path in order to switch between versions of OpenCV.
2, Configure property sheet
Step 2 is different
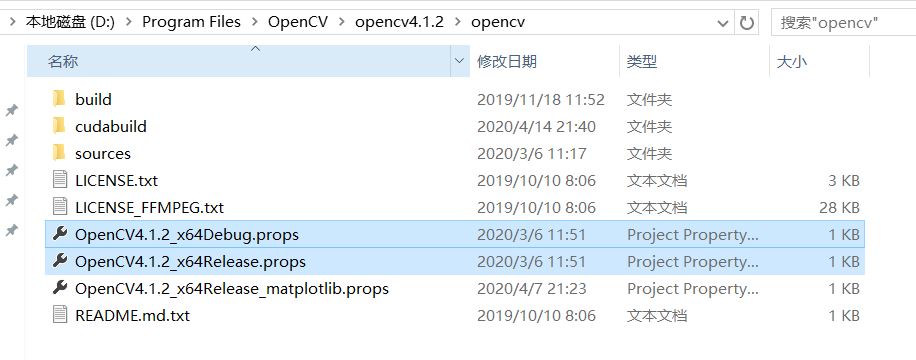
Do not tamper with the default property sheet of the system. Directly copy one of the following two property sheets and put them on another disk.
Microsoft.Cpp.Win32.user.props
Microsoft.Cpp.x64.user.props
To make it easier to distinguish the file names that can change the property sheet: (mine is as follows)
Edit the contents of the property sheet separately
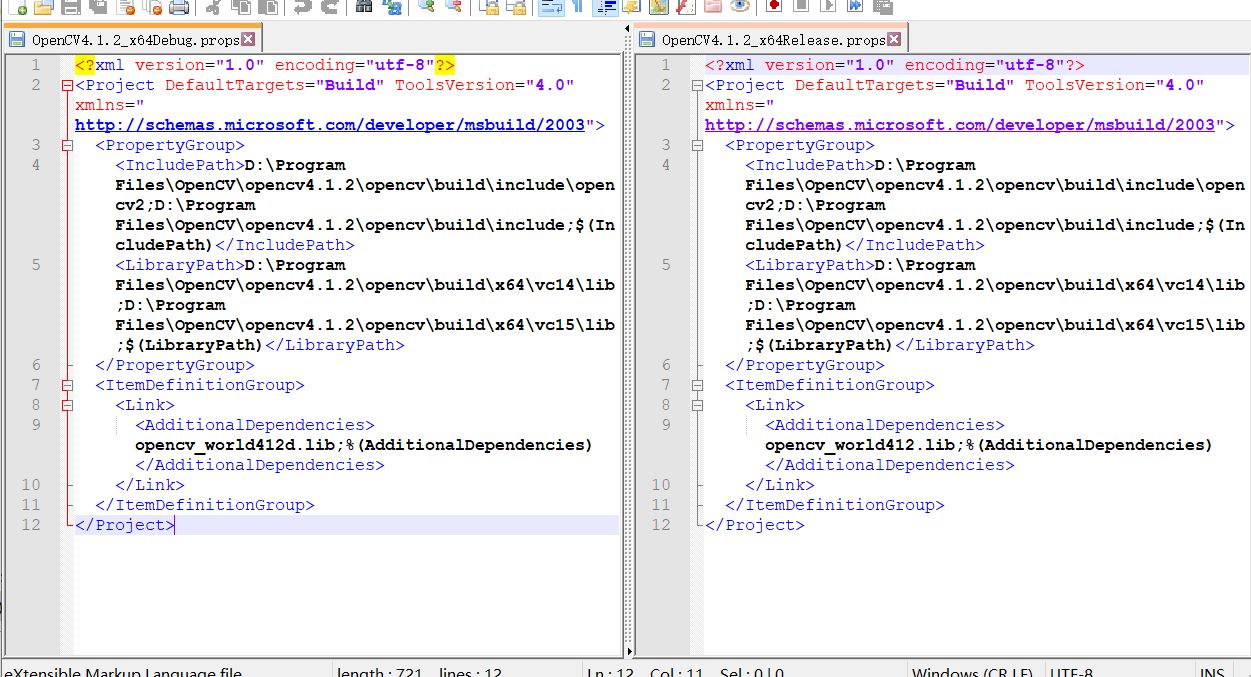
The following are the property tables of OpenCV4.1.2 in two operation modes:
Running mode: debug x64, in opencv4.1.2_ X64 Debug.props Add the following to:
<?xml version="1.0" encoding="utf-8"?>
<Project DefaultTargets="Build" ToolsVersion="4.0" xmlns="http://schemas.microsoft.com/developer/msbuild/2003">
  <PropertyGroup>
    <IncludePath>D:\Program Files\OpenCV\opencv4.1.2\opencv\build\include\opencv2;D:\Program Files\OpenCV\opencv4.1.2\opencv\build\include;$(IncludePath)</IncludePath>
    <LibraryPath>D:\Program Files\OpenCV\opencv4.1.2\opencv\build\x64\vc14\lib;D:\Program Files\OpenCV\opencv4.1.2\opencv\build\x64\vc15\lib;$(LibraryPath)</LibraryPath>
  </PropertyGroup>
  <ItemDefinitionGroup>
    <Link>
      <AdditionalDependencies>opencv_world412d.lib;%(AdditionalDependencies)</AdditionalDependencies>
    </Link>
  </ItemDefinitionGroup>
</Project>
Operation mode: Release x64, in opencv4.1.2_ X64 Release.props Add the following to:
<?xml version="1.0" encoding="utf-8"?>
<Project DefaultTargets="Build" ToolsVersion="4.0" xmlns="http://schemas.microsoft.com/developer/msbuild/2003">
  <PropertyGroup>
    <IncludePath>D:\Program Files\OpenCV\opencv4.1.2\opencv\build\include\opencv2;D:\Program Files\OpenCV\opencv4.1.2\opencv\build\include;$(IncludePath)</IncludePath>
    <LibraryPath>D:\Program Files\OpenCV\opencv4.1.2\opencv\build\x64\vc14\lib;D:\Program Files\OpenCV\opencv4.1.2\opencv\build\x64\vc15\lib;$(LibraryPath)</LibraryPath>
  </PropertyGroup>
  <ItemDefinitionGroup>
    <Link>
      <AdditionalDependencies>opencv_world412.lib;%(AdditionalDependencies)</AdditionalDependencies>
    </Link>
  </ItemDefinitionGroup>
</Project>
How many versions of OpenCV need to be used, and how many versions of property sheets need to be configured like this.
The following are the property sheets of OpenCV3.4.0 in two running modes:
Running mode: debug x64, in opencv3.4.0_ X64 Debug.props Add the following to:
<?xml version="1.0" encoding="utf-8"?>
<Project ToolsVersion="4.0" xmlns="http://schemas.microsoft.com/developer/msbuild/2003">
  <ImportGroup Label="PropertySheets" />
  <PropertyGroup Label="UserMacros" />
  <PropertyGroup>
    <IncludePath>D:\Program Files\OpenCV\opencv3.4.0\opencv\build\include;D:\Program Files\OpenCV\opencv3.4.0\opencv\build\include\opencv;D:\Program Files\OpenCV\opencv3.4.0\opencv\build\include\opencv2;C:\Program Files\NVIDIA GPU Computing Toolkit\CUDA\v9.2\include;$(IncludePath)</IncludePath>
    <LibraryPath>D:\Program Files\OpenCV\opencv3.4.0\opencv\build\x64\vc14\lib;C:\Program Files\NVIDIA GPU Computing Toolkit\CUDA\v9.2\lib\x64;$(LibraryPath)</LibraryPath>
  </PropertyGroup>
  <ItemDefinitionGroup>
    <Link>
      <AdditionalDependencies>opencv_world340d.lib;cublas.lib;cuda.lib;cudadevrt.lib;cudart.lib;cudart_static.lib;nvcuvid.lib;OpenCL.lib;%(AdditionalDependencies)</AdditionalDependencies>
    </Link>
  </ItemDefinitionGroup>
  <ItemGroup />
</Project>
Operation mode: Release x64, in opencv3.4.0_ X64 Release.props Add the following to:
<?xml version="1.0" encoding="utf-8"?>
<Project ToolsVersion="4.0" xmlns="http://schemas.microsoft.com/developer/msbuild/2003">
  <ImportGroup Label="PropertySheets" />
  <PropertyGroup Label="UserMacros" />
  <PropertyGroup>
    <IncludePath>D:\Program Files\OpenCV\opencv3.4.0\opencv\build\include;D:\Program Files\OpenCV\opencv3.4.0\opencv\build\include\opencv;D:\Program Files\OpenCV\opencv3.4.0\opencv\build\include\opencv2;C:\Program Files\NVIDIA GPU Computing Toolkit\CUDA\v9.2\include;$(IncludePath)</IncludePath>
    <LibraryPath>D:\Program Files\OpenCV\opencv3.4.0\opencv\build\x64\vc14\lib;C:\Program Files\NVIDIA GPU Computing Toolkit\CUDA\v9.2\lib\x64;$(LibraryPath)</LibraryPath>
  </PropertyGroup>
  <ItemDefinitionGroup>
    <Link>
      <AdditionalDependencies>opencv_world340.lib;cublas.lib;cuda.lib;cudadevrt.lib;cudart.lib;cudart_static.lib;nvcuvid.lib;OpenCL.lib;%(AdditionalDependencies)</AdditionalDependencies>
    </Link>
  </ItemDefinitionGroup>
  <ItemGroup />
</Project>
3, Verify configuration succeeded
1. New win32 console project (same as above)
At this time, go to the following directory and find that there is no OpenCV related content in it.
Right click the project name - > properties - > configure properties - > VC + + directory
The include directory contains the following:
D:\Program Files\OpenCV\opencv4.1.2\opencv\build\include\opencv2
D:\Program Files\OpenCV\opencv4.1.2\opencv\build\include
The library directory contains the following:
D:\Program Files\OpenCV\opencv4.1.2\opencv\build\x64\vc15\lib
Right click on the project name > Properties > configure Properties > linker > Enter
Additional dependencies: opencv_world412.lib
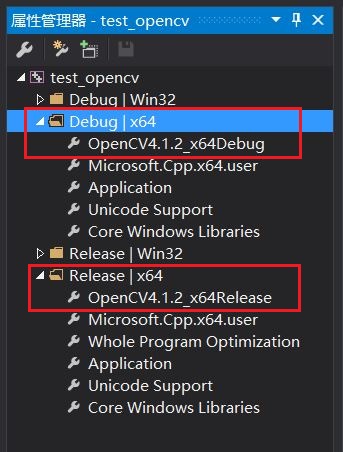
2. Add property sheet
Add the property sheet from the property manager, and add the property sheet according to the compiling mode, as shown in the following figure:
(right click to add an existing property sheet)
The attribute table of which version of OpenCV you want to use will be added, so as to switch between different versions of OpenCV.
Check the contents associated with OpenCV in the included directory, library directory and additional dependencies.
2. Verify that all configurations are configured successfully
Add code to the main function of the project project (as above)
Select the corresponding operation mode to run the project directly. If the picture is displayed successfully, the configuration is successful.
-
Patience is the foundation of all intelligence.