
In this chapter, we started to formally build a big data environment, with the goal of building a stable big data environment that can be operated and monitored. We will use Ambari to build the underlying Hadoop environment, and use the native way to build Flink, Druid, Superset and other real-time computing environments. Use the combination of big data construction tools and native installation to complete the installation of big data environment together.
Ambari builds the underlying big data environment
Apache Ambari is a Web-based tool that supports the provisioning, management, and monitoring of Apache Hadoop clusters. Ambari has supported most of the Hadoop components, including HDFS, MapReduce, Hive, Pig, Hbase, Zookeeper, Sqoop and Hcatalog.
Apache Ambari supports centralized management of HDFS, MapReduce, Hive, Pig, Hbase, zookeeper, Sqoop and Hcatalog. It is also one of the top-level hadoop management tools.
At present, the version of Ambari has been updated to 2.7, and more and more components are supported.

There are many distribution versions of Hadoop, including Huawei, Intel, Cloudera, MapR and HortonWorks. All distribution versions are derived from Apache Hadoop. The reason for producing these versions is determined by the open source protocol of Apache Hadoop: anyone can modify them, publish and sell them as open source or commercial products.
Charging version: The charging version will generally have new features. Most of the versions issued by domestic companies are charged, such as Intel version, Huawei version, etc.
Free version: There are mainly three free versions (all foreign manufacturers). Cloudera's Distribution Including Apache Hadoop (CDH for short). Apache foundation hadoop The Hortonworks Data Platform is referred to as "HDP". In order, it represents the utilization rate in China. Although CDH and HDP are toll versions, they are open-source and only charge for services. Strictly speaking, they are not toll versions.
Ambari is installed based on HDP, but they have different correspondence between different versions.
Correspondence between ambari 2.7 and HDP HDF:
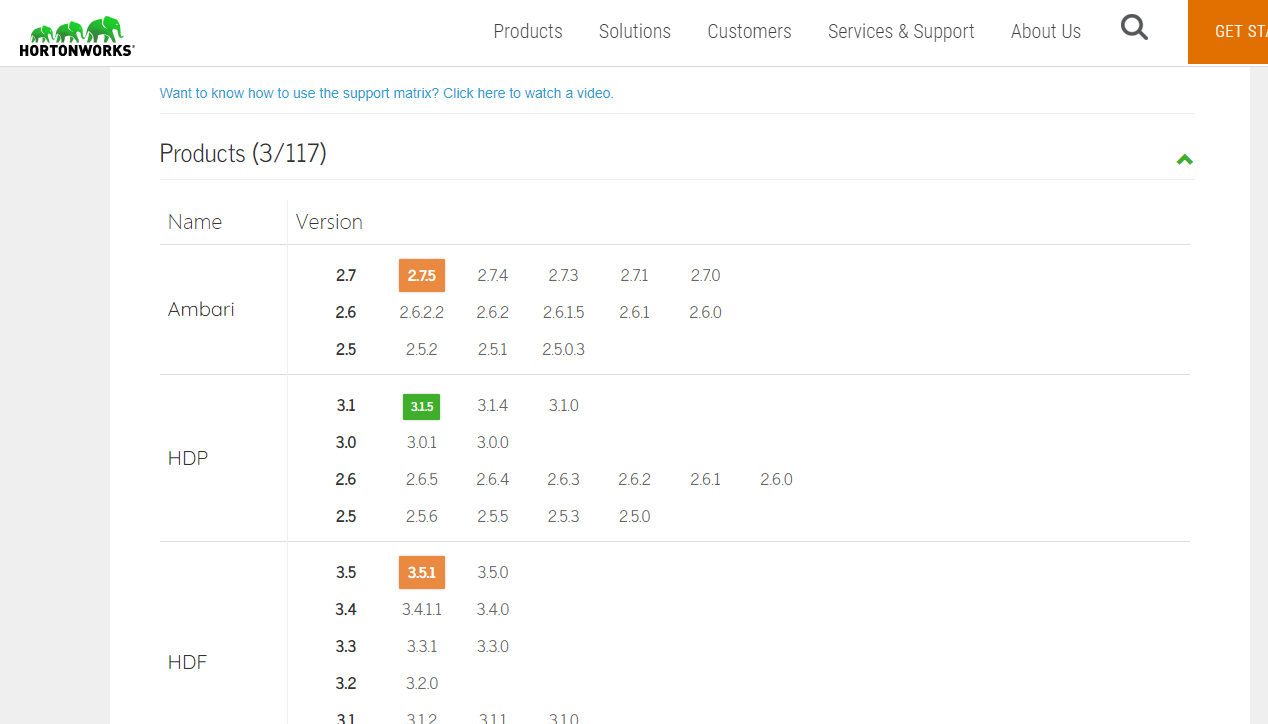
That is to say, the latest version is HDP 3.1.5, and HDP contains the following basic components of big data:
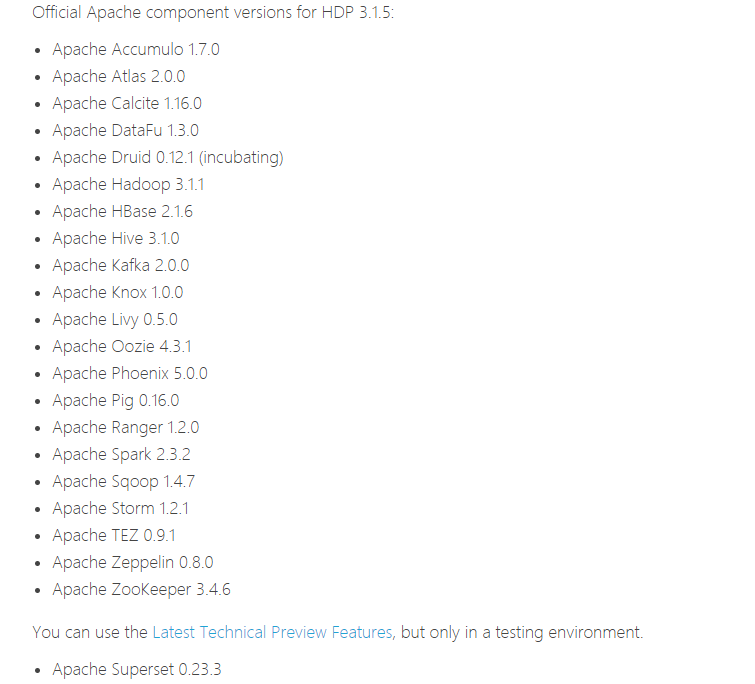
It's already very rich. Let's start the installation of Ambari.
preparation in advance
Preliminary preparation is divided into four parts
Host, database, browser, JDK
host
Please be prepared to install Ambari's host first, the development environment can be ok for three, and other environments are determined according to the size of the company's machines.
Suppose that the three machines of the development environment are:
192.168.12.101 master 192.168.12.102 slave1 192.168.12.103 slave2
The minimum requirements for the host are as follows:
Software requirements
On each host:
- yum and rpm (RHEL / CentOS / Oracle / Amazon Linux)
- zypper and php_curl(SLES)
- apt (Debian / Ubuntu)
- scp, curl, unzip, tar, wget and gcc*
- OpenSSL (v1.01, build 16 or later)
- Python (with Python devel *)
Ambari host shall have at least 1 GB RAM and 500 MB Free space.
To check the available memory on any host, run:
free -m
Local warehouse
If the network speed is not fast enough, we can download the package and build a local warehouse. The Internet is fast enough to ignore this step.
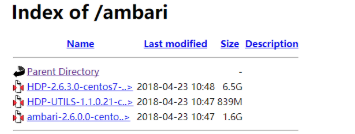
Download the installation package first

Install httpd service
yum install yum-utils createrepo
[root@master ~]# yum -y install httpd
[root@master ~]# service httpd restart
Redirecting to /bin/systemctl restart httpd.service
[root@master ~]# chkconfig httpd on
Then create a local yum source
mkdir -p /var/www/html/
Unzip the package you just downloaded to this directory.
Later accessed through browser successfully
createrepo  ./
//Make local source modify the source address in the file
vi  ambari.repo
vi hdp.repo


#VERSION_NUMBER=2.7.5.0-72
[ambari-2.7.5.0]
#json.url = http://public-repo-1.hortonworks.com/HDP/hdp_urlinfo.json
name=ambari Version - ambari-2.7.5.0
baseurl=https://username:password@archive.cloudera.com/p/ambari/centos7/2.x/updates/2.7.5.0
gpgcheck=1
gpgkey=https://username:password@archive.cloudera.com/p/ambari/centos7/2.x/updates/2.7.5.0/RPM-GPG-KEY/RPM-GPG-KEY-Jenkins
enabled=1
priority=1

[root@master ambari]# yum clean all
[root@master ambari]# yum makecache
[root@master ambari]# yum repolist
Software preparation
In order to facilitate future management, we need to make some configuration for the machine
install JDK
//Download address: http://www.oracle.com/technetwork/java/javase/downloads/jdk8-downloads-2133151.html

rpm -ivh jdk-8u161-linux-x64.rpm
java -version
Modify the machine name through vi /etc/hostname, which is mainly to find the corresponding server by name

Each node is changed to the corresponding name, which is master,slave1.slave2
  vi /etc/hosts
192.168.12.101 master
192.168.12.102 slave1
192.168.12.103 slave2

 vi /etc/sysconfig/network
 NETWORKING=yes
 HOSTNAME=master (other nodes are modified accordingly)
Turn off firewall
[root@master~]#systemctl disable firewalld
[root@master~]#systemctl stop firewalld
ssh Unclassified
ssh-keygen

ssh-copy-id -i ~/.ssh/id_rsa.pub remote-host
Different environment will have different problems, you can refer to the official website manual for corresponding installation.
Install ambari server
ambariserver will finally take us to complete the installation of big data cluster
yum install ambari-server

Installing : postgresql-libs-9.2.18-1.el7.x86_64         1/4
Installing : postgresql-9.2.18-1.el7.x86_64              2/4
Installing : postgresql-server-9.2.18-1.el7.x86_64       3/4
Installing : ambari-server-2.7.5.0-124.x86_64           4/4
Verifying  : ambari-server-2.7.5.0-124.x86_64           1/4
Verifying  : postgresql-9.2.18-1.el7.x86_64              2/4
Verifying  : postgresql-server-9.2.18-1.el7.x86_64       3/4
Verifying  : postgresql-libs-9.2.18-1.el7.x86_64         4/4

Installed:
  ambari-server.x86_64 0:2.7.5.0-72
Dependency Installed:
 postgresql.x86_64 0:9.2.18-1.el7
 postgresql-libs.x86_64 0:9.2.18-1.el7
 postgresql-server.x86_64 0:9.2.18-1.el7
Complete!
Startup and settings
set up
ambari-server setup
It is not recommended to use embedded postgresql directly, because other services also use mysql
Installation configuration MySql

yum install -y wget

wget -i -c http://dev.mysql.com/get/mysql57-community-release-el7-10.noarch.rpm

rpm -ivh mysql57-community-release-el7-10.noarch.rpm

yum -y install mysql-community-server

systemctl enable mysqld

systemctl start mysqld.service

systemctl status mysqld.service

grep "password" /var/log/mysqld.log

mysql -uroot -p

set global validate_password_policy=0;

set global validate_password_length=1;

set global validate_password_special_char_count=0;

set global validate_password_mixed_case_count=0;

set global validate_password_number_count=0;

select @@validate_password_number_count,@@validate_password_mixed_case_count,@@validate_password_number_count,@@validate_password_length;


ALTER USER 'root'@'localhost' IDENTIFIED BY 'password';

grant all privileges on . to 'root'@'%' identified by 'password' with grant option;

flush privileges;

exit
yum -y remove mysql57-community-release-el7-10.noarch

//Download mysql driver and put it into the

/opt/ambari/mysql-connector-java-5.1.48.jar


//Initialize database

mysql -uroot -p
create database ambari;

use ambari

source /var/lib/ambari-server/resources/Ambari-DDL-MySQL-CREATE.sql


CREATE USER 'ambari'@'localhost' IDENTIFIED BY 'bigdata';

CREATE USER 'ambari'@'%' IDENTIFIED BY 'bigdata';

GRANT ALL PRIVILEGES ON ambari.* TO 'ambari'@'localhost';

GRANT ALL PRIVILEGES ON ambari.* TO 'ambari'@'%';

FLUSH PRIVILEGES;
Complete ambari configuration
[root@localhost download]# ambari-server setup
Using python  /usr/bin/python
Setup ambari-server
Checking SELinux...
SELinux status is 'enabled'
SELinux mode is 'permissive'
WARNING: SELinux is set to 'permissive' mode and temporarily disabled.
OK to continue [y/n] (y)? y
Customize user account for ambari-server daemon [y/n] (n)? y
Enter user account for ambari-server daemon (root):
Adjusting ambari-server permissions and ownership...
Checking firewall status...
Checking JDK...
[1] Oracle JDK 1.8 + Java Cryptography Extension (JCE) Policy Files 8
[2] Custom JDK
==============================================================================
Enter choice (1): 2
WARNING: JDK must be installed on all hosts and JAVA_HOME must be valid on all hosts.
WARNING: JCE Policy files are required for configuring Kerberos security. If you plan to use Kerberos,please make sure JCE Unlimited Strength Jurisdiction Policy Files are valid on all hosts.
Path to JAVA_HOME: /usr/lib/jvm/java-1.8.0-openjdk-1.8.0.242.b08-0.el7_7.x86_64/jre
Validating JDK on Ambari Server...done.
Check JDK version for Ambari Server...
JDK version found: 8
Minimum JDK version is 8 for Ambari. Skipping to setup different JDK for Ambari Server.
Checking GPL software agreement...
GPL License for LZO: https://www.gnu.org/licenses/old-licenses/gpl-2.0.en.html
Enable Ambari Server to download and install GPL Licensed LZO packages [y/n] (n)? y
Completing setup...
Configuring database...
Enter advanced database configuration [y/n] (n)? y
Configuring database...
==============================================================================
Choose one of the following options:
[1] - PostgreSQL (Embedded)
[2] - Oracle
[3] - MySQL / MariaDB
[4] - PostgreSQL
[5] - Microsoft SQL Server (Tech Preview)
[6] - SQL Anywhere
[7] - BDB
==============================================================================
Enter choice (1): 3
Hostname (localhost):
Port (3306):
Database name (ambari):
Username (ambari):
Enter Database Password (bigdata):
Configuring ambari database...
Enter full path to custom jdbc driver: /opt/ambari/mysql-connector-java-5.1.48.jar
Copying /opt/ambari/mysql-connector-java-5.1.48.jar to /usr/share/java
Configuring remote database connection properties...
WARNING: Before starting Ambari Server, you must run the following DDL directly from the database shell to create the schema: /var/lib/ambari-server/resources/Ambari-DDL-MySQL-CREATE.sql
Proceed with configuring remote database connection properties [y/n] (y)? y
Extracting system views...
.....
Ambari repo file contains latest json url http://public-repo-1.hortonworks.com/HDP/hdp_urlinfo.json, updating stacks repoinfos with it...
Adjusting ambari-server permissions and ownership...
Ambari Server 'setup' completed successfully.
Then it's ready to start
ambari-server start

ambari-server status

ambari-server stop
Visit the following address
http://<your.ambari.server>:8080
Cluster installation
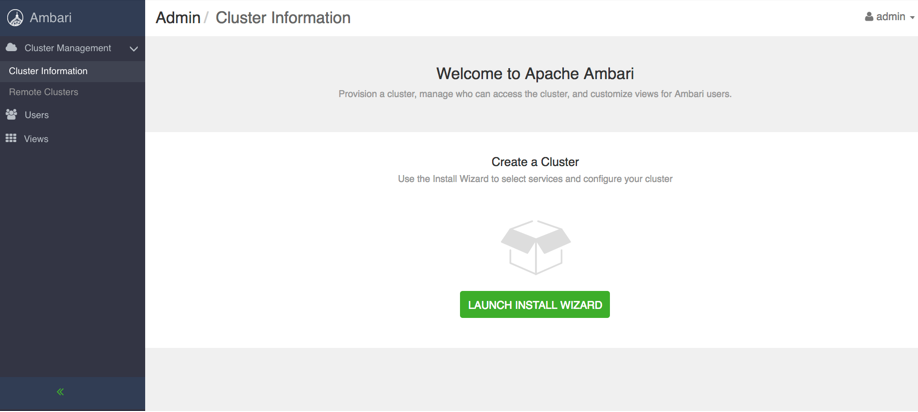
Next, install the cluster, including naming, ssh security free, version selection, and cluster planning
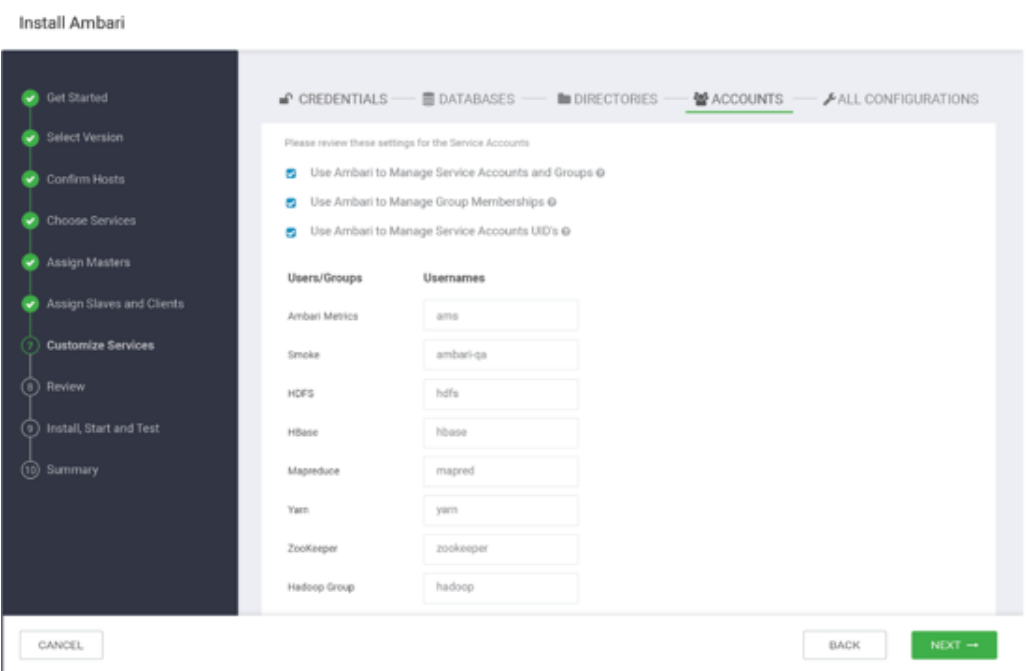
After the cluster installation, we can manage our cluster on the page.
Detailed official website installation document pdf please reply to ambari in the background of "real time streaming computing"
Real time computing environment construction
Because ambari supports a lower version of druid and currently does not support flink, the real-time computing components other than kafka need to be installed manually, which is also convenient for future upgrades.
Installing flink on Linux system
Cluster installation
Cluster installation is divided into the following steps:
1. Copy the extracted flink directory on each machine.
2. Select one as the master node, and then modify conf / Flink of all machines- conf.yaml
jobmanager.rpc.address =Master hostname
3. Modify conf/slaves to write all work nodes
work01
work02
4. Start cluster on master
bin/start-cluster.sh
Install in Hadoop
We can choose to have Flink run on the Yarn cluster.
Download the package of Flink for Hadoop
Guarantee HADOOP_HOME has been set correctly
Start bin/yarn-session.sh
Run the flink sample program
Batch example:
To submit a batch example program for flink:
bin/flink run examples/batch/WordCount.jar
This is a batch example program under examples provided by flink, which counts the number of words.
$ bin/flink run examples/batch/WordCount.jar
Starting execution of program
Executing WordCount example with default input data set.
Use --input to specify file input.
Printing result to stdout. Use --output to specify output path.
(a,5)
(action,1)
(after,1)
(against,1)
(all,2)
(and,12)
(arms,1)
(arrows,1)
(awry,1)
(ay,1)
Druid cluster deployment
Deployment recommendations
The allocation used for cluster deployment is as follows:
- Master node deployment Coordinator and Overlord process
- Two data nodes run the Historical and MiddleManager processes
- A query node to deploy Broker and Router processes
In the future, we can add more master nodes and query nodes
8vCPU 32GB memory recommended for master node
The profile is located in
conf/druid/cluster/master
Data node recommendations
16 vcpu 122gb memory 2 * 1.9TB SSD
The profile is located in
conf/druid/cluster/data
Query server recommendation 8vCPU 32GB memory
The profile is located in
conf/druid/cluster/query
Start deployment
Download the latest 0.17.0 release
decompression
tar -xzf apache-druid-0.17.0-bin.tar.gz
cd apache-druid-0.17.0
The main configuration files of cluster mode are located in:
conf/druid/cluster
Configure metadata store
conf/druid/cluster/_common/common.runtime.properties
replace
druid.metadata.storage.connector.connectURI
druid.metadata.storage.connector.host
For example, configure mysql as metadata store
Configure access rights in mysql:
-- create a druid database, make sure to use utf8mb4 as encoding
CREATE DATABASE druid DEFAULT CHARACTER SET utf8mb4;

-- create a druid user
CREATE USER 'druid'@'localhost' IDENTIFIED BY 'druid';

-- grant the user all the permissions on the database we just created
GRANT ALL PRIVILEGES ON druid.* TO 'druid'@'localhost';
Configuring in druid
druid.extensions.loadList=["mysql-metadata-storage"]
druid.metadata.storage.type=mysql
druid.metadata.storage.connector.connectURI=jdbc:mysql://<host>/druid
druid.metadata.storage.connector.user=druid
druid.metadata.storage.connector.password=diurd
Configure deep storage
Configure datastore as S3 or HDFS
For example, configure HDFS and modify
conf/druid/cluster/_common/common.runtime.properties
druid.extensions.loadList=["druid-hdfs-storage"]

#druid.storage.type=local
#druid.storage.storageDirectory=var/druid/segments

druid.storage.type=hdfs
druid.storage.storageDirectory=/druid/segments

#druid.indexer.logs.type=file
#druid.indexer.logs.directory=var/druid/indexing-logs

druid.indexer.logs.type=hdfs
druid.indexer.logs.directory=/druid/indexing-logs
Configure Hadoop with XML (core-site.xml ,hdfs-site.xml ,yarn-site.xml ,mapred-site.xml )Put it in Druid
conf/druid/cluster/_common/
Configure zookeeper connection
Or modify
conf/druid/cluster/_common/
Next
druid.zk.service.host
Just give the zk server address
Start cluster
Open port limit before starting
Primary node:
derby 1527
zk 2181
Coordinator 8081
Overlord 8090
Data nodes:
Historical 8083
Middle Manager 8091, 8100–8199
Query node:
Broker 8082
Router 8088
Remember to copy the druid you just configured to each node
Start master
Because we use external zk, we use no zk to start
bin/start-cluster-master-no-zk-server
Start data server
bin/start-cluster-data-server
Start query server
bin/start-cluster-query-server
In this way, the cluster will start successfully!
So far, our big data environment has been basically built. In the next chapter, we will access the data and start the development of tags, which is not finished yet~
reference
User portrait: methodology and engineering solutions
More real-time data analysis related blogs and technical information, welcome to pay attention to "real-time streaming computing" detailed ambari official website installation document pdf please reply to ambari in the background of "real-time streaming computing"