>File upload and download is a common function in Web application. In this tutorial, I will implement a Restful style file upload and download APIs based on Spring 2.2.6. > >Based on the Spring Boot 2.0 actual combat series source code, it has been pushed to Github warehouse: https://github.com/ramostear/springboot2.0-action . Welcome to Star/Fork.
1. Environment
- JDK: Java 1.8
- Framework: Spring Boot 2.2.6(Only Using Spring Web MVC)
- Maven: Maven 3.5.0+
- IDE: IntelliJ IDEA 2019.2
- Test: Postman 7.23.0
2. Function
In this tutorial, use Spring 2.2.6 to implement Restful APIs and provide the following functions:
- 1. Upload files from the client to the server
- 2. Limit the upload file size of the client (50MB)
- 3. Click the link address to download the file
- 4. Get the list of uploaded files (file name and download address)
The following is the list of APIs implemented in the tutorial (server request port is 8080 by default):
| Request method | URL address | explain |
|---|---|---|
| POST | /upload | Upload a file |
| GET | /files | Get the list of uploaded files |
| GET | /files/{filename} | Download files according to link address |
3. Engineering structure

The structure of the project directory is as follows:
- 1.config/Fil eUploadConfiguration.java : general component, mainly used to clean up the history file when restarting the application;
- 2.controller/FileUploadController.java : the main controller is responsible for handling file upload, download, browse and other requests;
- 3.exception/FileU ploadExceptionAdvice.java : Global exception handling class, providing user-friendly exception prompt information;
- 4.service/FileStorageService.java : file upload interface class, providing storage address initialization, saving files, loading files, cleaning files and other operations;
- 5.service/impl/Fi leStorageServiceImpl.java : file upload interface implementation class;
- 6.valueobject/UploadFile.java : POJO class encapsulating file name and storage address;
- 7.valueobject/Message.java : the message object of the request / response;
- 8.resources/application.yml : project configuration file, mainly configured the file upload size limit;
- Nine pom.xml : Maven depends on the configuration file.
4 create a Spring Boot project
This tutorial is based on IntelliJ IDEA to create a Spring Boot project. You can also choose your favorite IDE to create a project. After creating the project, please check pom.xml Does the file contain the following configuration:
<dependency>
    <groupid>org.springframework.boot</groupid>
    <artifactid>spring-boot-starter-web</artifactid>
</dependency>
>This tutorial only uses the functions of Spring Web MVC, so you only need to add spring boot starter web dependency.
4.1 file upload interface
According to the Convention (specification) of interface oriented programming, create an interface class to operate the uploaded file FileStorageService.java , and provide corresponding methods.
service/FileStorageService.java
package com.ramostear.springboot.uploadfile.service;

import org.springframework.core.io.Resource;
import org.springframework.web.multipart.MultipartFile;

import java.nio.file.Path;
import java.util.stream.Stream;

/**
 * @ClassName FileStorageService
 * @Description TODO
 * @Author Fox under the tree
 * @Date 2020/4/28 0028 18:35
 * @Version since 1.0
 **/
public interface FileStorageService {

    void init();

    void save(MultipartFile multipartFile);

    Resource load(String filename);

    Stream<path> load();

    void clear();

}
>When starting the application, first call the clear() method to clean up the history file, and then call the init() method to initialize the file upload address.
4.2 realize file upload interface
The implementation class of the file upload interface is relatively simple. Here is the code:
service/impl/FileStorageServiceImpl.java
/** * @ClassName FileStorageServiceImpl * @Description TODO * @Author Fox under the tree * @Date 2020/4/28 0028 18:38 * @Version since 1.0 **/ @Service("fileStorageService") public class FileStorageServiceImpl implements FileStorageService { private final Path path = Paths.get("fileStorage"); @Override public void init() { try { Files.createDirectory(path); } catch (IOException e) { throw new RuntimeException("Could not initialize folder for upload!"); } } @Override public void save(MultipartFile multipartFile) { try { Files.copy(multipartFile.getInputStream(),this.path.resolve(multipartFile.getOriginalFilename())); } catch (IOException e) { throw new RuntimeException("Could not store the file. Error:"+e.getMessage()); } } @Override public Resource load(String filename) { Path file = path.resolve(filename); try { Resource resource = new UrlResource(file.toUri()); if(resource.exists() || resource.isReadable()){ return resource; }else{ throw new RuntimeException("Could not read the file."); } } catch (MalformedURLException e) { throw new RuntimeException("Error:"+e.getMessage()); } } @Override public Stream<path> load() { try { return Files.walk(this.path,1) .filter(path -> !path.equals(this.path)) .map(this.path::relativize); } catch (IOException e) { throw new RuntimeException("Could not load the files."); } } @Override public void clear() { FileSystemUtils.deleteRecursively(path.toFile()); } }
>Where Files, Path, and Paths are java.nio.file The provided class, Resource is org.springframework.core Classes provided in the. IO package.
4.3 defining value objects
In this tutorial, you defined two simple objects UploadFile.java and Message.java , respectively encapsulating the upload file information and response message, the code is as follows:
valueobject/UploadFile.java
/**
 * @ClassName UploadFile
 * @Description TODO
 * @Author Fox under the tree
 * @Date 2020/4/28 0028 18:48
 * @Version since 1.0
 **/
public class UploadFile {

    private String fileName;
    private String url;

    public UploadFile(String fileName, String url) {
        this.fileName = fileName;
        this.url = url;
    }

    public String getFileName() {
        return fileName;
    }

    public void setFileName(String fileName) {
        this.fileName = fileName;
    }

    public String getUrl() {
        return url;
    }

    public void setUrl(String url) {
        this.url = url;
    }
}
valueobject/Message.java
/**
 * @ClassName Message
 * @Description TODO
 * @Author Fox under the tree
 * @Date 2020/4/28 0028 19:21
 * @Version since 1.0
 **/
public class Message {

    private String message;

    public Message(String message) {
        this.message = message;
    }

    public String getMessage() {
        return message;
    }

    public void setMessage(String message) {
        this.message = message;
    }
}
4.4 controller
Create a file upload controller under the controller package to process the client's requests. The code is as follows:
controller/FileUploadController.java
/** * @ClassName FileUploadController * @Description TODO * @Author Fox under the tree * @Date 2020/4/28 0028 18:52 * @Version since 1.0 **/ @RestController public class FileUploadController { @Autowired FileStorageService fileStorageService; @PostMapping("/upload") public ResponseEntity<message> upload(@RequestParam("file")MultipartFile file){ try { fileStorageService.save(file); return ResponseEntity.ok(new Message("Upload file successfully: "+file.getOriginalFilename())); }catch (Exception e){ return ResponseEntity.badRequest() .body(new Message("Could not upload the file:"+file.getOriginalFilename())); } } @GetMapping("/files") public ResponseEntity<list<uploadfile>> files(){ List<uploadfile> files = fileStorageService.load() .map(path -> { String fileName = path.getFileName().toString(); String url = MvcUriComponentsBuilder .fromMethodName(FileUploadController.class, "getFile", path.getFileName().toString() ).build().toString(); return new UploadFile(fileName,url); }).collect(Collectors.toList()); return ResponseEntity.ok(files); } @GetMapping("/files/{filename:.+}") public ResponseEntity<resource> getFile(@PathVariable("filename")String filename){ Resource file = fileStorageService.load(filename); return ResponseEntity.ok() .header(HttpHeaders.CONTENT_DISPOSITION, "attachment;filename=\""+file.getFilename()+"\"") .body(file); } }
>In the controller, the @ RestController composite annotation is used instead of@ Controller+@ResponseBody And adopt the shortcut annotation method of @ RequestMapping.
4.5 configure upload file size
In general, for security and performance reasons, we need to limit the size of the uploaded files on the client side. The maximum file size in this tutorial is 50MB. stay application.yml ( application.properties )Add the following configuration to the file:
application.yml
spring:
  servlet:
    multipart:
      max-request-size: 50MB
      max-file-size: 50MB
application.properties
spring.servlet.multipart.max-request-size=50MB
spring.servlet.multipart.max-file-size=50MB
> - spring.servlet.multipart . Max request size = 50MB: the total file size of the file that can be uploaded in a single request > - spring.servlet.multipart . max file size = 50MB: the file size that can be uploaded by a single file
4.6 global exception handling
In the controller, we use try catch statement to handle user-friendly exceptions that may occur in the process of file upload. However, when the client uploads a file with a size of more than 50MB, the application will throw MaxUploadSizeExceededException exception information, which we need to handle. The easiest way is to use@ ControllerAdvice+@ExceptionHandler Handling exception in combination mode. Create an exception handling class under the exception package. The code is as follows:
exception/FileUploadExceptionAdvice.java
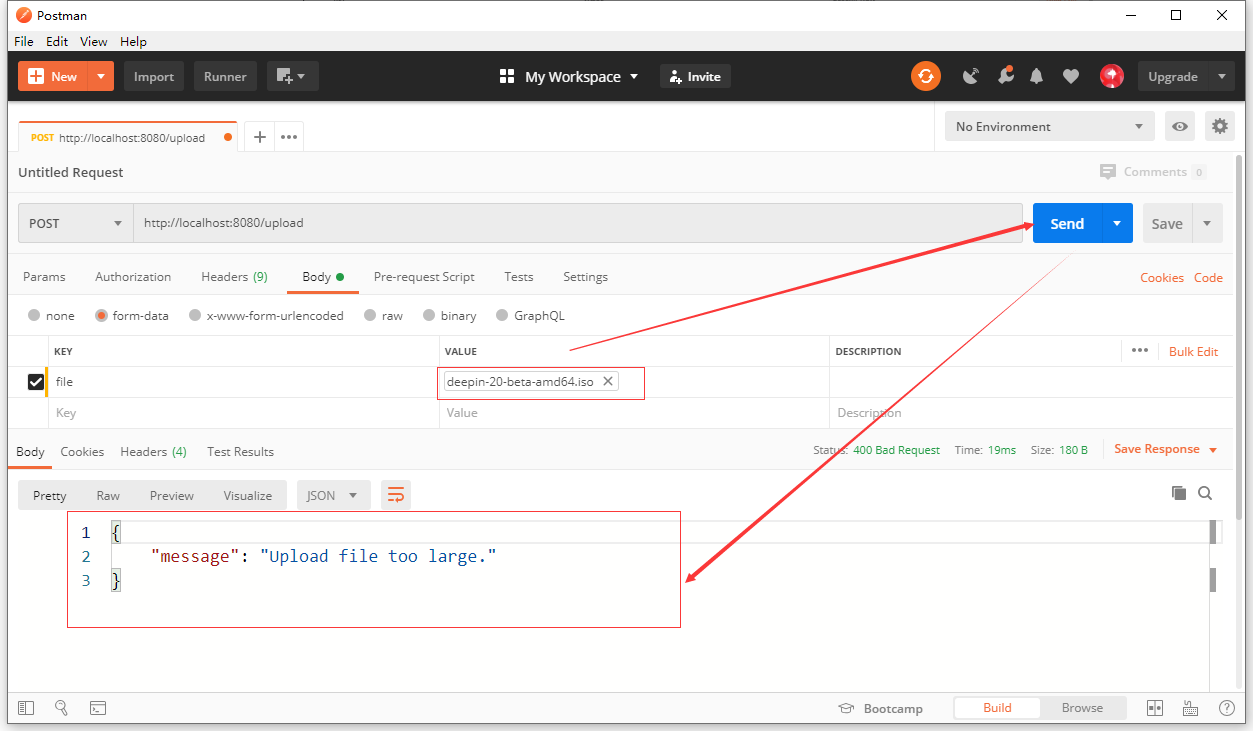
/**
 * @ClassName FileUploadExceptionAdvice
 * @Description TODO
 * @Author Fox under the tree
 * @Date 2020/4/28 0028 19:10
 * @Version since 1.0
 **/
@ControllerAdvice
public class FileUploadExceptionAdvice extends ResponseEntityExceptionHandler {

    @ExceptionHandler(MaxUploadSizeExceededException.class)
    public ResponseEntity<message> handleMaxUploadSizeExceededException(MaxUploadSizeExceededException e){
       return ResponseEntity.badRequest().body(new Message("Upload file too large."));
    }
}
4.7 initialize file storage space
In order to get clean test data during test and allocate storage address of upload file after application startup, we need to create a configuration class under config package, and call clear() method and init() method in FileStorageService during application startup. The fastest way to implement this function is to configure the class to implement the run() method of the CommandLineRunner interface class. The code is as follows:
config/FileUploadConfiguration.java
@Service
public class FileUploadConfiguration implements CommandLineRunner {

    @Autowired
    FileStorageService fileStorageService;

    @Override
    public void run(String... args) throws Exception {
        fileStorageService.clear();
        fileStorageService.init();
    }
}
> Inject FileStorageService into fil with @ Autowired annotation eUploadConfiguration.java Medium.
5. Run program and test
There are many ways to run Spring Boot applications, such as:
- 1. Command mode: mvn spring-boot:run
- 2.IntelliJ IDEA: click the "Run" button of IntelliJ IDEA
- 3.main() method: directly run the main() method in the main class
- 4. Run jar package: Java jar springboot- fileupload.jar
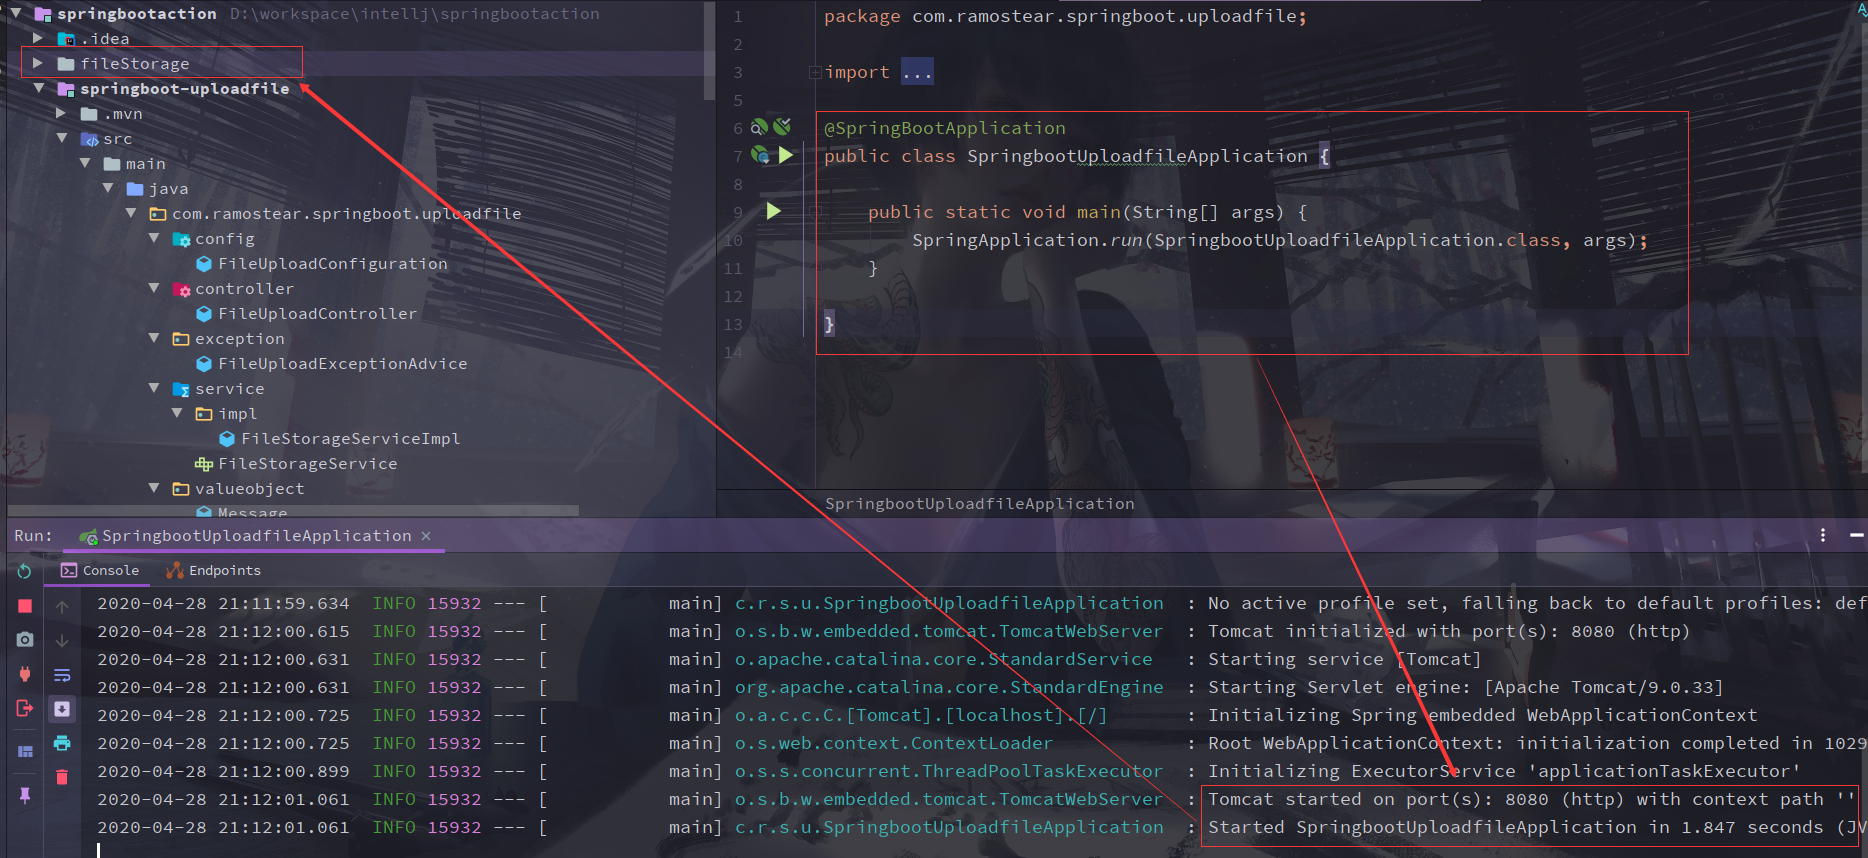
Choose a familiar way to run the Spring Boot application. When the application starts successfully, a folder named fileStorage will be created in the root directory of the project, which will be used to store the files uploaded by the client.
5.1 testing APIs with Postman
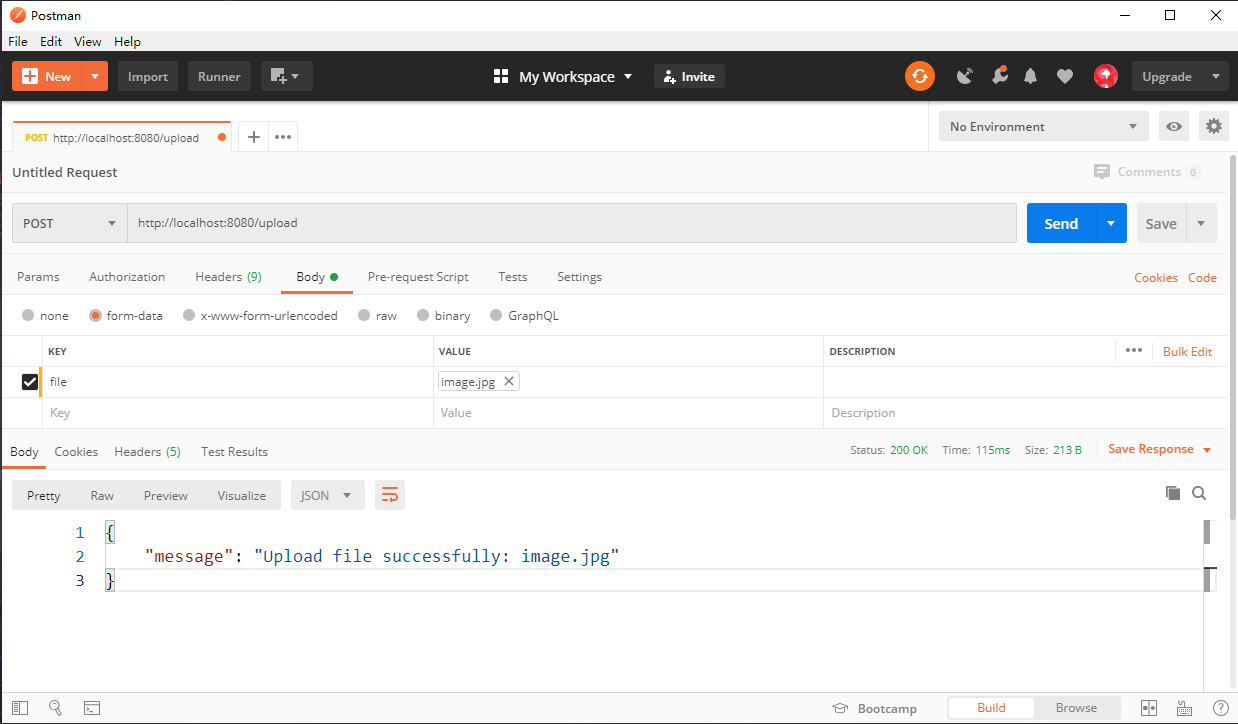
After the application starts successfully, we use Postman to test APIs in the application.
$call / upload interface to upload file:
$upload a file larger than 50MB
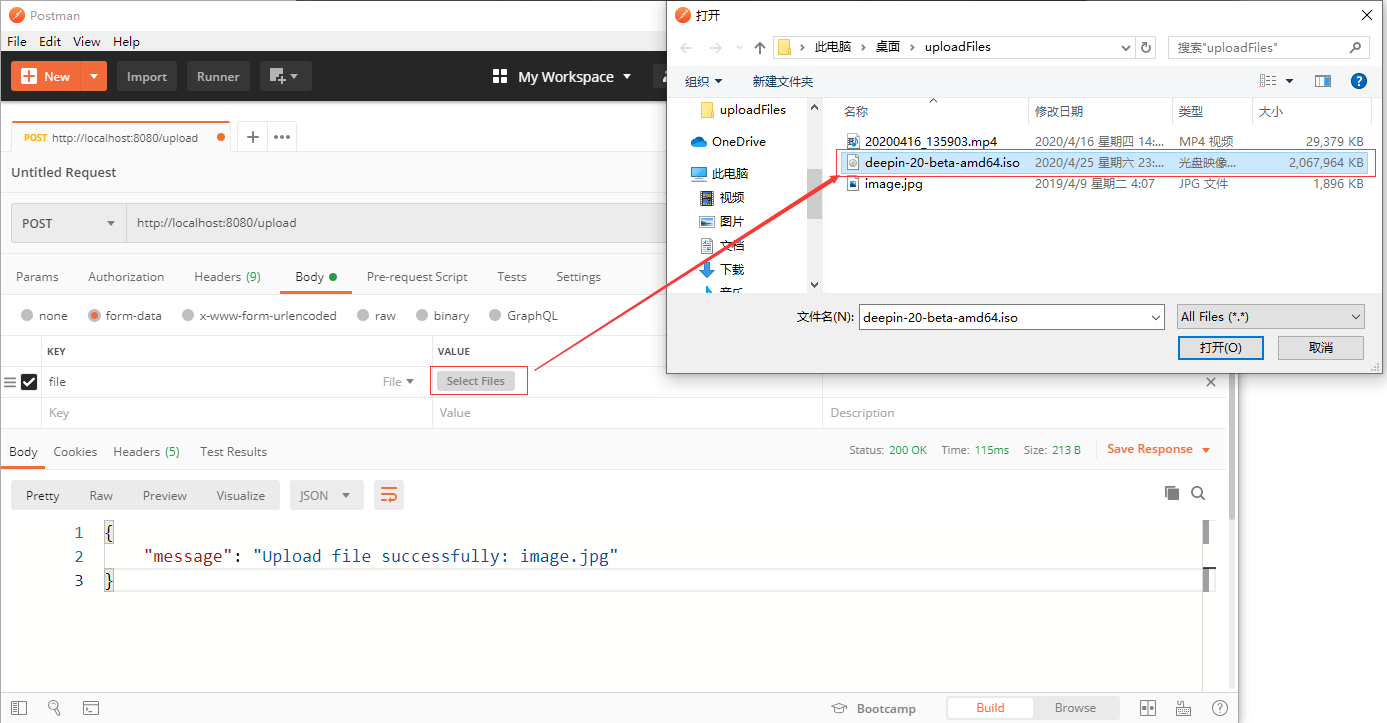
Execution result:
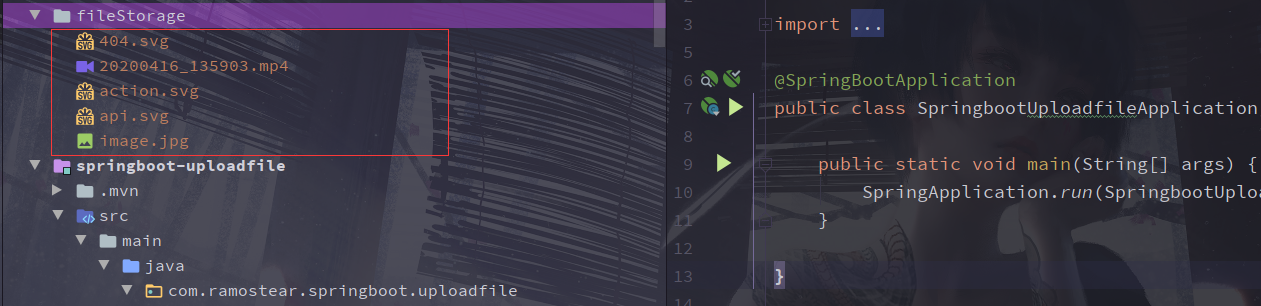
$check file storage folder
After the file is uploaded successfully, we can check the fileStorage folder under the root directory of the project to see if any files are stored in it:
$call the / files interface to get the list of all uploaded files
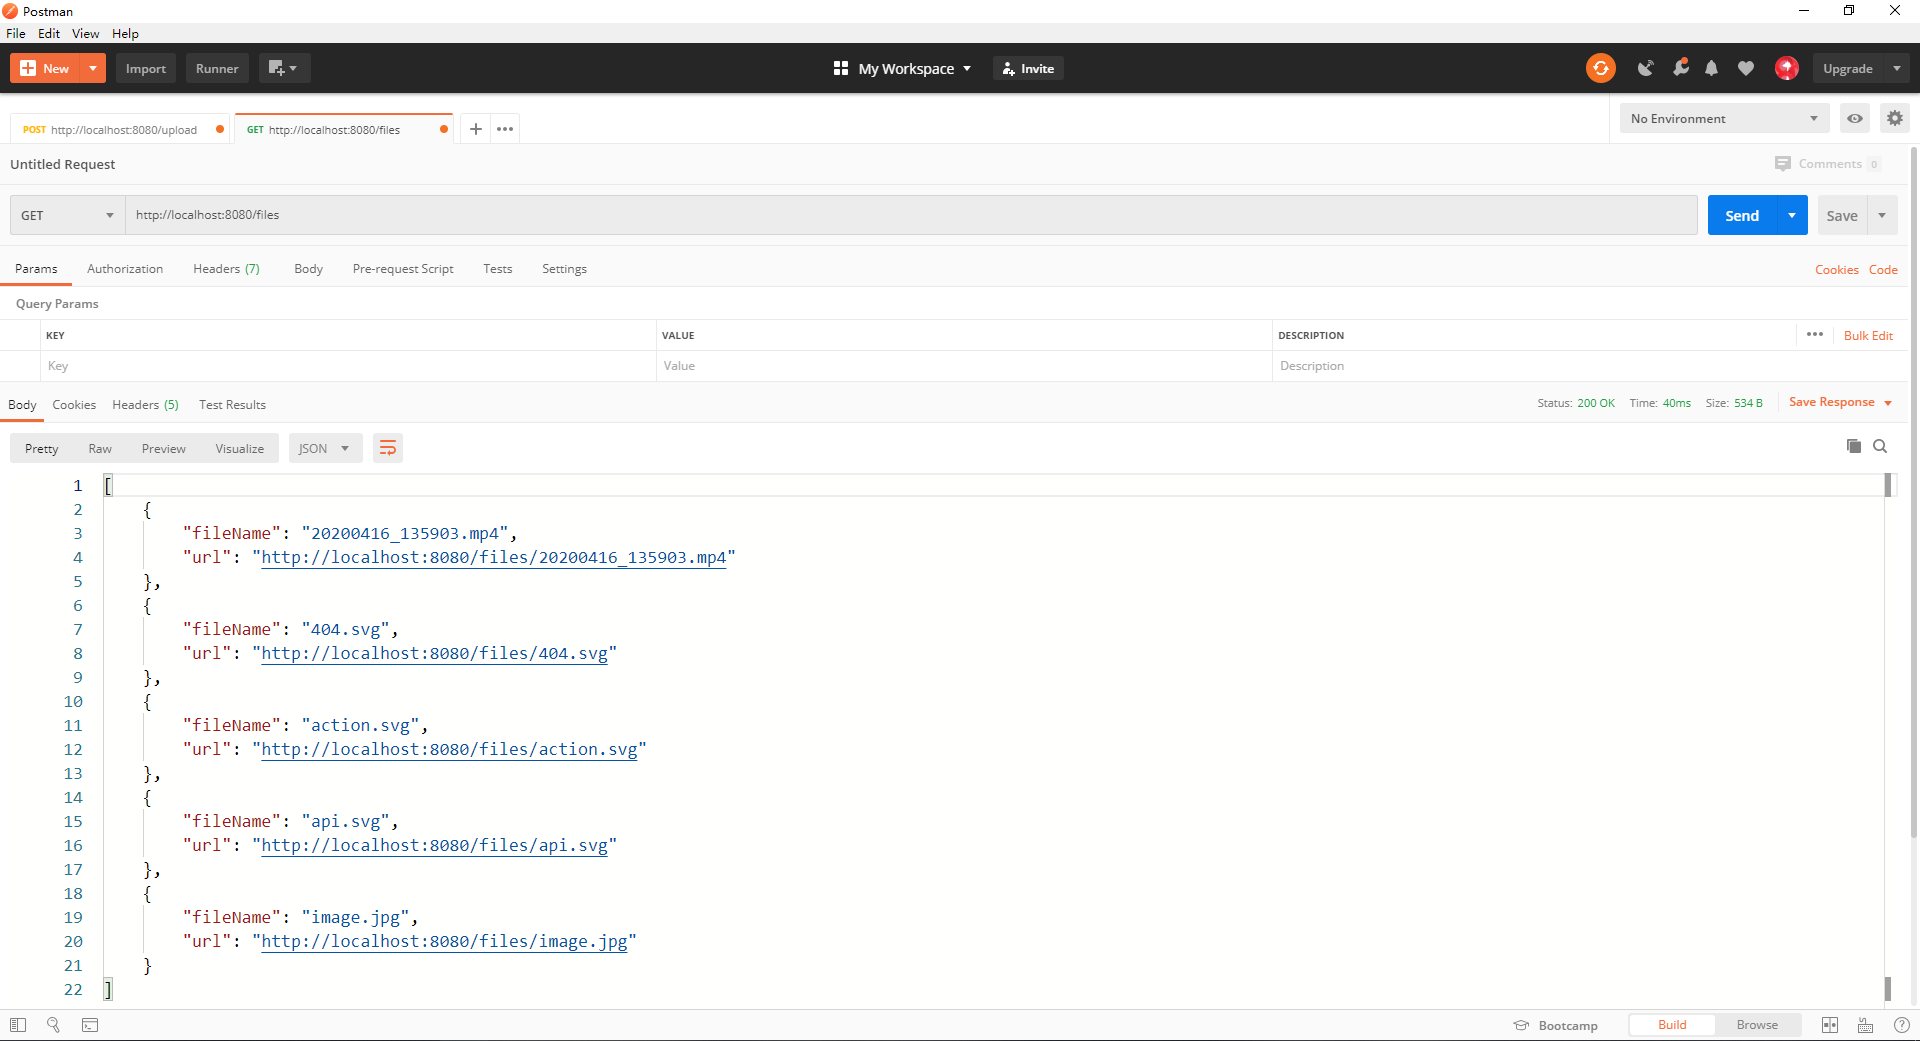
/The files interface will return all the uploaded file information. We can click any link address to download the file. In Postman, you can view the file details in the response header through the header tab, for example:
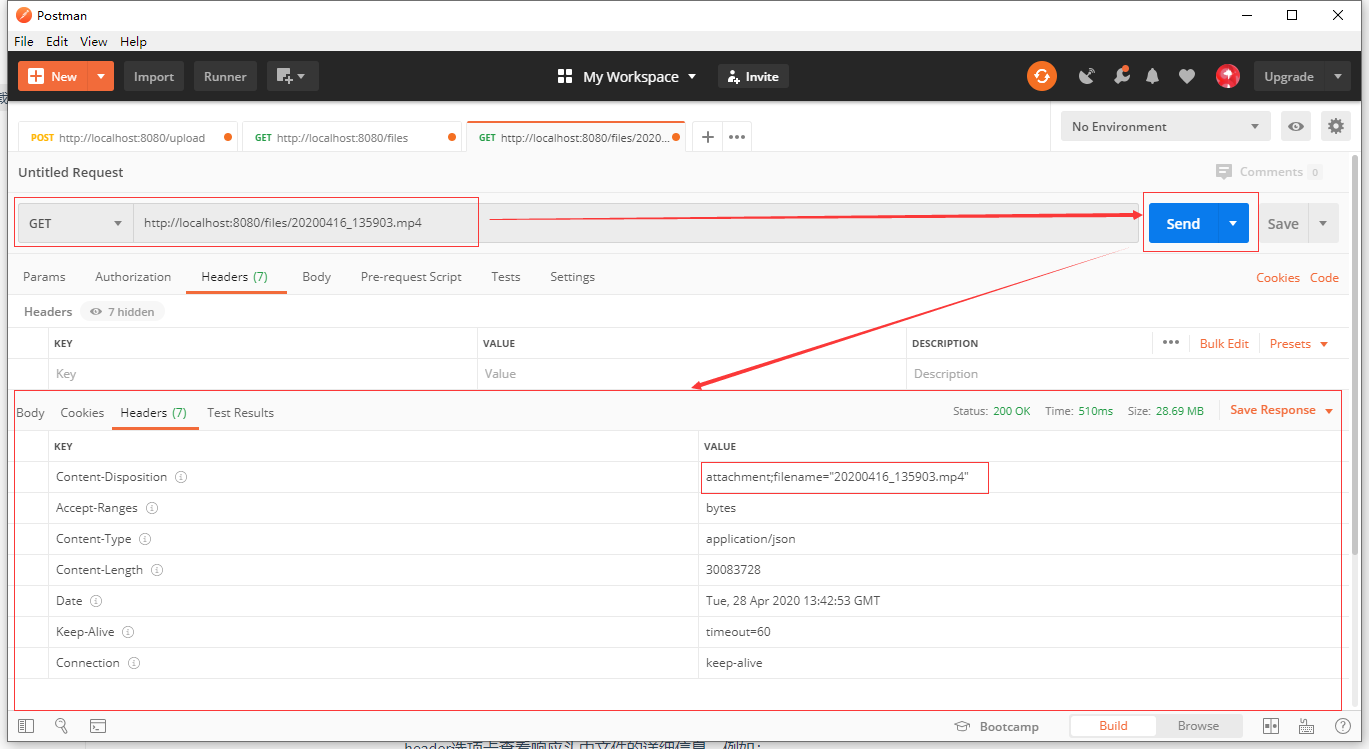
>You can also copy the link address in the list and access it in the browser. The browser will pop up a download inquiry dialog box, and click OK to download.
6 Summary
This chapter introduces the implementation of Spring Boot 2.0 based on Restful style file upload and download APIs, and uses Postman tools to test APIs, achieving the expected results of the design. You can get the relevant source code of this tutorial through the following link address.
>GitHub warehouse address > > https://github.com/ramostear/springboot2.0-action
If you have any problems running the source code provided in this tutorial, please contact me in the comments area.
>Do not reprint without permission! </message></resource></uploadfile></list<uploadfile></message></path></path>