1. Account preparation
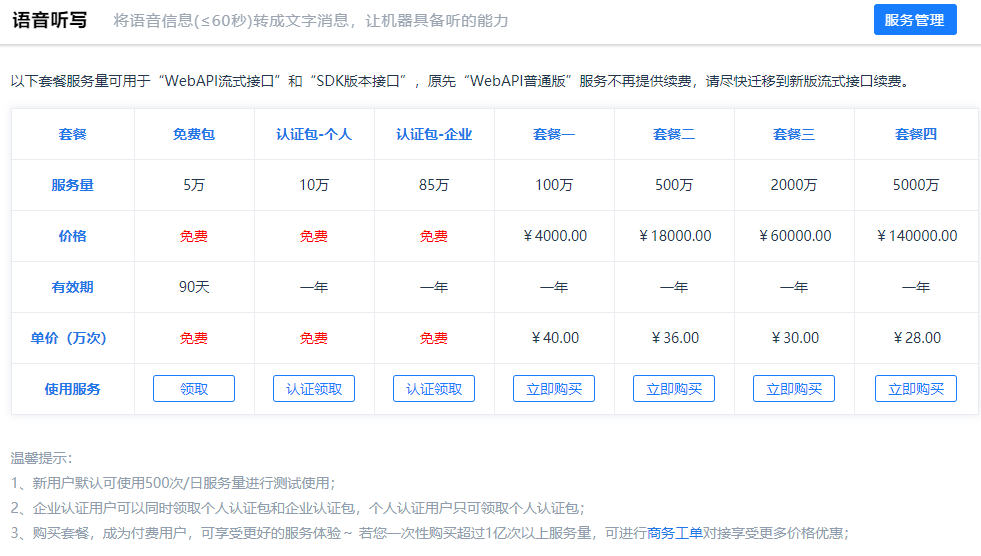
First of all, we need to have a iFLYTEK account to prepare for APPID, APPKey and other applications. By the way: iFLYTEK opens to users of different authentication types
The number of times you use the SDK is different, as shown in the following figure.
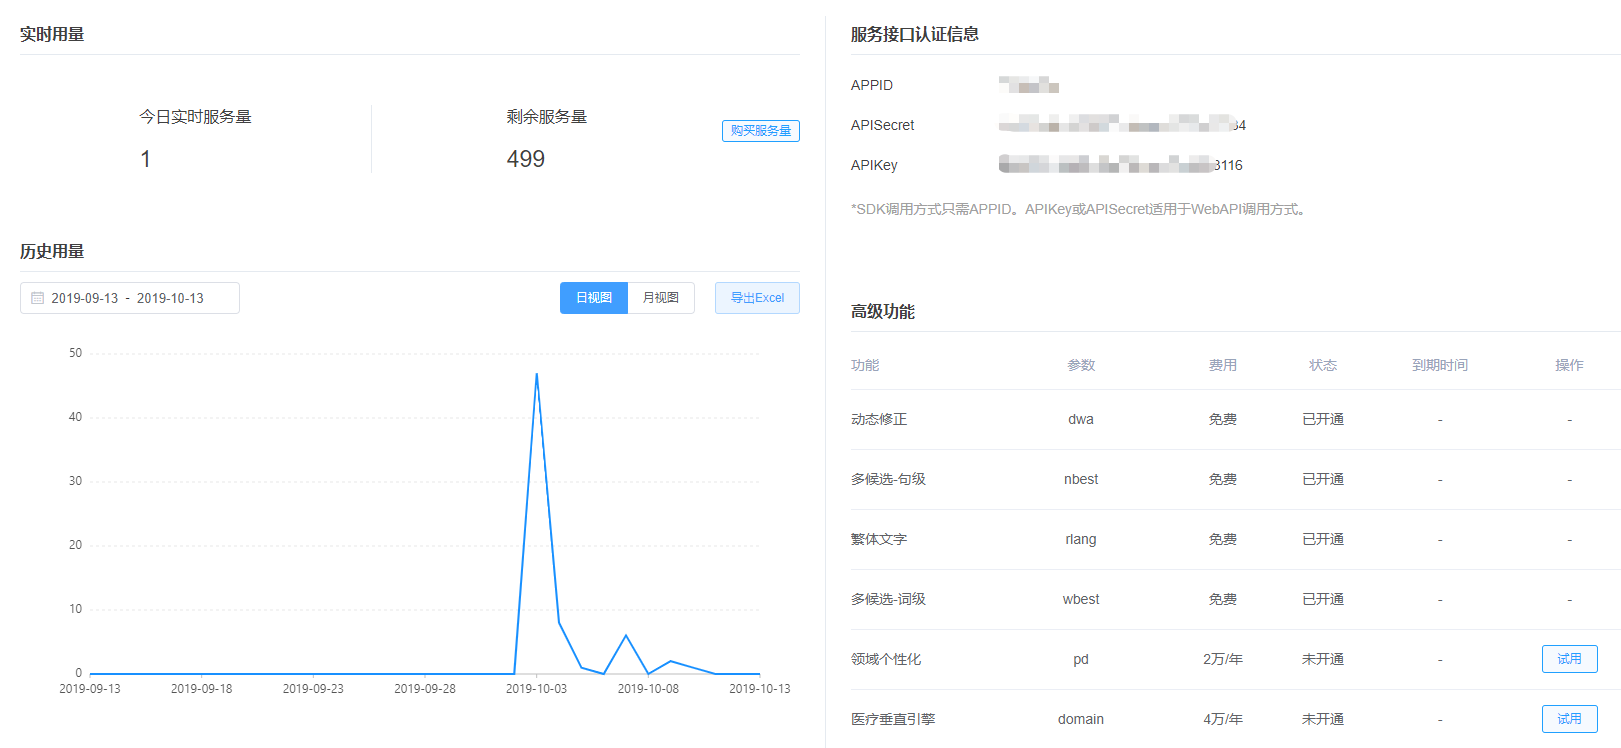
After the account application is completed, you need to go to your own Console Register your application, at the same time, you can also see the APPID and other attributes corresponding to your application, the functions opened, the number of calls remaining and other information.
This article introduces the access of Android SDK, which is Download address of Android SDK It can be analyzed according to the specific needs of the project.
2. SDK integration preparation
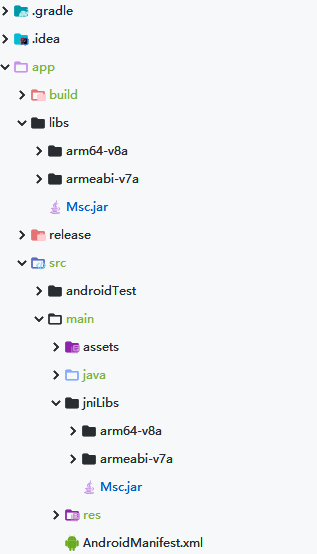
If you refer to the official documents or the official DEMO, you need to copy the files of the corresponding architecture to the libs directory of the Android project.
In the official DEMO, it only copies the armeabi-v7a architecture. As shown in the figure below (I believe in its evils. When I first accessed, I only imported the armeabi-v7a architecture by referring to the official DEMO, resulting in a lot of problems?)
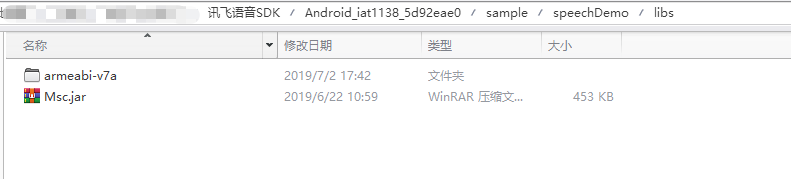
To avoid this pit, my suggestion is: copy the provided architecture into the project. (except for special equipment requirements)
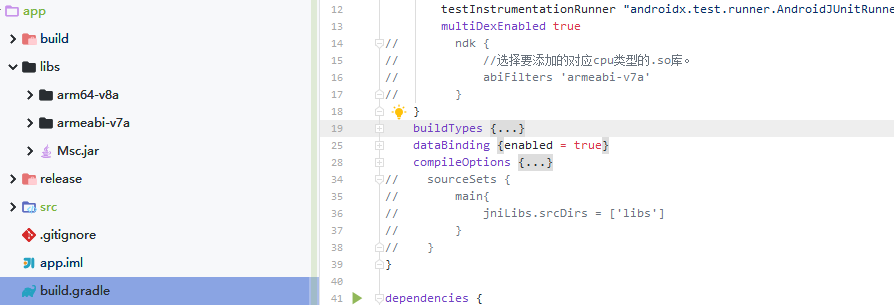
Then in the build.gradle file, add the SDK dependency
implementation files('libs/Msc.jar')
If the SDK is imported into the lib folder, there may be unrecognized errors.
You can try to comment out the following code (metaphysical operation ~ ~) in build.gradle(app) and continue troubleshooting.
//        ndk {
//            //Select the. so Library of the corresponding cpu type to add.
//            abiFilters 'armeabi-v7a', 'armeabi'
//        }

//    sourceSets {
//        main{
//            jniLibs.srcDirs = ['libs']
//        }
//    }
3. Add the required permissions in the Android manifest.xml file
Static add permission part, refer to the official documents.
<! -- connect to network permission, used to perform cloud voice capability -- >
<uses-permission android:name="android.permission.INTERNET"/>
<! -- access to the use right of mobile recorder, which is required for dictation, recognition and semantic understanding -- >
<uses-permission android:name="android.permission.RECORD_AUDIO"/>
<! -- read network information status -- >
<uses-permission android:name="android.permission.ACCESS_NETWORK_STATE"/>
<! -- get the current wifi status -- >
<uses-permission android:name="android.permission.ACCESS_WIFI_STATE"/>
<! -- allow programs to change network connection status -- >
<uses-permission android:name="android.permission.CHANGE_NETWORK_STATE"/>
<! -- access to mobile phone information -- >
<uses-permission android:name="android.permission.READ_PHONE_STATE"/>
<! -- read contact permission, which is required to upload contacts -- >
<uses-permission android:name="android.permission.READ_CONTACTS"/>
<! -- write permission for external storage, which is required for building syntax -- >
<uses-permission android:name="android.permission.WRITE_EXTERNAL_STORAGE"/>
<! -- read permission for external storage, which is required for building syntax -- >
<uses-permission android:name="android.permission.READ_EXTERNAL_STORAGE"/>
<! -- configuration permission, used to record application configuration information -- >
<uses-permission android:name="android.permission.WRITE_SETTINGS"/>
<! -- mobile location information, used to provide location for semantic and other functions, and provide more accurate services -- >
<! -- location information is sensitive information. You can close the location request through Setting.setLocationEnable(false) - >
<uses-permission android:name="android.permission.ACCESS_FINE_LOCATION"/>
<! -- if you need to use face recognition, you need to add: camera authority, and you need to use -- >
<uses-permission android:name="android.permission.CAMERA" />
However, static application for permission is not enough. For today's mobile phones, most of them are already Android version 678910. Applications need to apply for permissions dynamically. Only after the user confirms and agrees, can the APP use these permissions.
There are many ways to apply for permission dynamically, as well as many open source projects, which will not be introduced here.
4. SDK initialization
SDK initialization is recommended to be placed at the program entry (such as onCreate method of Application and Activity). It is very simple, just one line statement.
The initialization code is as follows:
//Replace "1234567" with the APPID you applied for
SpeechUtility.createUtility(context, SpeechConstant.APPID +"=1234567");
Note: SpeechConstant.APPID +"=1234567" is spliced, so it is not allowed to add any empty characters or escape characters between "=" and appid.
5. Call voice dictation
The most important thing is to be able to call its voice dictation.
For offline dictation, you need to purchase and download a specific offline recognition SDK, so online dictation is used here.
The SDK of online dictation provides two recognition methods: recognition with voice dialog box and recognition without UI.
1, No UI recognition
//Initialize recognition no UI recognition object
//With the SpeechRecognizer object, you can customize the interface based on the callback message -- your own speech recognition UI
mIat = SpeechRecognizer.createRecognizer(IatDemo.this, mInitListener);

//Set the syntax ID and SUBJECT to null to avoid setting this parameter due to previous syntax calls, or clear all parameters directly. For details, refer to the example of DEMO.
mIat.setParameter( SpeechConstant.CLOUD_GRAMMAR, null );
mIat.setParameter( SpeechConstant.SUBJECT, null );
//Set the return result format. Currently, json,xml and plain are supported. Plain is pure dictation text content
mIat.setParameter(SpeechConstant.RESULT_TYPE, "json");
//Where engineType is "cloud"
mIat.setParameter( SpeechConstant.ENGINE_TYPE, engineType );
//Set the speech input language to simplified Chinese
mIat.setParameter(SpeechConstant.LANGUAGE, "zh_cn");
//Set result return language
mIat.setParameter(SpeechConstant.ACCENT, "mandarin");
// Set the voice front endpoint: Mute timeout, in ms, that is, how long the user does not speak is treated as timeout
//Value range {1000 ~ 10000}
mIat.setParameter(SpeechConstant.VAD_BOS, "4000");
//Set the end point after voice: the mute detection time of the back-end point, in ms, that is, how long the user stops talking is considered as no longer input,
//Auto stop recording, range {0 ~ 10000}
mIat.setParameter(SpeechConstant.VAD_EOS, "1000");
//Set punctuation to "0" to return results without punctuation, set to "1" to return results with punctuation
mIat.setParameter(SpeechConstant.ASR_PTT,"1");
//Start recognition and set up a listener
mIat.startListening(mRecogListener);
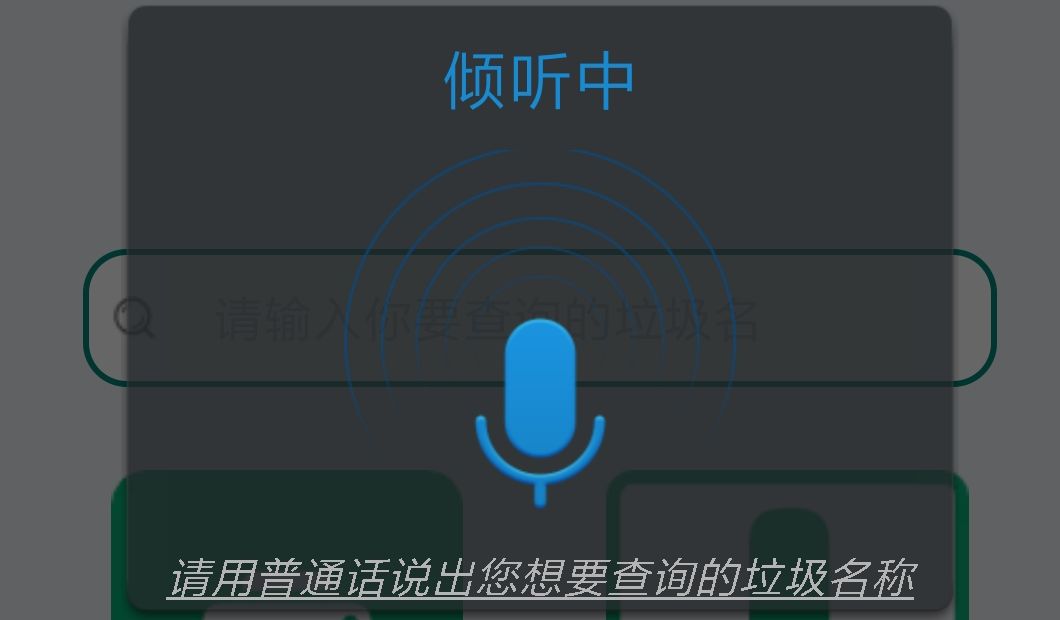
2, With voice dialog recognition (included in SDK)
// Initialize the dictation Dialog. If only the UI dictation function is used, the SpeechRecognizer does not need to be created
// To use the UI dictation function, please place layout files and picture resources according to notice.txt in the sdk file directory
mIatDialog = new RecognizerDialog(IatDemo.this, mInitListener);

//Set dictation parameters for dialog as follows
        mIatDialog.setParameter(SpeechConstant.RESULT_TYPE, "json");
        //Set the speech input language to simplified Chinese
        mIatDialog.setParameter(SpeechConstant.LANGUAGE, "zh_cn");
        //Set result return language
        mIatDialog.setParameter(SpeechConstant.ACCENT, "mandarin");
        // Set the voice front endpoint: Mute timeout, in ms, that is, how long the user does not speak is treated as timeout
        //Value range {1000 ~ 10000}
        mIatDialog.setParameter(SpeechConstant.VAD_BOS, "4500");
        //Set the end point after voice: the mute detection time of the back-end point, in ms, that is, how long the user stops talking is considered as no longer input,
        //Auto stop recording, range {0 ~ 10000}
        mIatDialog.setParameter(SpeechConstant.VAD_EOS, "1500");
        //Start identifying and setting up the listener
        mIatDialog.setListener(mRecognizerDialogListener);

//Start recognizing and setting up voice UI listener
mIatDialog.setListener(mRecognizerDialogListener);
//Show the dictation dialog box. The show method is actually an internal call without UI recognition
mIatDialog.show();
The key point is that many people are troubled. The official document says that using the voice recognition dialog box provided by the SDK, you need to put the corresponding layout file and picture resources into the project. However, after a lot of people do this, there will be a null pointer exception when mIatDialog.show(); is called.. For example:?
java.lang.NullPointerException
      at com.iflytek.cloud.ui.a.a(Unknown Source)
      at com.iflytek.cloud.ui.RecognizerDialog.setParameter(Unknown Source)
      atcom.example.mediaplayer.activity.SearchActivity.setParam(SearchActivity.java:111)
      at com.example.mediaplayer.activity.SearchActivity.onClick(SearchActivity.java:86)
      at android.view.View.performClick(View.java:4438)
      at android.view.View$PerformClick.run(View.java:18422)
      at android.os.Handler.handleCallback(Handler.java:733)
      at android.os.Handler.dispatchMessage(Handler.java:95)
      at android.os.Looper.loop(Looper.java:136)
      at android.app.ActivityThread.main(ActivityThread.java:5045)
      at java.lang.reflect.Method.invokeNative(Native Method)
      at java.lang.reflect.Method.invoke(Method.java:515)
      at com.android.internal.os.ZygoteInit$MethodAndArgsCaller.run(ZygoteInit.java:779)
      at com.android.internal.os.ZygoteInit.main(ZygoteInit.java:595)
      at dalvik.system.NativeStart.main(Native Method)
The solution is as follows:
First, put the required resources in the asset file. Note: the location of the asset folder should be at the next level of src/main /, and then
Create the jniLibs folder at the same level of the asset folder, and copy the corresponding SDK files of libs / folder to jniLibs, as shown in the figure:
At the same time, check whether the APPId initialized by the SDK has the possibility of error.
get data
After solving the problem of null pointer, call show method next, and you can get the returned dictation data happily in the custom listener
 //Create speech recognition UI dialog
 mIatDialog = new RecognizerDialog(getActivity(), searchViewModel.mInitListener);


 	/**
     * Initializes the dictation event listener.
     */
    public InitListener mInitListener = new InitListener() {

        @Override
        public void onInit(int code) {
            if (code != ErrorCode.SUCCESS) {
                //Todo
            }
        }
    };
    /**
     * Dictation UI monitor iFLYTEK
     */
    public RecognizerDialogListener mRecognizerDialogListener = new RecognizerDialogListener() {

        /**
         * Receive voice dictation callback information
         * @param recognizerResult Callback results
         * @param b Translation or not
         */
        @Override
        public void onResult(com.iflytek.cloud.RecognizerResult recognizerResult, boolean b) {
        //Data returned
		String data = recognizerResult.getResultString();
        }
        /**
         * Identify callback errors
         */
        public void onError(SpeechError error) {
            if(error.getErrorCode() == 14002) {
               //Todo
            } else {
               //Todo
            }
        }

    };
Change the text of the default dialog box
//The text at the bottom of the dialog box provided by iFLYTEK has been changed dynamically. It must be changed after the show of the dialog is executed. Otherwise, null pointer will report an error
TextView recorderDialogTextView = (TextView)  mIatDialog.getWindow().getDecorView().findViewWithTag("textlink");

recorderDialogTextView.setText(R.string.recorder_dialog_textview_text);
The returned dictation data instance is used to create the entity class:
{
    "sn": 1,
    "ls": true,
    "bg": 0,
    "ed": 0,
    "ws": [
        {
            "bg": 0,
            "cw": [
                {
                    "w": "Today",
                    "sc": 0
                }
            ]
        },
        {
            "bg": 0,
            "cw": [
                {
                    "w": "Of",
                    "sc": 0
                }
            ]
        },
        {
            "bg": 0,
            "cw": [
                {
                    "w": "weather",
                    "sc": 0
                }
            ]
        },
        {
            "bg": 0,
            "cw": [
                {
                    "w": "how",
                    "sc": 0
                }
            ]
        },
        {
            "bg": 0,
            "cw": [
                {
                    "w": ". ",
                    "sc": 0
                }
            ]
        }
    ]
}
Note: if the dynamic correction function is enabled in the SDK, the format of the returned data will be inconsistent. The official statement is as follows:
Dynamic correction:
- Dynamic correction is not enabled: the recognition result is returned in real time, and each returned result is an addition to the previous result;
- Enable dynamic correction: return recognition results in real time. Each returned result may be an addition to the previous result, or it may be a result to replace the previous one (i.e. correction);
- When dynamic correction is turned on, the particle size of the returned result is smaller and the visual impact effect is better than that when it is not turned on;
- To use the dynamic correction function, you need to click the console - stream Dictation - advanced function to activate, and set the corresponding parameters to use. Parameter setting method: mIat.setParameter("dwa", "wpgs");
- The dynamic correction function is only supported in Chinese;
- The format of the returned result is different from that of the result not opened. See the following for details;
If the dynamic correction function is enabled and dwa=wpgs is set (only supported in Chinese), the following fields will be returned:
| parameter | type | describe |
|---|---|---|
| pgs | string | When wpgs is turned on, if the value of this field is "apd", it means that the result of this piece is the final result appended to the front; if the value is "rpl", it means that some of the previous results are replaced, and the replacement range is rg field |
| rg | array | Replace range. If wpgs is enabled, the assumed value of this field is [2,5], which means that the result returned from the second to the fifth time is to be replaced |
PS: for the voice dictation requirements in general projects, the dynamic correction function can be avoided completely. However, if you want to use synchronous display of voice recognition results or compare the results that need more accurate results, you can consider using this function.
summary
IFLYTEK's voice dictation SDK has many pitfalls, but it is not very difficult. It is suitable for the rapid access to voice dictation needs of the project.. ?
For more operations and functions, refer to Official documents of iFLYTEK voice dictation SDK