When it comes to CI Yun, it's not strange. I don't know how to look down on my boots
Word cloud refers to the high frequency
The visual prominence of "key words"
Visitors can grasp the main idea of the text at a glance

See if this is a little love with sound and picture~
Today we collect the daily conversation between lovers
Use this to make a little romance that belongs to you only!
First, we need to export the data of ourselves and objects~
Wechat's backup function can't directly export text format to you. It is actually a database called sqlite. If we use the method circulated on the Internet to extract text data, iOS needs to download itunes to back up the whole machine, Android needs the root permission of the machine, which is very troublesome. Here we introduce a method to export only chat data with objects without the whole machine backup and the root permission of the machine.
That is to use the Android emulator to export, so that ios / Android can be used universally, and can avoid adverse effects on the machine. First, you need to use the wechat of the computer version to back up the chat records of you and your object. Take windows as an example:
1. Download the night God simulator
2. Download wechat in the night God simulator
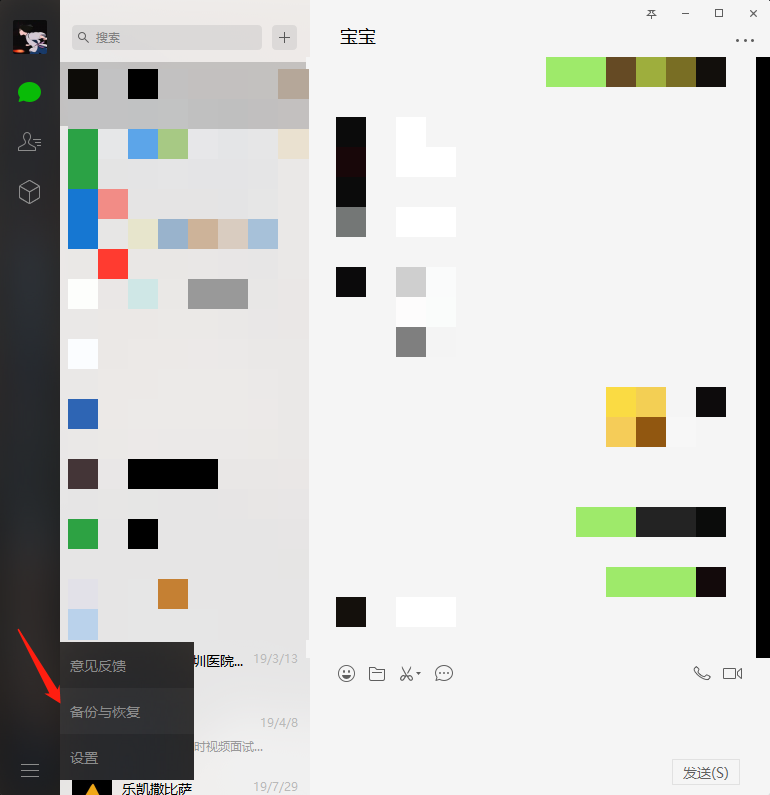
3. Use wechat of windows client for backup, as shown in the lower left corner

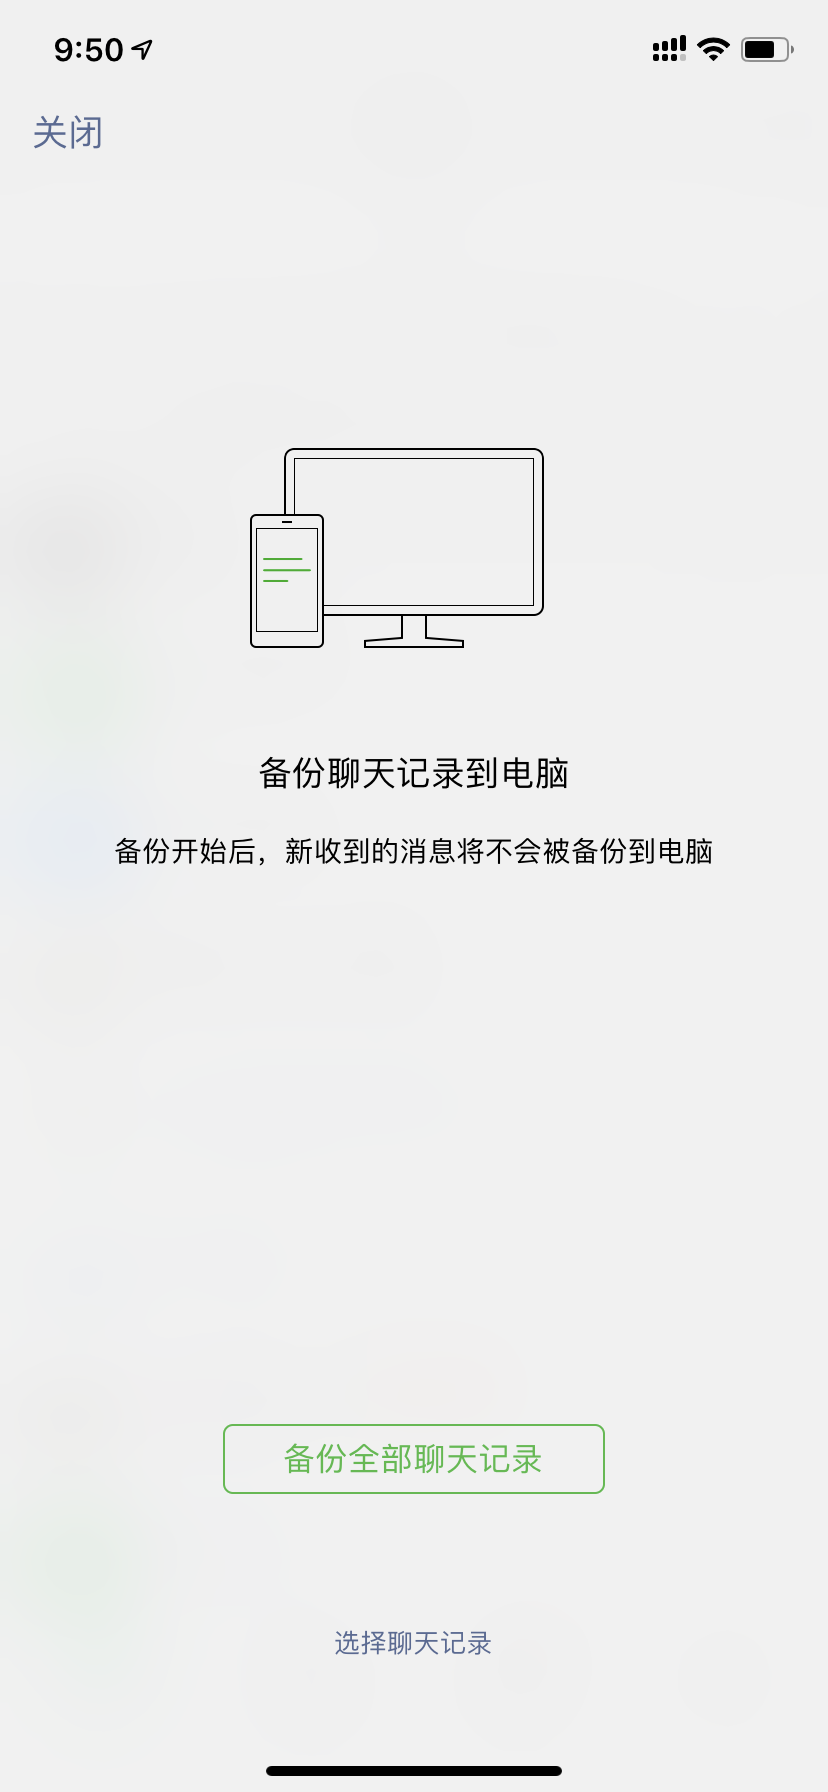
4. Click backup chat record to computer

5. Select the backup object on the mobile terminal
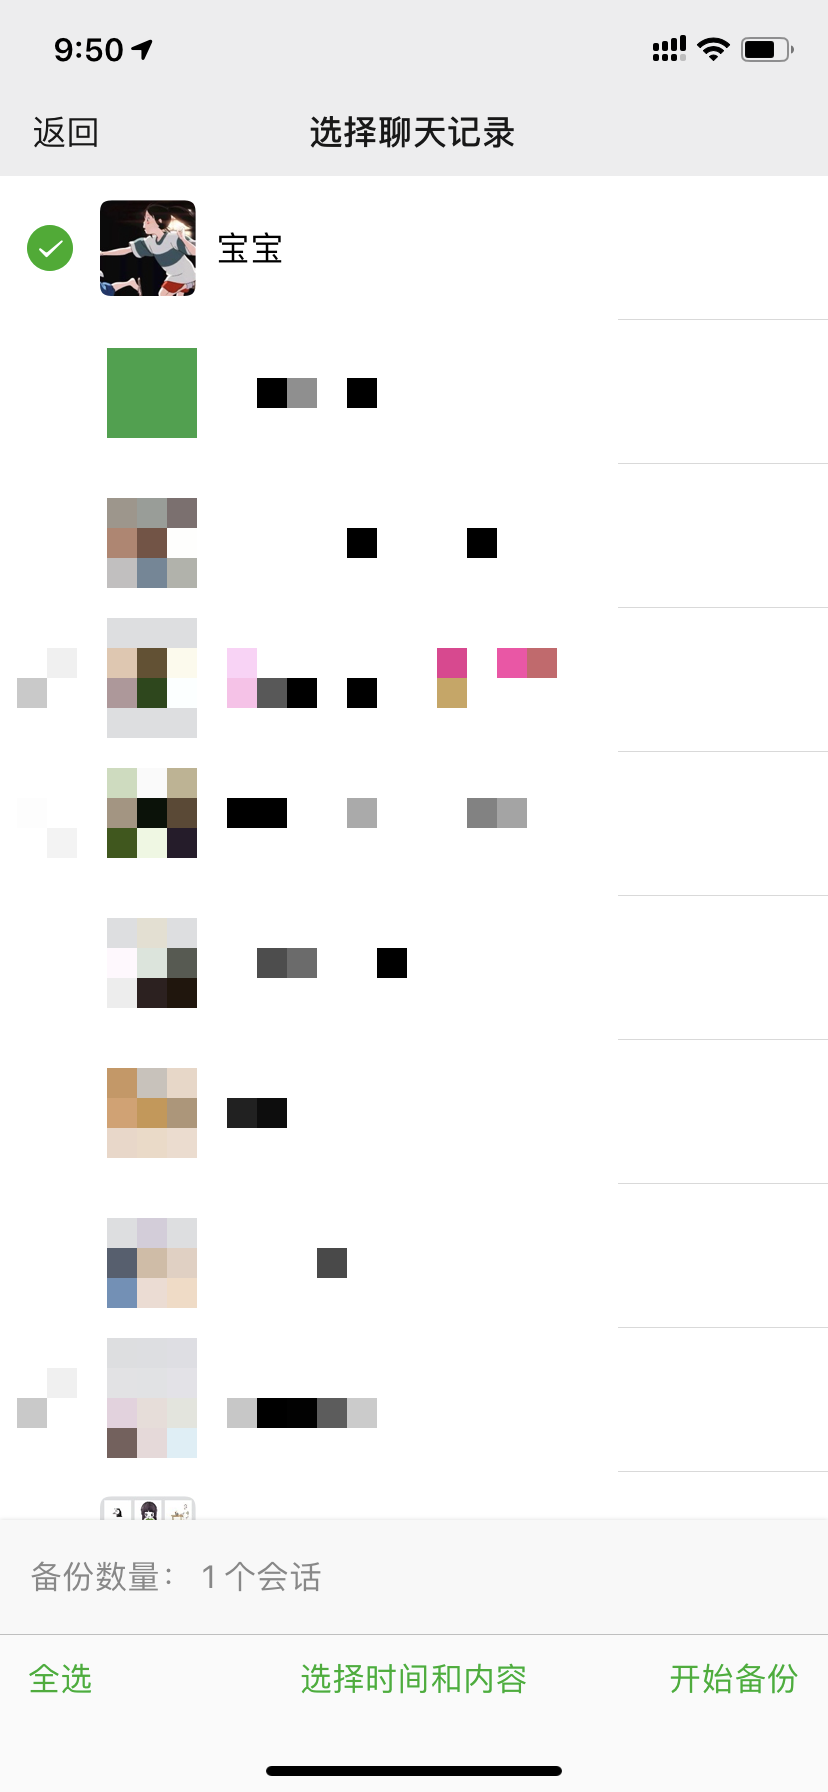
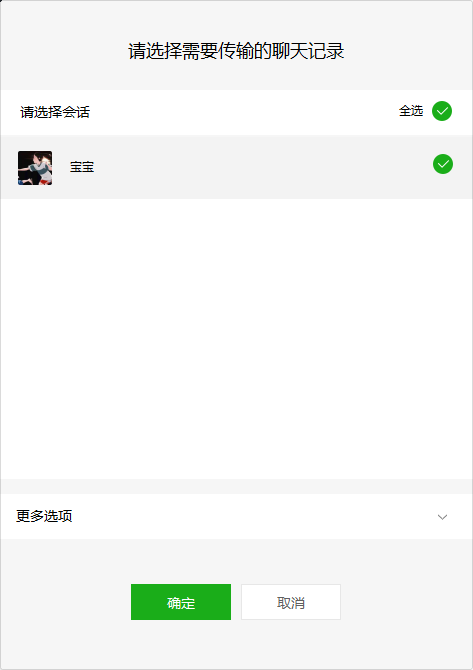
Click to enter the selection chat record below, and then select the record with your object
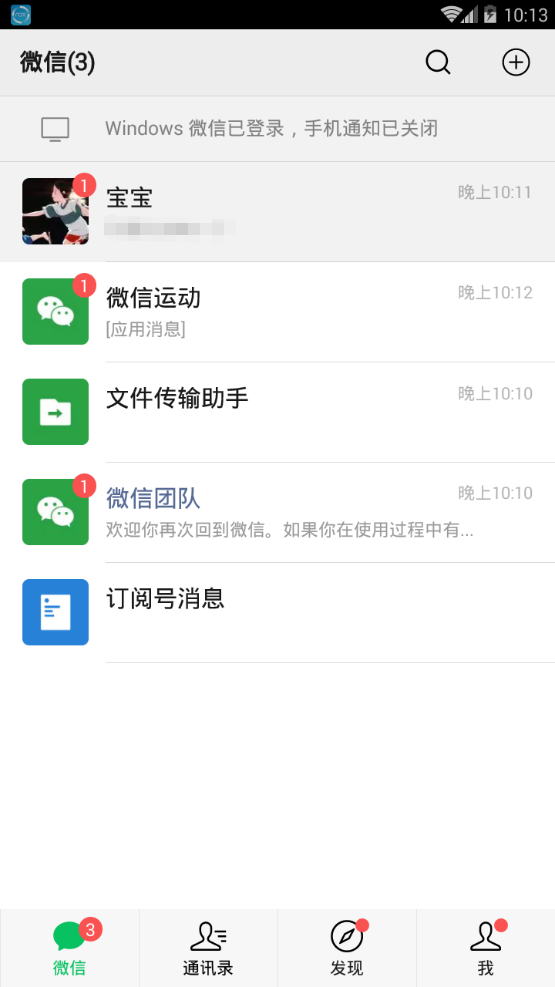
6. After exporting, open the simulator and log in to the WeChat
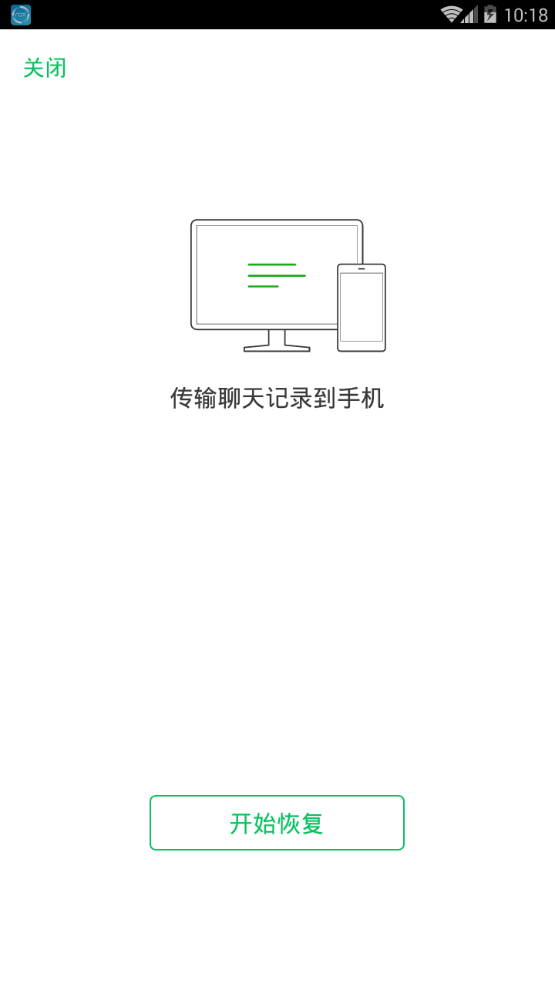
7. Return to computer version after login WeChat Log in, open backup and restore, and select Restore chat record to mobile phone

- Check the chat record we just exported and click on the mobile phone to start recovery
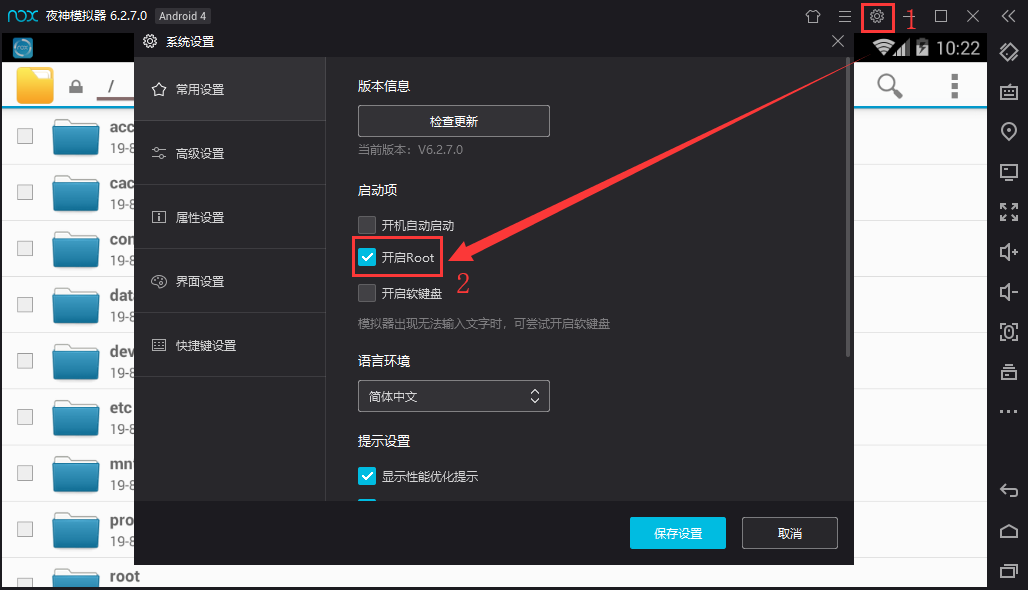
9. Open the root authority of the night God simulator
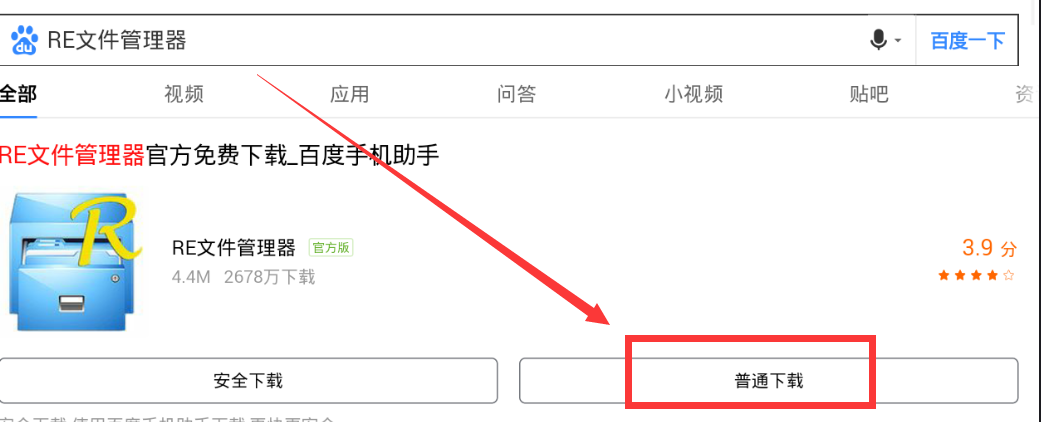
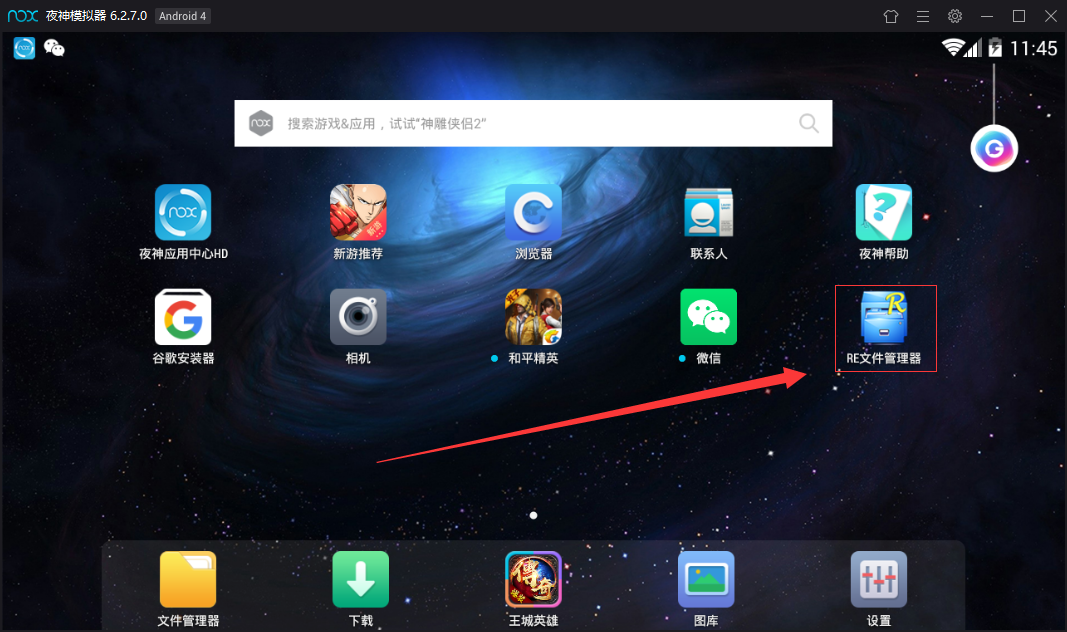
10. Search the RE file manager with Baidu browser of the simulator, download it (Figure 1) and open it after installation. A dialog box will pop up for you to give root permission, choose to give it permanently, open the RE file manager (Figure 2), and enter the following folder (Figure 3), which is the place where the application stores data.
/data/data/com.tencent.mm/MicroMsg
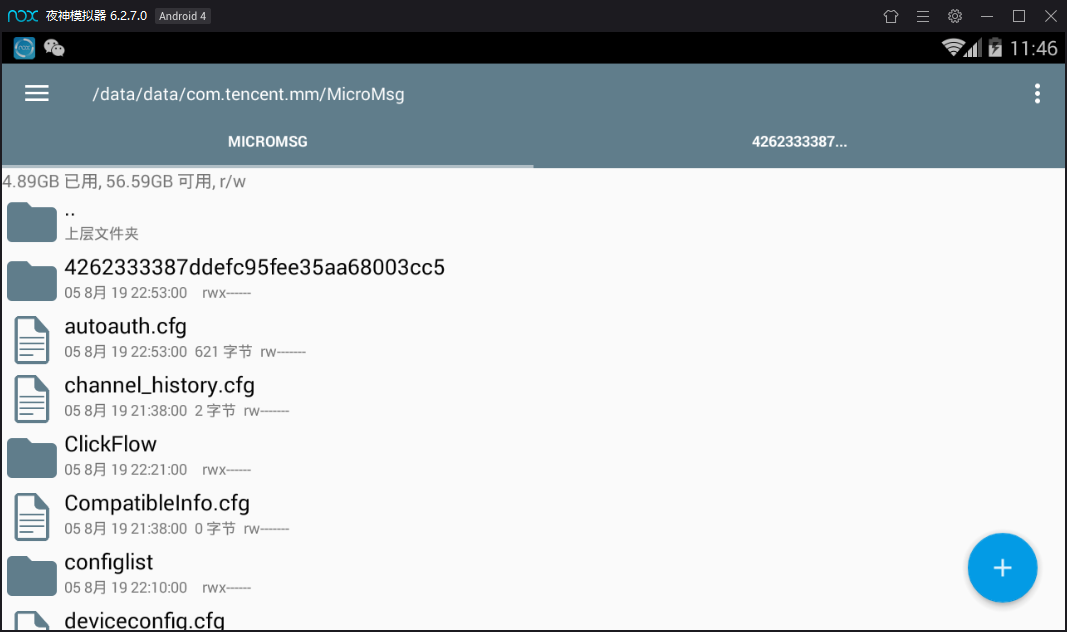
Then enter a folder composed of numbers and letters, as shown in Figure 3, 4262333387ddefc95fee35aa68003cc5
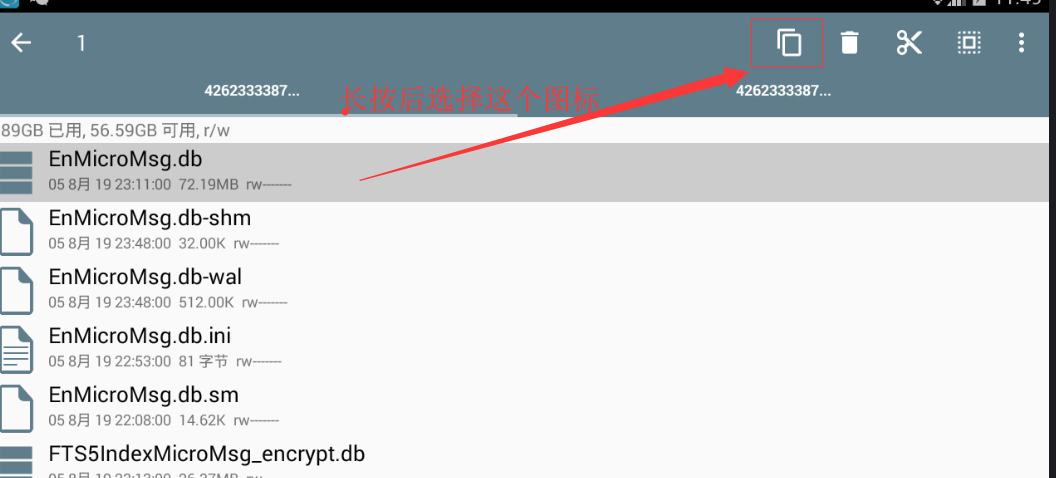
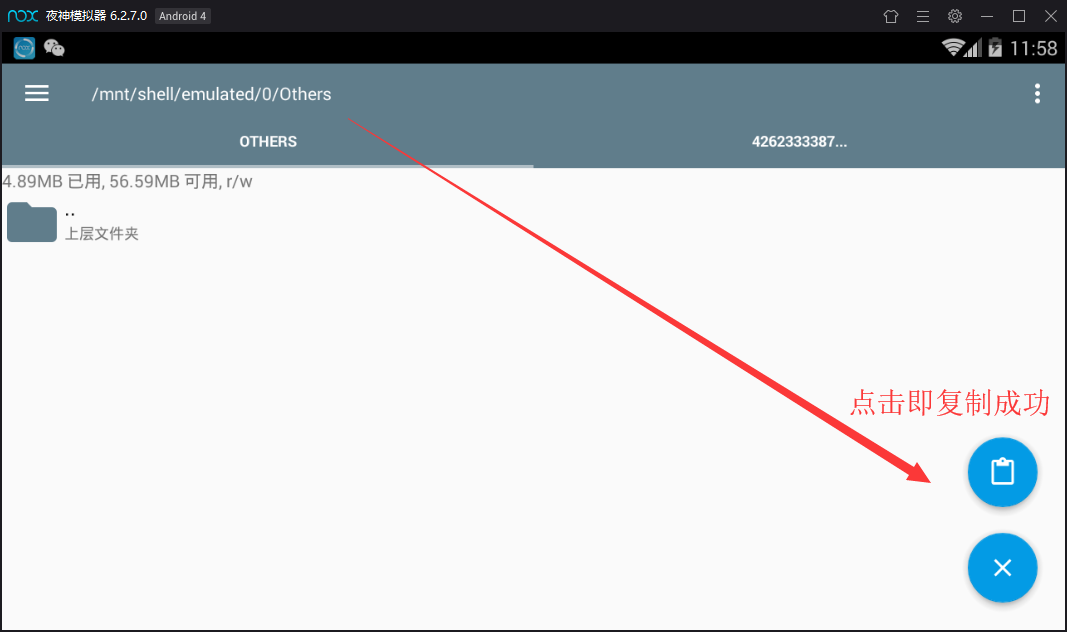
11. Find the file EnMicroMsg.db under the folder and copy it to the shared folder of the night God simulator (Figure 4). The location of the shared folder is / mnt/shell/emulated/0/others (Figure 5). Now visit C:\Users \ your user name \ NOx? Share \ othershare of windows to get the database
12. After exporting the database, use a software called * * sqlcipher * * to read the data
Before that, we need to know the password of the database. According to previous experience, the formula of the password is as follows
String "IMEI (mobile phone serial number) UIN (user information number)"
The first seven digits after MD5 calculation of the string are the data library For example, "355757010761231 857456862" actually has no space in the middle, and then put MD5 to calculate the first seven digits, which will be introduced in detail later.
Wow, it's really "easy to understand". It doesn't matter. Next, I'll tell you how to obtain IMEI and UIN.
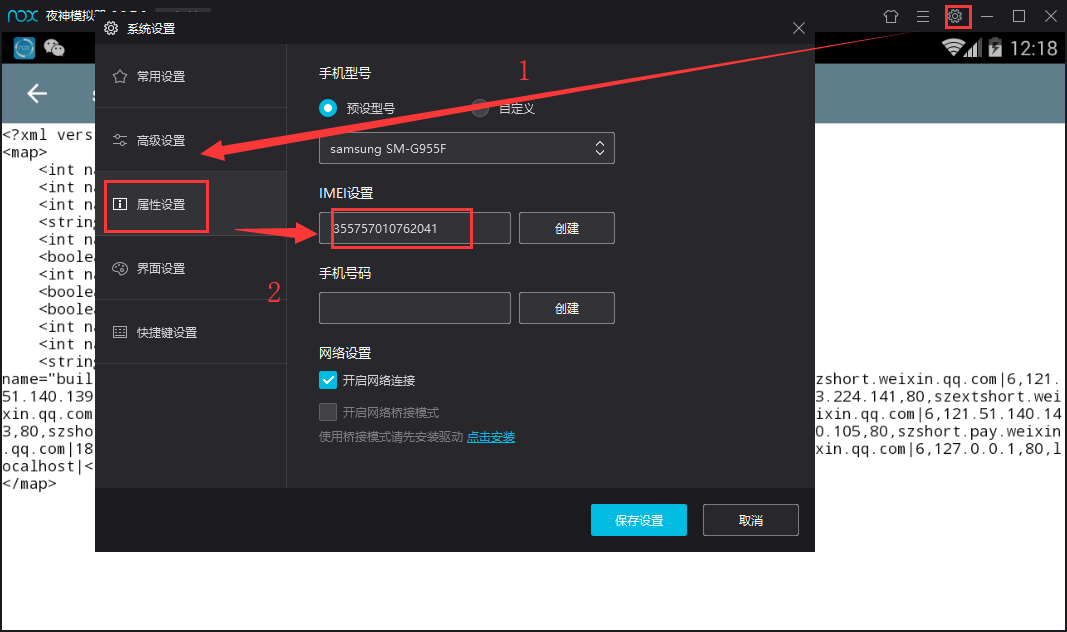
The first is IMEI, which can be found in the system settings - property settings in the upper right corner of the simulator, as shown in the figure.
Now that we have IMEI, what about UIN?
Similarly, open this file with the RE file manager
/data/data/com.tencent.mm/shared_prefs/system_config_prefs.xml
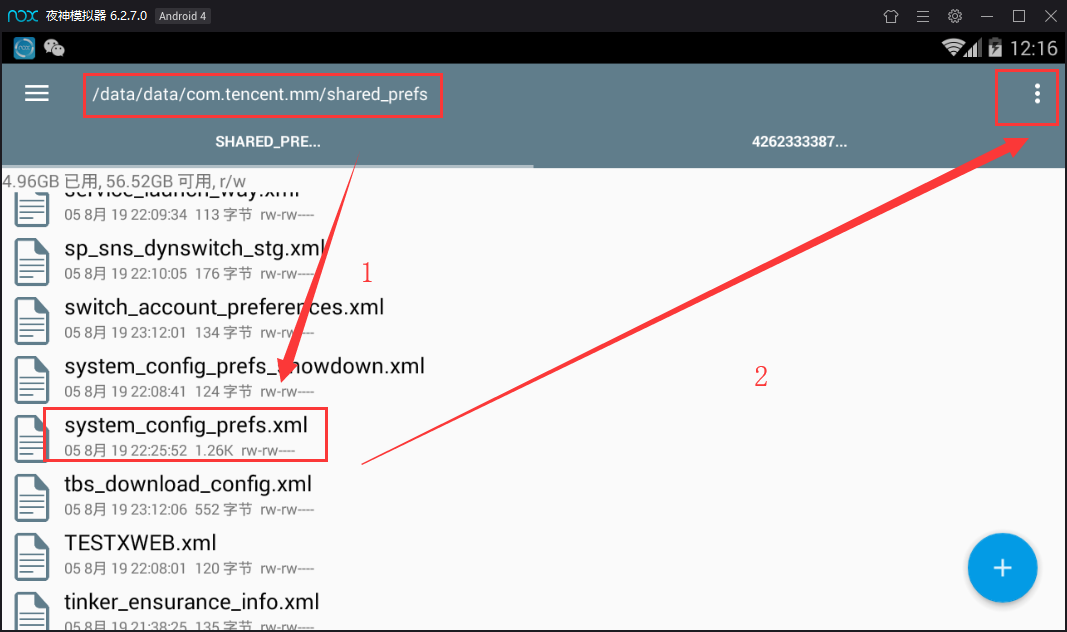
Long press to change the file, click the three points in the upper right corner - select the opening method - text browser, find the default UIN, and then the number is!
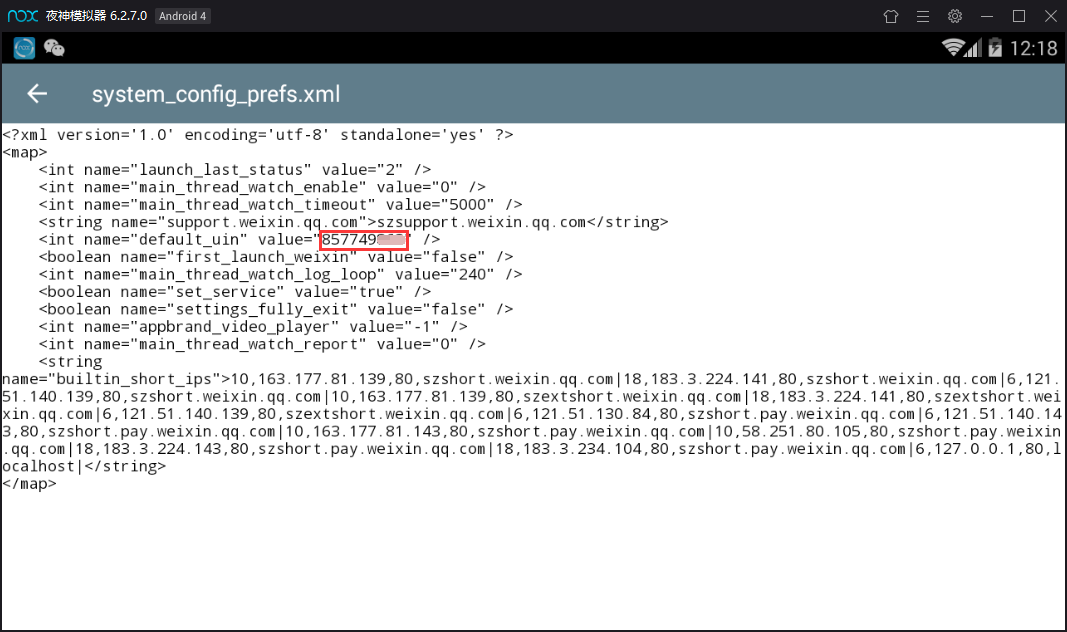
After getting these two strings of numbers, you can start to calculate the password. If my IMEI is 355757010762041 and Uin is 857749862, then the combination is 355757010762041857749862. Put this string of numbers into free MD5 online calculation
The first seven digits of the obtained number are our passwords, like this one is 6782538
Then we can enter our core link: use * * sqlcipher * * to export chat text data!
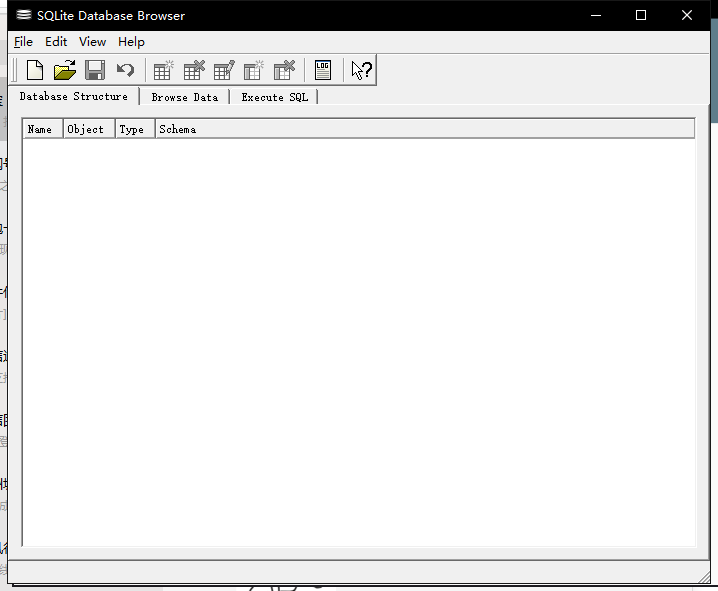
Click File - open database - select the database file we just created, and a box will pop up for you to enter the password. We can enter the database by entering the seven digit password we just obtained. Select message form, and this is the chat record between you and your object!
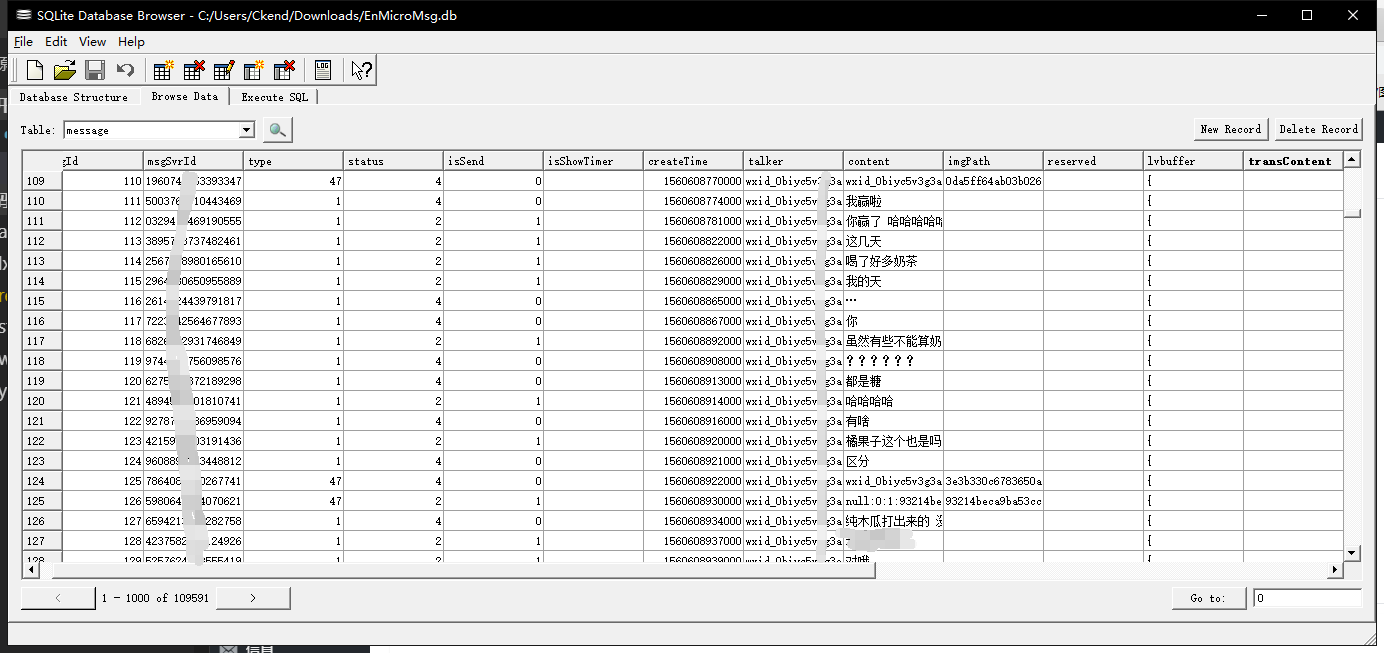
We can export it as a csv file: File - export - table as csv
Next, we will use Python code to extract the real chat content: content information, as shown below. Although this software also allows select, it is not allowed to export after select, which is very difficult to use, so we might as well write one ourselves:
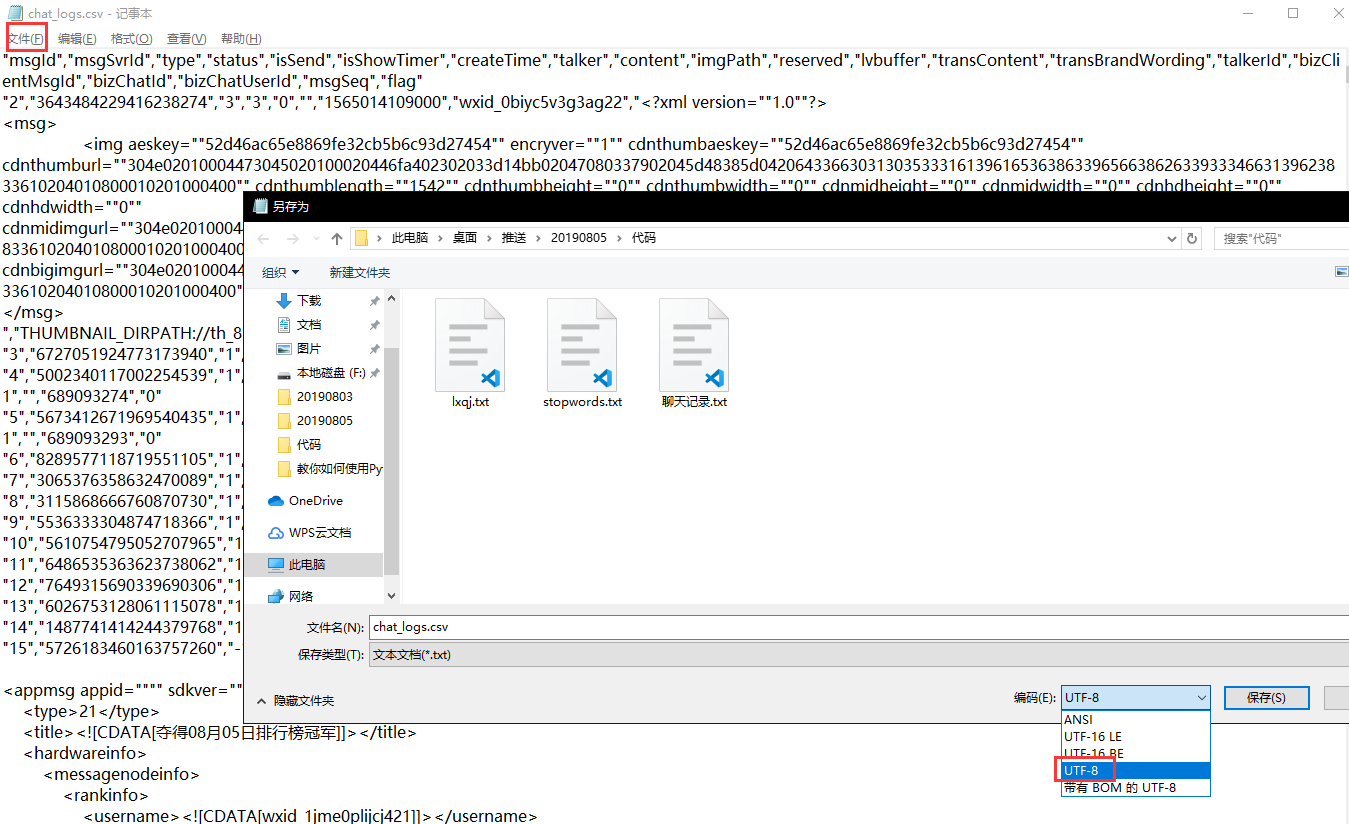
What I don't know in the learning process
python Study qun,855408893
//There are good learning video tutorials, development tools and e-books in the group.
//Share with you the current talent needs of python enterprises and how to learn python from scratch, and what to learn

#!/usr/bin/python
import pandas
import csv, sqlite3
conn= sqlite3.connect('chat_log.db')
# Create a new database as chat log.db
df = pandas.read_csv('chat_logs.csv', sep=",")
# Read the csv file we extracted in the previous step, and change it to your own file name here
df.to_sql('my_chat', conn, if_exists='append', index=False)
# Save to my chat table

conn = sqlite3.connect('chat_log.db')
# Connect to database
cursor = conn.cursor()
# Get cursor
cursor.execute('select content from my_chat where length(content)<30')
# Limit the content length to less than 30, because sometimes there is something sent by wechat in content
value=cursor.fetchall()
# fetchall returns filter results

data=open("Chat record.txt",'w+',encoding='utf-8')
for i in value:
    data.write(i[0]+'\n')
# Write filter results to chat.txt

data.close()
cursor.close()
conn.close()
# Close connection
Remember to convert the encoding format of the csv file to utf-8, otherwise it may not run:
You can also use regular expressions to remove the following
- Wechat data: wxid*
- Expression: [. *]
But I think it's also one of the necessary chat information. It's OK to keep it, so I won't join in here
The final text format is line by line chat content, after processing, we are ready to enter the next link! That's exciting! Generative word cloud
Step 2: generate word cloud according to the chat data obtained in step 1
1. Import our chat records and segment each line
Chat record is a sentence line by line. We need to use word segmentation tool to decompose the sentence line by line into an array of words. At this time, we need to use stammer participle.
After segmentation, we need to remove some mood words, punctuation marks, etc. (stop words), and then we need to customize some dictionaries. For example, if you love each other, the common stuttering participles cannot be recognized, and you need to define them by yourself. For example, don't catch a cold, the common segmentation result is
Little / fool / don't / cold /
If you add "little fool" to the custom dictionary (mywords.txt in our example below), the result of segmentation will be
Little fool / don't / have a cold /
Let's segment our chat records as follows:
# segment.py
import jieba
import codecs
def load_file_segment():
    # Read text file and segment words
    jieba.load_userdict("mywords.txt")
    # Load our own dictionary
    f = codecs.open(u"Chat record.txt",'r',encoding='utf-8')
    # Open file
    content = f.read()
    # Read the file to content
    f.close()
    # Close file
    segment=[]
    # Save segmentation results
    segs=jieba.cut(content)
    # Participle the whole
    for seg in segs:
        if len(seg) > 1 and seg != '\r\n':
            # If the result of word segmentation is not a single word and is not a line break, it is added to the array
            segment.append(seg)
    return segment
print(load_file_segment())
In this function, we use codecs to open our chat record file, and then make word segmentation, and finally return an array containing all words. Remember to install the jieba word segmentation package before running. By default, you have installed Python 3
windows opens CMD / Mac OS system opens Terminal input:
pip install jieba
After the installation, input our python code in the editor, and I will name it segment.py. Remember to place the chat record.txt and the custom vocabulary mywords.txt in the same directory, and then enter the command in CMD/Terminal to run
python segment.py
You can see the effect of word segmentation in your chat record
2. Calculate the corresponding frequency of words after segmentation
To facilitate the calculation, we need to introduce a package called pandas, and then to calculate the number of each word, we need to introduce a package called numpy. In cmd/terminal, enter the following command to install pandas and numpy:
- pip install pandas
- pip install numpy
I have written the detailed analysis in the notes below. You can read and practice by yourself. However, it should be noted that the function in the first step is load file segment(). If you don't know how to combine the two steps, it doesn't matter. Finally, we will provide a complete code
import pandas
import numpy
def get_words_count_dict():
    segment = load_file_segment()
    # Get word segmentation results
    df = pandas.DataFrame({'segment':segment})
    # Convert word segmentation array to pandas data structure
    stopwords = pandas.read_csv("stopwords.txt",index_col=False,quoting=3,sep="\t",names=['stopword'],encoding="utf-8")
    # Load stop words
    df = df[~df.segment.isin(stopwords.stopword)]
    # If not in the stop word
    words_count = df.groupby(by=['segment'])['segment'].agg({"count":numpy.size})
    # Group by words, count the number of each word
    words_count = words_count.reset_index().sort_values(by="count",ascending=False)
    # reset_index is to keep segment field, sort, and the large number is in front
    return words_count
print(get_words_count_dict())
As in the first step, you can see each word and its corresponding frequency by running this code. It should be noted that there is an operation to load the stop words. You need to put the stop words list in the current folder. We provide a download of the stop words list: stopwords.txt
3. Generate word cloud
It's finally the last part! Are you happy and excited (funny, before this step starts, we need to install the packages we need to use, including:
- pip install matplot
- pip install scipy
- pip install wordcloud
Open CMD/Terminal and enter the above command to install. In addition, the package of the previous two steps includes:
- pip install jieba
- pip install codecs
- pip install pandas
- pip install numpy
If you have any questions during the installation of these packages, please remember to put forward them in the comment area below, and we will answer them one by one.
The file structure of the running directory is as follows:
- Chat.txt
- mywords.txt (can be blank if you don't have a custom word)
- stopwords.txt
- wordCloud.py
- ai.jpg (it can be any picture, just like it)
The complete code, wordCloud.py, is as follows with detailed analysis:
What I don't know in the learning process
python Study qun,855408893
//There are good learning video tutorials, development tools and e-books in the group.
//Share with you the current talent needs of python enterprises and how to learn python from scratch, and what to learn

# coding:utf-8
import jieba
import numpy
import codecs
import pandas
import matplotlib.pyplot as plt
from scipy.misc import imread
import matplotlib.pyplot as plt
from wordcloud import WordCloud, ImageColorGenerator
from wordcloud import WordCloud

def load_file_segment():
    # Read text file and segment words
    jieba.load_userdict("mywords.txt")
    # Load our own dictionary
    f = codecs.open(u"Chat record.txt",'r',encoding='utf-8')
    # Open file
    content = f.read()
    # Read the file to content
    f.close()
    # Close file
    segment=[]
    # Save segmentation results
    segs=jieba.cut(content)
    # Participle the whole
    for seg in segs:
        if len(seg) > 1 and seg != '\r\n':
            # If the result of word segmentation is not a single word and is not a line break, it is added to the array
            segment.append(seg)
    return segment

def get_words_count_dict():
    segment = load_file_segment()
    # Get word segmentation results
    df = pandas.DataFrame({'segment':segment})
    # Convert word segmentation array to pandas data structure
    stopwords = pandas.read_csv("stopwords.txt",index_col=False,quoting=3,sep="\t",names=['stopword'],encoding="utf-8")
    # Load stop words
    df = df[~df.segment.isin(stopwords.stopword)]
    # If not in the stop word
    words_count = df.groupby(by=['segment'])['segment'].agg({"count":numpy.size})
    # Group by words, count the number of each word
    words_count = words_count.reset_index().sort_values(by="count",ascending=False)
    # reset_index is to keep segment field, sort, and the large number is in front
    return words_count

words_count = get_words_count_dict()
# Get words and frequency

bimg = imread('ai.jpg')
# Read the template image we want to generate word cloud
wordcloud = WordCloud(background_color='white', mask=bimg, font_path='simhei.ttf')
# Get the word cloud object, set the word cloud background color and its pictures and fonts

# If your background color is transparent, please replace the above two sentences with these two sentences
# bimg = imread('ai.png')
# wordcloud = WordCloud(background_color=None, mode='RGBA', mask=bimg, font_path='simhei.ttf')

words = words_count.set_index("segment").to_dict()
# Turn words and frequencies into Dictionaries
wordcloud = wordcloud.fit_words(words["count"])
# Mapping words and frequencies to word cloud objects
bimgColors = ImageColorGenerator(bimg)
# Generate color
plt.axis("off")
# Close axis
plt.imshow(wordcloud.recolor(color_func=bimgColors))
# Paint color
plt.show()
It is worth noting that the generation of bimg and wordcloud objects in this file. We know that the background of png format is generally transparent, so if your image is in png format, the background color should be set to None when generating word cloud, and then mode should be set to RGBA.
We can also control the size and number of word cloud fonts, using the following two parameters:
max_font_size=60, max_words=3000
Put it into wordcloud = WordCloud(background_color='white', mask=bimg, max_font_size=60, max_words=3000, font_path='simhei.ttf')
Before running, make sure that all the packages are installed and all the files we need are in the current directory
Now we can use our chat record to draw heart-shaped words!!!
CMD/Terminal enter the code folder, run: python wordcloud.py
The resulting image is as follows:


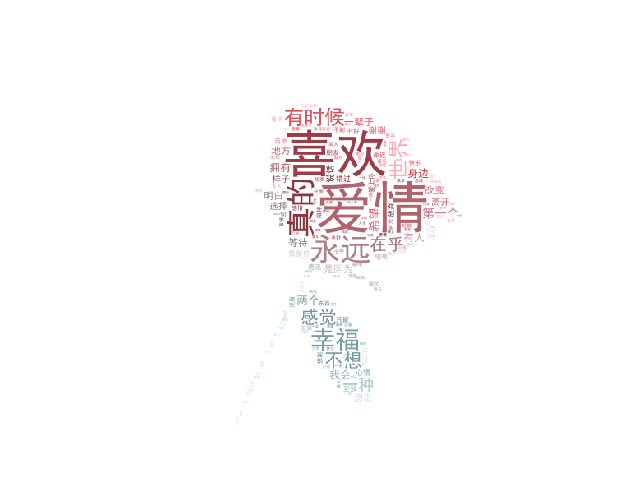

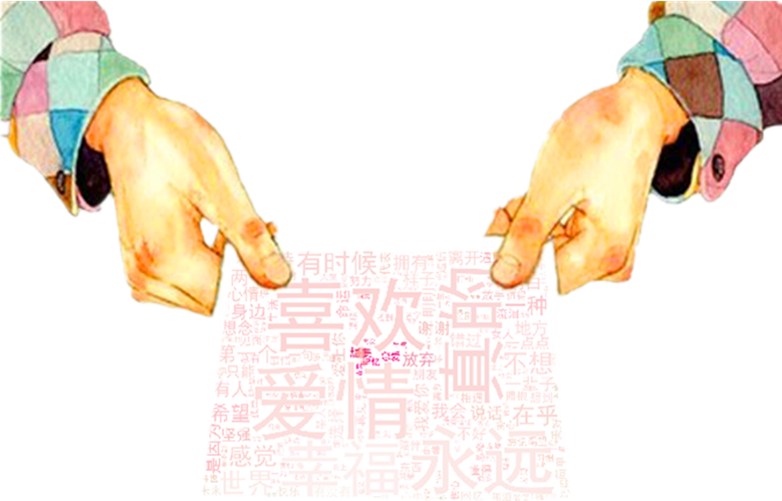
Do you like it? Take it if you like!
Finally, I wish you all a lover!
In order to solve the learning difficulties of beginners, the specially established Python learning buckle QUN: ⑧ ⑤ ⑤ - ④ zero ⑧ - ⑧ ⑨ ③ from zero foundation to practical project tutorials, development tools and e-books in various fields of Python. Share with you the current needs of enterprises for Python talents and learn Python's efficient skills. Keep updating the latest tutorials!