##Install elasticsearch on linux 1. Download elasticsearch
Go directly to the official website of elasticsearch and download the latest installation package: https://www.elastic.co/downloads/elasticsearch, this tutorial uses version 5.1.1. 2, Install elasticsearch
Upload the downloaded installation package to centos, or download it directly from centos using wget command. 1. Unzip
unzip elasticsearch-5.1.1.zip
2. Install jdk1.8
To install elastic search, the official recommendation is to use jdk1.8, so install and deploy jdk first. For the deployment of jdk, please refer to other materials on the Internet. 3. Operation
cd bin
./elasticsearch
There may be errors. The common errors are listed below: (1) elasticsearch cannot be run with root permission, which will occur:
Exception in thread "main" java.lang.RuntimeException: don't run elasticsearch as root.
Because the security problem elasticsearch does not allow the root user to run directly, create a new user solution:
Step 1: liunx creates a new user, adduser XXX, and then adds the password to the created user, passwd XXX, and enters the password twice. Step 2: switch the user su XXX you just created and execute elasticsearch to show that the Permission denied permission is insufficient. Step 3: assign permissions to the new XXX. chmod 777 * this is not OK, because this user does not have permissions and is sure that he cannot pay permissions to himself. Therefore, the root user should be used to log in and pay the permission. Step 4: root gives permission to XXX, chown -R XXX / your elasticsearch installation directory.
In linux cluster configuration, you may need to configure the maximum number of processes and cache size of linux. Please refer to the error reporting during personal installation and pay attention to the error reporting!!! Modify the following data as follows. The data may be different depending on the version
 vi /etc/security/limits.conf

Add the following:
*  soft nofile 65536

* hard nofile 131072

* soft nproc 2048

* hard nproc 4096


2 vi /etc/security/limits.d/90-nproc.conf

Find the following:

* soft nproc 1024

Change to

* soft nproc 2048

3 vi /etc/sysctl.conf

Add the following configuration:

vm.max_map_count=655360

And execute the command:

sysctl -p

4. Number of open files, which should be greater than 65535
 ulimit -n 65536
elasticsearch.yml file configuration:
cluster.name:  elasticsearch
#This is the cluster name. We call it elastic search
#After es is started, nodes with the same cluster name will be placed under one cluster.

node.name: "es-node1"
#Node name.

discovery.zen.minimum_master_nodes: 2
#Specifies that there are several master qualified nodes in the nodes in the cluster.
#You can write more than three for a large cluster.

discovery.zen.ping.timeout: 40s

#The default value is 3s, which is the timeout of ping connection when other nodes are automatically found in the cluster,

discovery.zen.ping.multicast.enabled: false
#Set whether to open the multicast discovery node. The default is true.

network.bind_host: 192.168.137.100
#Set the bound IP address. This is the IP address of my master virtual machine.

network.publish_host: 192.168.137.100
#Set the ip address that other nodes interact with the node.

network.host: 192.168.137.100
#Set the above two parameters of bind host and publish host at the same time.

discovery.zen.ping.unicast.hosts: ["192.168.137.100",  "192.168.137.101","192.168.137.100: 9301"]
#discovery.zen.ping.unicast.hosts: ["ip of node 1", "ip of node 2", "ip of node 3"]
#Indicates the ip address of other nodes in the cluster that may be the master,
#In case the es fails to discover other nodes in the cluster after startup.
#The first pair of quotation marks is node1, and the default port is 9300,
#The second is node2. On the other machine,
#The third quotation mark is node3, because it is on the same machine as node1, so port 9301 is specified.

http.cors.enabled: true
http.cors.allow-origin: "*"
head Configuration required by plug-in   head Accessible elasticsearch
##Install and download node.js for the head plug-in at: https://nodejs.org/en/
Install the node to disk D. For example, D:\nodejs.
Set node home to the environment variable (the installation package can also automatically add the PATH environment variable). Test whether the node is effective:
Install grunt
Grunt is a very convenient build tool, which can package, compress, test, execute and so on. The head plug-in in 5.0 is started by grunt. So you need to install grunt:
Note: cut the path to D:\nodejs.
npm install -g grunt-cli
-g represents a global installation. The installation PATH is C:\Users\yourname\AppData\Roaming\npm, and the PATH variable is added automatically. Check after installation:
Put the source code git clone of the head plug-in down:
git clone git://github.com/mobz/elasticsearch-head.git
The effect is as follows:
Modify head source code
Because the head code is still version 2.6, there are many restrictions on direct execution, such as no cross machine access. Therefore, users need to modify two places:
Directory: head/Gruntfile.js: copy code
connect: {
    server: {
        options: {
            port: 9100,
            hostname: '*',
            base: '.',
            keepalive: true
        }
    }
}
Copy code
Add the hostname property and set it to * to modify the connection address:
Directory: head / [site / app.js
Modify the connection address of the head:
this.base_uri = this.config.base_uri || this.prefs.get("app-base_uri") || "http://localhost:9200";

//Change localhost to the server address of your es, such as:

this.base_uri = this.config.base_uri || this.prefs.get("app-base_uri") || "http://10.10.10.10:9200";
Then in the head source directory, execute npm install to download the package:
npm install
If an error is reported here, change the image of npm to that of Taobao. 1. Use the config command
npm config set registry https://registry.npm.taobao.org
npm info underscore (If the above configuration is correct, this command will have a string response)
And then in the
npm install
After the previous step is completed
grunt server
Next, you can open localhost:9100 (or native ip:9100) on the browser to run the head plug-in
|Use curl on centos to insert data into elastic search in the correct format
curl -H "Content-Type: application/json" -XPOST 192.168.14.173:32000/test_index_1221/test_type/5 -d '{"user_name":"xiaoming"}'
##Using curl to insert data into elastic search on windows
curl -H "Content-Type: application/json" -XPOST 192.168.14.173:32000/test_index_1221/test_type/5 -d "{"""user_name""":"""xiaoming"""}"
##spring boot integrates elastic search
application.properties configuration
//Open the Elasticsearch warehouse. (default: true. )
spring.data.elasticsearch.repositories.enabled = true
//Address of the cluster
spring.data.elasticsearch.cluster-nodes =192.168.175.131:9300

//Cluster name. (default: elasticsearch)
spring.data.elasticsearch.cluster-name= es
pom.xml dependency
	<dependency>
            <groupId>org.springframework.boot</groupId>
            <artifactId>spring-boot-starter-data-elasticsearch</artifactId>
    </dependency>
<dependency>
	<groupId>org.springframework.boot</groupId>
	<artifactId>spring-boot-starter-web</artifactId>
</dependency>
controller class:
package com.example.demo;

import com.example.demo.User;
import com.example.demo.dom;

import org.springframework.beans.factory.annotation.Autowired;

import org.springframework.web.bind.annotation.GetMapping;
import org.springframework.web.bind.annotation.ResponseBody;
import org.springframework.web.bind.annotation.RestController;


@RestController
public class controller {

    @Autowired
    private dom userRepository;
    @ResponseBody
    //http://localhost:8888/save
    @GetMapping("save")
    public String save(){
        User user = new User(System.currentTimeMillis(),"commodity","This is a test product",15,"2018-4-25 11:07:42");
        userRepository.save(user);
        return "success";
    }

    //http://localhost:8888/delete?id=1525415333329
    @GetMapping("delete")
    public String delete(long id){
    	userRepository.deleteById(id);
        return "success";
    }

    //Http: / / localhost: 8888 / update? Id = 1525417362754 & name = modify & Description = modify
    @GetMapping("update")
    public String update(long id,String name,String description,Integer age,String createtm){
    	User user = new User(id,
                name,description,age,createtm);
    	userRepository.save(user);
        return "success";
    }


}
dom class inherits ElasticsearchRepository:
package com.example.demo;

import org.springframework.data.elasticsearch.repository.ElasticsearchRepository;
import org.springframework.stereotype.Component;

import com.example.demo.User;

@Component
public interface dom extends ElasticsearchRepository<User, Long>{

}
User class:
package com.example.demo;

import java.io.Serializable;

import org.springframework.data.elasticsearch.annotations.Document;

@Document(indexName = "q1", type = "user")
public class User implements Serializable {
	private static final long serialVersionUID = 1L;
	/** number */
	 private Long id;
	 /** Full name */
	 private String name;

	 /** Age */
	 private Integer age;

	 /** describe */
	 private String description;

	 /** Creation time */
	 private String createtm;

	public Long getId() {
		return id;
	}

	public void setId(Long id) {
		this.id = id;
	}

	public String getName() {
		return name;
	}

	public void setName(String name) {
		this.name = name;
	}

	public Integer getAge() {
		return age;
	}

	public void setAge(Integer age) {
		this.age = age;
	}

	public String getDescription() {
		return description;
	}

	public void setDescription(String description) {
		this.description = description;
	}

	public String getCreatetm() {
		return createtm;
	}

	public void setCreatetm(String createtm) {
		this.createtm = createtm;
	}

	public static long getSerialversionuid() {
		return serialVersionUID;
	}
	 public User(Long id, String name, String description,Integer age,String createtm) {
	        this.id = id;
	        this.name = name;
	        this.description = description;
	        this.age=age;
	        this.createtm=createtm;
	    }


}
Then enter localhost:8080/save in the browser
The browser will display success and see the following data in the head 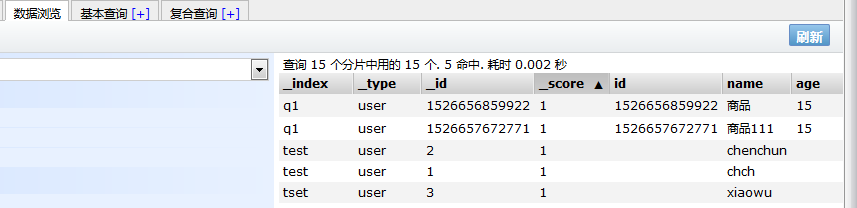 The integration of spring boot is successful!
=
=======================================================================================