1. License plate recognition project installation
https://blog.csdn.net/lilai619/article/details/79695109
1.git clone's latest documents
cd /opt/deploy
git clone  https://github.com/sergiomsilva/alpr-unconstrained.git
2. Download the pre training model
 cd alpr-unconstrained/
 bash get-networks.sh
3. Delete the project's own darknet and replace it with the official own darknet
rm -rf darknet
git clone https://github.com/pjreddie/darknet
4. Change the official darknet support gpu and make because my cudn driver is installed in the default location, I only need to change three places
cd darknet/
vim Makefile

//Will be the first1,2Supported for lines GPU
GPU=0
CUDNN=0
//Revised to:
GPU=1
CUDNN=1

//take24Line support cudnn
NVCC=nvcc
//Revised to:
NVCC=/usr/local/cuda/bin/nvcc

:wq
5. compilation
Make all-j6 adjust according to its own core number
6. Re enter the home directory
cd /opt/alpr-unconstrained
cp -R data/* darknet/data/
7. Change the names file
vim data/ocr/ocr-net.names

0
1
2
3
4
5
6
7
8
9
A
B
C
D
E
F
G
H
I
J
K
L
M
N
P
Q
R
S
T
U
V
W
X
Y
Z
 Beijing
 Shanghai
 Tianjin
 Chongqing
 Hebei
 Jin Dynasty
 Meng
 Liao
 Luck
 black
 Soviet
 Zhejiang
 Wan
 Fujian
 short name for Jiangxi province
 Lu
 Yu
 Hubei
 Xiang
 Guangdong
 GUI
 Joan
 Chuan
 Expensive
 cloud
 hide
 Shaanxi Province
 Gan
 young
 Ning
 new
8. Modify the location of corresponding training files
vim data/ocr/ocr-net.data

classes=66
names=data/ocr/ocr-net.names
train=data/ocr/train.txt
backup=data/ocr/output
9. Create output directory
mkdir -p data/ocr/output
10. Modify the layers and training parameters of the CFG network layer
cp /opt/deploy/darknet/cfg/yolov3.cfg data/ocr/ocr-net.cfg

vim data/ocr/ocr-net.cfg

//Specify the cfg part according to its GPU and memory

//During the training3,4Supported for lines GPU
batch=64
subdivisions=4

[net]
# Testing
# batch=1
# subdivisions=1
# Training
 batch=64
 subdivisions=8

......

[convolutional]
size=1
stride=1
pad=1
filters=33###75

activation=linear

[yolo]
mask = 6,7,8
anchors = 10,13,  16,30,  33,23,  30,61,  62,45,  59,119,  116,90,  156,198,  373,326
classes=6###20
num=9
jitter=.3
ignore_thresh = .5
truth_thresh = 1
random=0###1

......

[convolutional]
size=1
stride=1
pad=1
filters=33###75
activation=linear

[yolo]
mask = 3,4,5
anchors = 10,13,  16,30,  33,23,  30,61,  62,45,  59,119,  116,90,  156,198,  373,326
classes=6###20
num=9
jitter=.3
ignore_thresh = .5
truth_thresh = 1
random=0###1

......

[convolutional]
size=1
stride=1
pad=1
filters=33###75
activation=linear

[yolo]
mask = 0,1,2
anchors = 10,13,  16,30,  33,23,  30,61,  62,45,  59,119,  116,90,  156,198,  373,326
classes=6###20
num=9
jitter=.3
ignore_thresh = .5
truth_thresh = 1
random=0###1
------
filters How is the number calculated: 3 x(classes Number+5),It is related to the number distribution of clusters, which is explained in the paper;
//For example, I have66Class then 3* (66+5)=213
2. Method of license plate correction
Reference: https://github.com/zeuses/hyperlpr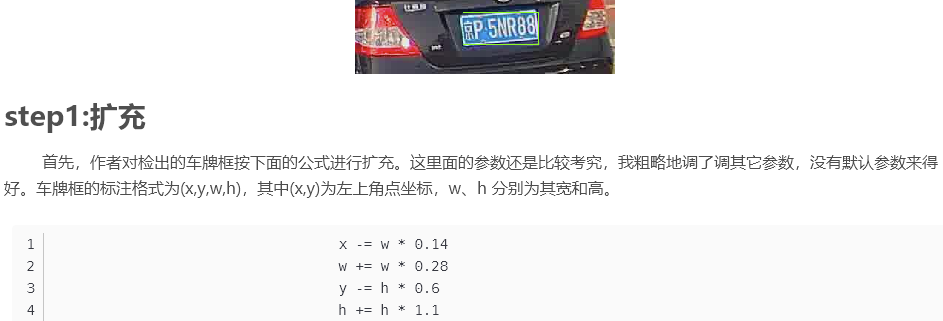
Part of the source code (I added some comments)
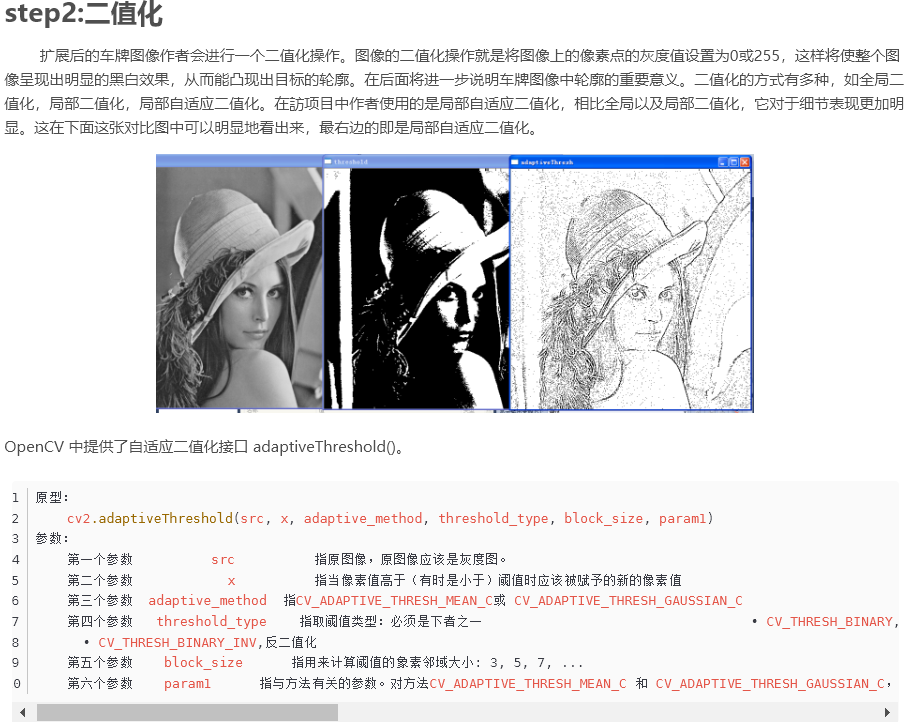
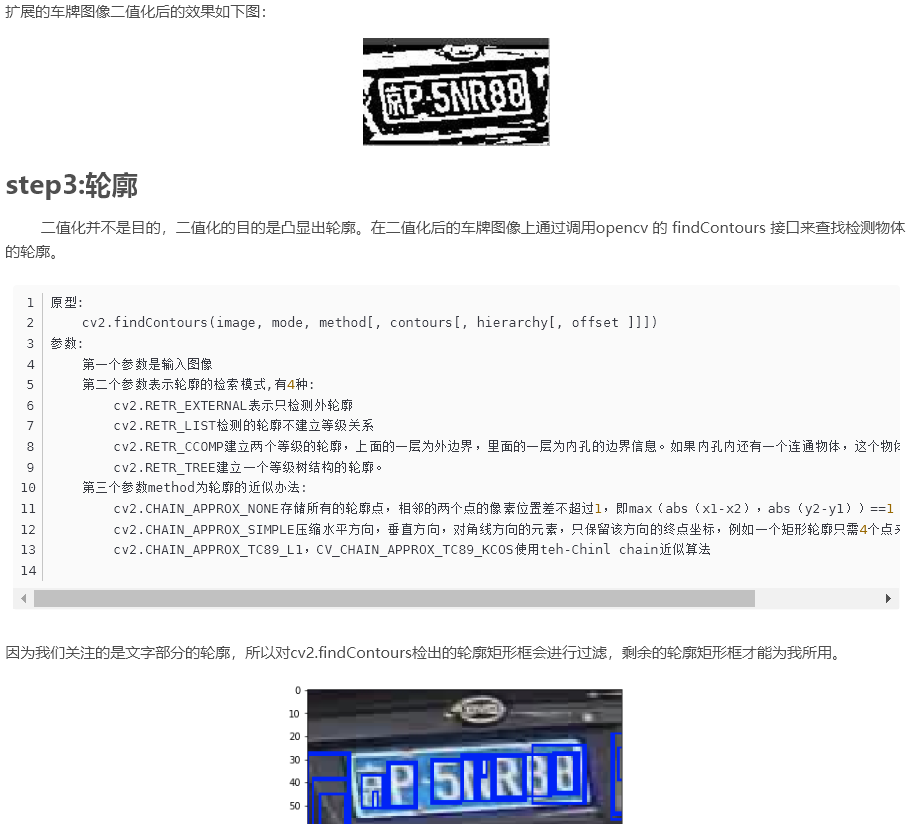
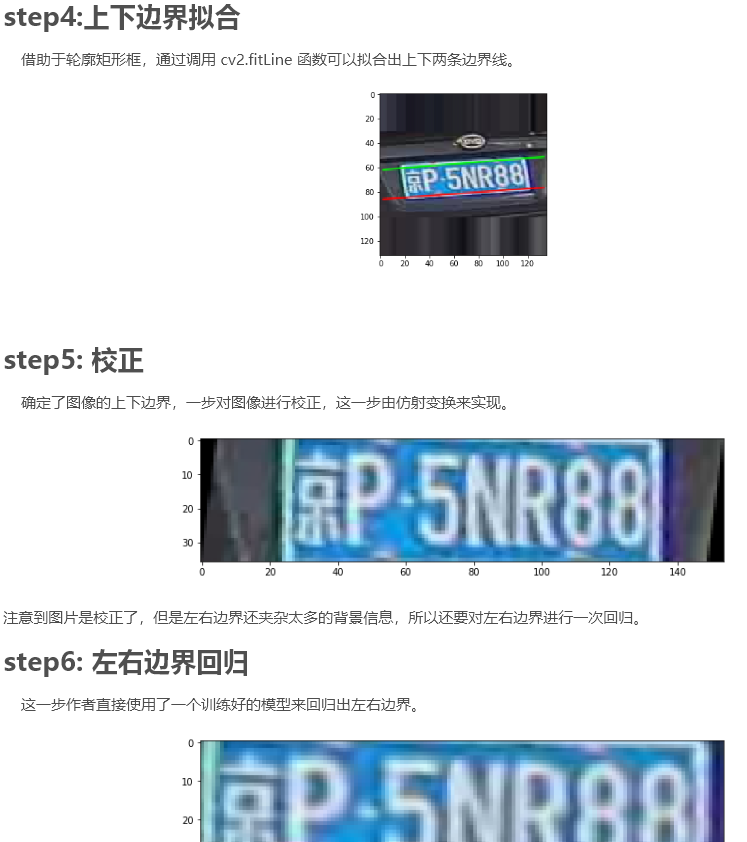
def findContoursAndDrawBoundingBox(image_rgb):


    line_upper  = [];
    line_lower = [];

    line_experiment = []
    grouped_rects = []
    gray_image = cv2.cvtColor(image_rgb,cv2.COLOR_BGR2GRAY)

    # for k in np.linspace(-1.5, -0.2,10):
    for k in np.linspace(-50, 0, 15):

        # thresh_niblack = threshold_niblack(gray_image, window_size=21, k=k)
        # binary_niblack = gray_image > thresh_niblack
        # binary_niblack = binary_niblack.astype(np.uint8) * 255

        # When different parts of an image have different brightness, we need to adopt adaptive threshold, which is calculated according to each small area of the image
        # Therefore, different thresholds are used in different areas of the same image, so that we can get better results under different brightness
        """
        Args:
         - src, Original image,It should be grayscale
         -  x, When the pixel value is higher than(Sometimes below)Threshold should be given a new pixel value, 255 It's white.
         - adaptive_method, CV_ADAPTIVE_THRESH_MEAN_C or CV_ADAPTIVE_THRESH_GAUSSIAN_C
         - threshold_type: Index threshold type
          . CV_THRESH_BINARY, Binary thresholding
          . CV_THRESH_BINARY_INV, Anti binary thresholding
         - block_size: Pixel neighborhood size used to calculate threshold(Block size):3,5,7,...
         - param1: Parameter related to method.Method for CV_ADAPTIVE_THRESH_MEAN_C and CV_ADAPTIVE_THRESH_GAUSSIAN_C,It is a constant extracted from mean or weighted mean,Although it can be negative.
          . Method for CV_ADAPTIVE_THRESH_MEAN_C,Find the average value in the block first, and then subtract it param1.
          . Method for CV_ADAPTIVE_THRESH_GAUSSIAN_C ,First find the weighted sum in the block(gaussian), Lose again param1.
        """
        binary_niblack = cv2.adaptiveThreshold(gray_image,255,cv2.ADAPTIVE_THRESH_MEAN_C,cv2.THRESH_BINARY,17,k) #Is neighborhood size 17 too big??
        #cv2.imshow("image1",binary_niblack)
        #cv2.waitKey(0)
        #imagex, contours, hierarchy = cv2.findContours(binary_niblack.copy(),cv2.RETR_EXTERNAL,cv2.CHAIN_APPROX_SIMPLE)
        contours, hierarchy = cv2.findContours(binary_niblack.copy(),cv2.RETR_EXTERNAL,cv2.CHAIN_APPROX_SIMPLE)  # modified by bigz
        for contour in contours:
            #Using the smallest rectangle, wrap the shapes you find
            bdbox = cv2.boundingRect(contour)
            if (bdbox[3]/float(bdbox[2])>0.7 and bdbox[3]*bdbox[2]>100 and bdbox[3]*bdbox[2]<1200) or (bdbox[3]/float(bdbox[2])>3 and bdbox[3]*bdbox[2]<100):
                # cv2.rectangle(rgb,(bdbox[0],bdbox[1]),(bdbox[0]+bdbox[2],bdbox[1]+bdbox[3]),(255,0,0),1)
                line_upper.append([bdbox[0],bdbox[1]])
                line_lower.append([bdbox[0]+bdbox[2],bdbox[1]+bdbox[3]])

                line_experiment.append([bdbox[0],bdbox[1]])
                line_experiment.append([bdbox[0]+bdbox[2],bdbox[1]+bdbox[3]])
                # grouped_rects.append(bdbox)

    """
    //If you want to create an edge around an image, you can use an access function, which is often used in convolution or zero filling
    Args:
     - src: input image
     - top,bottom,left,right Number of pixels corresponding to the boundary
     - borderType: What type of boundary do you want to add
       - BORDER_CONSTANT #Fixed pixel value is used for edge filling, for example, 0 is used for black edge filling, and 255 is used for white edge filling
       - BORDER_REPLICATE #Fill with the pixels of the corresponding edge of the original image, which seems to have the effect of "pasting" the edge of the image
    """
    rgb = cv2.copyMakeBorder(image_rgb,30,30,0,0,cv2.BORDER_REPLICATE)
    leftyA, rightyA = fitLine_ransac(np.array(line_lower),3)
    rows,cols = rgb.shape[:2]

    # rgb = cv2.line(rgb, (cols - 1, rightyA), (0, leftyA), (0, 0, 255), 1,cv2.LINE_AA)

    leftyB, rightyB = fitLine_ransac(np.array(line_upper),-3)

    rows,cols = rgb.shape[:2]

    # rgb = cv2.line(rgb, (cols - 1, rightyB), (0, leftyB), (0,255, 0), 1,cv2.LINE_AA)
    pts_map1  = np.float32([[cols - 1, rightyA], [0, leftyA],[cols - 1, rightyB], [0, leftyB]])
    pts_map2 = np.float32([[136,36],[0,36],[136,0],[0,0]])
    mat = cv2.getPerspectiveTransform(pts_map1,pts_map2)
    image = cv2.warpPerspective(rgb,mat,(136,36),flags=cv2.INTER_CUBIC)
    #Correction angle
    #cv2.imshow("before correction", image)
    #cv2.waitKey(0)
    image,M = deskew.fastDeskew(image)
    #cv2.imshow("after correction", image)
    #cv2.waitKey(0)
    return image


Published 37 original articles, won praise 112, visited 20000+