Verify the Python blog from 0 on, and I don't know what I want to verify.Write whatever you think.First set up the official blog.Record a hole in the middle. Official address
1. Preparation:
	Tools: pycharm+Anacondar
	Environment: Django3+python3.8
2. Create a project:
	pycharm->file->new project->Django
					->Location Set Project Path+entry name
						  Exsiting interpreter Set up the environment directory, which is used here Anaconda Then create your own environment and find"envs/Environment Name/python.exe"
						  Application name Set to"blog"
	//The directory structure is as follows
	blog                #APP Application Name and Directory
	│  admin.py        #Apply background management profile accordingly.
	│  apps.py         #Configuration file for the corresponding application.
	│  models.py       #Data module, database design is designed in this file.Key Explanations Following
	│  tests.py        #Automated test module, where you can write test scripts Automated test
	│  views.py        #View file used to execute response code.All you see in your browser is what it does.
	│  __init__.py
	│
	├─migrations        #Data migration, text catalog migration, record database operation records, content generation automatically.
	│  │  __init__.py
	myblog               #Project Configuration Directory
	│  __init__.py       #Initialize the file, normally without any modifications.
	│  settings.py        #The project configuration file, how to configure it, is described later.
	│  url.py             #The project URL settings file, which can be understood as a route, controls where you access it.
	│  wsgi.py          #For Python Server Gateway Interface, is the interface between Python and the WEB server.
	myblogvenv            #The virtual environment directory created by Pycharm is project-independent and does not need to be managed.
	templates           #Project template file directory, used to store template files
	manage.py     #Command line tools that allow you to interact with items and lines.Enter python manege.py help at the terminal to view the functionality.
3. Modify project configuration:
	stay myblog/settings.py file
	 1. ALLOWED_HOSTS = ['*']   #After modification, it means that any domain name can be accessed.If a domain name is specified, place the specified domain name in''
	 2. Set up TEMPLATES In'DIRS',Add Template Directory templates Path:'DIRS': [os.path.join(BASE_DIR, 'templates')]
	 3. The database is temporarily inactive and will be changed later
	 4. stay INSTALLED_APPS Add to APP Apply name:'blog.apps.BlogConfig',#Register APP Application
	 5. Modify project language and time zone:
	 	LANGUAGE_CODE = 'zh-hans' #Language Changed to Chinese
		TIME_ZONE = 'Asia/Shanghai' #
	 6.Create in the project root directory static and media,Two directories. static For storing templates CSS,JS,Static resources such as pictures, media Used to store uploaded files
	 STATIC_URL,Then add the following code to the next line:
		 	#Set static file directory and name
			STATIC_URL = '/static/'
		 	#Add the following code
		 	#This is the path to set the static folder directory
			 STATICFILES_DIRS = (
    		os.path.join(BASE_DIR, 'static'),
    		)
    		#Set file upload path, picture upload, file upload will be stored in this directory
    		MEDIA_URL = '/media/'
    		MEDIA_ROOT = os.path.join(BASE_DIR, 'media')
Django Blog Development Tutorial: Welcome Page
Click Terminal at the bottom left corner of Pycharm to launch a terminal window similar to the following: (startFromBlog) G:\PythonWorkspace\myblog>
4. Enter code for database migration:
python manage.py makemigrations
python manage.py migrate
The first command failed because no model was set
The second command executed successfully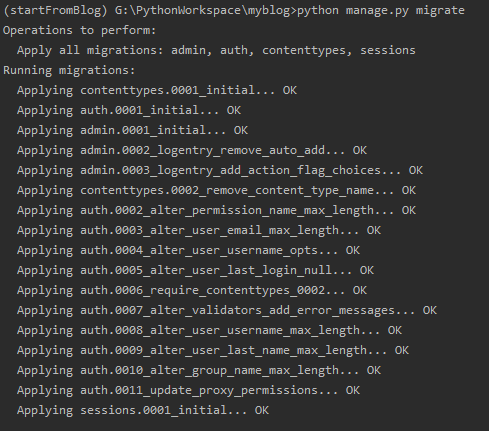
5. After data migration, a database file db.sqlite3 is automatically created in the site directory, which stores our data.
Then enter the following command to create an administrative account and password:
python manage.py createsuperuser
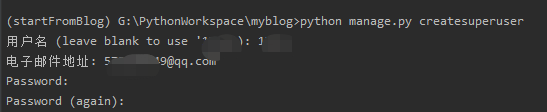
Note: The password should not be too simple or similar to e-mail, otherwise Django will have a risk alert.
Finally, we enter the following command to start our Django project:
python manage.py runserver #Use port 8000 by default
python manage.py runserver 8080 #Specify startup port
python manage.py runserver 127.0.0.1:9000 #Specify IP and Port
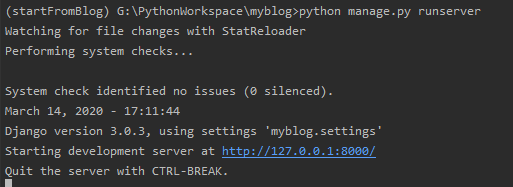
Prompt to start successfully, and then we enter in the browser: http://127.0.0.1:8000/
You can see Django's default welcome page!
After that, we can access in our browser: http://127.0.0.1:8000/admin to access the background management that comes with Django.
Enter the account number and password we just created and click Login.
Enter the management background, which is very powerful.We'll cover it in more detail later.

