Compile and install OpenCV
0-1. Uninstall opencv and opencv_contrib installed by pip or conda before installation:
pip uninstall opencv-contrib-python
pip uninstall opencv-python
0-2.install NumPY in Python environment first
pip install numpy
1. Download OpenCV source code: https://github.com/opencv/opencv,
And change to the corresponding version: git checkout 4.2.0
2. Download the opencv_contrib source code: https://github.com/opencv/opencv_contrib/,
And change to the corresponding version: git checkout 4.2.0
3. Download and install CMake: https://cmake.org/download/
4. When installing Visual Studio, check the C + + related environment.
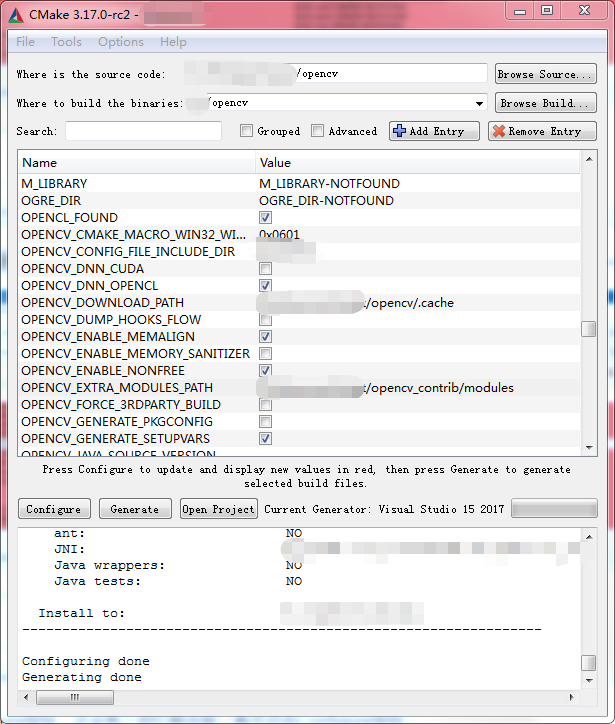
5. Open CMake, select the opencv source folder and the folder of the generated project.
6. Click the Configure button, select the corresponding Visual Studio version, and generate the configuration information.
7. Locate the opencv? Extra? Modules? Path option and select the opencv? Contrib / modules folder.
8. Find the python3? Execute option, and select the python.exe file.
9. Find the python3? Number? Include? Dirs option, and select the "Python path / lib / site packages / numpy / core / include" folder.
10. Find the python3? Library Option and select the "Python path / libs/python37.lib" file
11. Locate the python3? Packages? Path option and select the "Python path / lib / site packages" folder.
12. Locate the python3? Include? Dir option and select the "Python path / include" folder.
13. Check the open CV? Enable? Non free option.
14. Create a new build? Opencv? Python3 option and check it.
15. Create a new python3? Include? Path option, which is the same as the python3? Include? Dir value.
16. Create a new python3? Libraries option, which is the same as the python3? Library value.
17. Uncheck the "build" tests option.
18. Click Configure several times until all the red options turn white. Note that the log download is abnormal. If it is abnormal, you may need to download it manually and put it in the directory. cache folder.
19. Click Generate to Generate the project and open it with Visual Studio.
20. Select Release to regenerate the all build project.
21. Generate the INSTALL project, i.e. the installation is completed. cv2 folder will be generated under the "python path / lib / site packages /" folder. Please note whether the version number is wrong.

SIFT feature extraction
import cv2
import numpy as np
import time
import math
def fileToOpenCVImage(file_path):
'''OpenCV Read picture file(Chinese way)'''
nparr = np.fromfile(file_path, dtype=np.uint8)
opencv_img = cv2.imdecode(nparr, cv2.IMREAD_COLOR)
return opencv_img
def openCVImageToFile(file_path, opencv_img):
'''OpenCV Read picture file(Chinese way)'''
cv2.imencode('.jpg', opencv_img)[1].tofile(file_path)
# Read pictures
img1 = fileToOpenCVImage('./data/sift_img/Positive.jpg')
img2 = fileToOpenCVImage('./data/sift_img/side.jpg')
# size pictures
img1 = cv2.resize(img1, (800, 450))
img2 = cv2.resize(img2, (800, 450))
img1 = cv2.GaussianBlur(img1,(0,0),3)
img2 = cv2.GaussianBlur(img2,(0,0),3)
# Create SIFT object and detect 400 feature points
surf = cv2.xfeatures2d.SIFT_create(400)
# Extracting feature information of two graphs
start = time.time()
kp1, des1 = surf.detectAndCompute(img1, None)
kp2, des2 = surf.detectAndCompute(img2, None)
end = time.time()
print(len(kp1), len(kp2))
print('Feature time consuming:%.5f s' % (end-start))
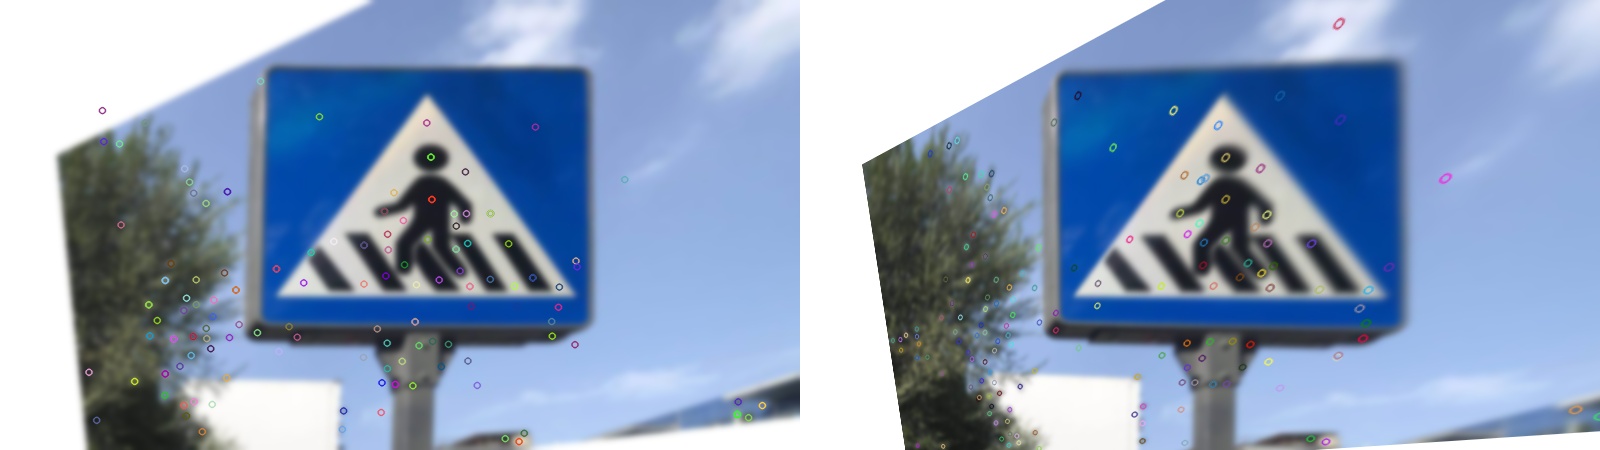
# Draw feature points
img1 = cv2.drawKeypoints(img1, kp1, img1)
img2 = cv2.drawKeypoints(img2, kp2, img2)
hmerge = np.hstack((img1, img2)) # Horizontal splicing
cv2.imshow("merge_img", hmerge) # Mosaic display
cv2.waitKey(0)
# BFMatcher matching feature
bf = cv2.BFMatcher()
start = time.time()
matches = bf.knnMatch(des1, des2, k=2)
end = time.time()
print('Matching time:%.5f s' % (end-start))
# Adjust ratio to filter out dense feature points according to distance proportion
good = []
for m, n in matches:
if m.distance/n.distance < 0.5:
good.append([m])
good.sort(key=lambda m: -m[0].distance)
# Draw unfiltered relationships
img_BFmatch = cv2.drawMatchesKnn(img1, kp1, img2, kp2, matches, None, flags=2)
cv2.imshow("BFmatch_all", img_BFmatch)
cv2.waitKey(0)
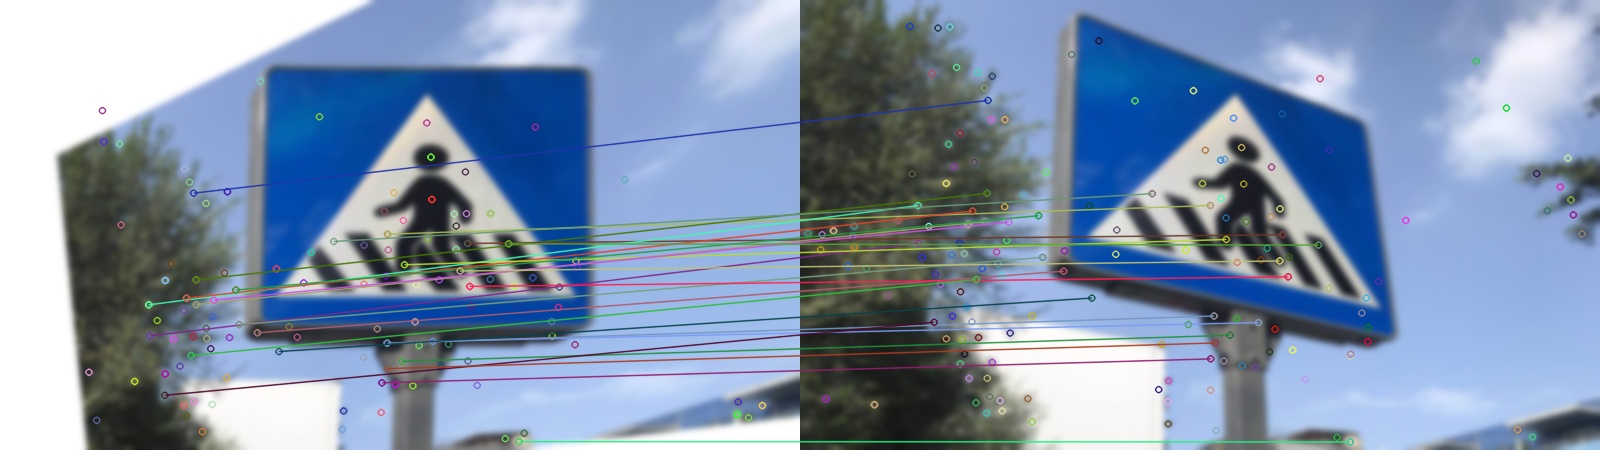
# Draw a filtered relationship
img_BFmatch = cv2.drawMatchesKnn(img1, kp1, img2, kp2, good, None, flags=2)
cv2.imshow("BFmatch_good", img_BFmatch)
cv2.waitKey(0)
cv2.destroyAllWindows()Perspective transformation to correct object direction
# Frontal coordinates
org = np.float32([[kp1[good[0][0].queryIdx].pt[0], kp1[good[0][0].queryIdx].pt[1]],
[kp1[good[1][0].queryIdx].pt[0], kp1[good[1][0].queryIdx].pt[1]],
[kp1[good[2][0].queryIdx].pt[0], kp1[good[2][0].queryIdx].pt[1]],
[kp1[good[3][0].queryIdx].pt[0], kp1[good[3][0].queryIdx].pt[1]]])
# Side coordinate
dst = np.float32([[kp2[good[0][0].trainIdx].pt[0], kp2[good[0][0].trainIdx].pt[1]],
[kp2[good[1][0].trainIdx].pt[0], kp2[good[1][0].trainIdx].pt[1]],
[kp2[good[2][0].trainIdx].pt[0], kp2[good[2][0].trainIdx].pt[1]],
[kp2[good[3][0].trainIdx].pt[0], kp2[good[3][0].trainIdx].pt[1]]])
print([kp1[good[0][0].queryIdx].pt[0], kp1[good[0][0].queryIdx].pt[1]],
[kp2[good[0][0].trainIdx].pt[0], kp2[good[0][0].trainIdx].pt[1]],
good[0][0].distance)
print(org)
print(dst)
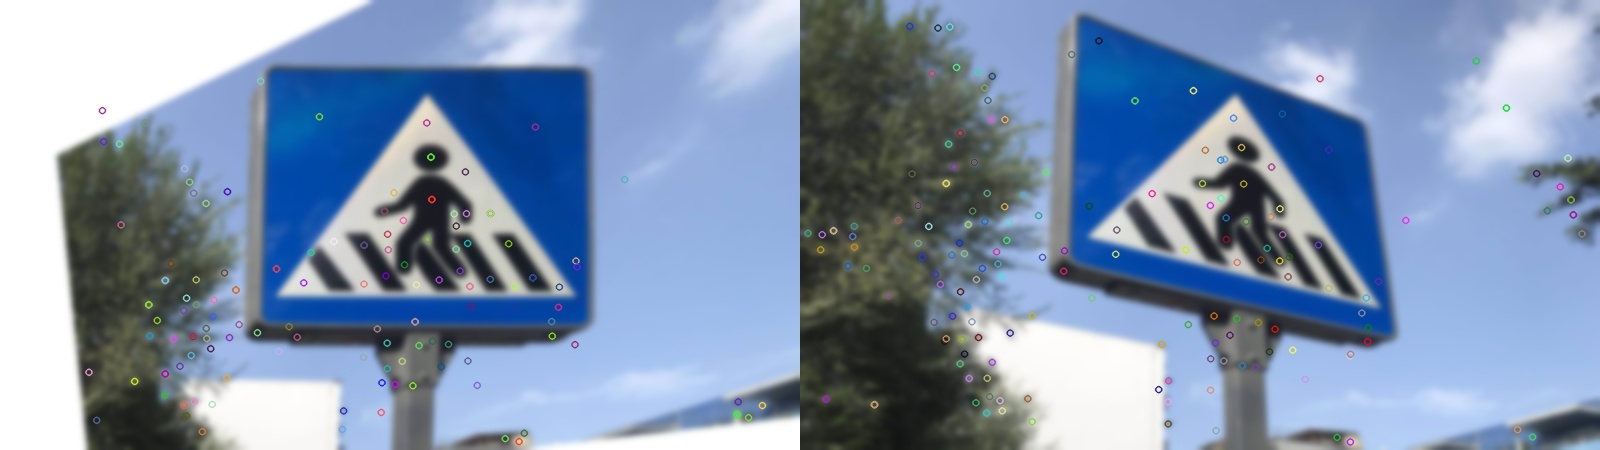
# Perspective transformation
warpM = cv2.getPerspectiveTransform(dst, org)
result_img = cv2.warpPerspective(
img2, warpM, (img2.shape[1], img2.shape[0]), borderValue=(255, 255, 255))
cv2.imshow("perspective_img", result_img)
cv2.waitKey(0)
# openCVImageToFile('./data/sift_img/c(450x800).jpg', result_img)
hmerge = np.hstack((img1, result_img)) # Horizontal splicing
cv2.imshow("merge_img", hmerge) # Mosaic display
cv2.waitKey(0)
SIFT feature points
Feature point matching
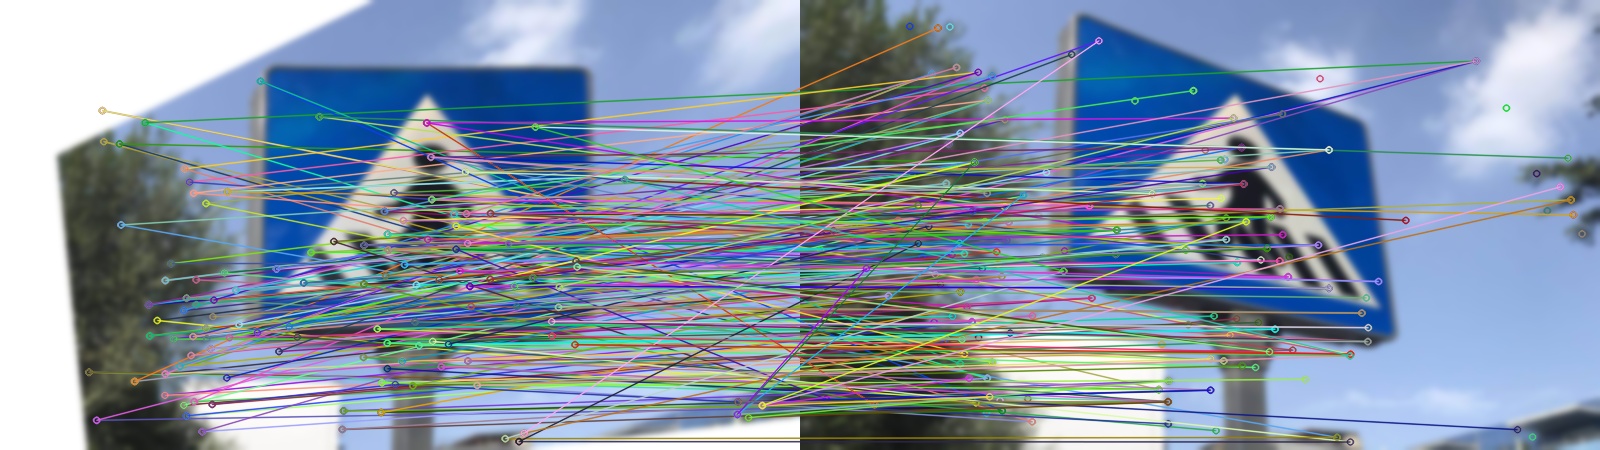
Screening matching
Perspective transformation (left: original front view, right: perspective transformed view)