Article directory
- 1, Struts 2 internationalization
- 2, Struts2 data verification framework
- 1. Steps of Struts2 data verification framework
- 2. Using validate method to verify data
- 3. Provide corresponding verification methods for each method
- 4. Using the validation framework to implement non coding validation for Action class
- 5. Using the validation framework to implement non coding validation for methods in Action classes
1, Struts 2 internationalization
1. Overview of struts 2 internationalization
(1) The international word, internationalization, is i18n. When an application is running, it can display different language interfaces according to the language of the country or region from which the client requests.
(2) Prerequisite knowledge:
① Locale: a class in java that represents the locale. Each locale object represents a specific region of geography, culture and language.
Codes of commonly used countries and languages:
ZH CN: Chinese - China
En US: English us
JA JP: Japanese Japan
Ko Kr: Korean Korea
Each browser has a default language and region. When the browser sends a request, the information is included in the request header and sent to the server together. With this information, the server can determine the language used by the client sending the request.
② ResourceBundle: a class in java that can save information in a resource file in the form of key value pairs similar to the Properties class.
(3) The internationalization of Struts2 depends on the i18n interceptor of Struts2. In this interceptor, the language used by the client sending the request will be judged. The text information required on the web page will be read from the corresponding resource file through the language code (the resource file needs to be provided by the developer), and the read information will be saved to the ResourceBundle together Class, finally use the tag library provided by struts 2 on the page to display the data in the ResourceBundle object on the page.
2. Internationalization of struts 2
(1) Developers need to provide a resource file for each Locale according to their own needs (need to internationalize the language types), which defines various text information in the web page. In order to facilitate the search of struts 2, a uniform resource file prefix name needs to be provided.
<constant name="struts.custom.i18n.resources" value="message" />
(2) If we want to provide internationalization for users in China and the United States, we need to provide two resource files in the src directory. The naming rule of the two resource files is the uniform prefix ﹣ language ﹣ country. properties. The same key is used to save data in the two resource files, but the value is defined in Chinese in one resource file. In addition A value defined in English. As follows:
message_zh_CN.properties:
username = user name
 Password = password
 Submit = submit
 Login= login
message_en_US.properties
username=username
password=password
submit=submit
login=login
(3) The struts 2 loading resource file is completed in the i18n interceptor. When we visit the jsp Web page, we must execute the i18n interceptor, so we must use Action to respond to a jsp, so that the jsp Web page request can also pass through the interceptor. The previous section talked about how to use a unified Aciton to respond to jsp requests, which can also be done here.
<constant name="struts.action.extension" value="action.jsp">
<package name="page" namespace="/page" extends="struts-default">
	<action name="*">
		<result>/WEB-INF/page/{1}.jsp</result>
	</action>
</package>
(4) Finally, we use the tag library of struts 2 to load the internationalized web page text information.
<%@ taglib prefix="s" uri="/struts-tags" %>

<s:text name="userName"></s:text>
In order to achieve internationalization in the above way, we must borrow the Struts2 tag library. However, the Struts2 tag library is rarely used in enterprises. Can we achieve internationalization without using the Struts2 tag library?
The core of internationalization is to load different resource files according to the language and region in the request, and then dynamically display the information in the resource file to the web page. Then can we store the information in the resource file in the request scope, and then use EL expression to display the internationalization data.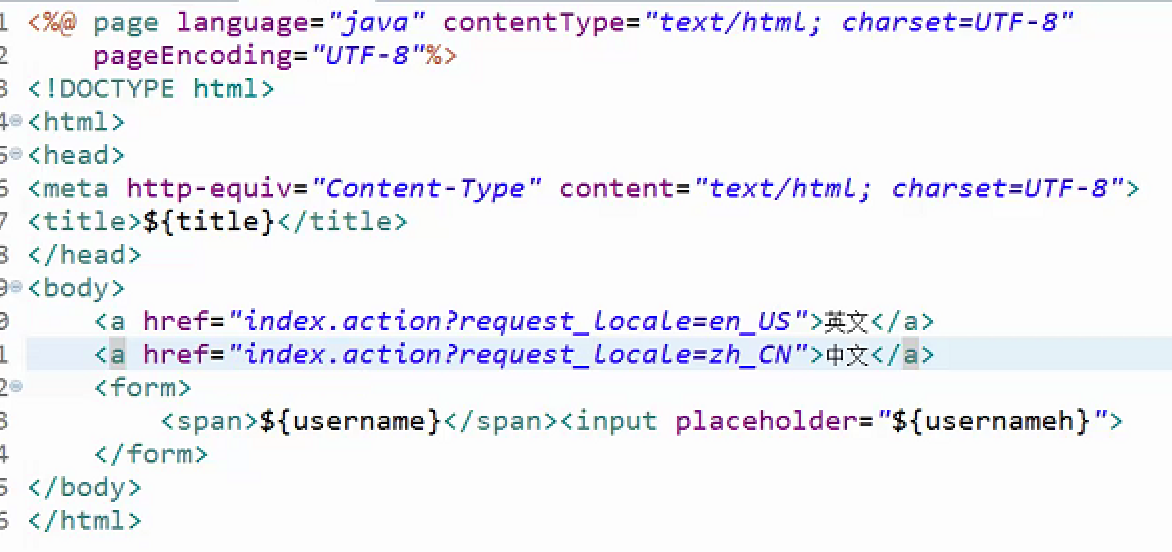
2, Struts2 data verification framework
1. Steps of Struts2 data verification framework
(1) Define a jsp Web page, submit the data to the Action through the form, the data verification of the server is an essential part in a web project, and struts 2 provides a variety of ways for data verification.
2. Using validate method to verify data
(1) First, define the appropriate object in the Action to receive the parameters passed by the client
(2) Rewrite the validate method in Action, and judge the data received in the object in this method. If it does not conform to the law, execute this.addFieldError("key"), ”Value). This method has two functions. The first is to save the error information in the fieldErrors attribute in the request scope. In other words, fieldErrors is all the error information. You can retrieve one of the error information from the scope through the fieldErrors. Key. The second is to return the input logic view.
@Override
public void validate(){
	if(userEntity.getUserName().equals("")){
		this.addFieldError("userName", "User name cannot be empty");
	}
	if(userEntity.getPassWord().equals("")){
		this.addFieldError("passWord", "Password name cannot be empty");
	}
}
(3) Mapping the input logical view in the action tag
<action name="login" class="com.KunKunStore.action.UserAction" method="login">
	<result>success.jsp</result>
	<result name="input">login.jsp</result>
</action>
(4) Use el expression in the web page where the form is located to take out the error information from the request scope and display it on the web page.
<input name="userEntity.userName"><span>${fielderrors.userName}</span>
Rewriting the validate method can complete the data verification work, but if there are multiple methods defined in an Action, there will be problems, because each method is used to process different requests, and the parameters required for different requests are naturally different. It is inevitable that the situation of considering one method and losing the other will occur.
3. Provide corresponding verification methods for each method
Multiple methods can be defined in Action. The naming rules of methods are
[validate + capitalize the method name to be validated]
For example, to verify the login method, you need to define a method, validateLogin(), to verify the registration method, you need to define a method, validateRegister(). The other validation processes are exactly the same.
4. Using the validation framework to implement non coding validation for Action class
In addition to the two methods mentioned above, struts 2 also provides a parameter verification method based on the validation verification framework. The advantage of this method is that it is easy to reuse, no coding and maintenance for parameter verification.
The validation framework workflow is to define validation rules in the configuration file, and then let struts 2 automatically complete the validation.
(1) Prepare the form and the Action class and struts.xml configuration file to process the request
① Form request (Registration)
<form action="regist.action" method="post">
	<input name="userEntity.username" value="${userEntity.userName}"><span>${fieldErrors["userEntity.userName"][0]}</span><br>
	<input name="password1" value="${passWord1}"><span>${fieldErrors.passWord1[0]}</span><br>
	<input name="password2" value="${passWord2}"><span>${fieldErrors.passWord2[0]}</span><br>
	<input name="userEntity.email" value="${userEntity.mail}"><span>${fieldErrors["userEntity.mail"][0]}</span><br>
	<input name="userEntity.phone" value="${userEntity.tel}"><span>${fieldErrors["userEntity.tel"][0]}</span><br>
	<input type="submit" value="Submission">
</form>
② struts.xml configuration file
<!-- register -->
<action name="regist" class="com.kunkunstore.action.UserFormCheckAction" method="regist">
	<result>main.jsp</result>
	<result name="input">regist.jsp</result>
</action>
③ Entity class
public class UserFormCheckAction extends ActionSupport{
	//Two password entries
	private String passWord1;
	private String passWord2;
	//Entity class object
	private UserEntity userEntity;
	//Omit set and get methods

	//Registration verification
	public String login() {
		return Action.SUCCESS;
	}
}
(2) Define a [Action class name - validation.xml] file in the same directory of Action class, which needs to import the dtd file of validation.
<?xml version="1.0" encoding="UTF-8"?>
<!DOCTYPE validators PUBLIC
        "-//Apache Struts//XWork Validator 1.0.3//EN"
        "http://struts.apache.org/dtds/xwork-validator-1.0.3.dtd">
(3) In this xml file, the validation rules for parameters passed to the server are as follows:
- Required: required verifier
- requiredstring: required string verifier, which can make null and empty judgments
- int: integer verifier
- Double: double precision floating point checker
- date: date checker
- Expression: expression validator
- Field expression: field expression validator
- email: email Verifier
- url: url checker
- Visitor: Visitor verifier
- Conversion: conversion validator
- stringlength: string length checker
- regex: regular expression validator
Attribute validation syntax:
<field name="Parameter name to verify">
  	<field-validator type="Verification mode">
  		<message>error message</message>
		<param name="Parameter name"></param>
  	</field-validator>
</field>
- field label: used to define the parameter name to be verified
- Field Validator label: a verification method used to define parameters. An attribute can be verified in multiple ways
- Message tag: define error message
- param tag: defines the parameters needed in the validation process. There can be multiple parameters
Configure the xml file as follows (userformcheckaction register validation. xml):
<?xml version="1.0" encoding="UTF-8"?>
<!DOCTYPE validators PUBLIC
    "-//Apache Struts//XWork Validator 1.0.3//EN"
    "http://struts.apache.org/dtds/xwork-validator-1.0.3.dtd">

<validators>
    <!-- Verification of registered account -->
    <field name="userEntity.userName">
        <field-validator type="requiredstring">
            <message>User name cannot be empty</message>
        </field-validator>
        <field-validator type="stringlength">
            <param name="minLength">6</param>
            <param name="maxLength">10</param>
            <message>User name length is 6-10 position</message>
        </field-validator>
    </field>
    <!-- Registration password verification -->
    <field name="passWord1">
        <field-validator type="requiredstring">
            <message>Password cannot be empty</message>
        </field-validator>
        <field-validator type="stringlength">
            <param name="minLength">6</param>
            <param name="maxLength">16</param>
            <message>Password length is 6-16 position</message>
        </field-validator>
    </field>
    <!-- Second input verification of registration password -->
    <field name="passWord2">
        <field-validator type="requiredstring">
            <message>Password cannot be empty</message>
        </field-validator>
        <field-validator type="stringlength">
            <param name="minLength">6</param>
            <param name="maxLength">16</param>
            <message>Illegal password length</message>
        </field-validator>
        <field-validator type="fieldexpression">
            <param name="expression">(passWord1 eq passWord2)</param>
            <message>The two passwords are inconsistent</message>
        </field-validator>
    </field>
    <!-- Registration email verification -->
    <field name="userEntity.mail">
        <field-validator type="requiredstring">
            <message>Mailbox cannot be empty</message>
        </field-validator>
        <field-validator type="email">
            <message>Illegal email format</message>
        </field-validator>
    </field>
    <!-- Registration phone verification -->
    <field name="userEntity.tel">
        <field-validator type="requiredstring">
            <message>Mobile number cannot be empty</message>
        </field-validator>
        <field-validator type="regex">
            <param name="regex"><![CDATA[(1{1}[3-9]){1}[0-9]{9}]]></param>
            <message>Incorrect format of mobile number</message>
        </field-validator>
    </field>
</validators>
(4) Display error information in the form page using the s tag library
<s:fielderror><s:param>userEntity.userName</s:param></fielderror>
(5) Common validation examples
① Required inspection
<validators>
	<field name="username">
		<field-validator type="required">
			<message>Specify the prompt for inspection failure</message>
		</field-validator>
	</field>
</validators>
② Required string inspection
<validators>
	<field name="username">
		<field-validator type="requiredstring">
			<param name="trim">true</param>
			<message>Specify the prompt for inspection failure</message>
		</field-validator>
	</field>
</validators>
③ Integer verifier / floating point verification
<validators>
	<field name="age">
		<field-validator type="int">
			<param name="min">1</param>
			<param name="max">150</param>
			<message>Age must be between 1 and 150</message>
		</field-validator>
	</field>
</validators>
④ Date inspection
<validators>
	<field name="birth">
		<field-validator type="date">
			<param name="min">1900-01-01</param>
			<param name="max">2050-02-21</param>
			<message key="birth.range"/>
		</field-validator>
	</field>
</validators>
⑤ Field expression validator (requires that the specified field satisfy a logical expression)
<validators>
	<field name="re_pass">
		<field-validator type="fieldexpression">
			<!--Specify logical expression -->
			<param name="expression"> (pass eq re_pass)</param>
			<message>Password must be the same as confirm password</message>
		</field-validator>
	</field>
</validators>
⑥ Email address verification
<validators>
	<field name="email">
		<field-validator type="email">
			< message > your email address must be a valid email address < / message >
		</field-validator>
	</field>
</validators>
⑦ Website inspection
<validators>
<field name="url">
<field-validator type="url">
< message > your home address must be a valid web address < / message >
</field-validator>
</field>
</validators>
⑧ String length check
<validators>
	<field name="user">
		<field-validator type="stringlength">
			<param name="minLength">6</param>
			<param name="maxLength">16</param>
			<message>Your username must be between 4 and 20 in length</message>
		</field-validator>
	</field>
</validators>
⑨ Regular expression test
<validators>
	<field name="user">
		<field-validator type="regex">
			<param name="regex"><![CDATA[(\w{4,25})]]></param>
			< message > the user name you enter can only be letters and arrays, and the length must be between 4 and 25 < / message >
		</field-validator>
	</field>
</validators
5. Using the validation framework to implement non coding validation for methods in Action classes
The above verification method is oriented to Action class. It will verify all the methods from request to Action class. There will also be the problem of considering one thing and losing the other. We can define corresponding verification rules for each Action request, which is also implemented by xml file. However, the xml file is named [Action class - Request Address - validation.xml], and other configuration methods are completely consistent .

