Density classification network
Population density estimation based on MSCNN:
- Overview and generation of population density map
- Data set making and data generator
- Density classification network
- Training and prediction of MSCNN
Classification target
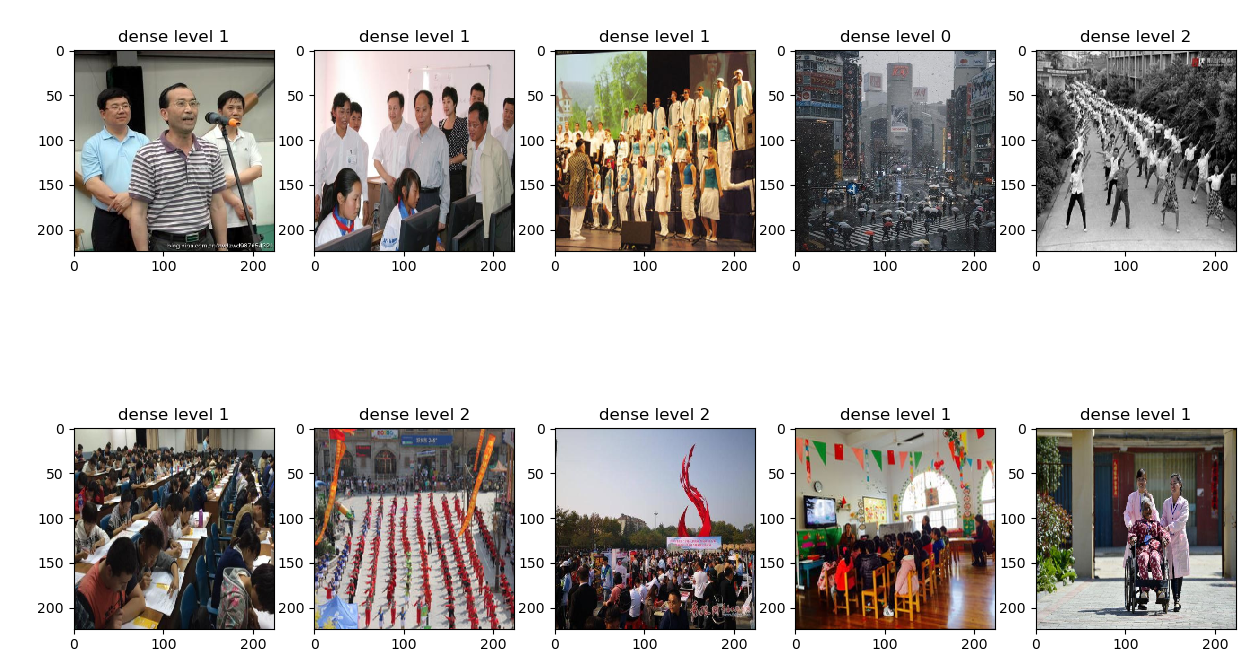
The purpose of density classification network is to roughly classify the images according to the data set, filter out different levels of personnel density, reduce the difficulty of network training and improve the accuracy. The density level is divided into three categories: none (no people in the picture), low density (1-99 people in the picture), high density (more than 100 people), using 0,1,2 as the category label, using one hot coding, using cross entropy as the loss function of the network.
Network architecture
Because the classification target is simple, the vgg16 network without full connection layer is used as the feature extraction network, followed by three custom full connection layers and finally the classification output. The vgg16 network does not participate in the training, but only trains the self-defined three-layer all connected network. When loading vgg16, you need to download the trained model in advance. Here, you need to pay attention to the fact that if you do not load the output layer of VGg, that is, "include top = false" in the code, then the downloaded model is "vgg16 ﹐ weights ﹐ TF ﹐ ordering ﹐ TF ﹐ kernels ﹐ not op.h5". Otherwise, it is "vgg16 ﹐ TF ﹐ ordering ﹐ TF ﹐ kernels. H5". I have uploaded the model used this time to my Baidu network disk Please, Project Home Check it up.
    def model(self):
        # finetune from the base model VGG16
        base_model = VGG16(include_top=False,
                           weights=self.vgg_weights_path,
                           input_shape=(224, 224, 3))
        # base_model.summary()
        out = base_model.layers[-1].output
        out = layers.Flatten()(out)
        out = layers.Dense(1024, activation='relu')(out)
        # Because there are too many deny features output earlier, we add dropout layer here to prevent over fitting
        out = BatchNormalization()(out)
        out = layers.Dropout(0.5)(out)
        out = layers.Dense(512, activation='relu')(out)
        out = layers.Dropout(0.3)(out)
        out = layers.Dense(128, activation='relu')(out)
        out = layers.Dropout(0.3)(out)
        out = layers.Dense(3, activation='softmax')(out)
        tuneModel = Model(inputs=base_model.input, outputs=out)

        # vgg layer does not participate in training
        for layer in tuneModel.layers[:19]:
            layer.trainable = False

        return tuneModel
Training code:
    def train(self, args_):
        tuneModel = self.model()
        tuneModel.compile(loss='categorical_crossentropy',
                          optimizer=optimizers.Adam(lr=3e-4))
        if os.path.exists(self.weights_path):
            tuneModel.load_weights(self.weights_path, by_name=True)
            print('success load weights ')

        batch_size = int(args_['batch'])
        callbacks = self.get_callbacks()
        history = tuneModel.fit_generator(DenseDataset().gen_train(batch_size, 224),
                                          steps_per_epoch=DenseDataset().get_train_num() // batch_size,
                                          validation_data=DenseDataset().gen_valid(batch_size, 224),
                                          validation_steps=DenseDataset().get_valid_num() // batch_size,
                                          epochs=int(args_['epochs']),
                                          callbacks=callbacks)
        if args_['show'] != 'no':
            self.train_show(history)
The only thing to notice is that the tag should be one hot coded when generating training data, and the value saved by the tag tool is "0,1,2", so "0,1,2" needs to be converted into ont hot coding in the data generator. Keras provides the transformed API keras. Utils. To_category(), please refer to https://github.com/zzubqh/CrowdCount/src/data.py for the specific code
     while True:
         if i + batch_size >= n:
             np.random.shuffle(index_all)
             i = 0
             continue
         batch_x, batch_y = [], []
         for j in range(i, i + batch_size):
             x, y = self.get_img_data(index_all[j], size)
             batch_x.append(x)
             batch_y.append(y)
         i += batch_size
         yield np.array(batch_x), to_categorical(np.array(batch_y), num_classes=3)
After training 20 epcho s, 96% of them are correct. The classification test results are as follows: During the test, it was found that some pictures larger than 100 were mistakenly classified into Class 0, which needs to be improved later!

