The previous article mainly introduced two methods of @ bean @ ComponentScan package scanning injection. Today, I will introduce the related usage of @ Conditional injection and @ import component import
1. First, the usage of @ Conditional: judge according to certain conditions, register the beans in the container if the conditions are met, and the @ bean annotation written before will be injected, but the @ Conditional annotation added to the bean will not necessarily be injected, but after the condition judgment, it will be said that the annotation is widely used in the springboot source code, which was introduced in spring4.0.
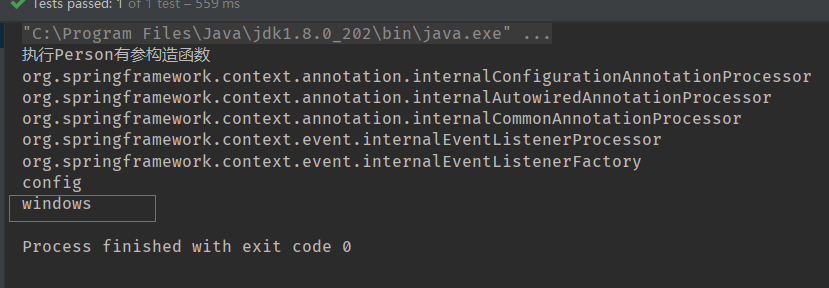
First, we create a Config and register two person beans in it, one of which is windows and the other is linux. Use @ Conditional annotation to determine whether the current operating system loads different beans on windows or linux, as shown in the following figure:
package com.study.chap4.conditional.config;
import com.study.chap4.conditional.Person;
import org.springframework.context.annotation.Bean;
import org.springframework.context.annotation.Conditional;
import org.springframework.context.annotation.Configuration;
@Conditional(WindowsCondition.class)
@Configuration
public class Config {
    /**
     * @Conditional({Condition}) :  Judge according to certain conditions, and register bean s in the container according to the conditions
     *
     * If the system is windows, register ("windows") in the container
     * If it's a linux system, register it in the container ("linux")
     */
    @Bean("windows")
    public Person person01(){
        return new Person("windows",18,"I am windows system");
    }
    @Conditional(LinuxCondition.class)
    @Bean("linux")
    public Person person02(){
        return new Person("linux", 48,"I am linux system");
    }
}
We can see from the @ Conditional source code that this annotation can be used on classes and methods. We create the judged condition classes WindowsCondition and linuxCondition respectively. In order to save space, only one class code is posted here
package com.study.chap4.conditional.config;
import org.springframework.context.annotation.Condition;
import org.springframework.context.annotation.ConditionContext;
import org.springframework.core.env.Environment;
import org.springframework.core.type.AnnotatedTypeMetadata;
/**
 *  Judge whether it is a windows system
 *
 * */
public class WindowsCondition implements Condition {

    @Override
    public boolean matches(ConditionContext context, AnnotatedTypeMetadata metadata) {
        Environment environment = context.getEnvironment();
        String property = environment.getProperty("os.name");
        return property.contains("Windows");
    }
}
Then test the class to output all the injected beans. Because the system is running in Windows environment, windows beans are injected, while linux does not
import com.study.chap4.conditional.config.Config;
import org.junit.Test;
import org.springframework.context.ApplicationContext;
import org.springframework.context.annotation.AnnotationConfigApplicationContext;
public class MainTest4 {
    @Test
    public void demoChap3(){
        ApplicationContext applicationContext = new AnnotationConfigApplicationContext(Config.class);
        String[] names = applicationContext.getBeanDefinitionNames();
        for (String name : names) {
            System.out.println(name);
        }

    }
}
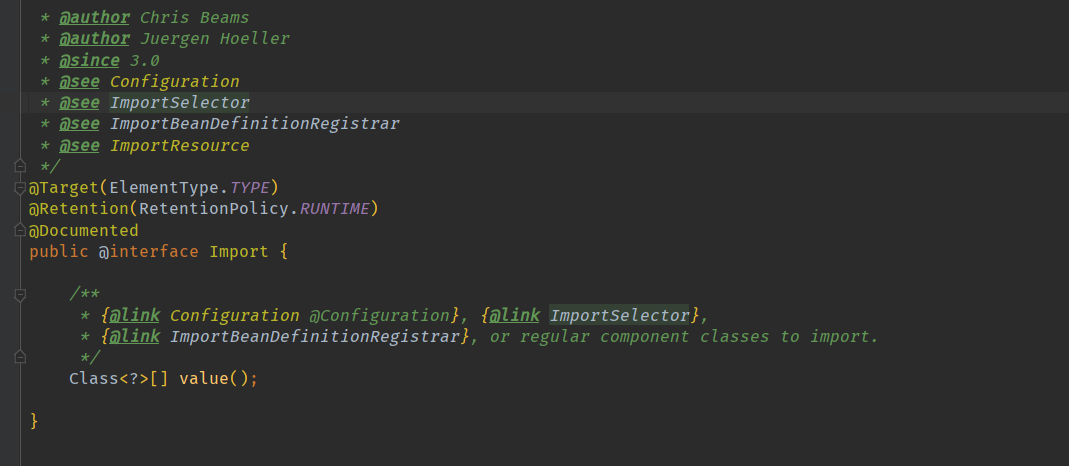
2. Use the @ import annotation to quickly import a component to the container. Observe the import source code. The annotation is available in spring 3.0, and you can also link ා importselector: return the full class name array of the component to be imported; and importbeandefinitionregister: manually register the bean into the container
Therefore, we first import the component name directly using import
package com.study.chap4.imports;
import com.study.chap4.imports.pojo.Blue;
import com.study.chap4.imports.pojo.Red;
import org.springframework.context.annotation.Configuration;
import org.springframework.context.annotation.Import;
@Configuration
@Import({Red.class, Blue.class})
//@Import imports components. By default, the component name is the full class name
public class Config {
}
Output visible

In another way, ImportSelector: returns the full class name array of the components to be imported, and this feature is used in the springboot startup class. Create a new MyImportSelector to implement the ImportSelector interface.
package com.study.chap4.imports;
import org.springframework.context.annotation.ImportSelector;
import org.springframework.core.type.AnnotationMetadata;
public class MyImportSelector implements ImportSelector {
    /**
     * @param importingClassMetadata  All annotation information of the class currently annotated with @ Import annotation
     * @return The return value is the full class name of the component imported into the container
     */
    @Override
    public String[] selectImports(AnnotationMetadata importingClassMetadata) {
        return new String[]{"com.study.chap4.imports.pojo.Yellow"};
    }
}
Then use the third method, importbeandefinitionregister: register the bean into the container manually. Importbeandefinitionregister is also useful in springboot startup class, which will be analyzed later.
package com.study.chap4.imports;
import com.study.chap4.imports.pojo.RainBow;
import org.springframework.beans.factory.support.BeanDefinitionRegistry;
import org.springframework.beans.factory.support.RootBeanDefinition;
import org.springframework.context.annotation.ImportBeanDefinitionRegistrar;
import org.springframework.core.type.AnnotationMetadata;

public class MyImportBeanDefinitionRegistrar implements ImportBeanDefinitionRegistrar {

    /**
     * AnnotationMetadata: Annotation information for the current class
     * BeanDefinitionRegistry:BeanDefinition Register class; there are many methods, register a bean, remove a bean, etc
     * 		Add all bean s that need to be added to the container; call
     * 		BeanDefinitionRegistry.registerBeanDefinition Register manually
     */
    @Override
    public void registerBeanDefinitions(AnnotationMetadata importingClassMetadata, BeanDefinitionRegistry registry) {

        boolean definition = registry.containsBeanDefinition("com.study.chap4.imports.pojo.Red");
        boolean definition2 = registry.containsBeanDefinition("com.study.chap4.imports.pojo.Blue");
        if(definition && definition2){
            //Specify the Bean definition information; (Bean type, Bean...)
            RootBeanDefinition beanDefinition = new RootBeanDefinition(RainBow.class);
            //Register a bean and specify the bean name
            registry.registerBeanDefinition("rainBow", beanDefinition);
            //Remove a bean
            registry.removeBeanDefinition("config");
        }
    }

}
At this point, the final output shows that: config has indeed been removed.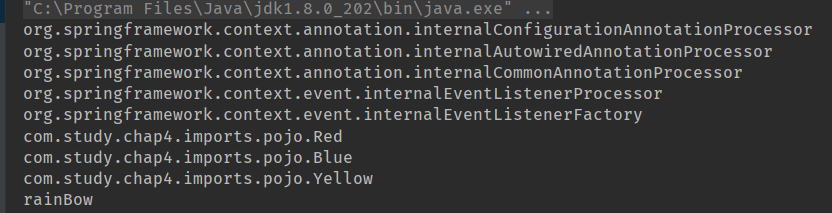
So far, we have learned two new annotation uses, one is @ Conditional and the other is @ Import. In fact, spring and springboot bottom layer use a lot of relevant code written by annotations, making full use of the characteristics of annotations. We can use and understand these annotations, and then we won't find it too hard to read the source code.
------------------------------------------------------------------------------------------------------------------------------------------------------------------
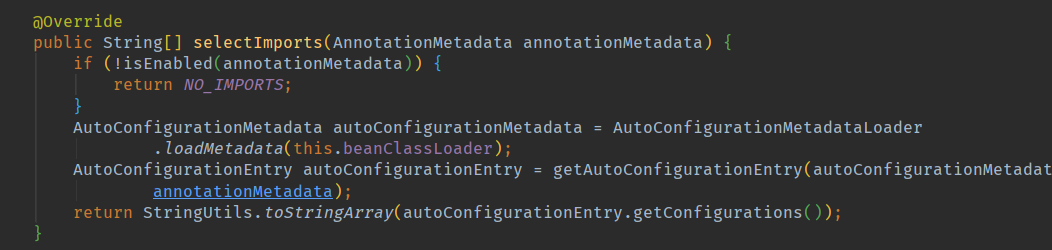
By the way, we will analyze this feature used in a springboot startup. First, we will check the springboot startup class annotation @ SpringBootApplication source code. Of course, there are a lot of springboot source startup. We will not complete the analysis here, but only analyze the @ import annotation feature used.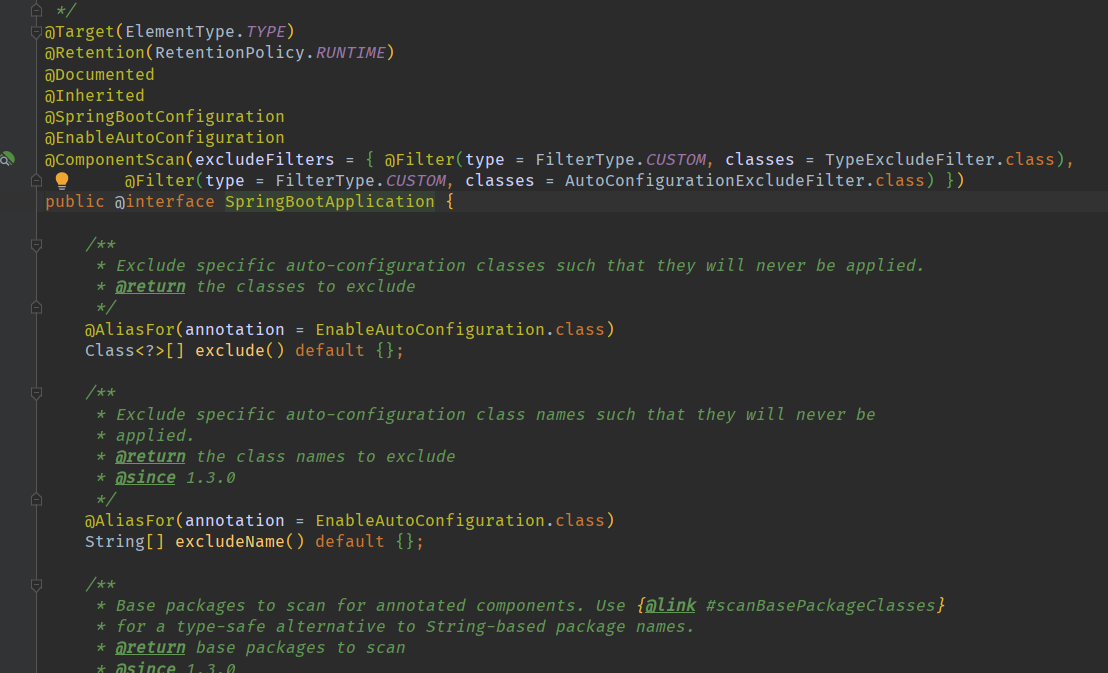
There are three annotations in it. One is the package injection container of @ ComponentScan's custom filter conditions. This annotation has been explained in detail in the second blog in my series. I won't explain too much here. spring5 Learning Series 2 register component 2 @ ComponentScan to customize scanning rules and filter components Next, I'll take a look at the second annotation @ SpringBootConfiguration and click in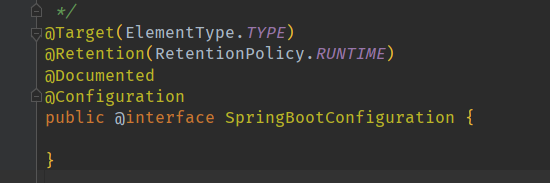
This is to encapsulate the @ Configuration annotation. In a view, the annotation is @ EnableAutoConfiguration. Open the source code of the annotation to see
Here's the key point. You will see an @ import annotation and specify an imported class. When you click in, you will see that the second method of import is used