Super detailed process of building Haproxy cluster and highly available Haproxy cluster!
1, What is Haproxy?
Previous blogs have shown how LVS load balancers work. Today's haproxy is better than LVS. LVS does not support regular expression processing at work, and the implementation of LVS for some large websites is relatively complex and expensive. Haproxy is suitable for high concurrency processing of large websites. It supports a variety of scheduling algorithms: RR polling, LC minimum number of connections and SH access source algorithm.
2, Building a general Haproxy cluster
1. Construction of node web server
Here are two nginx servers. To do this, I prepared a script to install nginx:
#!/bin/bash
systemctl stop firewalld
setenforce 0

read -p "Please input nginx Installation package path(Do not slash at the end of the path:/;Otherwise, there will be an error)" lj

#Unzip the installation package
echo "All compressed packages will be decompressed to/opt/in"
tar zxvf $lj/nginx-1.12.2.tar.gz -C /opt/ &> /dev/null

################################################
#nginx installation

#Installation environment
echo "Installation environment."
yum install pcre* zlib-devel gcc gcc-c++ -y

#Create a procedural user
echo "Establish nginx System users."
useradd -M -s /sbin/nologin nginx

cd /opt/nginx-1.12.2
#Compile installation path, user, group and statistics module
./configure --prefix=/usr/local/nginx --user=nginx --group=nginx --with-http_stub_status_module
make && make install

#Establish soft connection to facilitate system identification command
ln -s /usr/local/nginx/sbin/nginx /usr/local/sbin

touch /etc/init.d/nginx

#Create a startup script
cat >> /etc/init.d/nginx << EOF
#!/bin/bash
# chkconfig: - 99 20
# description: Nginx Service Control Script
case \$1 in
  start)
 /usr/local/nginx/sbin/nginx
 ;;
  stop)
  killall -s QUIT /usr/local/nginx/sbin/nginx
  ;;
   restart)
  killall -s QUIT /usr/local/nginx/sbin/nginx
    /usr/local/nginx/sbin/nginx
  ;;
   reload)
   killall -s HUP /usr/local/nginx/sbin/nginx
   ;;

  *)
  echo "Usage: $0 {start|stop|restart|reload}"
  exit 1

esac
exit 0

EOF


echo 'PATH=/usr/local/nginx/sbin/nginx:$PATH' >> /etc/profile
echo 'export PATH' >> /etc/profile
source /etc/profile

#Add execution permission
chmod +x /etc/init.d/nginx

#Import commands into the system
chkconfig --add nginx
After the nginx service is installed, you can leave it alone.
2. Construction of haproxy load balancer
1. Decompress the Haproxy compression package and install environment on the load balancer server
#Decompress haproxy package
tar zxvf haproxy-1.5.19.tar.gz -C /opt

#Installation environment
yum install -y pcre-devel bzip2-devel gcc gcc-c++ make
2. Move to compiling path to start compiling
cd /opt/haproxy-1.5.19

make TARGET=Linux26 && make install
3. Create main profile directory and copy profile only template
mkdir /etc/haproxy
cp /opt/haproxy-1.5.19/examples/haproxy.cfg /etc/haproxy/
4. Edit Master profile
#These two should be annotated
#chroot /usr/share/haproxy
#redispatch
#Delete all listening addresses and add the following listening address styles
listen webcluster 0.0.0.0:80
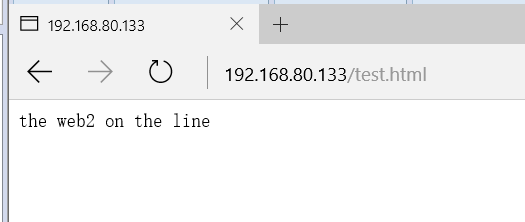
option httpchk GET /test.html
balance roundrobin
server inst1 192.168.80.132:80 check inter 2000 fall 3
server inst2 192.168.80.134:80 check inter 2000 fall 3
5. Configure startup script
#Copy startup script
cp /opt/haproxy-1.5.19/examples/haproxy.init /etc/init.d/haproxy
chmod +x /etc/init.d/haproxy
#Convenient for system management
chkconfig --add /etc/init.d/haproxy
ln -s /usr/local/sbin/haproxy /usr/sbin/haproxy
6. Log function on
#Modify log file path and log type in global configuration
global
        log /dev/log    local0 info
        log /dev/log    local1 notice
#Create log profile path
touch /etc/rsyslog.d/haproxy.conf
cd /etc/rsyslog.d/
vim haproxy.conf
#Add if condition judgment to it
if ($programname == 'haproxy' and $syslogseverity-text == 'info') then
-/var/log/haproxy/haproxy-info.log
& ~
if ($programname == 'haproxy' and $syslogseverity-text == 'notice') then
-/var/log/haproxy/haproxy-notice.log
& ~
#Turn on the log function and restart the Haproxy function
systemctl restart haproxy
service rsyslog restart
7. Test the Haproxy function.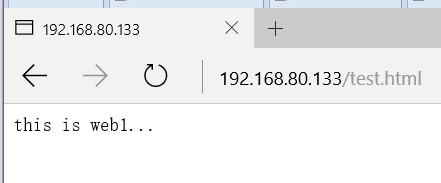
3, High availability Haproxy cluster building
Add another haproxy server as the standby server based on the experiment just now. Prevent the whole cluster from collapsing after the main server goes down.
1. Install keepalived.
yum install keepalived -y
2. Edit the keepalived.conf main configuration file
vim /etc/keepalived/keepalived.conf

! Configuration File for keepalived

global_defs {
   notification_email {
     acassen@firewall.loc
     failover@firewall.loc
     sysadmin@firewall.loc
   }
   notification_email_from Alexandre.Cassen@firewall.loc
   smtp_server 127.0.0.1				#Change to 127.0.0.1
   smtp_connect_timeout 30
   router_id_01								#Change to load balancer serial number
   vrrp_skip_check_adv_addr
   vrrp_strict
   vrrp_garp_interval 0
   vrrp_gna_interval 0
}

vrrp_instance VI_1 {
    state MASTER						#Major
    interface ens33
    virtual_router_id 10					#The main and standby should be in the same group
    priority 100								#set priority
    advert_int 1
    authentication {
        auth_type PASS
        auth_pass 1111
    }
    virtual_ipaddress {
        192.168.80.10					#Virtual IP
    }
}
3. Backup the keepalived configuration on the load balancer
You only need to modify the following:
 Change router ID to load balancer serial number
 state BACKUP is mainly MASTER
 priority 99 - set priority
4. Set virtual IP address
Both load balancers need to set the same virtual IP.
cd /etc/sysconfig/network-scripts/
cp -p ifcfg-ens33 ifcfg-ens33:0
vim ifcfg-ens33:0
#Add virtual network card settings
DEVICE="ens33:0"
ONBOOT="yes"
IPADDR=192.168.80.10
NETMASK=255.255.255.0
Turn off the network of the MAST load balancer and wait a moment.
After a while, you can still surf the Internet.
The above is the building process of Haproxy high availability cluster.

