0. Effect demonstration
It's annoying to plug in a video.You can go out and turn right to Youku. Click on me!).
1. Preparations
1.1 Front End Framework
The front end uses nuxt.js based on vue.js.Why use nuxt.js?
The first thing I did was a blog project, so SSR is important.Although it has nothing to do with the login registration described in this article, if the article is acquired asynchronously using axios, the search engine will not be able to capture any data.nuxt.js can be used for the whole project.
The second point is effortless, Nuxt.js has very clear project organization, very convenient routing and template functions, and easy communication between front-end and service-side.The syntax of es67 is also automatically supported, with no further details such as the nodemon functionality included.Interested can own Baidu.
1.2 Backend Framework
With koa2, you can place the later item directly in the server directory if you use Nuxt.js.The general trend of using koa2, with little explanation, has been in 0202, so there is no problem with fewer plug-ins than express.
1.3 Database
The database uses mongodb and redis, so why do they work together because redis are better suited for caching classes and for storing temporary data such as authentication codes or session s.Mongodb is well suited for databases, with aggregation pipelines and multi-level joins, and can be compared with relational databases such as mysql.But because I'm a front-end, mongoose writes more comfortably, so mongodb is chosen.
1.4ui Framework
Use element-ui, why use element-ui, because everyone is using it, follow the trend.
2. Project Setup
It's no use saying more. Interest can go straight in. nuxt.js Official website.
First install npx, then create the project with create-nuxt-app, the command line is as follows.
$ npx create-nuxt-app project-name
Then follow the tips to enter the project, with a few small pits and a few mouths.
- For historical reasons, the backend does not support es6import syntax by default, so to configure babel, do the following
- Install Plugins. npm i babel-preset-es2015
- Create a new.babelrc file in the project directory, enter {"presets": ["es2015"]} and save it.
- Finally, add --exec babel-node at the end of dev_start in "scripts" in package.json and save.as follows
-
1  "scripts": {
2     "dev": "cross-env NODE_ENV=development nodemon server/index.js --watch serve --exec babel-node",
3     "build": "nuxt build",
4     "start": "cross-env NODE_ENV=production node server/index.js --exec babel-node",
5     "generate": "nuxt generate"
6   },
3. Project Setup
3.1 Project Directory Introduction
First, look at the directory of nuxt.js to get a general idea of how we are going to write this project.
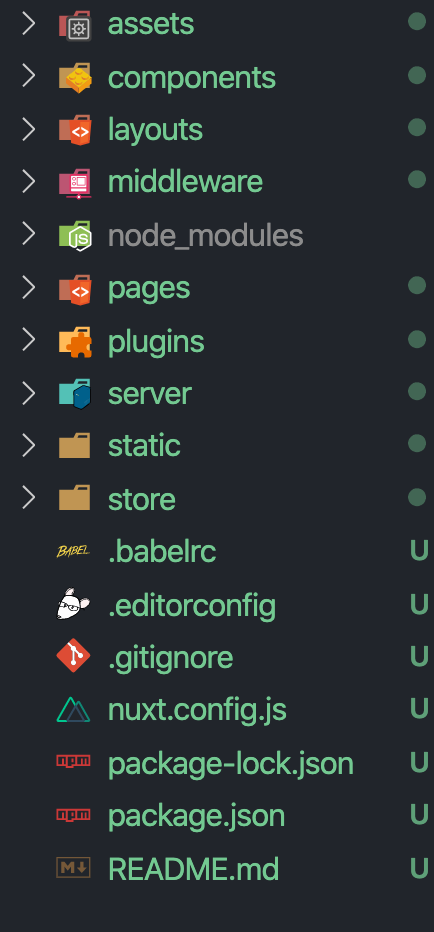
Explain one by one
- assets, as the name implies, is where uncompiled static resources are placed.
- Compoonents Place Component's
- A layouts template can contain a specified template, which is equivalent to the meaning of a photo frame
- Middleware middleware.
- Where node_modules depend
- Pages are pages, nuxt.js configures it for you. Creating a new 1.vue inside is equivalent to configuring a'/1'route.
- Where plugins are placed, plugins can be configured in advance and exported.
- server is the back-end folder, which is a bit complex. Wait a moment to expand.
- Where static files are located
- Where store s place vuex models
See the documentation for details ( Click on me!)
3.2 Front End Build
The front-end focus is not so much, the only thing that's a little complicated is form checking, but the element-ui is already done.
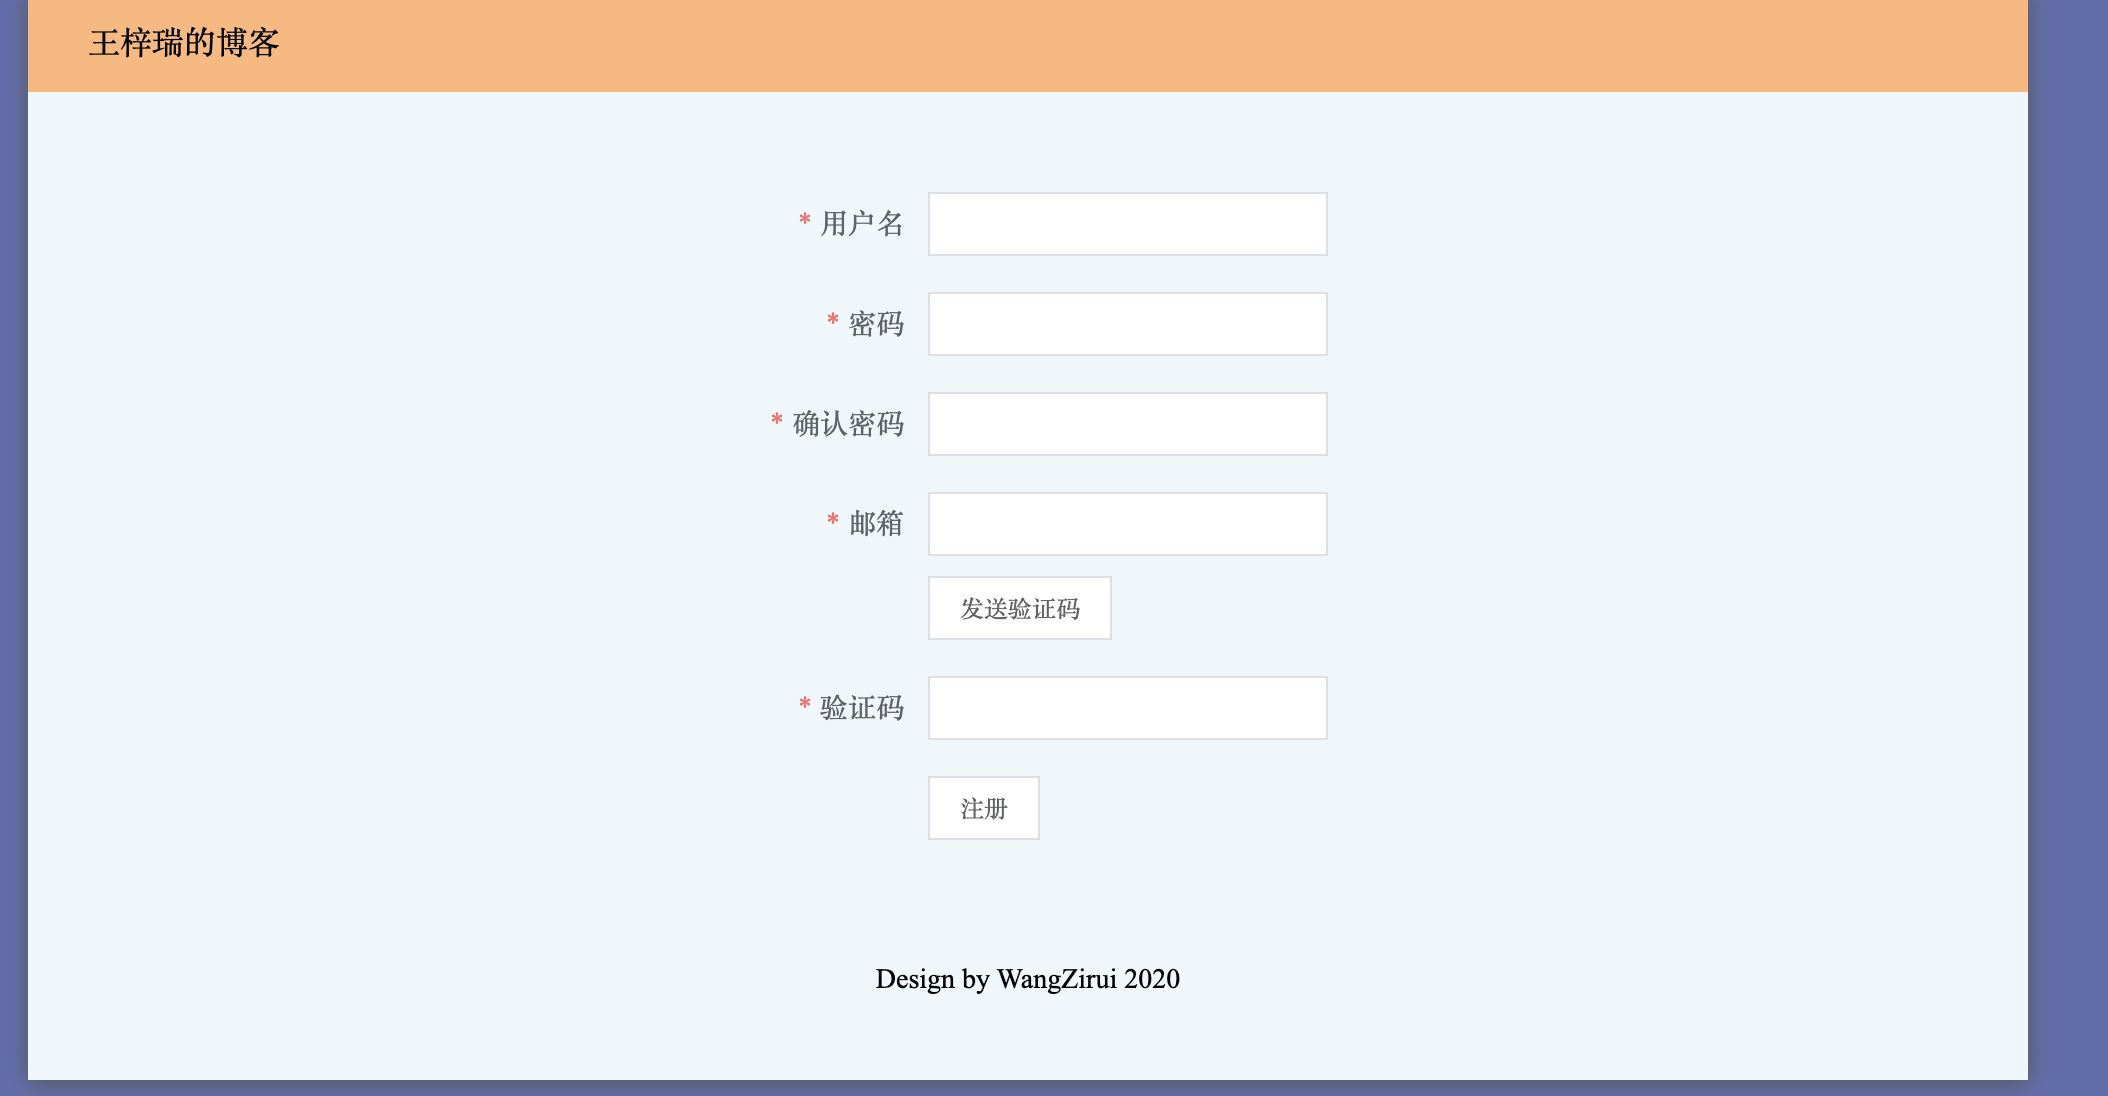
But let's start with a brief overview. The first step is to create a new template, which is the frame that is enclosed outside.

As shown in the figure, the green box is equivalent to a template, and the active part is equivalent to page content, which is like vue-router content in vue-cli. This is true, but nuxt.js is a different term.
 1 <template>
 2   <div class="body1">
 3     <div class="container animated slideInDown">
 4       <header>
 5         <Myheader :location="this.location" />
 6       </header>
 7       <main class="main">
 8         <nuxt />
 9       </main>
10       <footer>
11         <Myfooter />
12       </footer>
13     </div>
14   </div>
15 </template>
 1 <script>
 2 import Myheader from "../components/public/header";
 3 import Myfooter from "../components/public/footer";
 4 export default {
 5   components: {
 6     Myheader,
 7     Myfooter
 8   },
 9   data: () => {
10     return {
11       location: ""
12     };
13   },
14   mounted() {
15     this.location = window.location.href.split("/").pop();
16   }
17 };
18 </script>
The location property of this is used to determine whether the login registration word at the top of the template appears on the login page registration page.However, this is not the focus, the focus is on the login registration function that this article will talk about, so of course this is casual.Don't give too much description.
3.2.1 Registration Page Setup
No crap, just look at the code, code location @/pages/register.js
<template>
  <div class="login_container">
    <!-- First element The outer label of the form.Attributes in the label can be referenced element-ui Document's Form form -->
    <el-form
      :model="ruleForm"
      :rules="rules"
      ref="ruleForm"
      class="ruleForm"
      label-width="100px"
      size="small"
    >
      <!-- Where the form item is used el-form-item Label wrapped to prove this is a form item -->
      <el-form-item label="User name" prop="name">
        <el-input v-model="ruleForm.name"></el-input>
      </el-form-item>
      <el-form-item label="Password" prop="password">
        <el-input v-model="ruleForm.password"></el-input>
      </el-form-item>
      <el-form-item label="Confirm Password" prop="password2">
        <el-input v-model="ruleForm.password2"></el-input>
      </el-form-item>
      <el-form-item label="mailbox" prop="email">
        <el-input v-model="ruleForm.email"></el-input>
        <el-button
          @click="sendMsg"
          class="sendemail"
          :disabled="ruleForm.verifyflag"
        >{{ ruleForm.verifymsg }}</el-button>
      </el-form-item>

      <el-form-item label="Verification Code" prop="code">
        <el-input v-model="ruleForm.code"></el-input>
      </el-form-item>
      <el-form-item>
        <el-button @click="submitForm('ruleForm')">register</el-button>
        <!-- <el-button @click="resetForm('ruleForm')"></el-button> -->
      </el-form-item>
    </el-form>
  </div>
</template>
Next, put the code, which is the ruleForm object used to receive the form information
1      ruleForm: {
2         name: "",
3         password: "",
4         password2: "",
5         email: "",
6         code: "",
7         verifymsg: "Send Authentication Code", // To set to dynamic data,Instead of filling in the button directly because data Change required, direct operation data A little more convenient.
8         verifyflag: false // Test if the button is clickable now because the verification code cannot be repeated within 60 seconds
9       },
Form validation now does not require direct manipulation of the dom node or validation of data in the ruleForm.Because element-ui provides a way to check.The checking method is controlled by the rule object whose form property is rules="rules".
Place code directly as it used to be:
 1   rules: {
 2         name: [{ required: true, message: "enter one user name", trigger: "blur" }],
 3         password: [{ required: true, message: "Please input a password", trigger: "blur" }],
 4         password2: [
 5           {
 6             required: true,
 7
 8             message: "Please confirm your password",
 9             trigger: "blur"
10           },
11           {
12             validator: (rule, value, callback) => {
13               if (value === "") {
14                 callback(new Error("Please enter your password again"));
15               } else if (value !== this.ruleForm.password) {
16                 callback(new Error("Passwords do not match twice"));
17               } else {
18                 callback();
19               }
20             },
21             trigger: "blur"
22           }
23         ],
24         email: [
25           {
26             required: true,
27             type: "email",
28             message: "Please enter your mailbox correctly",
29             trigger: "blur"
30           }
31         ],
32         code: [
33           {
34             required: true,
35             message: "Please enter your verification code correctly",
36             trigger: "blur"
37           }
38         ]
39       }
In a nutshell, each property of rules is an array with objects inside it, which is the way to check this form's property with the same name.Simply check the name attribute to see if it is mandatory and prompt the message every day.
Complex, like password2, with a second object in the check array, just add a validator method.The following parameters and more detailed usage are welcome to the documentation( Click on me!)
This form is now ready for front-end verification.Add methods and wait until the backend is finished (next blog post).
Similarly, when we create a new @/pages/login.vue, we automatically create the route for the login, and we just need to focus on the code.
 1 <template>
 2   <div class="login_container">
 3     <el-form
 4       :model="ruleForm"
 5       :rules="rules"
 6       ref="ruleForm"
 7       class="ruleForm"
 8       label-width="100px"
 9       size="small"
10     >
11       <el-form-item label="User name" prop="name">
12         <el-input v-model="ruleForm.name"></el-input>
13       </el-form-item>
14       <el-form-item label="Password" prop="password">
15         <el-input v-model="ruleForm.password" show-password></el-input>
16       </el-form-item>
17       <el-form-item>
18         <el-button @click="submitForm('ruleForm')">Sign in</el-button>
19         <el-button @click="resetForm('ruleForm')">register</el-button>
20       </el-form-item>
21     </el-form>
22   </div>
23 </template>
24
25 <script>
Similarly, script code
 1  data() {
 2     return {
 3       ruleForm: {
 4         name: "",
 5         password: ""
 6       },
 7       rules: {
 8         name: [{ required: true, message: "enter one user name", trigger: "blur" }],
 9         password: [{ required: true, message: "Please input a password", trigger: "blur" }]
10       }
11     };
ok, the front end is basically like this, or it's simpler.
But the css problem has not been written for the moment, after all, I am not a ui, simple and generous, just functional enough.