Preface
The text and pictures of this article are from the Internet, only for learning and communication, not for any commercial purpose. The copyright belongs to the original author. If you have any questions, please contact us in time for handling.
Author: machine learning and statistics
PS: if you need Python learning materials, you can click the link below to get them by yourself
http://note.youdao.com/noteshare?id=3054cce4add8a909e784ad934f956cef
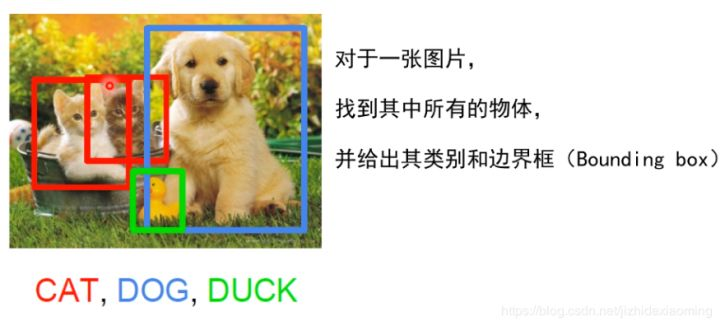
At present, computer vision (CV), natural language processing (NLP) and speech recognition are the three hot directions of artificial intelligence, while object detection in computer vision is widely used, such as automatic driving, video monitoring, industrial quality inspection, medical diagnosis and other scenes.
Here is our complete code implementation (debugged):
1 import numpy as np 2 import cv2 3 font = cv2.FONT_HERSHEY_SIMPLEX 4 lower_green = np.array([35, 110, 106]) # Green range low threshold 5 upper_green = np.array([77, 255, 255]) # Green range high threshold 6 lower_red = np.array([0, 127, 128]) # Red range low threshold 7 upper_red = np.array([10, 255, 255]) # Red range high threshold 8 #Need more colors, you can go to Baidu HSV Threshold! 9 # cap = cv2.VideoCapture('1.mp4') # Open video file 10 cap = cv2.VideoCapture(0)#open USB Camera 11 if (cap.isOpened()): # Video opened successfully 12 flag = 1 13 else: 14 flag = 0 15 num = 0 16 if (flag): 17 while (True): 18 ret, frame = cap.read() # Read a frame 19 20 if ret == False: # Failed to read frame 21 break 22 hsv_img = cv2.cvtColor(frame, cv2.COLOR_BGR2HSV) 23 mask_green = cv2.inRange(hsv_img, lower_green, upper_green) # Delete selection according to color range 24 mask_red = cv2.inRange(hsv_img, lower_red, upper_red) 25 # Delete selection according to color range 26 mask_green = cv2.medianBlur(mask_green, 7) # median filtering 27 mask_red = cv2.medianBlur(mask_red, 7) # median filtering 28 mask = cv2.bitwise_or(mask_green, mask_red) 29 mask_green, contours, hierarchy = cv2.findContours(mask_green, cv2.RETR_EXTERNAL, cv2.CHAIN_APPROX_NONE) 30 mask_red, contours2, hierarchy2 = cv2.findContours(mask_red, cv2.RETR_EXTERNAL, cv2.CHAIN_APPROX_NONE) 31 32 for cnt in contours: 33 (x, y, w, h) = cv2.boundingRect(cnt) 34 cv2.rectangle(frame, (x, y), (x + w, y + h), (0, 255, 255), 2) 35 cv2.putText(frame, "Green", (x, y - 5), font, 0.7, (0, 255, 0), 2) 36 37 for cnt2 in contours2: 38 (x2, y2, w2, h2) = cv2.boundingRect(cnt2) 39 cv2.rectangle(frame, (x2, y2), (x2 + w2, y2 + h2), (0, 255, 255), 2) 40 cv2.putText(frame, "Red", (x2, y2 - 5), font, 0.7, (0, 0, 255), 2) 41 num = num + 1 42 cv2.imshow("dection", frame) 43 cv2.imwrite("imgs/%d.jpg"%num, frame) 44 if cv2.waitKey(20) & 0xFF == 27: 45 break 46 cv2.waitKey(0) 47 cv2.destroyAllWindows()
As shown in the figure, we will detect the red area

Final rendering:
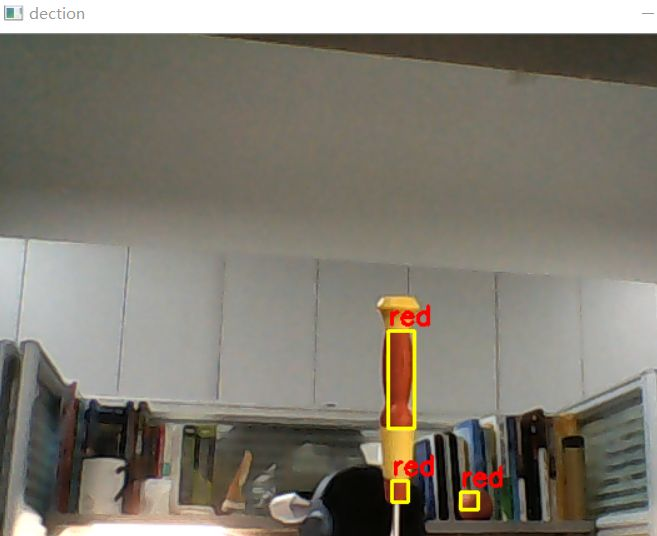
.