For the eureka project of HongHu cloud, we do the following construction. The whole construction process is very simple. I will record every step of the construction process, hoping to help you:
1. Create a maven project named particle common Eureka and inherit the particle common service. The specific pom.xml configuration file is as follows:
<?xml version="1.0" encoding="UTF-8"?>
<project xmlns="http://maven.apache.org/POM/4.0.0" xmlns:xsi="http://www.w3.org/2001/XMLSchema-instance"
	xsi:schemaLocation="http://maven.apache.org/POM/4.0.0 http://maven.apache.org/xsd/maven-4.0.0.xsd">
	<modelVersion>4.0.0</modelVersion>

	<parent>
		<groupId>com.ml.honghu</groupId>
		<artifactId>particle-commonservice</artifactId>
		<version>0.0.1-SNAPSHOT</version>
	</parent>

	<artifactId>particle-commonservice-eureka</artifactId>
	<packaging>jar</packaging>

	<name>particle-commonservice-eureka</name>
	<description>particle-commonservice project for Spring Boot</description>

	<dependencies>
		<dependency>
			<groupId>org.springframework.cloud</groupId>
			<artifactId>spring-cloud-starter-eureka-server</artifactId>
		</dependency>
		<dependency>
			<groupId>org.springframework.boot</groupId>
			<artifactId>spring-boot-starter-security</artifactId>
		</dependency>
		<dependency>
			<groupId>org.springframework.boot</groupId>
			<artifactId>spring-boot-devtools</artifactId>
		</dependency>

		<dependency>
			<groupId>org.springframework.boot</groupId>
			<artifactId>spring-boot-starter-test</artifactId>
			<scope>test</scope>
		</dependency>

	</dependencies>

	<build>
		<plugins>
			<plugin>
				<groupId>org.springframework.boot</groupId>
				<artifactId>spring-boot-maven-plugin</artifactId>
				<executions>
					<execution>
						<id>1</id>
						<goals>
							<goal>repackage</goal>
						</goals>
					</execution>
	                <execution>
	                	<id>2</id>
	                    <goals>
	                        <goal>build-info</goal>
	                    </goals>
	                </execution>
				</executions>
				<configuration>
					<executable>true</executable>
				</configuration>

			</plugin>
		</plugins>
	</build>
</project>
2. Refer to the relevant configuration of eureka in the startup class entry. The code is as follows:
package com.ml.honghu;

import org.springframework.boot.SpringApplication;
import org.springframework.boot.autoconfigure.SpringBootApplication;
import org.springframework.cloud.netflix.eureka.server.EnableEurekaServer;

@EnableEurekaServer
@SpringBootApplication
public class ServiceApplication {

	public static void main(String[] args) {
		SpringApplication.run(ServiceApplication.class, args);
	}
}
3. Configure the application.yml file
# Server (the default port of Eureka is 8761)
server:
  port: 8761

# spring
spring:
  application:
    name: particle-commonservice-erueka

# eureka
eureka:
  client:
    # Register to eureka or not
    register-with-eureka: true
    # Whether to obtain registration information from eureka
    fetch-registry: false
    availability-zones:
      honghu: honghuZone
    service-url:
      honghuZone: http://honghu:123456@localhost:8761/eureka/
      defaultZone: http://honghu:123456@localhost:8761/eureka/
  instance:
    prefer-ip-address: true
    hostname: localhost
    metadataMap:
      zone: honghuZone
      user: ${security.user.name}
      password: {security.user.password}

  # Designated environment
  environment: dev
  #Specify data center
  datacenter: honghu
  # Turn off self protection mode
  server:
    enable-self-preservation: false
  #Set the time interval for cleaning invalid nodes. The default is 60000, which is 60s
    eviction-interval-timer-in-ms: 60000

# Service authentication
security:
  basic:
    enabled: true
  user:
    name: honghu
    password: 123456

management:
  security:
    enabled: false
4. Add the log mechanism and package operation mechanism of the project (we will write the package deployment mechanism for Linux Centos in detail later)
5. After the deployment of the whole project is completed, run as > spring boot app manually. The running results are as follows:
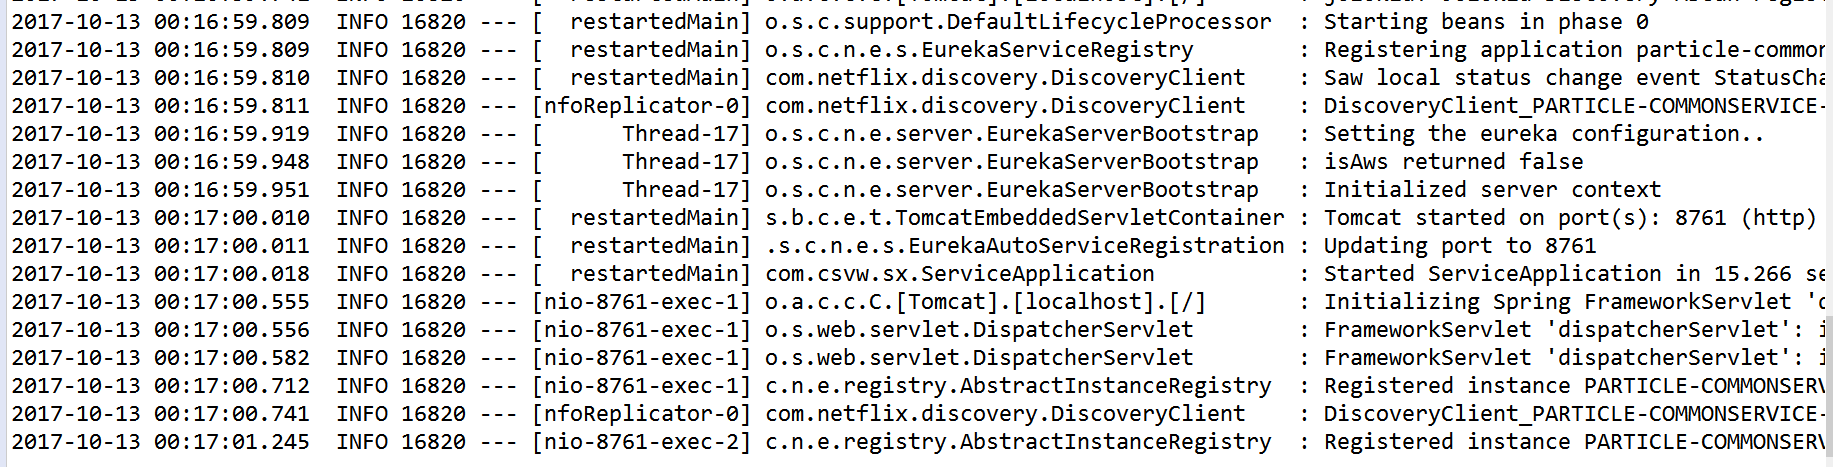
Console run results:
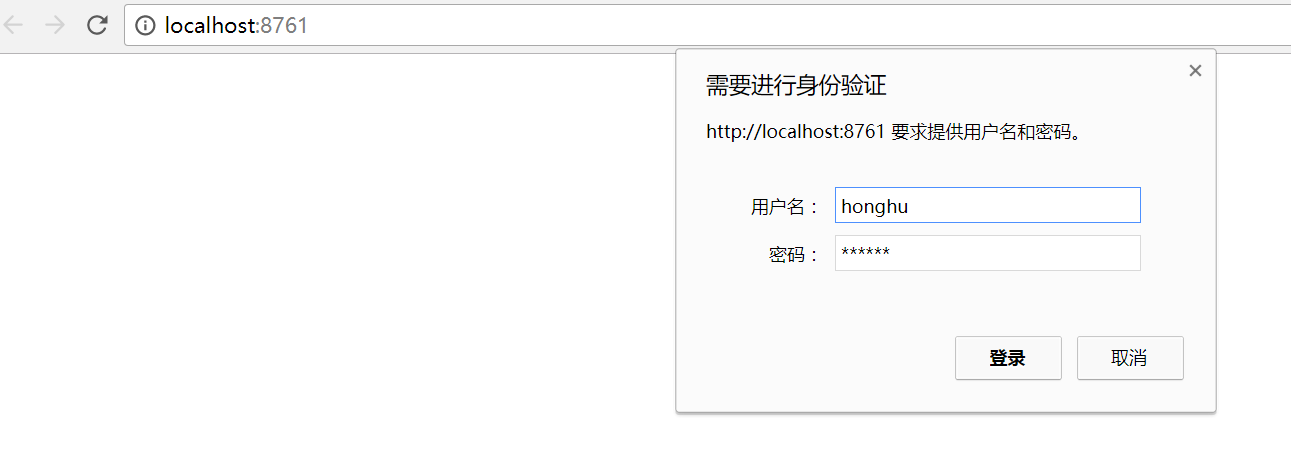
Access the console and log in:
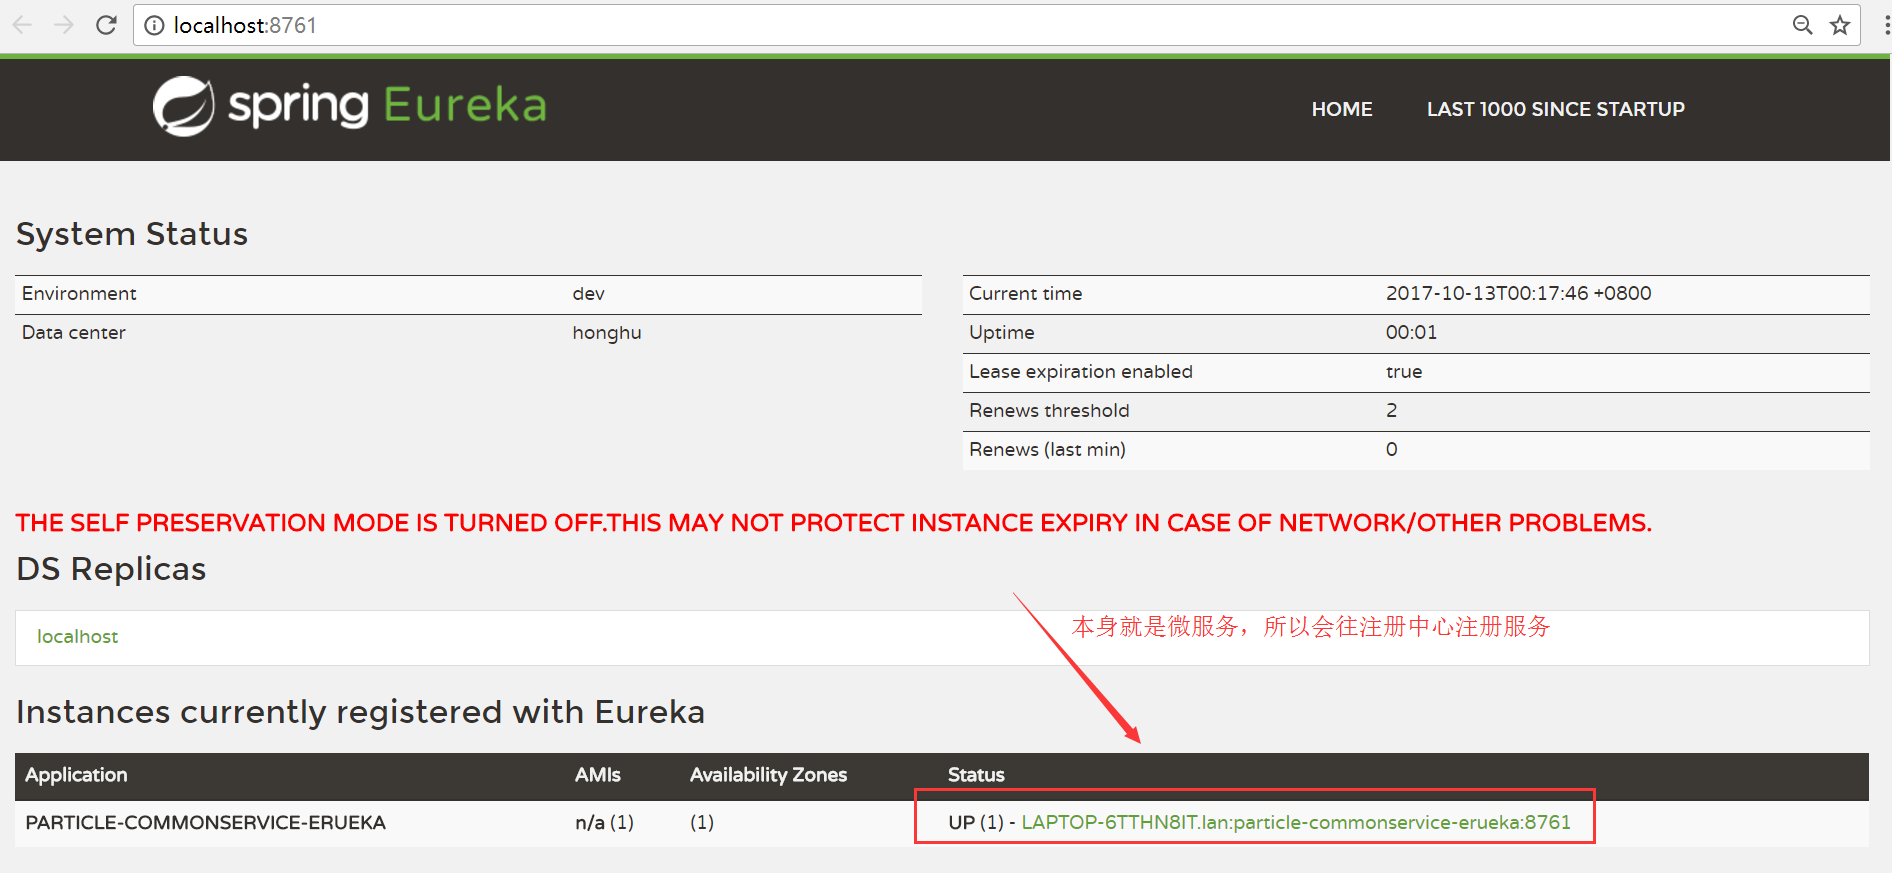
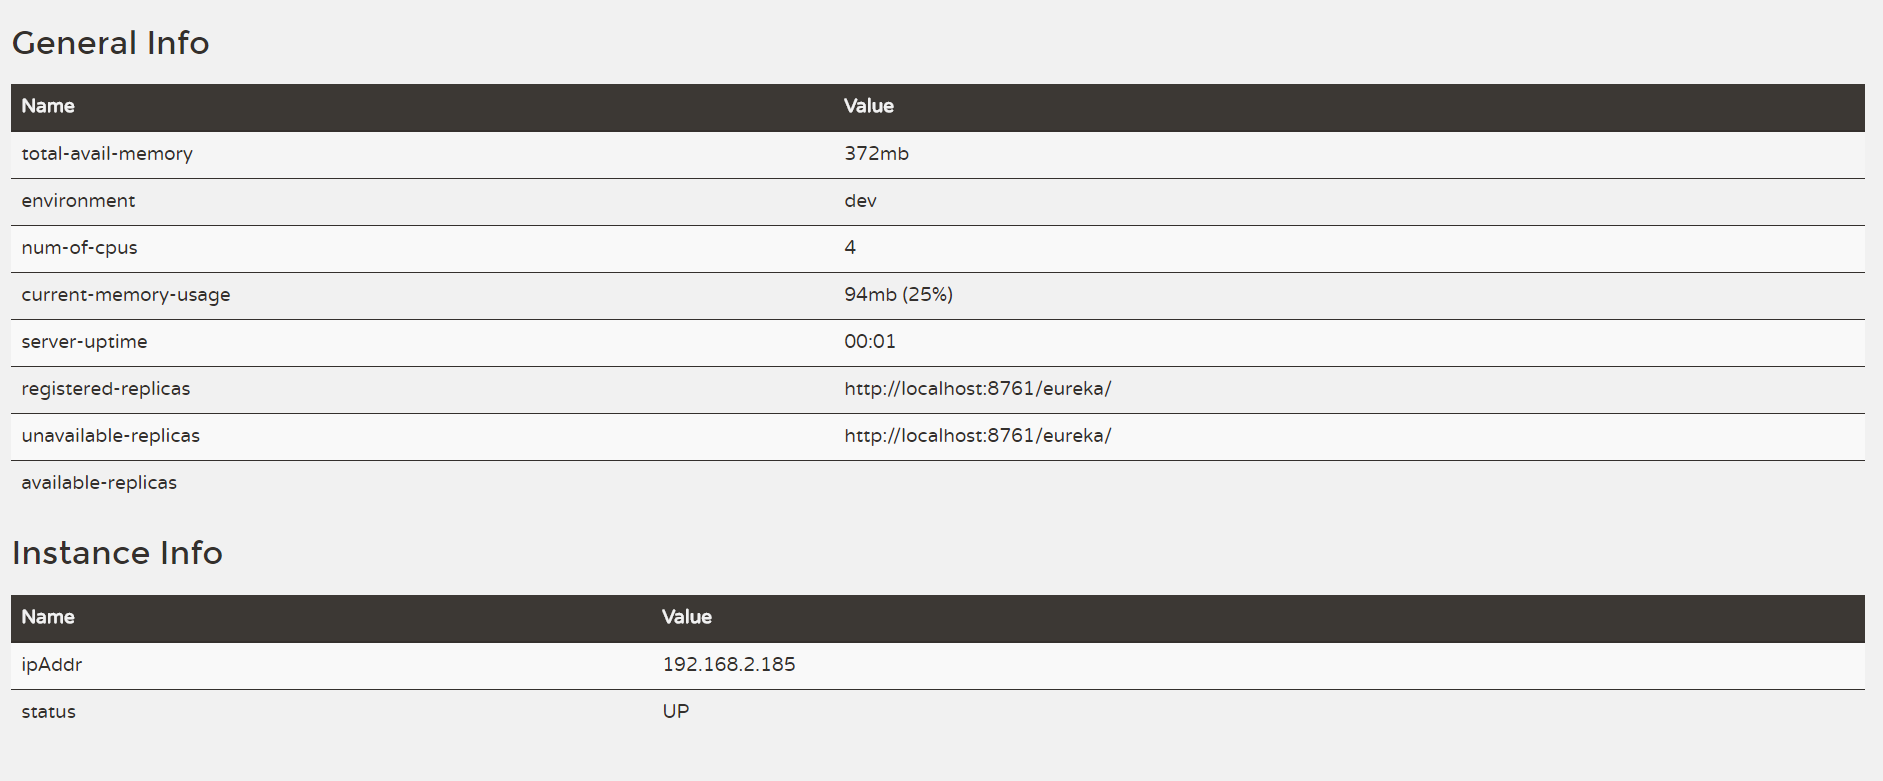
Console operation effect:
From now on, I will record the construction process and essence of the recently developed spring cloud micro service Cloud Architecture to help more friends who are interested in developing the spring cloud framework. Let's discuss the construction process of the spring cloud architecture and how to apply it to enterprise projects.