Preface:
We've seen a lot of articles analyzing the use or principles of Redis, but the introduction to a complete set of independent redis cluster environments is not much or not detailed enough.
Then, this paper will take you hand to set up a Redis cluster environment, Redis cluster in the company's internal production environment, mostly built using the Linux operating system.
Therefore, this paper will also lead you to set up a virtual machine environment, in which Linux is installed, commonly used Linux operating systems such as Ubuntu, CentOS, Redhat and so on.
It happens that I downloaded a CentOS image on my notebook before, so let's use CentOS to install the operating system. The steps are simple, and will be described in detail below.
Set up a virtual machine environment:
If you are at a company, you can also install using virtual machines that are readily available within the company, but if you are not at the company, because of the limitations of the company environment itself, you may have to connect to the company's VPN to access the company's servers, which is not very convenient.
Therefore, it is better to set up a virtual machine environment on your own. As long as there is an operating system image, it is easy for you to install, use and manage.
I use the MAC OS, MAC OS is the desktop operating system of Unix kernel itself, so if your computer is a MAC, you can also set up Redis cluster directly, but at present most students still use the Windows operating system, for this reason, it is more convenient to install a virtual machine.
Virtual Machine can choose Oracle's free open source virtual machine software VirtualBox. I have not found any problems with the MAC OS at this time.
The following steps describe the installation and configuration of VirtualBox:
VirtualBox is silly, very simple, and since some people don't use it all, it's also described here.
1) Download and install on the official website
Go to the website to download the VirtualBox software for your computer's operating system.
Download address: https://www.virtualbox.org/wi...
Current latest version of OS X: VirtualBox-6.0.14-133895-OSX.dmg
After downloading, double-click to install directly.
2) New Virtual Machine
The "Expert Mode" selected here is created. If the "Wizard Mode" is selected (default), there will be a lot of prompts during the installation process.

Memory is created using the default selection 1024M and virtual hard disk is the default VDI, which refers to disk mirroring using VirtualBox.
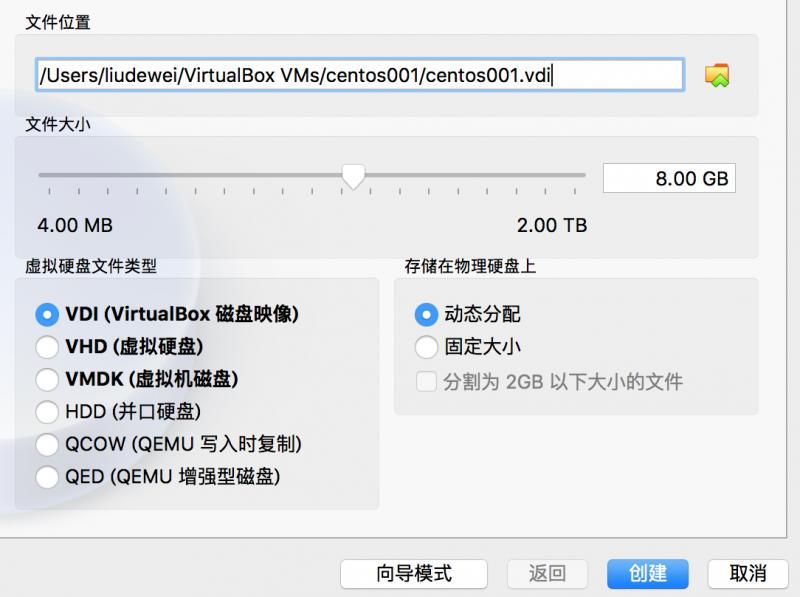
The default virtual hard disk size for Linux mirroring is 8g. If you are installing a windows virtual machine, the default virtual hard disk size recommendation is to request 32g of disk space.
Click Create to complete the creation of the virtual machine without prompting for the installation of the operating system image.
3) Configure virtual machines
Show zoom adjustment:
My computer uses the default zoom rate of 100%, the window is small, enter the global settings, click "Display" to adjust the zoom rate, such as 200%, you can adjust according to the window size.

Virtual Machine Network Card Configuration:
Enter Network and select Bridge Network Card to connect. Note that when you change your wifi environment, you need to reconfigure your network IP, etc.

4) Install operating system
When you have finished creating the new virtual machine, click Start on the right interface as shown below:

Select the locally prepared EnOS Linux operating system image file and click Create to start the installation process.
Notes on the installation process, select the language, default English, time zone Asia Shanghai, and INSTALLATION DESTINATION default auto-partition.
Once you're sure, click "Begin Installation" to start the installation. The next step is to set the root account password.
After installation, the system restarts automatically, and after restart, enter the root password you just set to log in to the virtual machine.
5) Virtual Machine Environment Configuration
Edit ifcfg-enp0s3 file:
vi /etc/sysconfig/network-scripts/ifcfg-enp0s3
# Modify ONBOOT to yes
ONBOOT=yes
Set static IP address:
# Modify default dhcp to static
BOOTPROTO=static
# Static IP Address
IPADDR=192.168.0.111
# Your wifi network subnet mask
NETMASK=255.255.255.0
# Your wifi Network Gateway Address
GATEWAY=192.168.0.1
Restart network:
service network restart
Configure DNS:
# Check NetManager status:
systemctl status NetworkManager.service
# Check the network interfaces managed by NetManager:
nmcli dev status
# Check network connections managed by NetManager:
nmcli connection show
# Set dns:
nmcli con mod enp0s3 ipv4.dns "114.114.114.114 8.8.8.8"
# For dns configuration to take effect:
nmcli con up enp0s3
Configure hosts:
Edit the hosts file, which can be used for ssh configurations.
vi /etc/hosts
# Native hosts configuration
192.168.0.111 host01
# Other host hosts configuration
192.168.0.112 host02
Turn off the firewall:
By default, starting some software will make the network unable to communicate
systemctl stop firewalld.service
systemctl disable firewalld.service
Configure yum:
yum as package management tool
yum clean all
# Local cache of package downloads from the server
yum makecache
yum install -y wget
At this point, you are logged in to the virtual machine. If you execute ifconfig, you will not see the network card information. Install the net-tools toolkit.
yum install -y net-tools
Install JDK:
There are many ways to install, if you have an rpm package, you can download it from wget.
Execute the rpm installation command:
rpm -ivh jdk-8u131-linux-x64.rpm
Configure the JDK environment:
vi ~/ .bashrc
export JAVA_HOME=/usr/java/latest
export PATH=$PATH:$JAVA_HOME/bin
source .bashrc
Check that the installation was successful: java-version normally displays JDK version information to indicate that the installation is working.
6) Installation of other virtual machine nodes
VirtualBox provides virtual machine cloning, installs a virtual machine operating system, and quickly creates multiple virtual machines with the same operating system by "copying".

Modify the virtual machine name after copying, and after normal startup, modify the static IP address and hosts configuration, refer to step 5.
7) ssh Secret-Free Trust Configuration
After ssh mutual trust configuration, you can log on to the server through ssh followed by IP or hostname without entering a password, which is a very common configuration during maintenance.
Execute command:
# Generate a native public-private key pair
ssh-keygen -t rsa
Copy the public key as an authorized_keys file, and then use ssh to connect to the local machine without entering a password.
cd /root/.ssh
cp id_rsa.pub authorized_keys
Use the ssh-copy-id-i hostname command to copy the local public key to the authorized_keys file of the specified machine.
For example, if you are on the host01 machine, you can log on to the host02 machine directly through the ssh host02 command in the future, and you do not need to enter the password again.
Redis cluster environment setup:
Introduction to Redis Cluster:
Redis is an open source key-value distributed storage system. Because of its excellent performance, most Internet enterprises use it as a server-side distributed cache.Redis only supported single-instance mode before 3.0, but also supported master-slave mode and sentry mode to achieve high availability and avoid single-point failures.Cluster mode has been introduced since version 3.0 to better meet business needs.
Redis cluster uses P2P mode and is completely de-centralized.All keys are divided into 16384 slots, and each Redis instance is responsible for a portion of the slots.Periodically synchronize data between cluster nodes to maintain data consistency.The Redis client can then initiate a request to any Redis instance, and if the required data does not exist in that instance, the redirect command will direct the client to access the other instances it needs.
This article builds clusters based on Redis version 4.0.1.
Of course, if you have a Docker or K8S environment, you can quickly set up a cluster environment after pulling the ready-made Redis image directly from the mirror warehouse and starting with some parameter configurations.
But this way of using it is black box for you, that is, the installation process is unknown to you.
For your convenience, we still deploy Redis using the original installation package.
We prepare three virtual machines to build a three-master, three-slave EDIS cluster.

Redis is currently the latest version to 5.0.6, this installation uses Redis 4.0.1 version, Redis 4.0 version is also currently used by many enterprises, a version that has been extensively validated in the production environment, and is relatively stable.
The clustering process is as follows:
1) Download and install
Download the installation package:
# wget download installation package
wget http://download.redis.io/releases/redis-4.0.14.tar.gz
# decompression
tar xzf redis-4.0.14.tar.gz
# Rename it redis and copy it to the / usr/local directory
mv redis-4.0.14 redis
cp -r redis /usr/local
Install dependent packages:
yum install -y tcl gcc zlib-devel openssl-devel
Compile:
make MALLOC=libc
Add common commands to the system PATH:
cp -a /usr/local/redis/src/redis-server
/usr/local/redis/src/redis-cli
/usr/local/redis/src/redis-sentinel
/usr/local/redis/src/redis-trib.rb
/usr/local/redis/src/redis-check-aof
/usr/local/redis/src/redis-check-rdb
/usr/local/redis/src/redis-benchmark
/usr/local/bin/
This allows commands to be used directly from any directory on the server.
2) Cluster directory creation and configuration
Create Redis Cluster Directory:
mkdir -p /opt/redis-cluster/nodes-{7001,7002}
After the command is executed, nodes-7001 and nodes-7002 directories are created in the / opt/redis-cluster directory.
Create a new redis.conf file in these two directories and add the file contents:
# Current machine IP address binding settings port
bind 192.168.0.111
# redis listening port
port 7001
# Enable daemons with yes
daemonize yes
# When Redis runs as a daemon, Redis defaults to pid
pidfile redis_7001.pid
# There are four levels of logging: debug, verbose, notice (default), warning
loglevel notice
# Log Directory
logfile "/opt/redis-cluster/nodes-7001/redis_7001.log"
# Local Database Storage Directory
dir /opt/redis-cluster/nodes-7001/
# Save node configuration, create automatically, update automatically
cluster-config-file nodes-7001.conf
# Manage the Redis daemon through upstart and systemd, operating system specific
supervised no
# Log after each update operation, default:no
appendonly yes
# Turn on cluster mode
cluster-enabled yes
# Cluster timeout, beyond which a node fails to respond is determined to be down
cluster-node-timeout 15000
# Synchronize data to a data file as many updates as possible within a given period of time.
save 900 1
save 300 10
save 60 10000
# Name of the local database
dbfilename dump.rdb
# Store to local file to turn compression on, default:yes
rdbcompression yes
# Update log file name
appendfilename "appendonly.aof"
# Specify update log conditions:
# no: Operating systems like this synchronize data caches to disk (fast)
# always: Call fsync() manually to write data to disk after each update operation (slow, secure)
# everysec: Synchronize once per second (compromise, default)
appendfsync everysec
# Password not set yet, configuration given
# When master service is password protected, slav service connects master's password
#masterauth
# Connection password, client needs to connect using AUTH <password>command
#requirepass
Other parameters can consult the official website documentation.
3) Download and install ruby
Setting up a Redis cluster uses the redis-trib.rb script to help create it, so you need to rely on ruby.
Of course, all three virtual machines can be installed, or you can choose one of them to install, remember it, and then execute commands from that machine to create a Redis cluster.
The Centos 7 operating system we use does not have ruby by by default, so we need to download and install it separately.
Download and install ruby:
# wget download ruby installation package
wget https://cache.ruby-lang.org/pub/ruby/2.3/ruby-2.3.4.tar.gz
# decompression
tar xzf ruby-2.3.4.tar.gz
# Copy to / usr/local directory and rename to ruby directory
mv ruby-2.3.4 /usr/local/ruby
# Compile
cd /usr/local/ruby/ && ./configure && mark && make install
# View the version installed below
ruby -v
If your ruby version is too low, uninstall and reinstall:
ruby -v
rpm -qa | grep ruby
yum erase ruby
Install ruby-redis.gem:
# Install ruby-redis.gem
cd /usr/local/redis && gem install redis
Installation process if error is as follows:
`
ERROR: Loading command: install (LoadError)
cannot load such file -- zlib
ERROR: While executing gem ... (NoMethodError)
undefined method invoke_with_build_args for nil:NilClass
`
Solution:
cd /usr/local/ruby/ext/zlib
ruby extconf.rb
make && make install
Execute gem install redis again if the following error occurs:
`
ERROR: While executing gem ... (Gem::Exception)
Unable to require openssl, install OpenSSL and rebuild ruby (preferred) or use non-HTTPS sources
`
Solution:
cd /usr/local/ruby/ext/openssl
ruby extconf.rb
 Replace the ${top_srcdir} in the MakeFile file generated by the previous step with. /..
make && make install
3) Repeat steps 1 and 2 above on two other virtual machines
Remember to modify the port of the redis.conf file:
Edit files without requiring port-by-port modifications
vi redis.conf
Type the following command directly:
:%s/7001/7002/g
You can batch change 7001 to 7002, and then enter: wq! Exit save.
4) Create Redis Cluster
Create a Redis cluster using the redis-trib.rb script and automatically assign three master s and three slave s in the cluster after executing the following commands.
cd /usr/local/redis/src
./redis-trib.rb create --replicas 1 192.168.0.111:7001 192.168.0.111:7002 192.168.0.112:7001 192.168.0.112:7002 192.168.0.113:7001 192.168.0.113:7002
Encountered during cluster creation:
` >>>Creating cluster
[ERR] Sorry, can't connect to node 192.168.0.111:7001`
Solution:
Close the firewall as mentioned above.
Install Cluster Execution Results Example:

Enter yes, return, as shown in the following example:

As you can see from the diagram, three M (Master s) have allocated port 7001 for three virtual machines and three S (Slave) have allocated port 7002 for three virtual machines.
If you need to re-create the Redis cluster or add new nodes to the cluster after the virtual machine restarts, you may encounter the following problems:
 ./redis-trib.rb create --replicas 1 192.168.0.111:7001 192.168.0.111:7002 192.168.0.112:7001 192.168.0.112:7002 192.168.0.113:7001 192.168.0.113:7002
>>> Creating cluster
[ERR] Node 192.168.0.111:7001 is not empty. Either the node already knows other nodes (check with CLUSTER NODES) or contains some key in database 0.
Solution:
Delete the dump.rdb, appendonly.aof, nodes-7001.conf files below the node and restart Redis.
cd /opt/redis-cluster/nodes-7001 && rm -rf dump.rdb appendonly.aof nodes-7001.conf
cd /opt/redis-cluster/nodes-7002 && rm -rf dump.rdb appendonly.aof nodes-7002.conf
# Restart redis, boot from start, described in more detail below
service redis restart
If a new node is added, you may need to log in to the node and delete the database in addition to executing the above commands.
redis-cli -c -h 192.168.0.114 -p 7001
192.168.0.114:7001> flushall
OK
5) Test Redis Cluster
For testing convenience, the cluster password is not set at this time, and the password setting parameters are also mentioned in the configuration above.
Log in using the redis-cli client:
# Connect directly through the redis-cli command
redis-cli -c -h 192.168.0.111 -p 7001
192.168.0.111:7001> set name zhangsan
-> Redirected to slot [5798] located at 192.168.0.112:7001
OK
192.168.0.112:7001> get name
"zhangsan"
Find any IP and port connections from other nodes to query this key:
redis-cli -c -h 192.168.0.113 -p 7001
192.168.0.113:7001> get name
-> Redirected to slot [5798] located at 192.168.0.112:7001
"zhangsan"
The data we tested is synchronized between clusters.
View the cluster configuration information below:
# redis-cli command connection node
redis-cli -c -h 192.168.0.111 -p 7001
# Execute CLUSTER nodes and see information about cluster node assignment
192.168.0.112:7001> CLUSTER nodes
f3b21c6377853c8da63ac6a55fecb1937715ec3b 192.168.0.111:7002@17002 slave 6e81b09991104bf09129aa2bbd226d94d3fcdbe7 0 1574004839302 3 connected
75dec349e2b7fcbcad4d5f5d7979aadefdf69514 192.168.0.113:7002@17002 slave d32ab53d8f93661b09a3c31513fce8c4ed6cbf2b 0 1574004838284 6 connected
6388d80cd9f0a1fbf03d0ac2a309cfedfdb79dc4 192.168.0.111:7001@17001 master - 0 1574004836251 1 connected 0-5460
59f25e64a8ab1fc3309e15d51ea630f439793a94 192.168.0.112:7002@17002 slave 6388d80cd9f0a1fbf03d0ac2a309cfedfdb79dc4 0 1574004840322 1 connected
d32ab53d8f93661b09a3c31513fce8c4ed6cbf2b 192.168.0.113:7001@17001 master - 0 1574004839000 5 connected 10923-16383
6e81b09991104bf09129aa2bbd226d94d3fcdbe7 192.168.0.112:7001@17001 myself,master - 0 1574004837000 3 connected 5461-10922
# Execute CLUSTER info and see information about the cluster itself
192.168.0.112:7001> CLUSTER info
cluster_state:ok
cluster_slots_assigned:16384
cluster_slots_ok:16384
cluster_slots_pfail:0
cluster_slots_fail:0
cluster_known_nodes:6
cluster_size:3
cluster_current_epoch:6
cluster_my_epoch:3
cluster_stats_messages_ping_sent:1256
cluster_stats_messages_pong_sent:1275
cluster_stats_messages_meet_sent:3
cluster_stats_messages_sent:2534
cluster_stats_messages_ping_received:1273
cluster_stats_messages_pong_received:1259
cluster_stats_messages_meet_received:2
cluster_stats_messages_received:2534
6) Set up boot-up self-start
Because of the virtual machines we use, we can shut down directly when not in use, so as to avoid occupying system resources all the time.
When restarting a virtual machine, if you're not too cumbersome, you can log in to the virtual machine and run the redis-server command directly to start the service.
More elegant way, of course, is to start Redis service automatically after boot-up, which is also the production environment, R&D or maintenance must be concerned about, server restart, corresponding services also need to start automatically without manual intervention.
Enter the / etc/init.d/directory to create and edit the redis file:
#!/bin/bash
#chkconfig: 22345 10 90
#description: Start and Stop redis

IP=`ip addr | grep 'state UP' -A2 | tail -n1 | awk '{print $2}' | cut -f1 -d '/'`

REDISPORT_1=7001
REDISPORT_2=7002

PIDFILE_1=/opt/redis-cluster/nodes-7001/redis_7001.pid
PIDFILE_2=/opt/redis-cluster/nodes-7002/redis_7002.pid
CONF_1="/opt/redis-cluster/nodes-7001/redis.conf"
CONF_2="/opt/redis-cluster/nodes-7002/redis.conf"

EXEC=/usr/local/redis/src/redis-server
CLIEXEC=/usr/local/redis/src/redis-cli

case "$1" in
    start)
        if [ -f $PIDFILE_1 ];then
            echo "$PIDFILE_1 exists,process is already running or crashed"
        else
            echo "Starting Redis server... $CONF_1"
            $EXEC $CONF_1
        fi
        if [ -f $PIDFILE_2 ];then
            echo "$PIDFILE_2 exists,process is already running or crashed"
        else
            echo "Starting Redis server... $CONF_2"
            $EXEC $CONF_2
        fi
        ;;
    stop)
        if [ ! -f $PIDFILE_1 ];then
            echo "$PIDFILE_1 does not exist,process is not running"
        else
            PID=$(cat $PIDFILE_1)
            echo "Stopping..."
            $CLIEXEC -h $IP -p $REDISPORT_1 shutdown
            while [ -x /proc/${PID} ]
                do
                    echo "Waiting for Redis to shutdown..."
                    sleep 1
                done
                echo "Redis stopped $CONF_1"
        fi

        if [ ! -f $PIDFILE_2 ];then
            echo "$PIDFILE_2 does not exist,process is not running"
        else
            PID=$(cat $PIDFILE_2)
            echo "Stopping..."
            $CLIEXEC -h $IP -p $REDISPORT_2 shutdown
            while [ -x /proc/${PID} ]
                do
                    echo "Waiting for Redis to shutdown..."
                    sleep 1
                done
                echo "Redis stopped $CONF_2"
        fi
        ;;
    restart)
        "$0" stop
        sleep 3
        "$0" start
        ;;
    *)
       echo "Please use start or stop or restart as first argument"
        ;;
esac
Each virtual machine has two Redis ports 7001 and 7002, so the above scripts have been modified. If a machine has one Redis service, it is much easier. You can copy the scripts yourself.
Redis files are modified to executable files:
chmod +x /etc/init.d/redis
Add to the list of system services:
# Add/etc/init.d/redis to the list of system services
chkconfig --add redis
# Set boot-up self-start
chkconfig redis on
# View all registered script files
chkconfig --list
Then you don't need to look for Redis startup commands and configuration files for easy administration and maintenance.
Start a little low:
/usr/local/redis/src/redis-server /opt/redis-cluster/nodes-7001/redis.conf
/usr/local/redis/src/redis-server /opt/redis-cluster/nodes-7002/redis.conf
More elegant way to start:
# Start Services
service redis start
# Out of Service
service redis stop
# Restart Service
service redis restart
Another way to turn on and start automatically:
Add the startup command directly to the / etc/rc.d/rc.local file.
Modify the rc.local file to be executable, otherwise it will not execute after restart:
chmod +x /etc/rc.d/rc.local
Summary:
This paper uses VirtualBox free open source virtual machine software to complete the construction of virtual machine environment step by step.
Then a Redis cluster environment is built based on three virtual machine environments.
Redis cluster environment is created by redis-trib.rb script, which consists of three machines, six communication ports and automatically builds a three-master, three-slave cluster architecture.
Based on the results of executing the redis-trib.rb script log, the Reedis cluster architecture for automatically assigning IP is as follows:

The solutions to the problems encountered during the virtual machine installation and Redis cluster installation are given. If you encounter some new problems during the installation, you can also query the relevant information to solve them.
In addition, you can learn many common Linux commands from the above installation practices.
When you build your own single machine or cluster environment, you can #Collection#This article as a reference!
Welcome to pay attention to my public number, scan QR code to get more exciting articles, and grow with you ~
