Nginx implementation connection timeout
- In order to avoid the waste of resources caused by the same customer occupying the connection for a long time in the enterprise website, the corresponding connection timeout parameters can be set to control the connection access time.
- Viewing connection parameters using the fiddler tool
Timeout parameter
Keepalive_timeout
Set the connection retention timeout, which can be set only by default to 65 seconds, depending on the site, or closed, at http, server, or location segments
Client_header_timeout
Specify the timeout to wait for the client to send the request header
Client_body_timeout
Set Request Body Read Timeout
Modify Profile
[root@localhost ~]# cd /usr/local/nginx/conf/
[root@localhost conf]# vim nginx.conf    ##Modify Profile

#keepalive_timeout  0;
keepalive_timeout  65 180;     ##Timeout on the server and client
client_header_timeout 80;       ##Request Header Timeout
client_body_timeout 80;          ##Request Body Timeout

[root@localhost conf]# service nginx stop  ##Turn Off Open Service
[root@localhost conf]# service nginx start
Number of Nginx Running Processes
- In high concurrency scenarios, more Nginx processes need to be started to ensure fast response to handle user requests and avoid blocking
- You can use the ps aux command to see the number of Nginx running processes
- Change the configuration method for the number of processes
Modify profile, modify process configuration parameters - Modify worker_process parameter of configuration file
Number of CPU s or cores generally set
Set to twice the number of CPU s or cores in high concurrency - With more processes running, Nginx will not temporarily start a new process to provide services in response to an access request, reducing system overhead and improving service speed
- Use ps aux to see how the number of running processes changes
- By default, multiple processes of Nginx may run on one CPU, and different processes can be assigned to different CPUs to make full use of hardware multicore multiCPUs
- On a 4-core physical server, you can configure the following to assign processes
worker_cpu_affinity 0001 0010 0100 1000
1, view current worker process information
[root@localhost ~]# ps aux | grep nginx  ##View process information
root       7231  0.0  0.0  20548   620 ?        Ss   01:57   0:00 nginx: master process  ##Main Process
nginx      7232  0.0  0.0  23076  1400 ?        S    01:57   0:00 nginx: worker process ##1 worker process
root       7372  0.0  0.0 112728   972 pts/2    S+   02:07   0:00 grep --color=auto nginx
2, add CPU for virtual machine
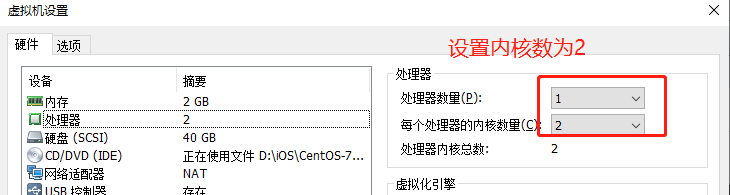
3, Modify Profile
[root@localhost ~]# cd /proc/
[root@localhost proc]# cat cpuinfo   ##View number of cpu cores
processor       : 0   ##First
...
processor       : 1   ##The second
...
[root@localhost proc]# cd /usr/local/nginx/conf/
[root@localhost conf]# vim nginx.conf   ##Modify Profile

#user  nobody;
worker_processes  2;    ##Number of cores is 2
worker_cpu_affinity 01 10;   ##Process Assignment
4, View Work Processes
[root@localhost conf]# ps aux | grep nginx   ##View Nginx process information
nginx  2329  0.0  0.0  23076  1392 ?    S  20:12   0:00 nginx: worker process
##At this point, there are two worker processes
nginx   2330  0.0  0.0  23076  1384 ?   S  20:12   0:00 nginx: worker process
Nginx Implements Web Page Compression
- Nginx's ngx_http_gzip_module compression module provides the ability to compress file contents
- Allow the Nginx server to compress the output before sending it to the client to save bandwidth and improve the user's access experience. Installed by default
- Compression performance can be optimized by adding appropriate compression function parameters to the configuration file
Compression function parameters
- gzip on: turn on gzip compressed output
- gzip_min_length 1k: Sets the minimum number of bytes of pages that are allowed to compress
- gzip_buffers 4 16k: Indicates that four units of 16K memory are requested for the compression result stream cache. The default value is to request the same size of memory as the original data to store the gzip compression result
- zip_http_version 1.0: Used to set the recognition HTTP protocol version, default is 1.1. Most browsers currently support gzip decompression, but it is the slowest to process and consumes server CPU resources
- gzip_comp_level 2: used to specify gzip compression ratio, 1 compression ratio is the smallest, processing speed is the fastest; 9 compression ratio is the largest, transmission speed is fast, but processing speed is the slowest, use the default
- gzip_types text/plain: Compression type, which enables compression for those web documents
- Gzip_vary: Option lets the front-end cache server cache gzip-compressed pages
Experimental environment
Linux Server (192.168.13.142)
A win10 test machine
1, modify configuration file to add compression module content
[root@localhost ~]# cd /usr/local/nginx/conf/
[root@localhost conf]# vim nginx.conf   ##Modify Profile
        #gzip  on;   ##Turn on gzip compression (not on for now)
        gzip_min_length 1k;      ##Compression threshold
        gzip_buffers 4 16k;        ##Buffer size is 4 16k buffer sizes
        gzip_http_version 1.1;   ##Compressed version
        gzip_comp_level 6;       ##Compression ratio, 5, 6 moderate
        gzip_types text/plain application/x-javascript text/css image/jpg image/jpeg
 image/png image/gif application/xml text/javascript application/x-httpd-php app
lication/javascript application/json;
    ##Supported Type Formats
        gzip_disable "MSIE [1-6]\.";   ##Disable gzip condition and support regularity, meaning that gzip is not enabled below ie6
        gzip_vary on;     ##Cache front-end servers to cache gzip-compressed pages
2, Insert pictures in your web site
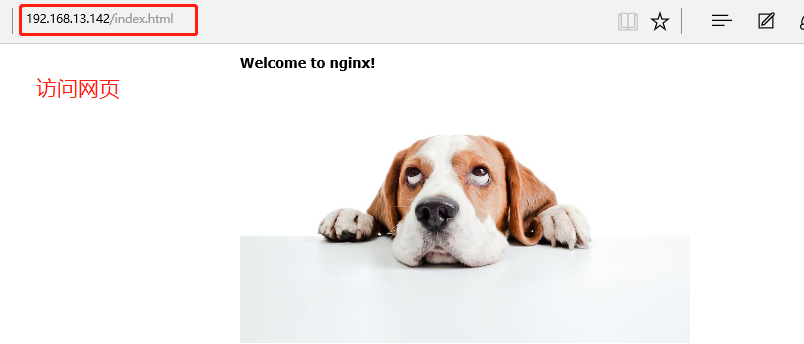
[root@localhost html]# mount.cifs //192.168.100.3/LAMP-C7/mnt ##Mount Share
Password for root@//192.168.100.3/LAMP-C7:
[root@localhost html]# ls /mnt
apr-1.6.2.tar.gz                  Discuz_X2.5_SC_UTF8.zip  LAMP-php5.6.txt
apr-util-1.6.0.tar.gz             error.png                mysql-5.6.26.tar.gz
awstats-7.6.tar.gz                httpd-2.4.29.tar.bz2     nginx-1.12.0.tar.gz
cronolog-1.6.2-14.el7.x86_64.rpm  kali.jpg                 php-5.6.11.tar.bz2
[root@localhost html]# cp /mnt/11.png ./    ##Copy Pictures to Site
[root@localhost html]# vim index.html       ##Put pictures on Web pages

<h1>Welcome to nginx!</h1>
<img src="11.jpg"/>   ##Add Picture

[root@localhost html]# service nginx stop   ##Close Open Nginx Service
[root@localhost html]# service nginx start
[root@localhost html]# systemctl stop firewalld.service ##Close Firewall
[root@localhost html]# setenforce 0
3. View web page information and capture packages with fiddler
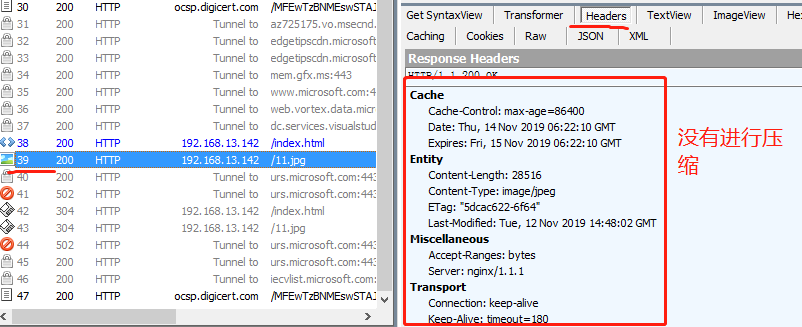
4, turn on gzip compression
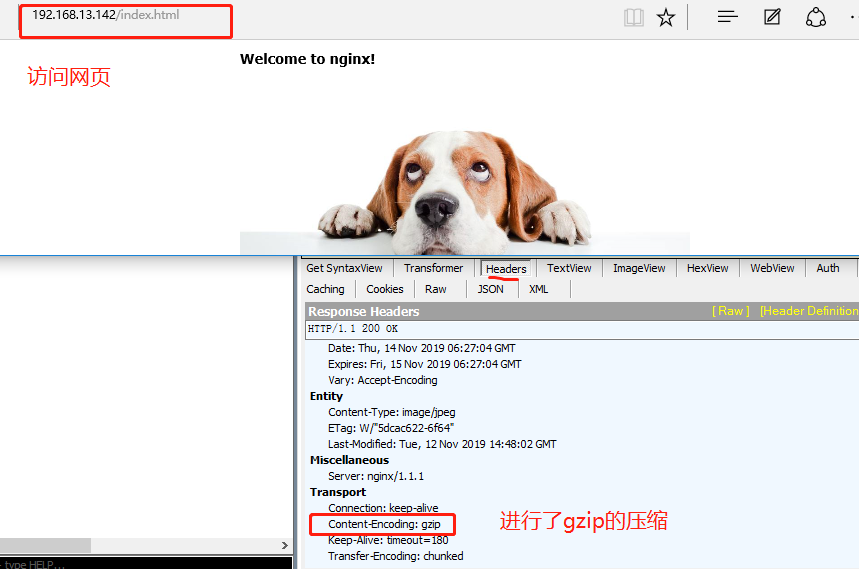
[root@localhost html]# vim /usr/local/nginx/conf/nginx.conf  ##Modify Profile
gzip  on;   ##Turn on compression
[root@localhost html]# service nginx stop  ##Turn off and start the Nginx service
[root@localhost html]# service nginx start
5, view the web page, and use fiddler to capture the package to see the compression
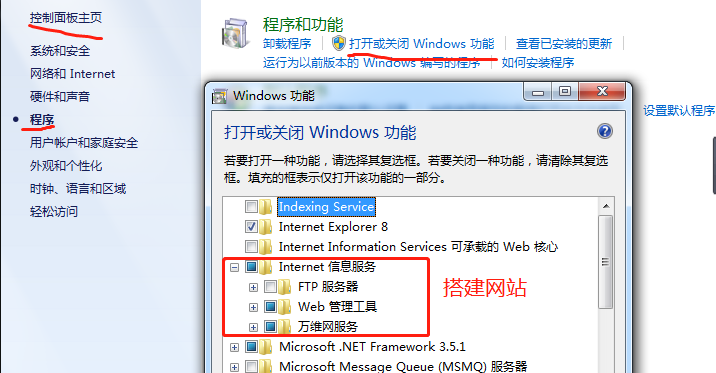
Nginx Implement Anti-theft Chain
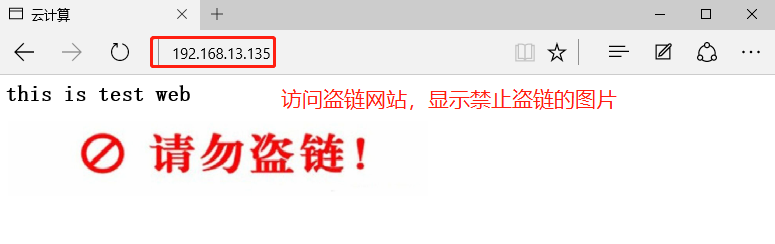
In the service of enterprise website, the function of anti-theft chain should be configured to avoid illegal usurpation of website content and cause economic losses.
Nginx anti-theft chains are also very powerful.By default, anti-theft chains can be handled by simple configuration
Experimental environment
A Linux server (192.168.13.142)
A win7 theft chain website (192.168.13.135)
A win10 test machine
1. Create a web page in the win7 theft chain website
1, create a web page content with text and modify the suffix to index.html
<html>
 <head>
     <title>cloud computing</title>
 </head>
 <body>
     <h1>this is test web</h1>
     <img src="http://Www.kgc.com/11.jpg'/> ##Pictures of theft chains
 </body>
</html>
2, set up a web site, specify DNS server address (192.168.13.142)

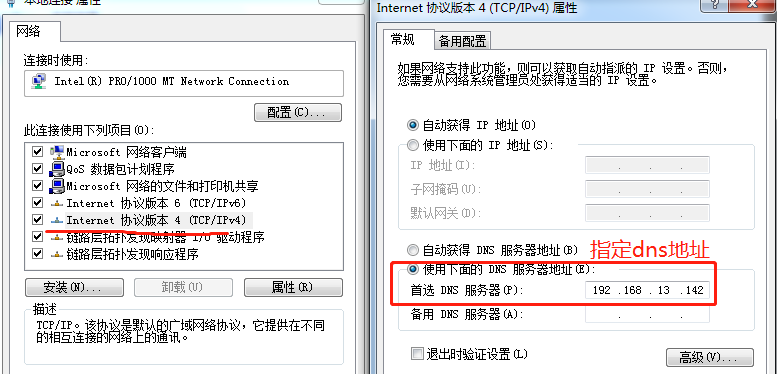
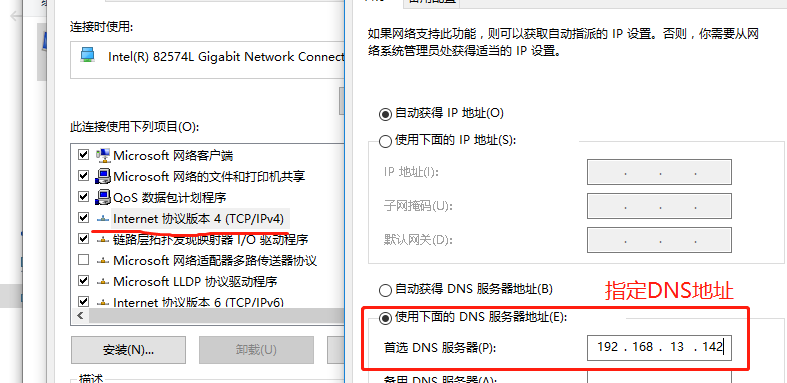
3, Install dns server
[root@localhost html]# yum install bind -y ##Install dns
[root@localhost html]# vim /etc/named.conf
options {
listen-on port 53 { any; }; ##Listen on all
listen-on-v6 port 53 { ::1; };
directory "/var/named";
dump-file "/var/named/data/cache_dump.db";
statistics-file "/var/named/data/named_stats.txt";
memstatistics-file "/var/named/data/named_mem_stats.txt";
recursing-file "/var/named/data/named.recursing";
secroots-file "/var/named/data/named.secroots";
allow-query { any; }; ##Allow all
[root@localhost html]# vim /etc/named.rfc1912.zones ##Configuration Zone Profile
zone "kgc.com" IN {
type master;
file "kgc.com.zone"; ##kgc zone data profile
allow-update { none; };
};
[root@localhost html]# cd /var/named/
[root@localhost named]# cp -p named.localhost kgc.com.zone ##Copy Template
[root@localhost named]# vim kgc.com.zone ##Modify Zone Profile
$TTL 1D
@ IN SOA @ rname.invalid. (
0 ; serial
1D ; refresh
1H ; retry
1W ; expire
3H ) ; minimum
NS @
A 127.0.0.1
www IN A 192.168.13.142 ##Local Address
[root@localhost named]# systemctl start named ##Open dns Service
[root@localhost named]# systemctl stop firewalld.service ##Close Firewall
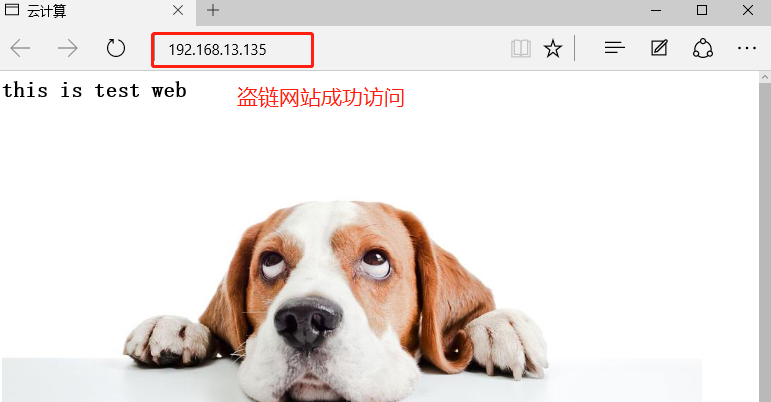
[root@localhost named]# setenforce 04. Use the test machine to visit the stolen chain website, the original website

5. Modify configuration file to turn on anti-theft chain function
[root@localhost named]# vim /usr/local/nginx/conf/nginx.conf
##Insert Anti-theft Chain Configuration in server Segment
        error_page   500 502 503 504  /50x.html;
        location = /50x.html {
                root   html;
        }

        location ~*\.(jpg|gif|swf)$ {     ##Supported formats
                        valid_referers none blocked *.kgc.com kgc.com;   ##Allow kgc.com access for suffixes
                        if ( $invalid_referer ) {
                                rewrite ^/ http://www.kgc.com/error.png; ##not send the wrong picture
                        }
        }
[root@localhost named]# cp /mnt/error.png /usr/local/nginx/html/   ##Place anti-theft chain pictures on site
[root@localhost named]# service nginx stop   ##Close Open Nginx Service
[root@localhost named]# service nginx start
6. Use the test machine to visit the stolen chain website
Parameter optimization of FPM module
- The PHP parsing function of Nginx is implemented if it is handled by FPM. In order to improve the output speed of PHP, the parameters of FPM module can be adjusted.
- FPM module parameters adjust to server memory and server load
- Start fpm process mode
static: a fixed number of fpm processes will be generated
dynamic: fpm processes will be generated dynamically
Specify by pm parameter
FPM Optimization Parameters
- Parameters for the way static s work
pm.max_children: Specifies the number of processes to start - Dynamic mode parameters
pm.max_children: Specifies the maximum number of processes to start
pm.start_servers: Initial number of fpm processes in a dynamic manner
pm.min_spare_servers: Minimum number of fpm empty processes in a dynamic manner
pm.max_spare_servers: Maximum number of fpm empty processes in a dynamic manner
FPM Optimization Parameter Adjustment
Reason for optimization: The server is a cloud server, running a personal forum, with 1.5G memory, 20 fpm processes, nearly 1G memory consumption, and slow processing
 Optimize Parameter Adjustment: FPM has five processes at startup, a minimum of 2 processes, a maximum of 8 processes, and a maximum of 20 processes.