This engine v2.0.10
target
Tile map generation collision track
process
First
We need a tile map.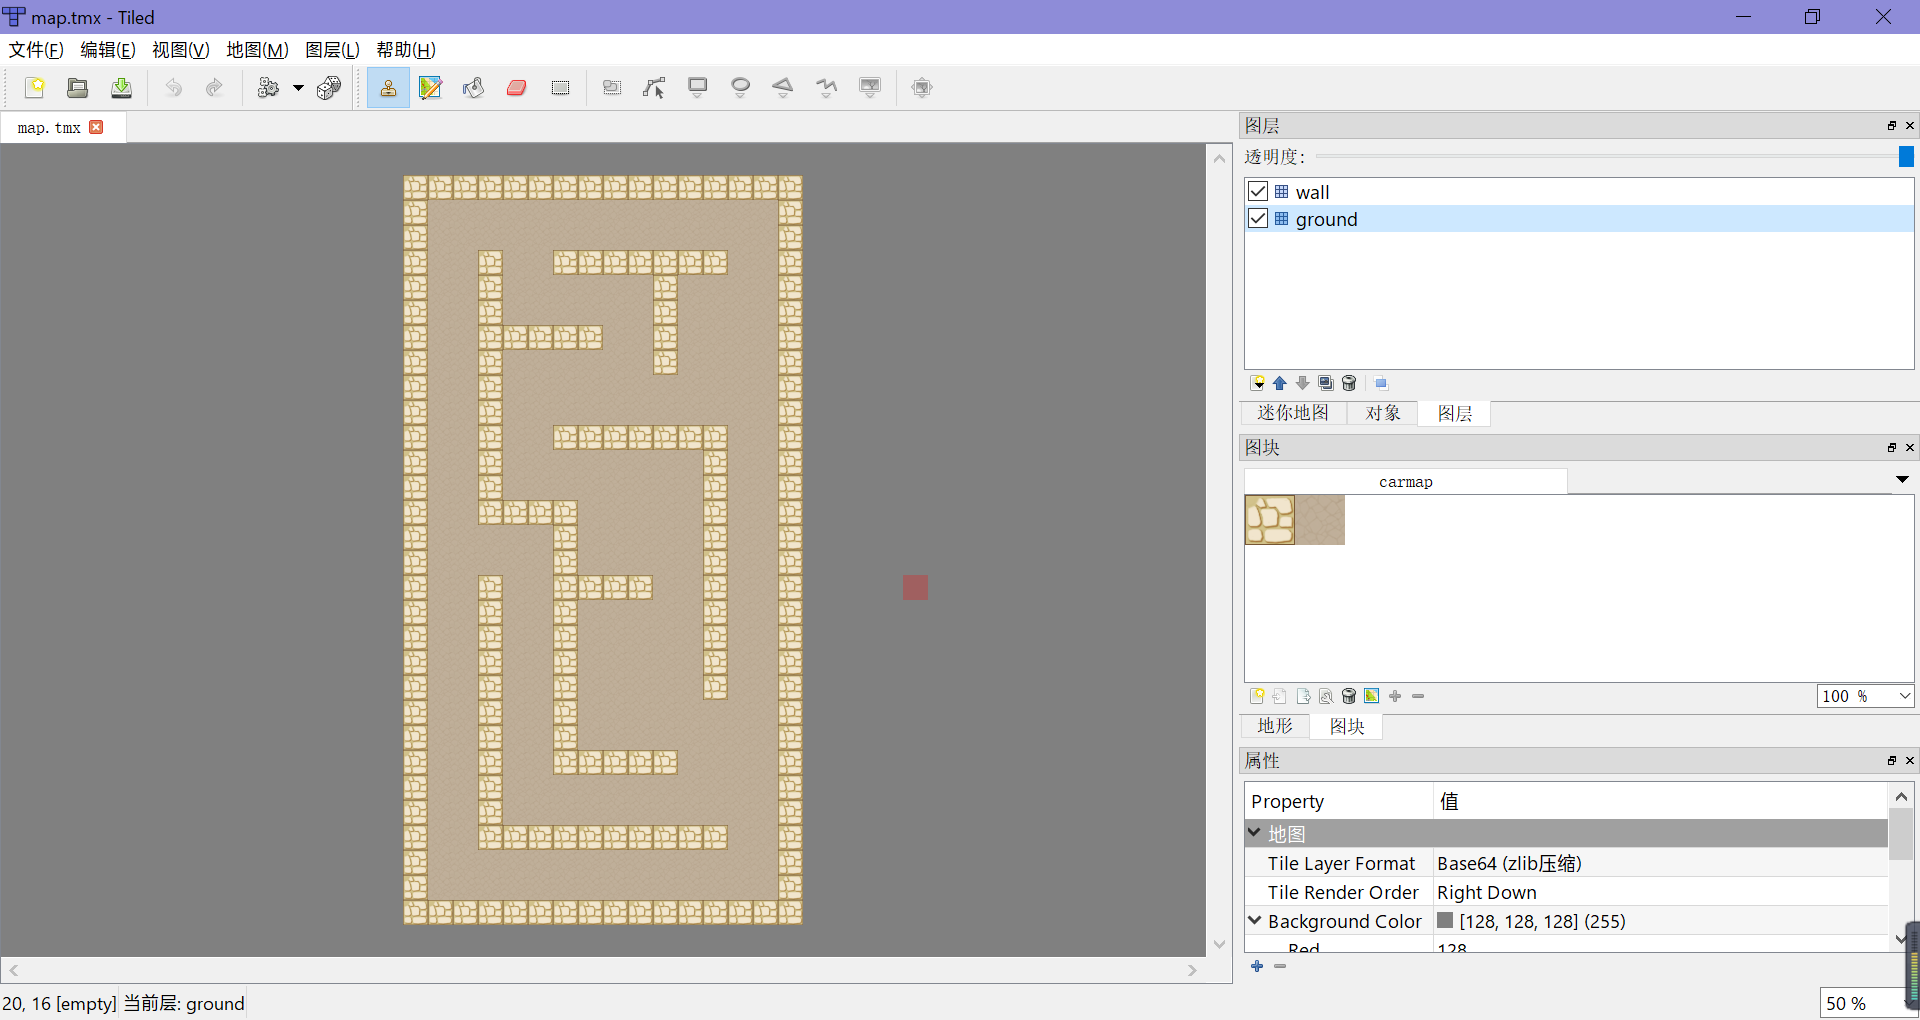
Very simple map, divided into two layers, wall and ground.
Then?
Drag the hierarchy manager directly into cocos creator.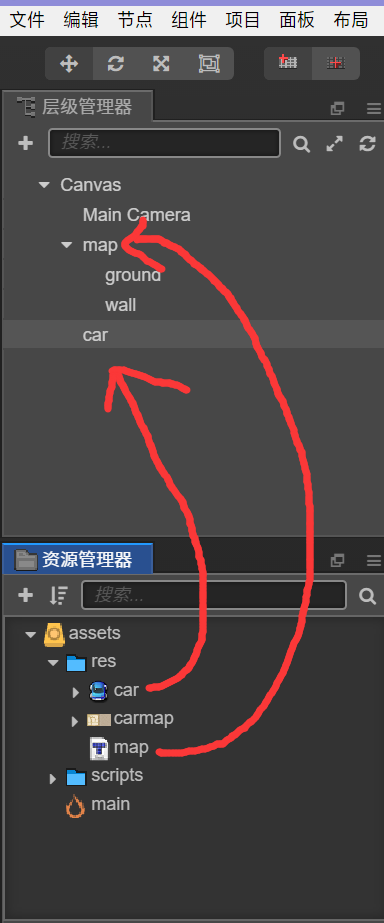
Then you will find that the layer automatically forms nodes and mounts components.
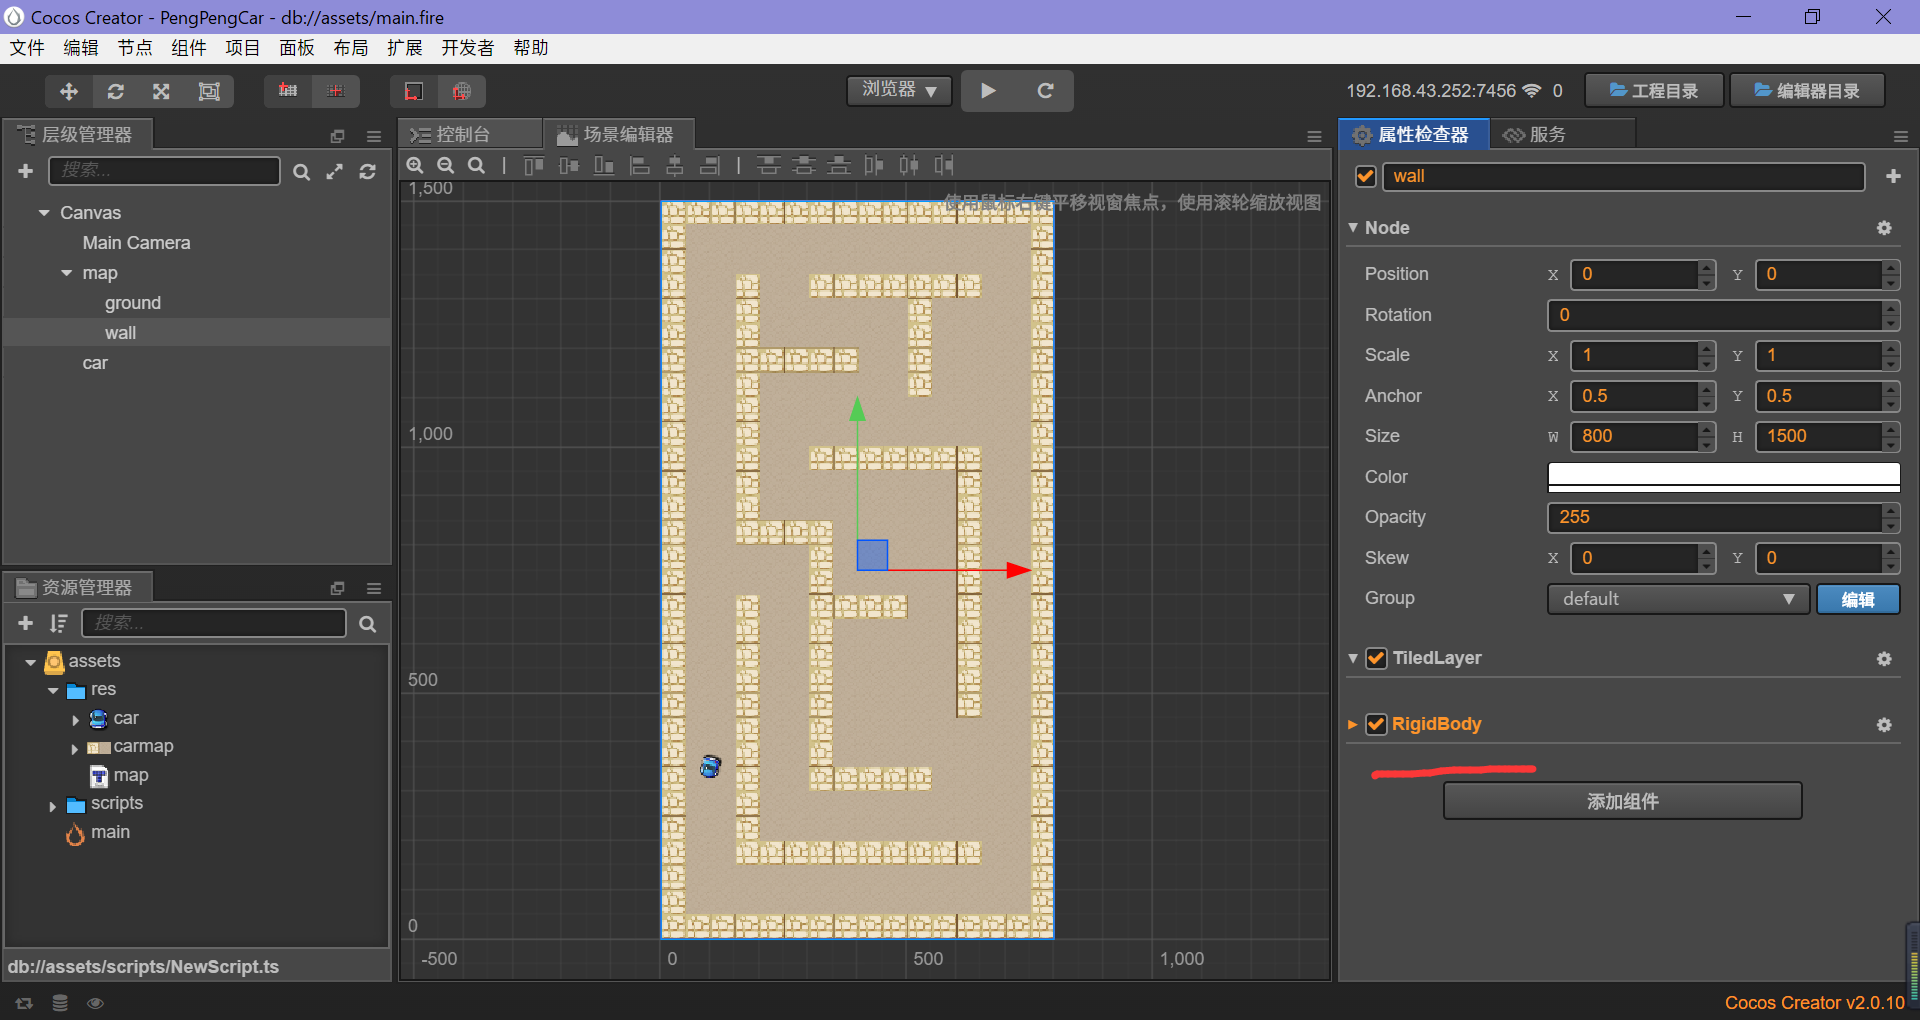
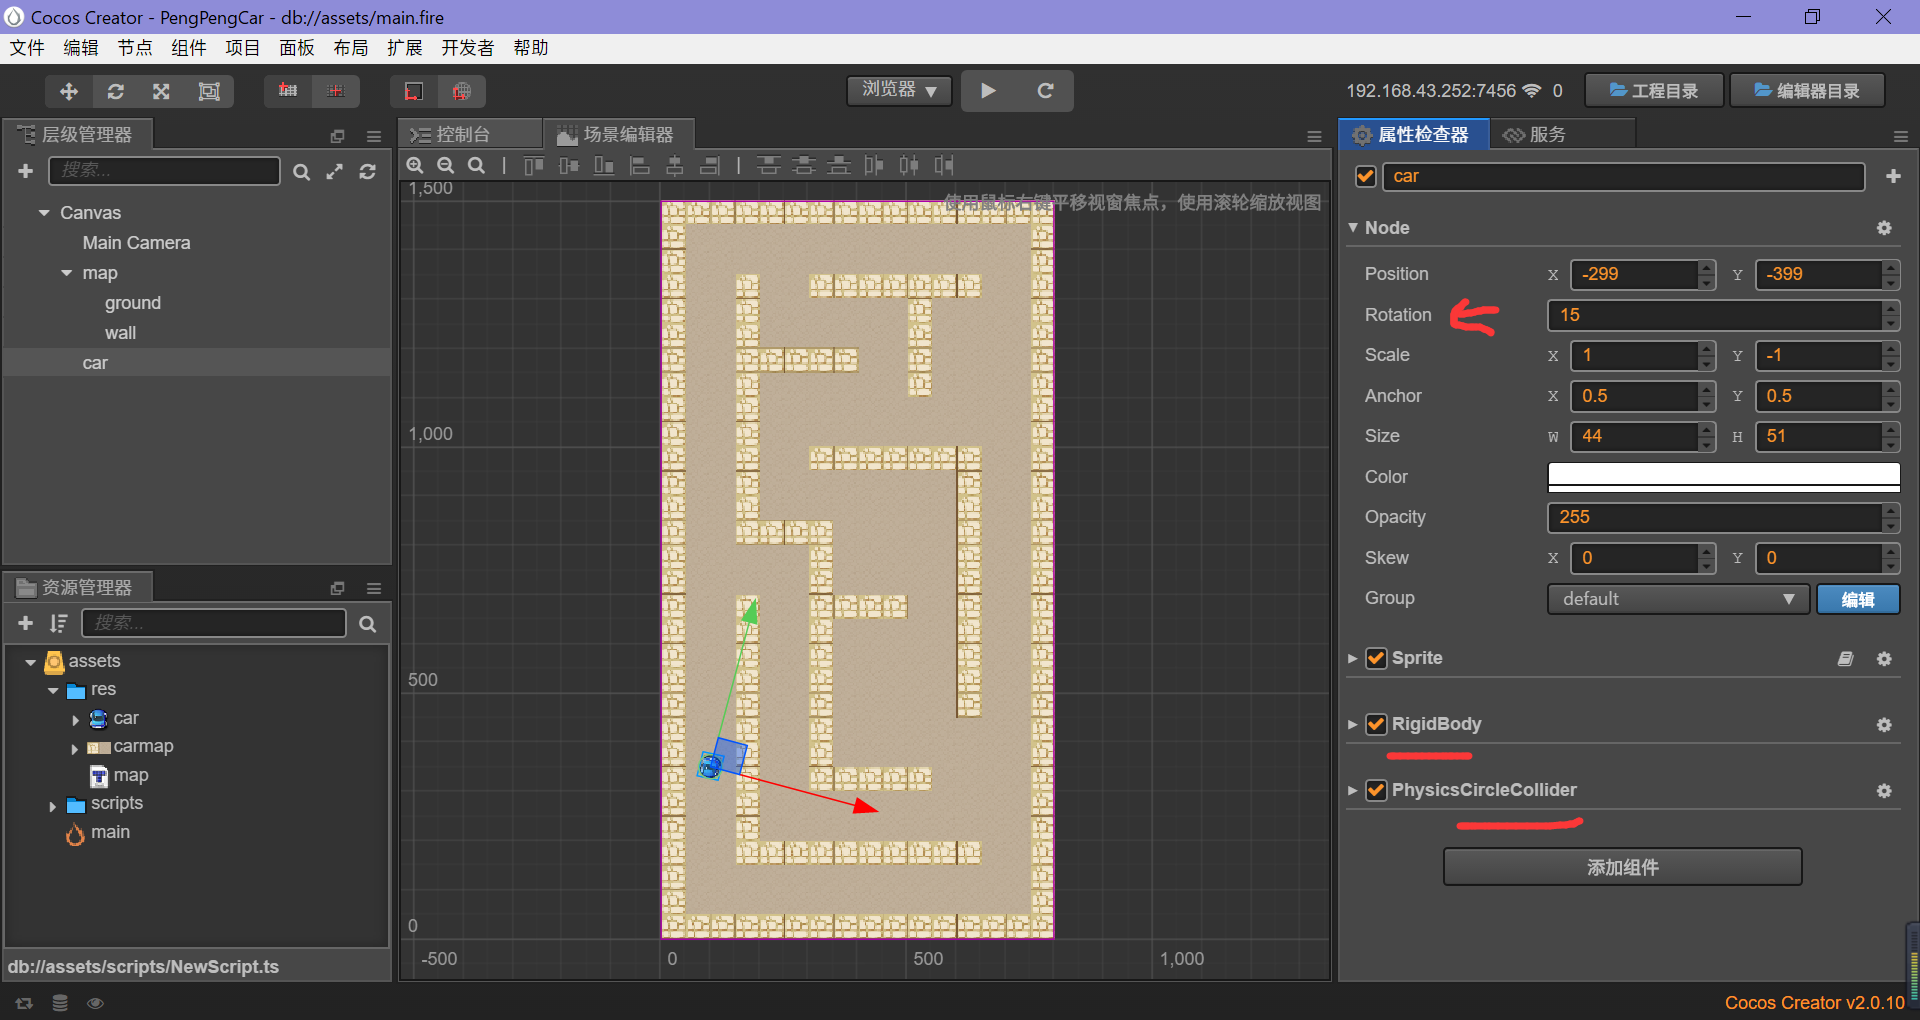
And then we add rigid bodies to wall and car.
Note that the wall is a static rigid body, the car is dynamic, and I rotated it 15 degrees for easy testing.
The following picture:
Last
getTileGIDAt is used to check whether there are tiles.
There is also coordinate conversion. For example, the tile at the top left corner is 0 0, and the coordinate is - 375 725.
Because I made 800 * 1500 tiles and 50 * 50 tiles.
const {ccclass, property} = cc._decorator;

@ccclass
export default class Main extends cc.Component {

    @property(cc.TiledLayer) wall: cc.TiledLayer = null;
    // Rigid body of trolley
    @property(cc.RigidBody) car: cc.RigidBody = null;

    onLoad () {
        let p = cc.director.getPhysicsManager();
        p.enabled = true;
        p.debugDrawFlags = 1;
        // Closing gravity
        p.gravity = cc.v2(0, 0);
    }

    start () {
        // Map 16 * 30; size 800 * 1500
        for (let i = 0; i < 16; i++) {
            for (let j = 0; j < 30; j++) {
                let n = this.wall.getTileGIDAt(i, j);
                // If tiles are present
                if (n === 1) {
                    // Calculated position
                    let x = -400 + i * 50 + 25;
                    let y = 750 - j * 50 - 25;
                    // Add collision box
                    let p: cc.PhysicsBoxCollider = this.wall.node.addComponent(cc.PhysicsBoxCollider);
                    p.offset.set(cc.v2(x, y));
                    p.size.width = 50;
                    p.size.height = 50;
                    p.apply();
                }
            }
        }
    }

    update (dt) {
        // Always give a forward force test
        let hudu = cc.misc.degreesToRadians(this.car.node.rotation);
        let x = Math.sin(hudu);
        let y = Math.cos(hudu);
        this.car.applyForceToCenter(cc.v2(100 * x, 100 * y), false);
    }
}
O(∩_∩)O~~
Get not yet.
Add me QQ group: (there are projects in the blog and group files)
706176551
Let's study together!
O(∩_∩)O~~