Source: https://blog.csdn.net/Powerful_Fy
Install jdk:
Oracle official download https://www.oracle.com/technetwork/java/javase/downloads/index.html
Install openjdk from yum:
1. Find the available jdk package:
[root@linux ~]# yum list |grep jdk
2. Select the package installation of the corresponding version:
[root@linux ~]# yum -y install java-1.8.0-openjdk
To install tomcat:
tomcat website: http://tomcat.apache.org/ tomcat mainstream version: 7.0 / 8.5 / 9.0
Download the tomcat binary package:
[root@linux ~]# cd /usr/local/src/
[root@linux src]# wget https://mirrors.tuna.tsinghua.edu.cn/apache/tomcat/tomcat-9/v9.0.27/bin/apache-tomcat-9.0.27.tar.gz
Decompression:
[root@linux src]# tar -xzvf apache-tomcat-9.0.27.tar.gz
Move to / usr/local / Directory:
[root@linux src]# mv apache-tomcat-9.0.27 /usr/local/tomcat
Start tomcat:
[root@linux ~]# /usr/local/tomcat/bin/startup.sh
Using CATALINA_BASE:   /usr/local/tomcat
Using CATALINA_HOME:   /usr/local/tomcat
Using CATALINA_TMPDIR: /usr/local/tomcat/temp
Using JRE_HOME:        /usr
Using CLASSPATH:       /usr/local/tomcat/bin/bootstrap.jar:/usr/local/tomcat/bin/tomcat-juli.jar
Tomcat started.
View process: ps -ef|grep tomcat or ps -ef|grep java
To view a listening port:
[root@linux ~]# netstat -lntp |grep java
tcp6       0      0 :::8009                 :::*                    LISTEN      13601/java
tcp6       0      0 :::8080                 :::*                    LISTEN      13601/java
tcp6       0      0 127.0.0.1:8005          :::*                    LISTEN      13601/java
8080: web port 8005: Management Port 8009: AJP port (provided for third-party application connection)
To deploy a website through tomcat using zrlog:
zrlog is an open source java blog system, official website: https://www.zrlog.com/
Download zrlog:
[root@linux ~]# wget http://dl.zrlog.com/release/zrlog-2.1.3-b5f0d63-release.war?attname=ROOT.war&ref=index
Move to the webapps directory of tomcat:
[root@linux ~]# mv zrlog-2.1.3-b5f0d63-release.war\?attname\=ROOT.war /usr/local/tomcat/webapps/zrlog.war
When the. war package is moved to the webapps directory, it will be automatically decompressed:
[root@linux ~]# cd /usr/local/tomcat/webapps/
[root@linux webapps]# ls
docs  examples  host-manager  manager  ROOT  zrlog  zrlog.war
Rename the zrlog directory to ROOT:
[root@linux webapps]# mv ROOT ROOT.bak
[root@linux webapps]# mv zrlog ROOT
To create a database for the zrlog blog site:
[root@linux ~]# mysql -uroot -p123456 -e "create database zrlog"
Create database users and authorize:
[root@linux ~]# mysql -uroot -p123456 -e "grant all on zrlog.* to 'zrloguser'@'127.0.0.1' identified by 'test123'"
#Create user zrloguser, password test123, authorized host: 127.0.01
Access from browser: http://ip:8080/

#Next step after configuring database information
Configure administrator account information:
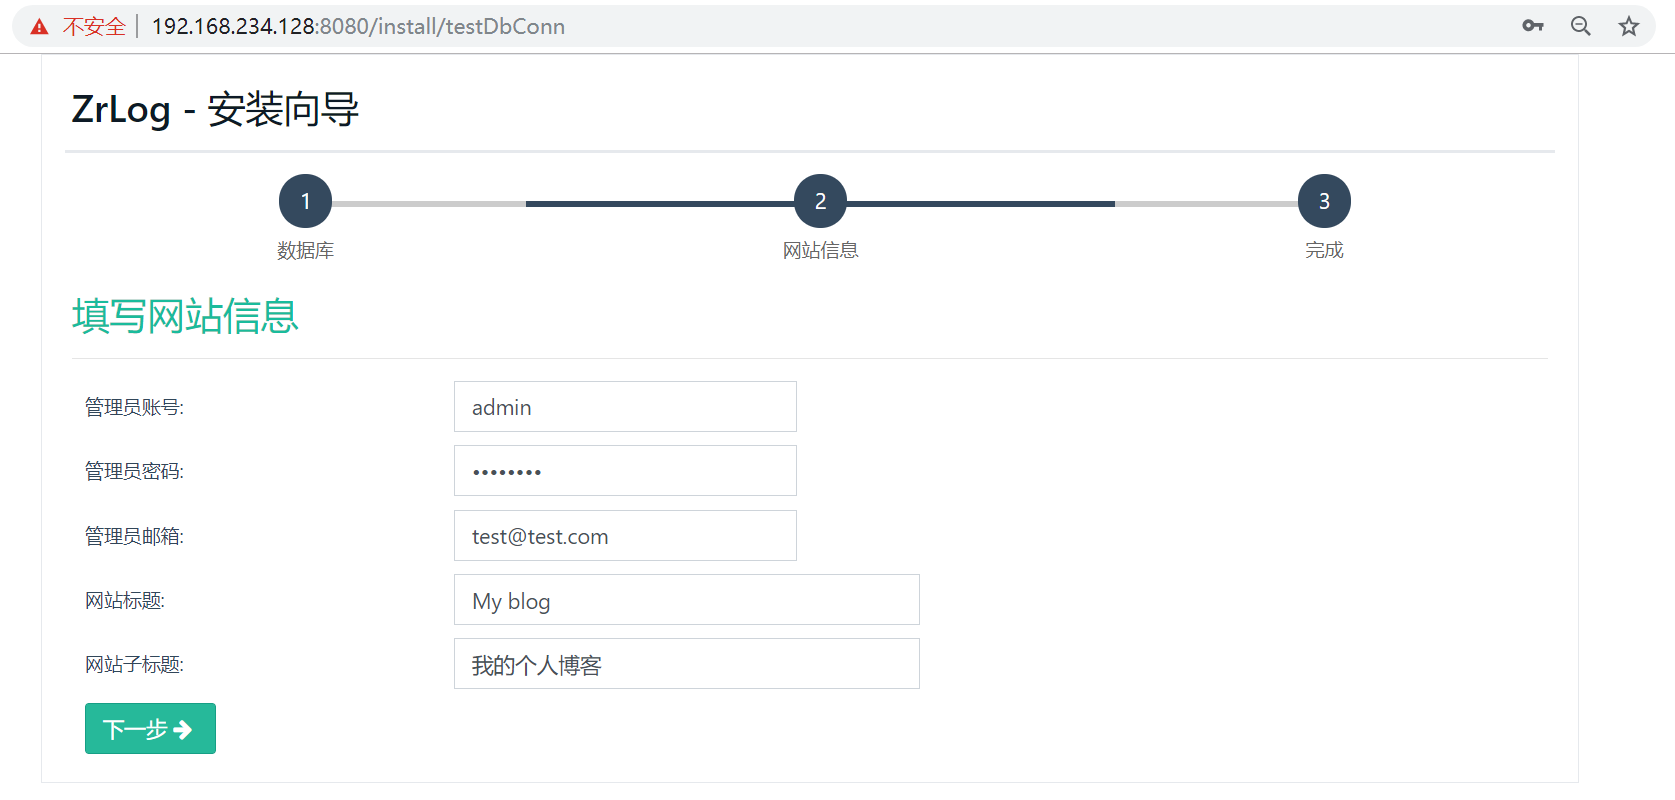
#Click next to install successfully after input
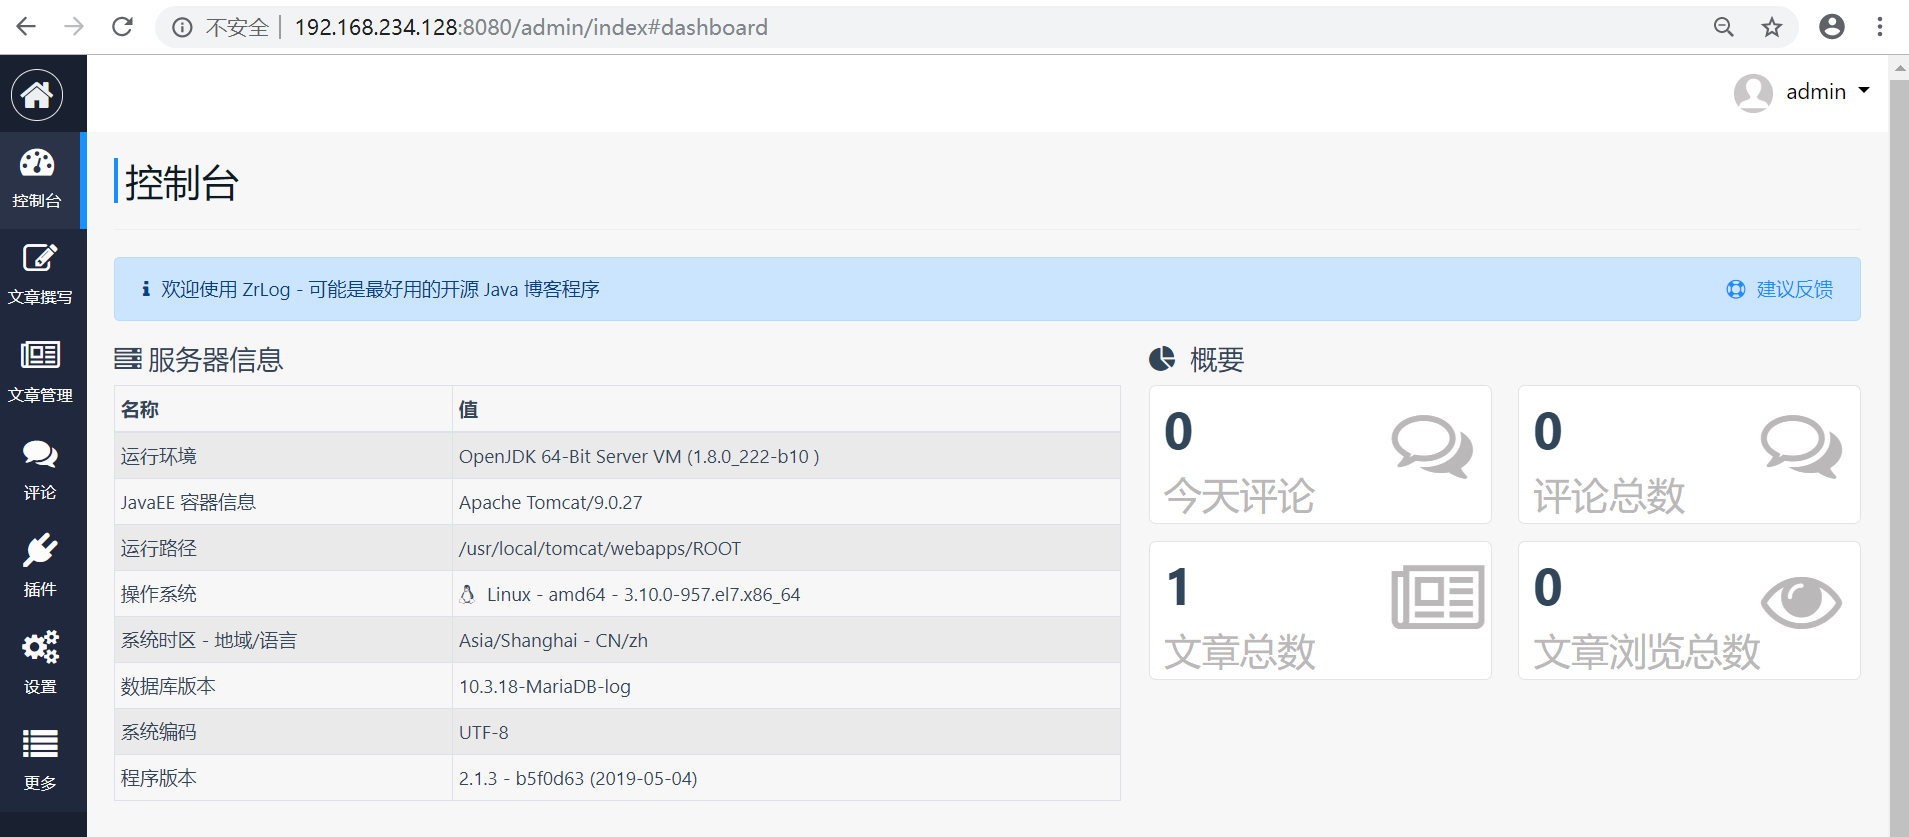
After you log in to the background with the administrator account, you can perform various settings:
Why do I need to configure nginx reverse proxy for tomcat?
1. When the server has nginx and tomcat at the same time, it will conflict if tomcat modifies port 8080 to 80. 2.tomcat can use the 80 port of nginx without changing the listening port 8080 3.Nginx is better than Tomcat in static request speed, and Tomcat is not good at high concurrent static file request processing.
Add nginx virtual host profile:
[root@linux ~]# vi /etc/nginx/conf.d/z.blog.com
Add the following:
erver {

        server_name z.blog.com;

        location /
        {
            proxy_pass http://127.0.0.1:8080;
            proxy_set_header Host $host;
            proxy_set_header X-Real-IP $remote_addr;
            proxy_set_header X-Forwarded-For $proxy_add_x_forwarded_for;
        }
}
Verify configuration and reload:
[root@linux ~]# nginx -t
nginx: the configuration file /etc/nginx/nginx.conf syntax is ok
nginx: configuration file /etc/nginx/nginx.conf test is successful
[root@linux ~]# nginx -s reload
Modify the Windows system C:\Windows\System32\drivers\etc\hosts file:
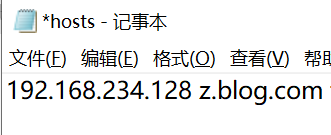
#Map custom domain names to server addresses
Access in browser:
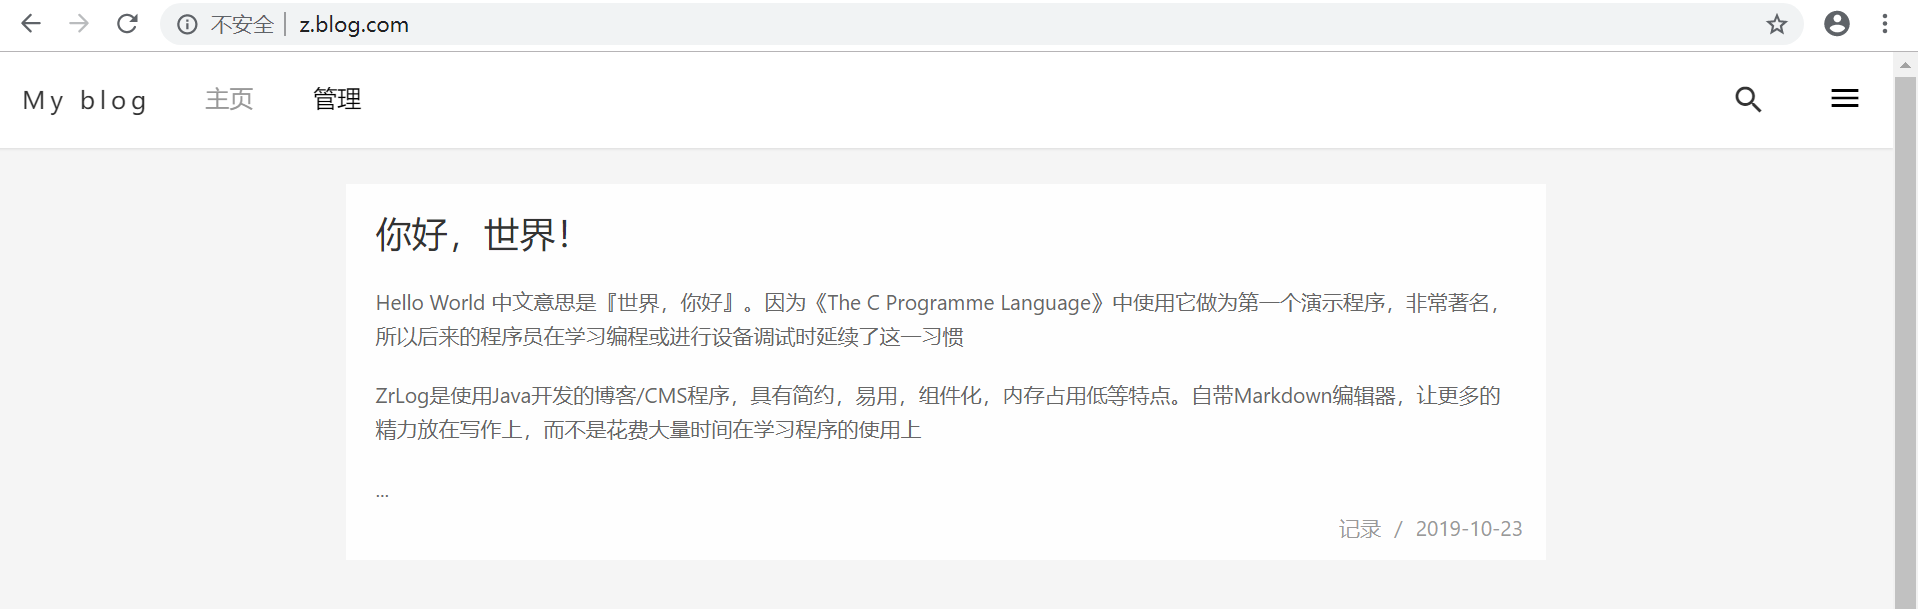
#Success, the personal blog website deployed under tomcat has shown that the visit does not need to add port 8080.
How to deploy multiple websites using tomcat:
Method 1:
Modify tomcat configuration file: server.xml
[root@linux ~]# vi /usr/local/tomcat/conf/server.xml
Add a new host tag:
<Host name="www.test2.com"  appBase="/data/www/test2.com"
      unpackWARs="true" autoDeploy="true">
</Host>
#Name: specify the domain name, appBase: application storage path (it will be created automatically after restarting tomcat), similar to creating a new webapps. Since the first website has been proxy to port 80 by nginx in the previous article, the application package under the directory can be accessed through port 8080 by changing its name to ROOT.
Method two:
Add a new tomcat:
[root@linux local]# cd
[root@linux ~]# cd /usr/local/
[root@linux local]# cp -r tomcat/ tomcat2
Edit the configuration file server.xml:
[root@linux local]# vi tomcat2/conf/server.xml
Modify port 8005 to 8006, and modify port 8080 to 80818009 to delete the line directly. #Ports can be defined according to actual needs
Start tomcat:
[root@linux ~]# /usr/local/tomcat2/bin/startup.sh
To view a listening port:
[root@linux ~]# netstat -lntp |grep java
tcp6       0      0 :::8009                 :::*                    LISTEN      32371/java
tcp6       0      0 :::8080                 :::*                    LISTEN      32371/java
tcp6       0      0 :::8081                 :::*                    LISTEN      32290/java
tcp6       0      0 127.0.0.1:8005          :::*                    LISTEN      32371/java
tcp6       0      0 127.0.0.1:8006          :::*                    LISTEN      32290/java
#Port 8006 and port 8081 have been monitored. Put the application package of the second website under the tomcat2/webapps directory and change it to ROOT. You can access it through port 8081.
Supplement:
When starting tomcat, port 8005 starts slowly, because Tomcat will call a random character device of the system when it starts
Because the JVM calls the system's / dev/random device to generate random numbers, and / dev/random is block ed when generating random numbers, the 8005 port will start slowly naturally. The solution is to use / dev/random instead of / dev/random.
The solution is as follows: 1.vi $JAVA_HOME/jre/lib/security/java.security
2. Change securerandom.source=file:/dev/random to securerandom.source=file:/dev/random
$JAVA_HOME path: If it is openjdk (installed from yum), in / usr/lib/jvm/ If the binary package is downloaded, it is the installation directory of JDK (such as / usr/local/jdk_1.8)