Introduction to Spring MVC:
1. Create a maven project and import dependencies
maven project pom configuration:
<dependencies>

		<dependency>
			<!-- Junit test -->
			<groupId>junit</groupId>
			<artifactId>junit</artifactId>
			<version>4.12</version>
			<scope>test</scope>
		</dependency>

		<dependency>
			<groupId>javax.servlet</groupId>
			<artifactId>javax.servlet-api</artifactId>
			<version>3.1.0</version>
			<scope>provided</scope>
		</dependency>

	<!-- jstl -->
		<dependency>
			<groupId>javax.servlet</groupId>
			<artifactId>jstl</artifactId>
			<version>1.2</version>
		</dependency>


		<!-- Add to Spring package -->
		<dependency>
			<groupId>org.springframework</groupId>
			<artifactId>spring-webmvc</artifactId>
			<version>4.3.7.RELEASE</version>
		</dependency>

		<dependency>
			<groupId>org.springframework</groupId>
			<artifactId>spring-context</artifactId>
			<version>4.3.7.RELEASE</version>
		</dependency>
		<dependency>
			<groupId>org.springframework</groupId>
			<artifactId>spring-context-support</artifactId>
			<version>4.3.7.RELEASE</version>
		</dependency>

		<dependency>
			<groupId>org.springframework</groupId>
			<artifactId>spring-web</artifactId>
			<version>4.3.7.RELEASE</version>
		</dependency>


		<!-- To facilitate unit testing, add spring-test package -->
		<dependency>
			<groupId>org.springframework</groupId>
			<artifactId>spring-test</artifactId>
			<version>4.3.7.RELEASE</version>
		</dependency>

		<dependency>
			<groupId>org.springframework</groupId>
			<artifactId>spring-aspects</artifactId>
			<version>4.3.7.RELEASE</version>
		</dependency>
		<dependency>
			<groupId>org.springframework</groupId>
			<artifactId>spring-expression</artifactId>
			<version>4.3.7.RELEASE</version>
		</dependency>
		<dependency>
			<groupId>org.springframework</groupId>
			<artifactId>spring-orm</artifactId>
			<version>4.3.7.RELEASE</version>
		</dependency>
		<dependency>
			<groupId>org.aspectj</groupId>
			<artifactId>aspectjweaver</artifactId>
			<version>1.8.5</version>
		</dependency>

</dependencies>
2. Configure the core controller:
Configure Dispatcher Servlet Core Controller (Servlet) in web.xml
    <! - Configure Spring MVC Core Controller: -->
	<servlet>
		<servlet-name>DispatcherServlet</servlet-name>
        <servlet-class>org.springframework.web.servlet.DispatcherServlet</servlet-class>
		<! - Configure the initial cu lt ural parameters of Dispatcher Servlet: Set the path and file name of the file - >.
		<init-param>
			<param-name>contextConfigLocation</param-name>
			<param-value>classpath:springmvc.xml</param-value>
		</init-param>
		<! -- The point at which the object to configure the servlet is created: when the application is loaded. Values can only be non-zero positive integers, indicating the order of start-up - >.
		<load-on-startup>1</load-on-startup>
	</servlet>
   <servlet-mapping>
	    <servlet-name>DispatcherServlet</servlet-name>
	     <! - Servlet access paths, which requests need to be managed by Springmvc - >
   		 <! - / Indicates that all requests are managed - >
		<url-pattern>/</url-pattern>
	</servlet-mapping>
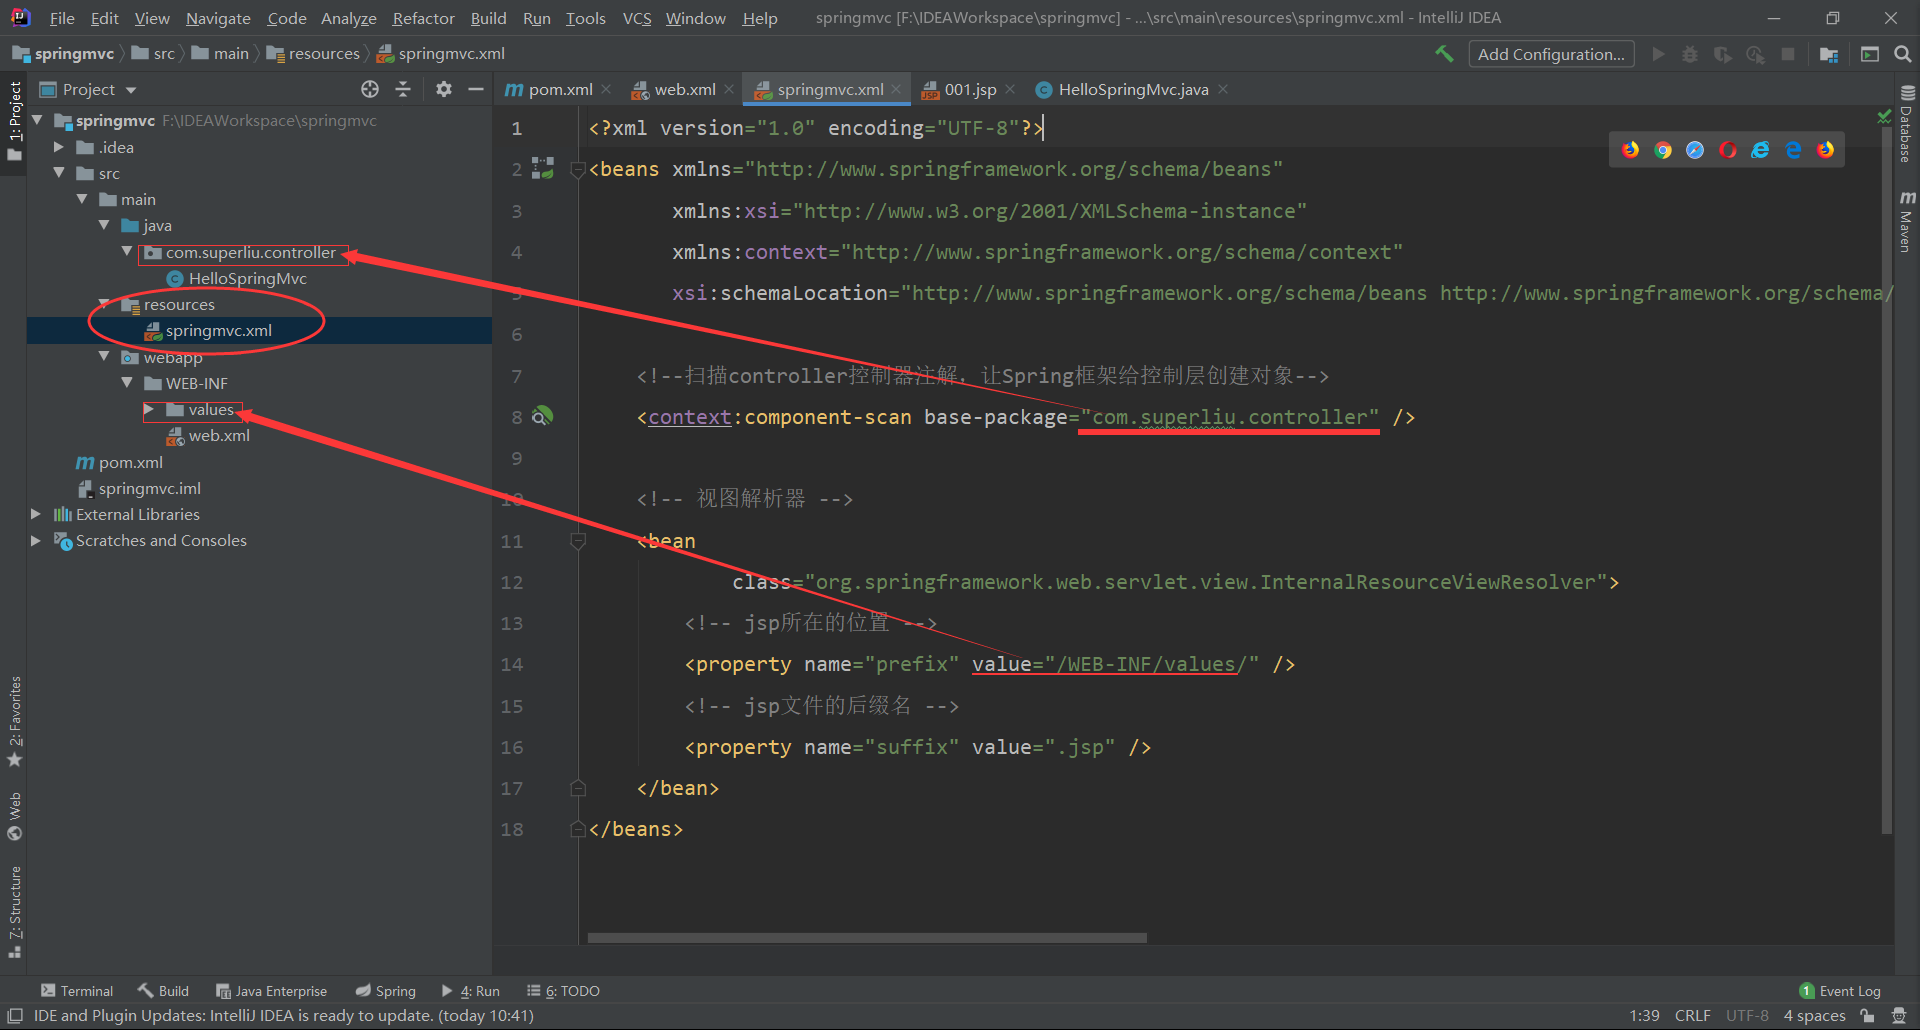
3. Create configuration files for spring MVC (as shown below):
	<!--scanning controller Controller Annotation Spring Framework creates objects for the control layer-->
	<context:component-scan base-package="com.springmvc.controller" />

	<!-- view resolver -->
	<bean
		class="org.springframework.web.servlet.view.InternalResourceViewResolver">
		<!-- jsp Location -->
		<property name="prefix" value="/WEB-INF/values/" />
		<!-- jsp File suffix name -->
		<property name="suffix" value=".jsp" />
	</bean>

4. Write controllers and use annotations to configure:
/**
 * Controller
 */
@Controller//Note that this class is a controller class

//Action method
public class HelloSpringMvc {
    @RequestMapping(value = "/HelloSpringMvc")// Request mapping annotations
    public String hello(Model model){
        System.out.println("HelloSpringMvc~~~~~~~~~~~~~~~~~~~~~~~~~");
        model.addAttribute("message","My first SpringMvc program");
        return "001";
    }
}
5. Test Spring MVC:
Publish the project, through the browser, access the corresponding address of the current project +/HelloSpring Mvc can be