
Modify the contents of AppDelegate by changing setDesignResolutionSize to
<span style="font-size:14px;">(960, 640, ResolutionPolicy::FIXED_HEIGHT)</span>
Modify the width of the design resolution based on the screen resolution while maintaining the height of the incoming design resolution
Through:
To start a new scene and enter the start game interfaceauto scene = WelcomeScene::createScene(); director->runWithScene(scene);
First is Kingdom Rush's LOGO and its animation
Load resource file xx.plist
Add Background PictureSpriteFrameCache::getInstance()->addSpriteFramesWithFile("mainmenu_spritesheet_32_1-hd.plist");
//Load pictures from the SpriteFrameCache
auto sprite_background = Sprite::createWithSpriteFrameName("mainmenu_bg.png");

//Set Location
sprite_background->setPosition(Point(visibleSize.width/2,visibleSize.height/2));
Then add kingdom Rush Logo//Add a background with Zorder set to -1 at the bottom of the scene addChild(sprite_background,-1);
The LOGO is then displayed on top of the background image, initially 0.2 times the size, giving it a ScaleTo animation such as ScaleTo::create(0.5,1.5,1.5) and play itsprite_Logo = Sprite::createWithSpriteFrameName("logo.png"); //Calculate where the Logo diagram should be located point_Logo.x = visibleSize.width/2,visibleSize.height; point_Logo.y = visibleSize.height-(sprite_Logo->getContentSize().height/2); //Set position, initial size sprite_Logo->setScale(0.2f); sprite_Logo->setPosition(point_Logo); addChild(sprite_Logo,1);
After the LOGO zoom animation is completed, Kingdom flashes from left to right. By looking at the original game resource picture, it is found that this is a frame animation. Each frame of the picture has been saved in plist, and the effect can be achieved by playing the frame animation.
Animation RepeatForever::create creates an uninterrupted animation that is overlaid on the Logo and the animation effect is complete.//Add pictures from resources, set location auto sprite = Sprite::createWithSpriteFrameName("logo_brillo_0001.png"); sprite->setPosition(point_Logo); //Generate frame animation //See http://www.cnblogs.com/onlycxue/p/3509610.html SpriteFrame* frame = NULL; Vector<SpriteFrame*> aFrames(20); for (int len = 1;len <= 21; len++) { frame = SpriteFrameCache::getInstance()->spriteFrameByName(String::createWithFormat("logo_brillo_00%02d.png",len)->getCString()); if(frame!=nullptr) aFrames.pushBack(frame); } addChild(sprite,2); auto animation = Animation::createWithSpriteFrames(aFrames,0.1f); //Play animations sprite->runAction(RepeatForever::create(Animate::create(animation)));
Create an animation sequence Sequence, add logo zoom animation and frame animation to the sequence, then link the frame animation after logo zoom animation is completed to achieve the original game effect.
Next up is to start key generation and animation
In cocos2dx, you can use MenuItemSprite to define a wizard key to set the key effect and listen
This paper implements a key by adding monitoring to Sprite
First, load the resource picture
Add one more start button at the end of the above animation sequence Sequence to move down MoveTo. The code is omitted
Create a monitor
auto button_Start_listener = EventListenerTouchOneByOne::create();
Set onTouchBegan to correspond when clicked
button_Start_listener->onTouchBegan = [&](Touch* touch, Event* event){
  //Get Click Target
  auto target = static_cast<Sprite*>(event->getCurrentTarget());
  //Gets click coordinates after converting touch points in world coordinates to model coordinates
  Point locationInNode = target->convertTouchToNodeSpace(touch);
  //Get the size of the target
  Size size = target->getContentSize();
  //Create rect region
  Rect rect = Rect(0+40, 0+30, size.width-80, size.height/3 +15);
  //When clicking coordinates in an area
  if (rect.containsPoint(locationInNode))
  {
    //Change Button Style to Click
    target->setDisplayFrame(SpriteFrameCache::getInstance()->spriteFrameByName("menu_startchain_0002.png"));
    return true;
  }
  return false;
};
Set up post-click release action monitoring
button_Start_listener->onTouchEnded = [&](Touch* touch, Event* event){
  auto target = static_cast<Sprite*>(event->getCurrentTarget());
  static_cast<Sprite*>(event->getCurrentTarget())->setDisplayFrame(SpriteFrameCache::getInstance()->spriteFrameByName("menu_startchain_0001.png"));
  button_Start->runAction(MoveTo::create(0.3f, Point(point_Logo.x,point_Logo.y)));
  button_Start->setVisible(false);
  setSaveMenuVisible();
};
After clicking the Start button MoveTo to Logo, hide it and move the Start Game menu up
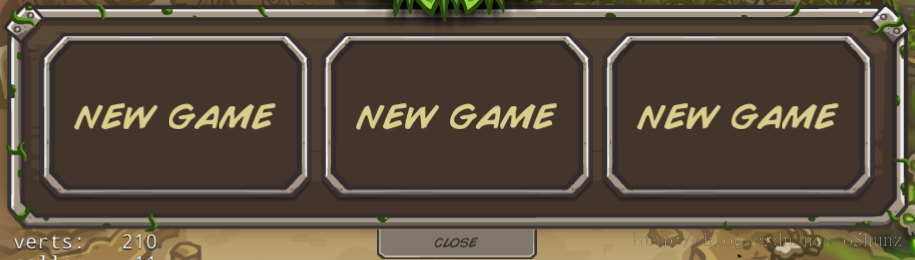
The three "NEW GAME" background pictures are a SPRITE and the "CLOSE" keys set to listen in a similar way to the above start keys. You can also use the MenuItemSprite method to add a MoveTo animation to these elves and move them to the scene when the start keys are clicked.
NEW GAME uses a new way to create a custom Elf
class SlotMenu : public Sprite
{
public:
    SlotMenu();
    ~SlotMenu();
    virtual bool initWithNum(int num);
    CREATE_FUNC(SlotMenu);
    void button_Savelot_Delete_callback(Ref* pSender);
    void conform_delete(Ref* pSender);
    void cancel_delete(Ref* pSender);
    void createNewGame();
    static SlotMenu* createMenu(int num);
protected:
    Label* label_hint;
    MenuItemSprite* button_Savelot_Delete;
    Sprite* savelot;
};
First, let's customize a creation method:
See http://cn.cocos2d-x.org/tutorial/show?id=1987 for details
Where num is the incoming parameter and is set to which of the three NEW GAME sSlotMenu* SlotMenu::createMenu(int num) { auto slotMenu = new SlotMenu(); if (slotMenu && slotMenu->initWithNum(num)) { slotMenu->autorelease(); return slotMenu; } CC_SAFE_DELETE(slotMenu); return NULL; }
In initWithNum(int num), add all the elves in turn

Set whether a recorded game starts by using UserDefault:: getInstance()->getBoolForKey.
Display the current record if it exists and the X key as shown on the right, and NEW GAME if it does not exist
Click the X key to display "DELETE SLOT" and two keys
For example, delete keys:
auto confirm_Delete = MenuItemSprite::create(Sprite::createWithSpriteFrameName("mainmenu_saveslot_confirmdelete_0001.png"),
		Sprite::createWithSpriteFrameName("mainmenu_saveslot_confirmdelete_0001.png"),
		CC_CALLBACK_1(SlotMenu::conform_delete, this));
And the key listens:
void SlotMenu::conform_delete(Ref* pSender)
{
	savelot->getChildByTag(LABEL_HINT)->setVisible(false);
	savelot->removeChildByTag(NEWGAME);
	createNewGame();
	UserDefault::getInstance()->setBoolForKey(String::createWithFormat("<span style="font-family: Arial, Helvetica, sans-serif;">is_savelot_%d_exit</span>",this->num)->getCString,false);
}
Text is created in Label mode, three keys in MenuItemSprite mode set the listening and clicking effect, and the logic set in the listening determines which item should be hidden and which item should be displayed. The specific code is omitted.
Set up monitoring for the whole elf's bottom level, click and jump to the new game interface
The next one will show you how to customize a jump sceneif (rect.containsPoint(locationInNode)&&!savelot->getChildByTag(LABEL_HINT)->isVisible()) { target->setDisplayFrame(SpriteFrameCache::getInstance()->spriteFrameByName("mainmenu_saveslot_0002.png")); return true; }
Reprinted at: https://my.oschina.net/wuhaoyu/blog/607820