1. Overview
Through the previous articles
The most comprehensive series of SignalR tutorials in history - 1. Understanding SignalR
We've got an introduction to SignalR and know how to apply it reasonably to practical projects. The previous article mainly talks about the concept of SignalR, hosting, and push function. This article mainly explains how to realize one-to-one and point-to-point chat through SignalR.
2. SignalR One-to-One Chat Implementation
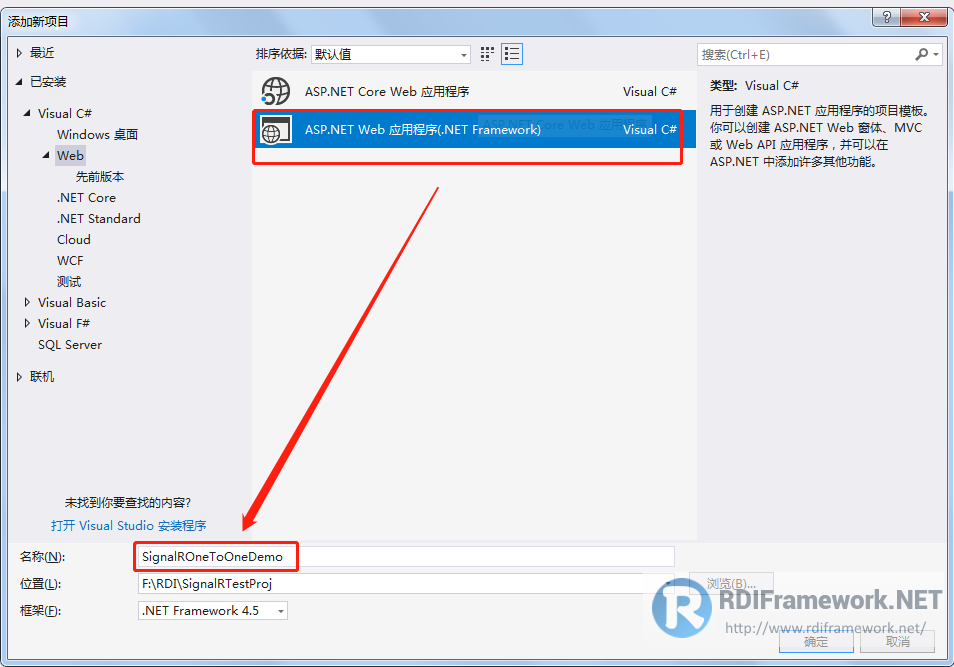
2.1. Create ASP.NET Mvc Project
Create an empty ASP.NET Mvc project named SignalROneToOne, as shown in the following figure. For the integrity of the whole series, we added a test project directly on the basis of the previous project, followed by the project's source hosting address.
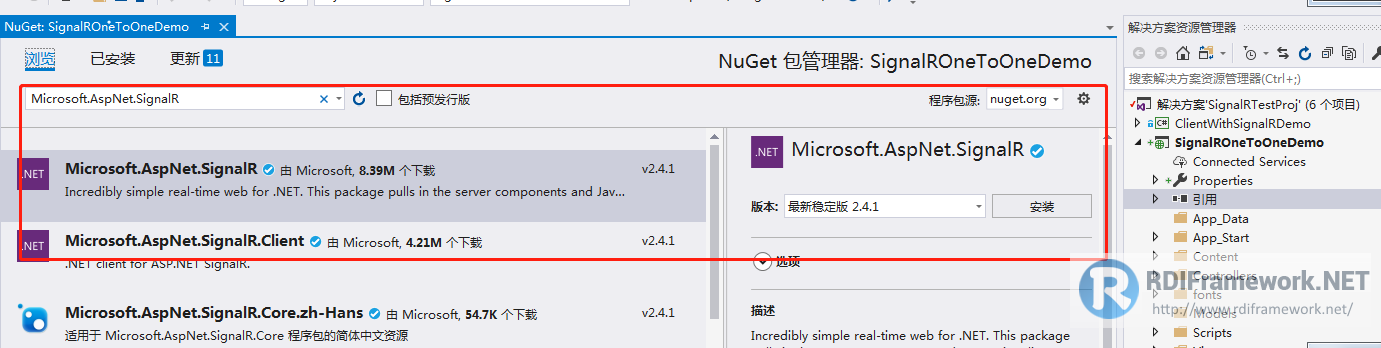
2.2. Install Nuget package
After the project is created, to use SignalR, you need to install the SignalR package first, which can be installed by entering the package installation command through the package management console.
Install-Package Microsoft.AspNet.SignalR
You can also use the interface, as shown in the figure below.
2.3. Realization of Background Code for One-to-One Chat###
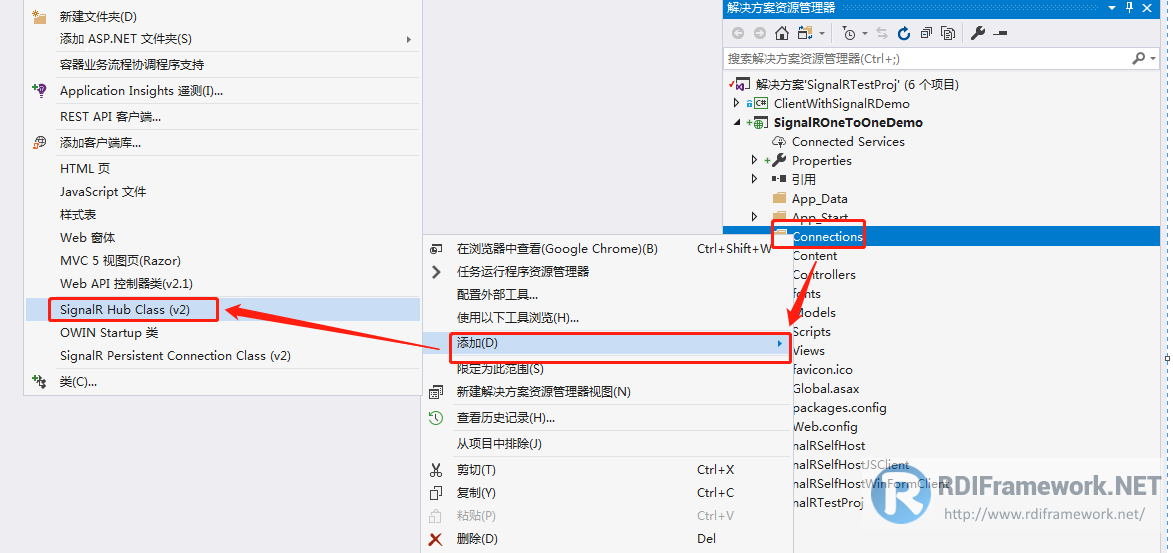
Add the HubConnections directory to the project and the OneToOneHub.cs file to it, as shown in the following figure:
The main steps of realization are as follows:
- Rewrite the OnConnected connection method and the OnDisconnected disconnection method.
- Send a message using the SendMessage server-side method, and GetName gets the user name.
- Client response prompts return information methods, such as Clients.Client(Context.ConnectionId).addMessage(message)
The OneToOneHub code is as follows:
using Microsoft.AspNet.SignalR;
using Microsoft.AspNet.SignalR.Hubs;
using Newtonsoft.Json;
using System;
using System.Collections.Generic;
using System.ComponentModel.DataAnnotations;
using System.Linq;
using System.Threading.Tasks;

namespace SignalROneToOneDemo.Connections
{
    /// <summary>
    /// User Entity Class
    /// </summary>
    public class User
    {
        /// <summary>
        /// Connection ID
        /// </summary>
        [Key]
        public string ConnectionID { get; set; }

        /// <summary>
        /// User Name
        /// </summary>
        public string Name { get; set; }

        public User(string name, string connectionId)
        {
            this.Name = name;
            this.ConnectionID = connectionId;
        }
    }

    /// <summary>
    /// Point-to-point (one-to-one) chat
    /// </summary>
    [HubName("chat")]
    public class OneToOneHub : Hub
    {
        public static List<User> users = new List<User>();

        //send message
        public void SendMessage(string connectionId, string message)
        {
            Clients.All.hello();
            var user = users.Where(s => s.ConnectionID == connectionId).FirstOrDefault();
            if (user != null)
            {
                Clients.Client(connectionId).addMessage(message + "" + DateTime.Now, Context.ConnectionId);
                //Send it to yourself, pass the user's ID to yourself
                Clients.Client(Context.ConnectionId).addMessage(message + "" + DateTime.Now, connectionId);
            }
            else
            {
                Clients.Client(Context.ConnectionId).showMessage("The user is offline...");
            }
        }

        [HubMethodName("getName")]
        public void GetName(string name)
        {
            //Query Users
            var user = users.SingleOrDefault(u => u.ConnectionID == Context.ConnectionId);
            if (user != null)
            {
                user.Name = name;
                Clients.Client(Context.ConnectionId).showId(Context.ConnectionId);
            }
            GetUsers();
        }

        /// <summary>
        /// Rewrite connection events
        /// </summary>
        /// <returns></returns>
        public override Task OnConnected()
        {
            //Query Users
            var user = users.Where(u => u.ConnectionID == Context.ConnectionId).SingleOrDefault();
            //Determine whether the user exists or not, otherwise add a collection
            if (user == null)
            {
                user = new User("", Context.ConnectionId);
                users.Add(user);
            }
            return base.OnConnected();
        }

        public override Task OnDisconnected(bool stopCalled)
        {
            var user = users.Where(p => p.ConnectionID == Context.ConnectionId).FirstOrDefault();
            //Judging whether the user exists or not, deleting if it exists
            if (user != null)
            {
                //delete user
                users.Remove(user);
            }
            GetUsers();//Get a list of all users
            return base.OnDisconnected(stopCalled);
        }

        //Get an online list of all users
        private void GetUsers()
        {
            var list = users.Select(s => new { s.Name, s.ConnectionID }).ToList();
            string jsonList = JsonConvert.SerializeObject(list);
            Clients.All.getUsers(jsonList);
        }
    }
}
If you are the type of mvc project added without authentication in vs2015, you must add a Startup class. If there is no such class, please add, otherwise the project will not run, the specific code is as follows:
using Microsoft.Owin;
using Owin;

[assembly: OwinStartup(typeof(SignalROneToOneDemo.App_Start.SignalRQuickStart))]

namespace SignalROneToOneDemo.App_Start
{
    public class SignalRQuickStart
    {
        public void Configuration(IAppBuilder app)
        {
            // For more information on how to configure the application, visit https://go.microsoft.com/fwlink/?LinkID=316888
            // Configuration Hub
            app.MapSignalR();
        }
    }
}
2.4. Implementation of one-to-one chat front-end code###
@{
    ViewBag.Title = "OneToOneChat";
}

<h2>Point-to-point (one-to-one) chat instance code</h2>

<div>
    <div>User name:<label id="userName"></label>(<label id="conId"></label>)</div>

    <div style="width:25%;border:1px solid #ff0000">
        <div>Online User List</div>
        <ul id="users"></ul>
    </div>
    <div id="userBox">
    </div>
</div>

@section scripts {
    <script src="~/Scripts/jquery-3.3.1.min.js"></script>
    <script src="~/Scripts/jquery.signalR-2.4.1.min.js"></script>
    <script src="~/signalr/hubs"></script>
    <script type="text/javascript">
        var clients = [];
        var chat;
        $(function () {
            chat = $.connection.chat;
            console.info(chat);

            //Display prompt method
            chat.client.showMessage = function (message) {
                alert(message);
            }

            //Method of registering and displaying information
            chat.client.addMessage = function (message, connectionId) {
                //debugger
                if ($.inArray(connectionId, clients)==-1) {
                    showWin(connectionId);
                }

                $("#messages" + connectionId).each(function () {
                    $(this).append('<li>'+message+'</li>');
                })
            }

            //Method of registering and displaying all users
            chat.client.getUsers = function (data) {
                if (data) {
                    var json = $.parseJSON(data);
                    console.info(json);
                    $("#users").html(" ");
                    for (var i = 0; i < json.length; i++) {
                        var html = '<li>User name:' + json[i].Name + '<input type="button" connectionId="' + json[i].ConnectionID + '" id="'  + json[i].ConnectionID + '" value="chat"  onclick="userChat(this)" />' ;
                        $("#users").append(html);
                    }
                }
            }

            //Registration Display and Promotion of Chat Tips
            chat.client.exitUser = function (data)
            {
                alert(data);
            }

            //Method of registering and displaying personal information
            chat.client.showId = function (data)
            {
                $("#conId").html(data);
                clients.push(data);
            }

            //Get the user name
            $('#UserName'. HTML (prompt ('Please enter your name','));

            //Get your own information when the connection is successful
            $.connection.hub.start().done(function () {
                chat.server.getName($('#userName').html());
            });
        });

        //Start chatting
        function userChat(obj)
        {
            var connectionId = $(obj).attr('connectionId');
            showWin(connectionId);
        }

        function showWin(connectionId)
        {
            clients.push(connectionId);
            var html = '<div style="float:left;margin-top:5px;margin-right: 5px;margin-bottom: 5px;border:1px solid #Ff0000 "id="'+connectionId +'"connectionId="'+connectionId +'>'+connectionId+'"button onclick=" exit Chat (this)> exit </button> <ul id= "messages'+connectionId+"> </ul> <input type= "text" <buttononclick= "sendMessage (this)> send </button>;
            $("#userBox").append(html);
        }

        function exitChat(btnObj)
        {
            $(btnObj).parent().remove();
            chat.server.exitChat(connectionId);
        }

        //send message
        function sendMessage(data)
        {
            var message = $(data).prev().val();
            var  userObj = $(data).parent();
            var username = $("#userName").html();
            message = username + ":" + message;
            console.info($(userObj).attr("connectionId"));
            var targetConnectionId = $(userObj).attr("connectionId");
            chat.server.sendMessage(targetConnectionId, message);
            $(data).prev().val("");
        }
    </script>
}
3. Effect demonstration
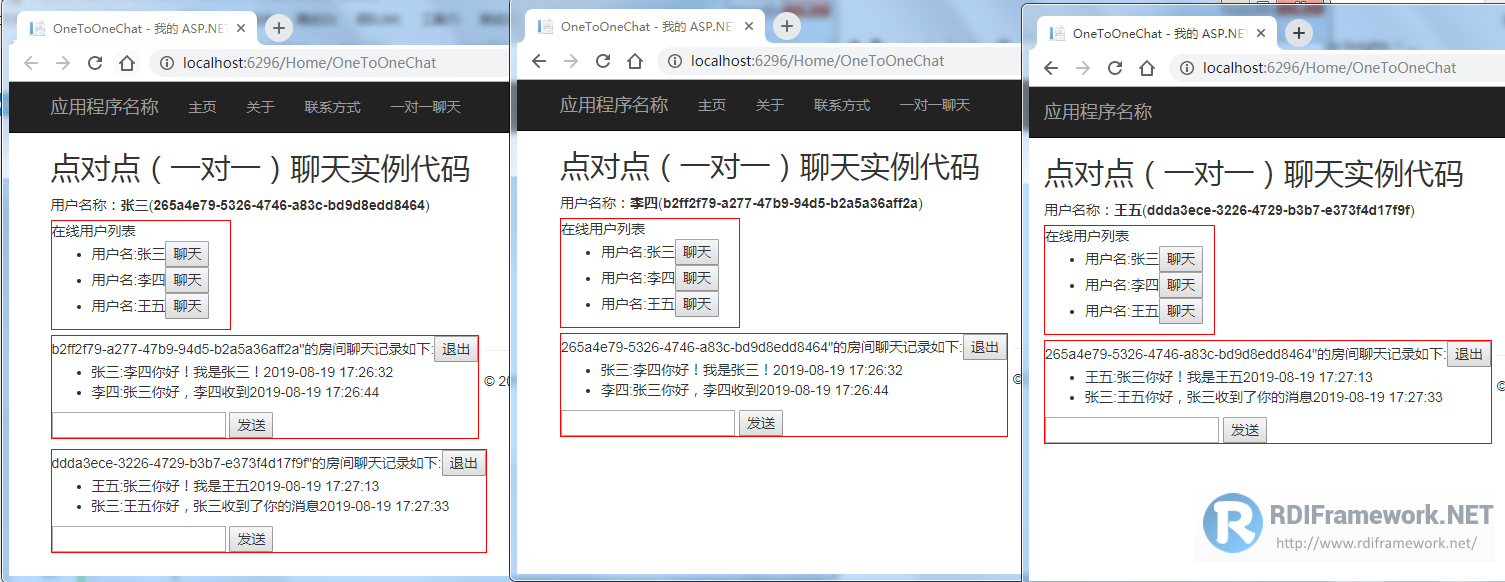
At this point, a signal R one-to-one (point-to-point) chat example is completed. Let's briefly analyze the code below:
Clients.Client(connectionId).addMessage(): Acts on the client to register the addMessage method and send a message to the client that specifies the connection to Id. Since the messages sent by one-to-one chat should also be sent back to themselves, the Id sent back to their connection can be retrieved through Context.ConnectionId. Of course, you can also use Client.Caller() instead of Client.Client(Context.ConnectionId) method to send directly.
Client.Clients(IList connectionIds): Sending messages to multiple ConnectionIds at the same time is similar to the function of @Friends on QQ.
Through browser F12, we can see how SignalR generates us:
[Img-GYymAggz-1566444208515 (http://doc.rdiframework.net/blog/article/20190822111606097.png-pw)]
We can see the two methods we developed on the server side. It needs to be noted that the first letter of the method name on the server side is lowercase in client calls. Of course, we can also use HubMethodName to identify the method name.
4. Code Download
Instance source code can be downloaded by github, address: https://github.com/yonghu86/SignalRTestProj
5. Reference Articles
-
The most comprehensive series of SignalR tutorials in history - 1. Understanding SignalR
-
The most comprehensive series of SignalR tutorials in history - catalogue summary
-
Wechat Public Number Development Series - Play Wechat Development - Directory Summary
-
RDIFramework.NET-Framework for Rapid Information System Development Based on.NET-Series Catalogues
-
RDIFramework.NET Code Generator Released in New V3.5 Version - Major Upgrade
Over the years, thanks to the supporters and users of the RDIFramework.NET framework, you can find out the details at the following address.
RDIFramework.NET official website: http://www.rdiframework.net/
RDIFramework.NET official blog: http://blog.rdiframework.net/
At the same time, we need to explain that all future technical articles are based on the official website, welcome to collect!
RDIFramework.NET Framework has been built, updated and upgraded by the professional team of Hainan Guosi Software Technology Co., Ltd. for a long time. Please feel free to use it!
Welcome to pay attention to the official public micro-message (micro-signal: guosisoft) of RDIFramework.net framework, and keep abreast of the latest developments.
Scanning Two-Dimensional Code for Immediate Attention