After we have finished some basic knowledge of java and spring boot, today we will talk about how spring boot implements database management.
At present, there are two mainstream approaches.
1. springboot combines mybatis to manage database
2. springboot combines jpa to manage data
These two methods have their own advantages. Today we will talk about spring boot 2 combined with mybatis to achieve data addition, deletion, modification and check operation. In the next section, we will talk about jpa.
First, add mybatis dependencies to pom.xml.
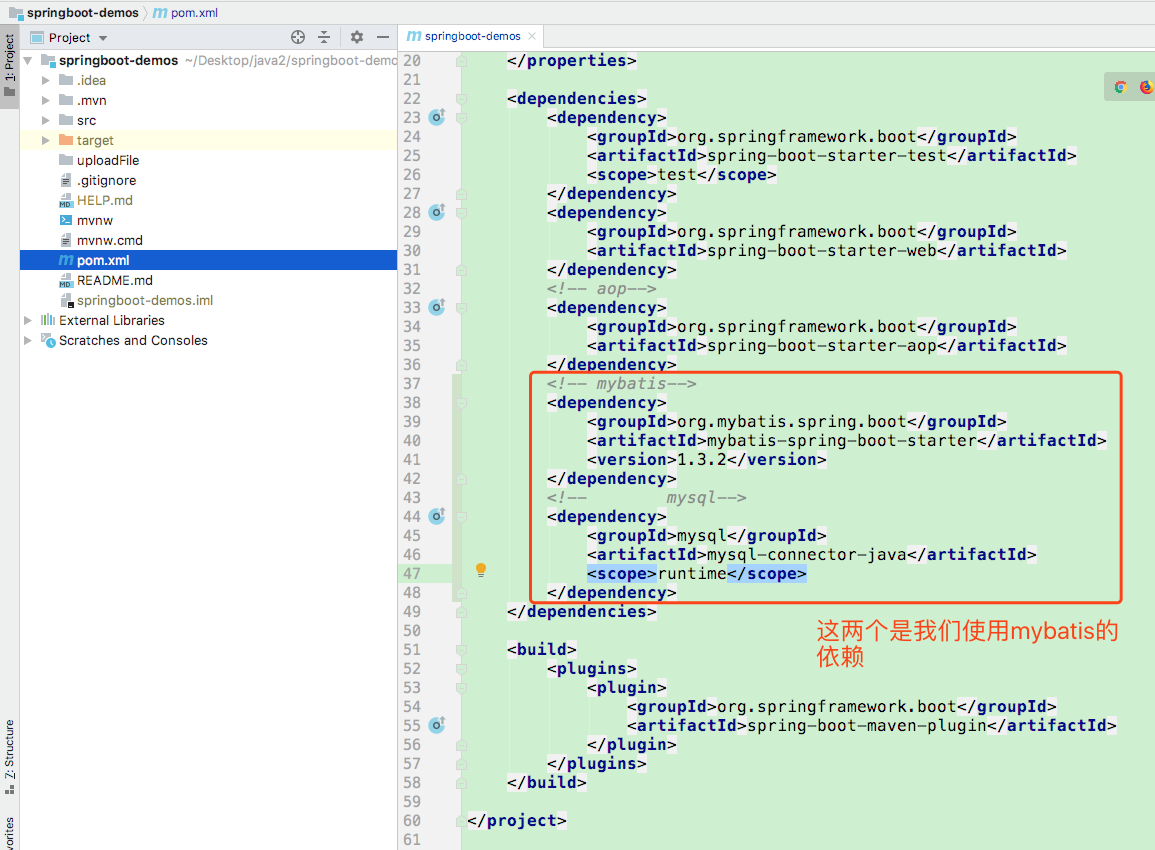
As shown in the figure above, we need to add mybatis and mysql dependencies. The code is as follows
        <!-- mybatis-->
        <dependency>
            <groupId>org.mybatis.spring.boot</groupId>
            <artifactId>mybatis-spring-boot-starter</artifactId>
            <version>LATEST</version>
        </dependency>
        <!--  mysql-->
        <dependency>
            <groupId>mysql</groupId>
            <artifactId>mysql-connector-java</artifactId>
            <scope>runtime</scope>
        </dependency>
Here's a brief explanation.
The mybatis library is the core of our implementation of mybatis.
mysql library is used to drive and manage database.
Second, configure the following information in application.yml

The above figure is done, local server port configuration, database association configuration. What matters is the following paragraph.
mybatis:
  mapper-locations: classpath:/mybatis/mapper/*.xml
  config-location:  classpath:/mybatis/config/mybatis-config.xml
-
mapper-locations is the location where we configure our mapper.xml file. We configure it in the / src/main/resource/mybatis/mapper directory.
-
config-locations is the location where the mybatis-confg.xml file is configured. We configure it in the / src/main/resource/mybatis/config directory.
Next, we create the mybatis directory under the resource directory, and then create the / mapper directory and / config directory under the mybatis directory.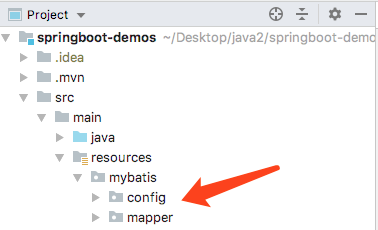
Third, configure mybatis configuration xml file
1. Create a new mybatis-config.xml in the / src/main/resource/mybatis/config directory
The specific code is as follows.
Paste the code to everyone.
<?xml version="1.0" encoding="UTF-8"?>
<!DOCTYPE configuration
    PUBLIC "-//mybatis.org//DTD Config 3.0//EN"
    "http://mybatis.org/dtd/mybatis-3-config.dtd">
<configuration>
    <settings>
        <setting name="mapUnderscoreToCamelCase" value="true"/>
    </settings>
    <!-- The database table corresponds to bean   -->
    <typeAliases>
        <package name="com.shitou.springbootdemos.mybatis.bean"/>
    </typeAliases>
</configuration>
Note here that the package configuration under typeAliases is in the directory where our entity classes are located.
 <typeAliases>
        <package name="com.shitou.springbootdemos.mybatis.bean"/>
 </typeAliases>
As in our User entity class, this directory is shown in the following figure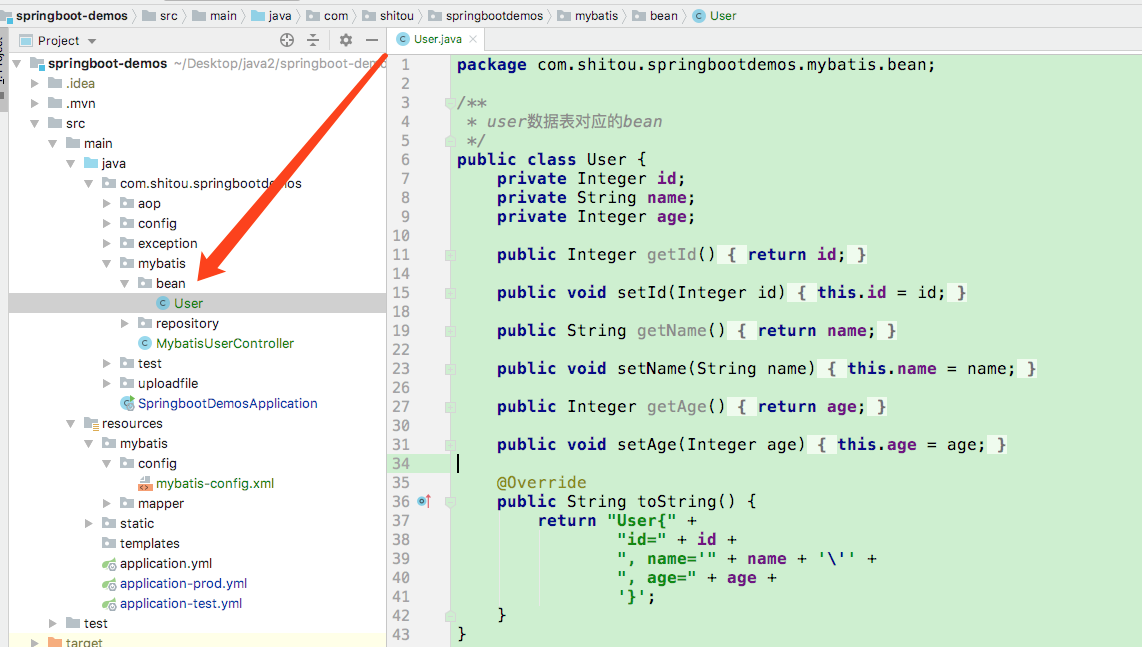
2. Create a new UserMapper.xml in the / src/main/resource/mybatis/mapper directory
This UserMapper.xml contains some sql statements that we want to execute. First, I'll post the code to you.
<?xml version="1.0" encoding="UTF-8"?>
<!DOCTYPE mapper PUBLIC "-//mybatis.org//DTD Mapper 3.0//EN"
    "http://mybatis.org/dtd/mybatis-3-mapper.dtd">
<!--Declarations correspond bean Namespace-->
<mapper namespace="com.shitou.springbootdemos.mybatis.repository.UserMapper">

    <!--    Return Style of Queried Result-->
    <resultMap id="SysUserResultMap" type="User">
        <id property="id" column="id" javaType="java.lang.Integer" jdbcType="INTEGER"/>
        <result property="name" column="name" javaType="java.lang.String" jdbcType="VARCHAR"/>
        <result property="age" column="AGE" javaType="java.lang.Integer" jdbcType="INTEGER"/>
    </resultMap>

    <!--increase-->
    <insert id="save" parameterType="User">
        insert into user
        <trim prefix="(" suffix=")" suffixOverrides=",">
            <if test="id != null">
                id,
            </if>
            <if test="name != null">
                name,
            </if>
            <if test="age != null">
                age
            </if>
        </trim>
        <trim prefix="values (" suffix=")" suffixOverrides=",">
            <if test="id != null">
                #{id,jdbcType=INTEGER},
            </if>
            <if test="name != null">
                #{name,jdbcType=VARCHAR},
            </if>
            <if test="age != null">
                #{age,jdbcType=INTEGER},
            </if>
        </trim>
    </insert>

    <!--    Delete-->
    <delete id="deleteById">
        delete from user where id=#{id}
    </delete>

    <!--    change-->
    <update id="update" parameterType="User">
        update user
        <set>
            <if test="name != null">
                name = #{name,jdbcType=VARCHAR},
            </if>
            <if test="age != null">
                age = #{age,jdbcType=INTEGER},
            </if>
        </set>
        where id = #{id,jdbcType=INTEGER}
    </update>


    <!--    check-->
    <select id="selectAll" resultMap="SysUserResultMap">
        select * from user
    </select>
    <select id="selectById" resultMap="SysUserResultMap">
        select
        *
        from user
        where id = #{id,jdbcType=INTEGER}
    </select>
</mapper>
Fourth, create User entity classes.
package com.shitou.springbootdemos.mybatis.bean;

/**
 * user Beans corresponding to data tables
 */
public class User {
    private Integer id;
    private String name;
    private Integer age;

    public Integer getId() {
        return id;
    }

    public void setId(Integer id) {
        this.id = id;
    }

    public String getName() {
        return name;
    }

    public void setName(String name) {
        this.name = name;
    }

    public Integer getAge() {
        return age;
    }

    public void setAge(Integer age) {
        this.age = age;
    }

    @Override
    public String toString() {
        return "User{" +
                "id=" + id +
                ", name='" + name + '\'' +
                ", age=" + age +
                '}';
    }
}
Let's simply create a user class that corresponds to our user table with only three fields: id, name and age.
5. Create UserMapper interface to do add, delete and change checks
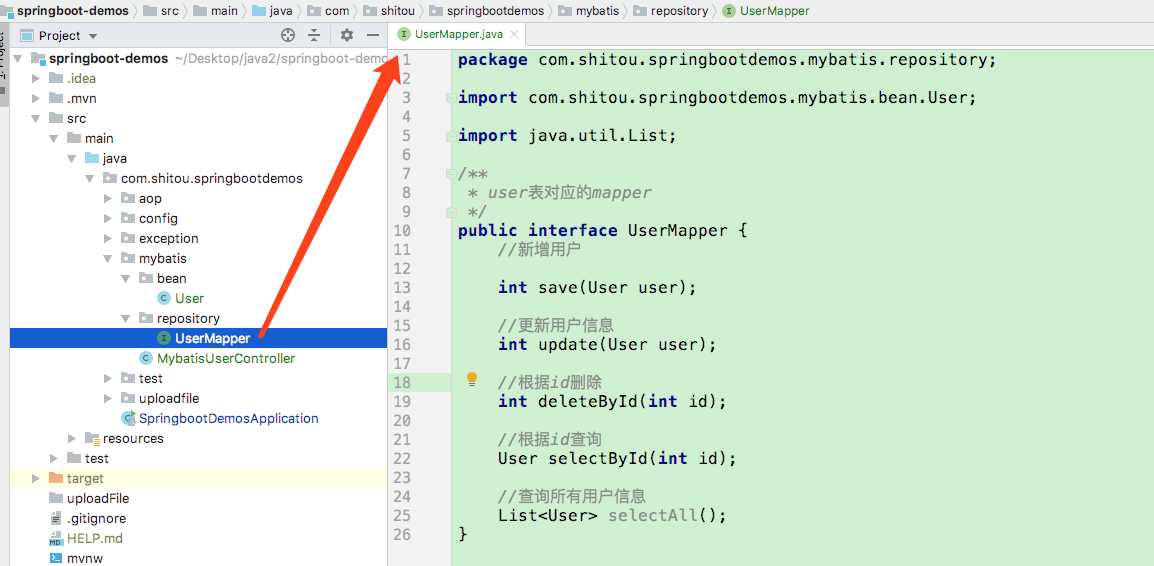
The code is posted to you.
/**
 * user mapper corresponding to table
 */
public interface UserMapper {
    //New Users

    int save(User user);

    //Update user information
    int update(User user);

    //Delete by id
    int deleteById(int id);

    //Query by id
    User selectById(int id);

    //Query all user information
    List<User> selectAll();
}
Sixth, create user table.
I created database tables using idea's own visual management tools. As I mentioned earlier, if you use idea to visualize the management of mysql database. You can read my previous articles.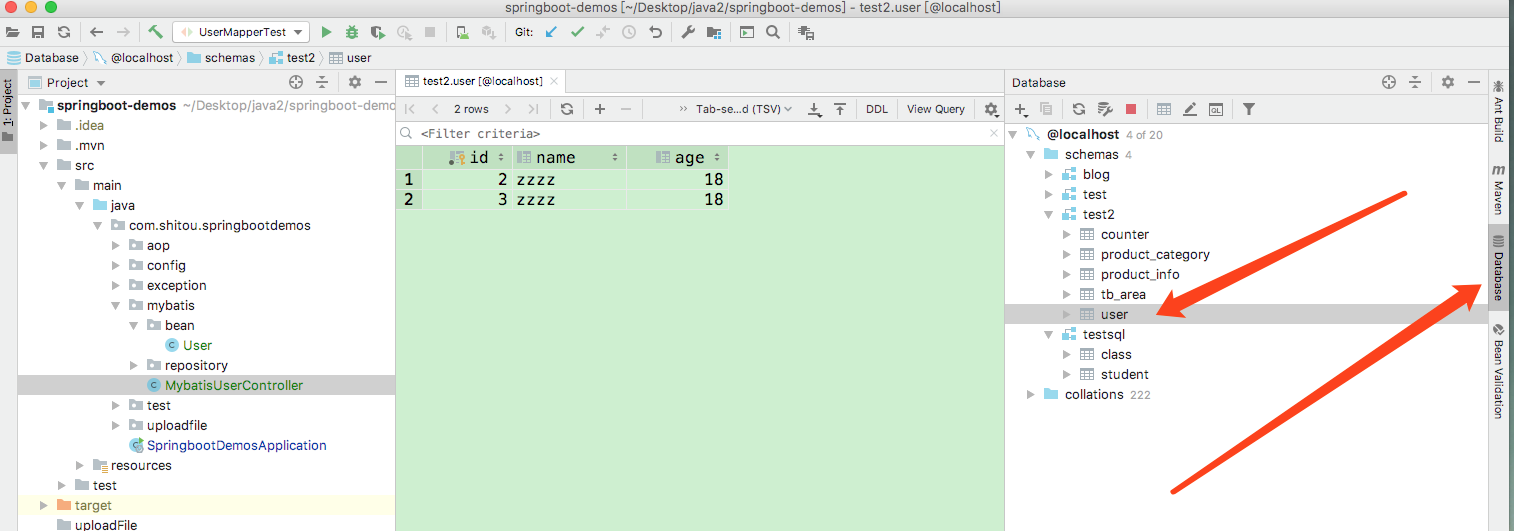
Visual tabulation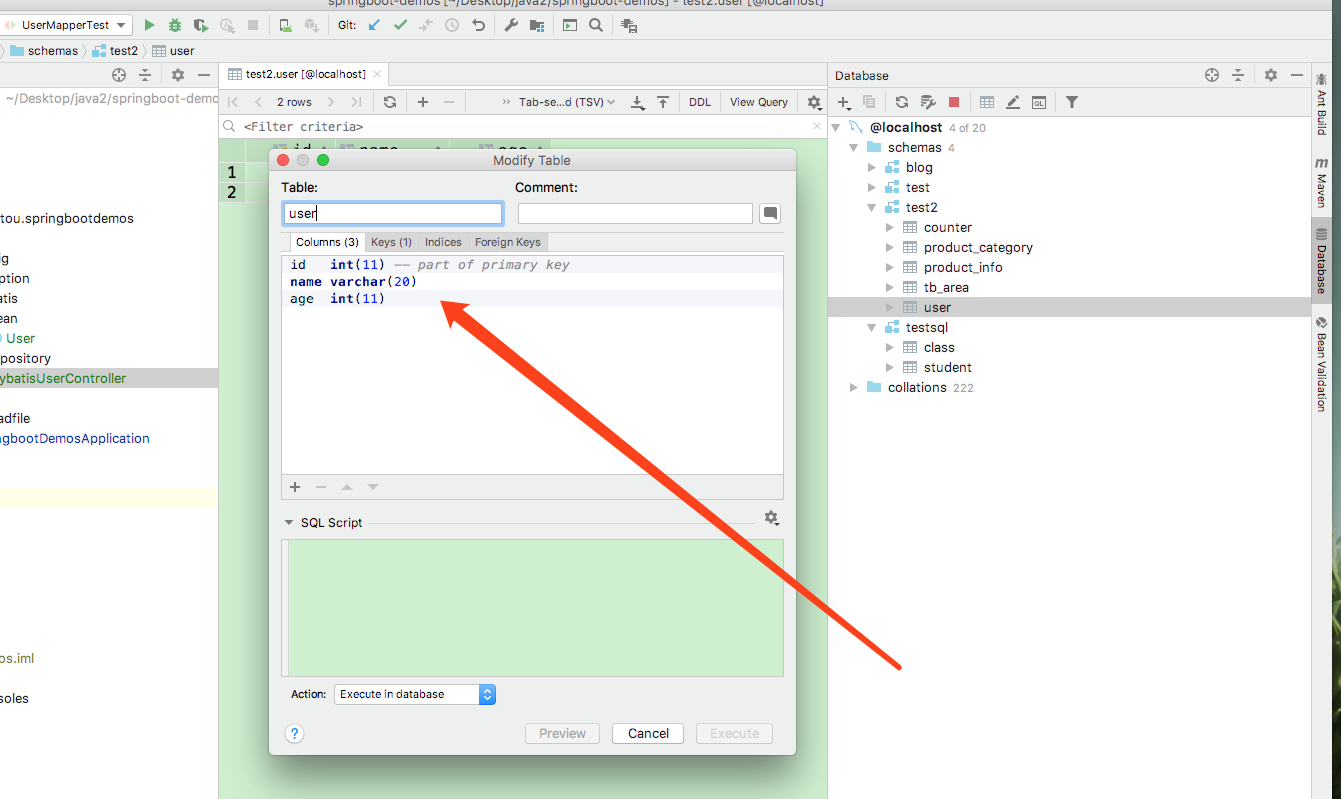
At this point, mybatis configuration is not successful, we need to expose mapper's path to spring for scanning management, so we need to add a comment @MapperScan("com.shitou.springbootdemos.mybatis.repository") to the Chapter 4Application.java file to scan mapper's location.
Seven, automatically scan the mapper interface we defined in the boot class

So far. Our mybaits interface is finished. Let's test it next.
8. Define controller
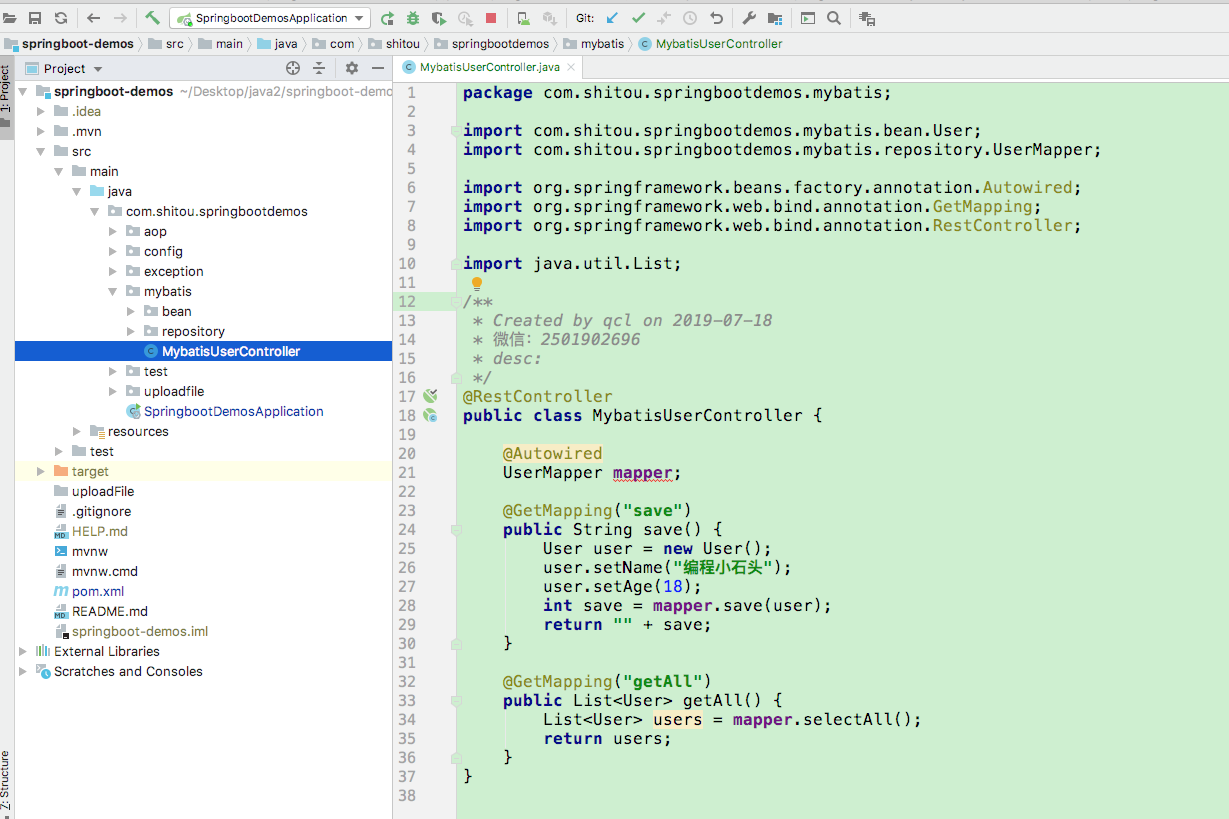
As shown in the figure above, we define a controller to implement an interface for adding data. And an interface to query all users.
1. Start the project.
2. Access save interface in browser
Return 1 represents the success of adding new users. Look at the user table and you can see that the data was added successfully.
3. Access getAll interface in browser
You can see that we successfully accessed the data we added in the previous step.
At this point, we can easily implement spring boot 2 and mybatis to manage the database function.
Source code:
https://github.com/qiushi123/springboot-demos
Video Interpretation
https://edu.csdn.net/course/detail/23443
Recent Review
-
Introduction to java 002-jdk8 Windows 32-bit 64-bit Mac 64-bit installation package
-
Java entry 006-spring boot to realize multi-file upload (java multi-file upload)
- Java entry 013-java exception capture-spring boot captures exceptions through @Controller Advice and @ExceptionHandler
- java introductory 014-spring boot custom error page and redirect to home page
- java introductory 015-spring boot 2 integrates mybatis, which makes it easy to add, delete and check mysql data
- java introductory 016-spring boot 2 combined with mybatis, xml-free configuration
- Java introductory 017-spring boot to create multi-Moudle multi-module java project