Introduction:
webpack is simply a configuration file in which all the magic happens. This configuration file is divided into three main blocks
Which file is the entry file for webpack to use as the entry for the project
output exits let webpack place the processed files
What different modules do module modules use to process various types of files?
Next, we will build a simple project step by step, not to mention much, the self-contained Baidu, here is only responsible for your own web pack to run.
(1) Installation
Global installation of webpack
npm install -g webpack
You also need to install webpack in the folder
npm install webpack
This is a global installation in your root directory, remember to add - g,npm is too slow, it is recommended to use npm mirror cnpm installation method.
(2) Creating projects
New folder command line input command. Enter npm init and return all the way to see if you need to change it yourself
cd study-webpack
npm init
{
  "name": "study-webpack2.0",
  "version": "1.0.0",
  "description": "",
  "main": "index.js",
  "scripts": {
    "test": "echo \"Error: no test specified\" && exit 1"
  },
  "author": "",
  "license": "ISC"
}
At this point, a package.json is generated and then
npm install
Install basic dependency templates
(3) Establishing the basic catalogue structure of the project
Now there's a package.json in the project. Let's add a little more and enrich its content slowly.
/app
    index.js
    sub.js
package.json
webpack.config.js
Two js files have been added, and the most important configuration file of webpack has been added. We started playing with a very simple hello world. Webpack natively supports both AMD and Common js formats.
JS code
sub.js
//We use the Common JS style here
function generateText() {
  var element = document.createElement('h2');
  element.innerHTML = "Hello h2 world";
  return element;
}

module.exports = generateText;
index.js
var sub = require('./sub');
var app  = document.createElement('div');
app.innerHTML = '<h1>Hello World</h1>';
app.appendChild(sub());
document.body.appendChild(app);
The code is finished, a simple function is completed, a new single module is created, and it is quoted in another module. Finally, two titles are printed in the page.
Configuring webpack
Now start configuring webpack, the goal is to merge the two js files into one file. We can manually build an index.html folder in the build folder ourselves, and then refer to the merged js in it, but this is troublesome, so we install a plugin here, which can automatically and quickly generate HTML for us.
npm install html-webpack-plugin --save-dev
Start writing webpack.config.js file with this plug-in
var path = require('path');
var HtmlwebpackPlugin = require('html-webpack-plugin');
//Define the path of some folders
var ROOT_PATH = path.resolve(__dirname);
var APP_PATH = path.resolve(ROOT_PATH, 'app');
var BUILD_PATH = path.resolve(ROOT_PATH, 'build');

module.exports = {
  //The folder of the project can be directly named with the folder name. By default, index.js can also be found to determine which file name it is.
  entry: APP_PATH,
  //After the output file name is merged, the js will be named bundle.js
  output: {
    path: BUILD_PATH,
    filename: 'bundle.js'
  },
  //Adding our plug-in automatically generates an html file
  plugins: [
    new HtmlwebpackPlugin({
      title: 'Hello World app'
    })
  ]
};
Then run the instructions in the project root directory, which generates a build folder with bundle.js and index.html
webpack //This is a command line command.
Configure webpack-dev-server
Although the above task is completed, we need to run the program and view the page constantly, so it is better to build a new development server, which can serve our pack ed code, and automatically refresh the browser when the code is updated.
Install webpack-dev-server
npm install webpack-dev-server --save-dev
Add configuration to webpack.config.js after installation
module.exports = {
  ....
  devServer: {
    historyApiFallback: true,
    hot: true,
    inline: true
  },
  ...
}
Then configure the running commands in package.json. npm supports customizing some commands
...
"scripts": {
  "start": "webpack-dev-server --hot --inline"
},
...
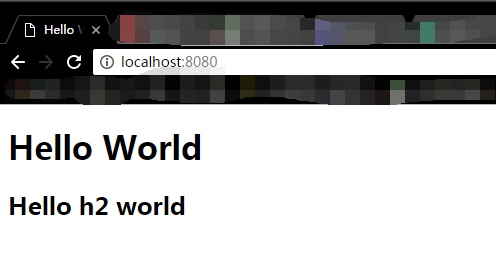
Okay, everything is ready. Enter npm start in the project root directory. After a bunch of colorful information, the server is up and entered in the browser. http://localhost:8080 Find the great hello world appeared, in the js arbitrarily modify some output and save, boom! Browser automatically refresh, new results appear.

With regard to some document dependency explanations:

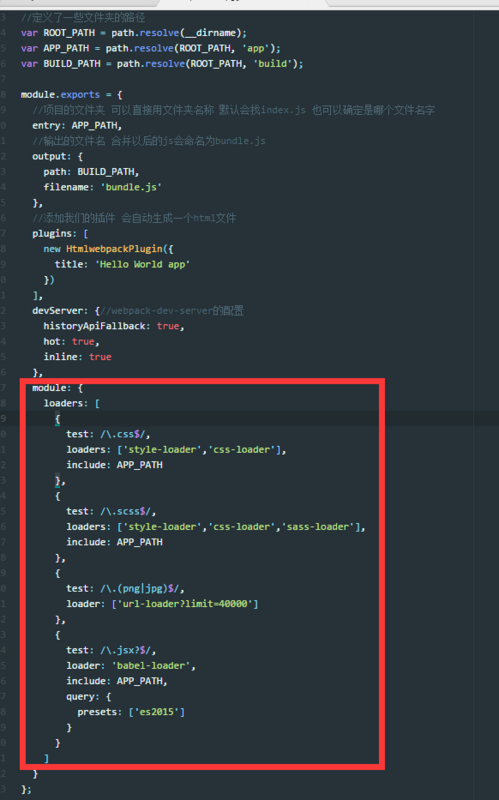
What's in the red box is the configuration you need to run some files. Remember to add it under the module in webpack.config.js, for example, you need to use sass.
{
  test: /\.scss$/,
  loaders: ['style-loader','css-loader','sass-loader'],
  include: APP_PATH
},


The command line has to install these corresponding templates npm install style-loader css-loader sass-loader --save-dev can also be written separately


Reminder: to use es6, you must install babel-core globally; to use sass, you must install sass globally, first install ruby;
Expand
Attached below is the complete project screenshot code (es6):
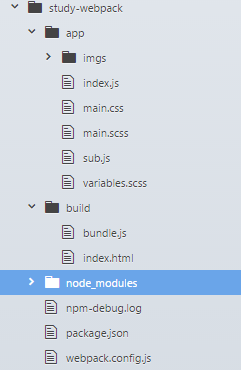
Project directory
npm-debug.log is a debug log file. Errors can be corrected by referring to this file.

index.js
import './main.css';
import './main.scss';

import generateText from './sub';
import $ from 'jquery';
import moment from 'moment';

let app = document.createElement('div');
const myPromise = Promise.resolve(42);
myPromise.then((number) => {
  $('body').append('<p>look at me! now is ' + number + ' now is ' + moment().format() + '</p>')
})
app.innerHTML = '<h1>Hello World!!</h1>';
document.body.appendChild(app);
app.appendChild(generateText());
sub.js
export default function() {
  var element = document.createElement('h2');
  element.innerHTML = 'Hello h2 world hahaha';
  return element;
}
main.css

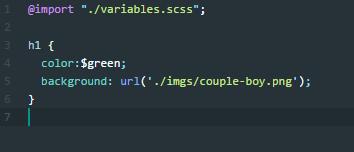
main.scss

variables.scss

Things in the build folder will be generated automatically, so I won't let them go.
package.json
{
  "name": "aaa",
  "version": "1.0.0",
  "description": "",
  "main": "webpack.config.js",
  "scripts": {
    "test": "echo \"Error: no test specified\" && exit 1",
    "start": "webpack-dev-server --hot --inline"
  },
  "author": "",
  "license": "ISC",
  "devDependencies": {
    "babel-loader": "^6.3.2",
    "babel-preset-es2015": "^6.22.0",
    "css-loader": "^0.26.2",
    "file-loader": "^0.10.1",
    "html-webpack-plugin": "^2.28.0",
    "jquery": "^3.1.1",
    "moment": "^2.17.1",
    "node-sass": "^4.5.0",
    "sass-loader": "^6.0.2",
    "style-loader": "^0.13.2",
    "url-loader": "^0.5.8",
    "webpack": "^2.2.1",
    "webpack-dev-server": "^2.4.1"
  }
}
webpack.config.js
var path = require('path');
var HtmlwebpackPlugin = require('html-webpack-plugin');
//Define the path of some folders
var ROOT_PATH = path.resolve(__dirname);
var APP_PATH = path.resolve(ROOT_PATH, 'app');
var BUILD_PATH = path.resolve(ROOT_PATH, 'build');

module.exports = {
  //The folder of the project can be directly named with the folder name. By default, index.js can also be found to determine which file name it is.
  entry: APP_PATH,
  //After the output file name is merged, the js will be named bundle.js
  output: {
    path: BUILD_PATH,
    filename: 'bundle.js'
  },
  //Adding our plug-in automatically generates an html file
  plugins: [
    new HtmlwebpackPlugin({
      title: 'Hello World app'
    })
  ],
  devServer: {//Configuration of webpack-dev-server
    historyApiFallback: true,
    hot: true,
    inline: true
  },
  module: {
    loaders: [
      {
        test: /\.css$/,
        loaders: ['style-loader','css-loader'],
        include: APP_PATH
      },
      {
        test: /\.scss$/,
        loaders: ['style-loader','css-loader','sass-loader'],
        include: APP_PATH
      },
      {
        test: /\.(png|jpg)$/,
        loader: ['url-loader?limit=40000']
      },
      {
        test: /\.jsx?$/,
        loader: 'babel-loader',
        include: APP_PATH,
        query: {
          presets: ['es2015']
        }
      }
    ]
  }
};
