After installation of Ubuntu 16.04, 1. Install the commonly used software Sogou Input Method + Editor Atom + Browser Chome + Video Player vlc + Image Editor GIMP + Video Recording Software RcordMyDesktop. 2. Development Environment Configuration. JDK Environment Configuration+ Scala Environment Configuration + Noejs Environment Configuration + Development Tool intellij IDEA Installation+ Python Data Analysis Environment Configuration + Jupyter Development Tool Installation + Python Multi-Edition Support at the same time.
1. Ubuntu 16.04 Install Common Software (Sogou Input Method + Editor Atom + Browser Chome + Video Player vlc + Video Recording Software RcordMyDesktop)
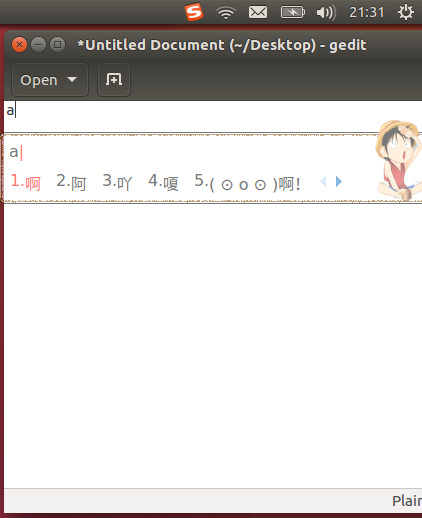
1.1. Install Sogou Input Method
a Install ficx input method and visual configuration tool
wxl@wxl-pc:~$ sudo apt-get install fcitx
wxl@wxl-pc:~$ sudo apt-get install fcitx-config-common
wxl@wxl-pc:~$ sudo apt-get install fcitx-config-gtk
Download the linux version of the input method from Sogou's official website
sudo dpkg -i /home/wxl/Downloads/sogoupinyin_2.0.0.0078_amd64.deb
Update sudo apt-get upgrade-f
Select fcitx(system settings - langure superter) in Selection Language Support
In the fcitx configuration, select the sougo input method (or open the fcitx configuration in the search box) as shown in Figure 1. Remove the Only Show Current Language "option" and remove the check to search for Sogou Pinyin.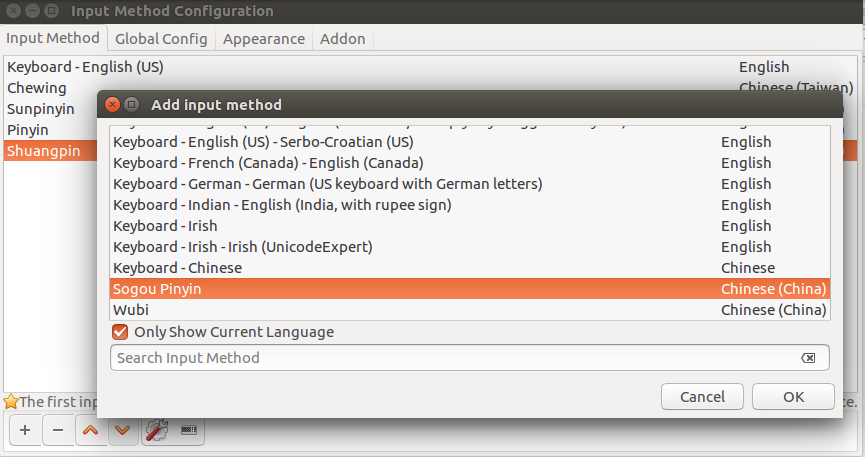
1.2. Install atom setup
Download the. deb installation package for atom
First package installation, which will prompt installation dependencies
sudo dpkg -i /home/wxl/Downloads/atom-amd64.debInstallation Dependency
sudo apt-get -f installPack installation will be successful again. Search atom in dashboard and you can see that it has been successfully installed.
sudo dpkg -i /home/wxl/Downloads/atom-amd64.deb
1.3. Install chome
sudo dpkg -i /home/wxl/Downloads/google-chrome-stable_current_amd64.deb
sudo apt-get -f install
sudo dpkg -i /home/wxl/Downloads/google-chrome-stable_current_amd64.deb
1.4. Install vlc player
sudo apt-get install vlc1.5.GIMP Image Editor Installation
Similar to photoshop, for image editing.
Search for installation directly in the application store Ubuntu Software. 
1.6. Summary of commands
#View packages you want to install, such as all packages with fcitx
wxl@wxl-pc:~$ sudo apt-cache search fcitx
#Install deb packages that have been downloaded, such as installing Google Browser
wxl@wxl-pc:~$ sudo dpkg -i /home/wxl/Downloads/google-chrome-stable_current_amd64.deb
#Install packages in ubuntu's own source
wxl@wxl-pc:~$ sudo apt-get install Software name
#System (or dependency) updates
wxl@wxl-pc:~$ ssudo apt-get -f install
2. Ubuntu 16.04 Configuration Development Environment (JDK Environment Configuration + scala Environment Configuration + Noejs Environment Configuration + Development Tool intellij IDEA + Data Analysis Python Environment + Development Tool Jupyter)
2.0. Configuration of environment variables at three levels of Ubuntu
2.0.1 temporary variable, that is, it will fail after exiting terminal.
export PATH=${PATH}2.0.2 Single User Variable, equivalent to the "User Variable" of windows
vim ~/.bashrc2.0.3 System Variables, equivalent to windows's "System Variables" - prompts never to modify environment variables!
vim /etc/environmentTip: Ubuntu modifies the environment to fail to access the system
Press ctrl+alt+F1 to enter command prompt mode
Enter username and password
/usr/bin/sudo /usr/bin/vi /etc/environmentChange back
PATH="/usr/local/sbin:/usr/local/bin:/usr/sbin:/usr/bin:/sbin:/bin:/usr/games:/usr/local/games"Restart, you can
/usr/bin/sudo rebootThe global environment variable file under Tip:CentOS is: / etc/profile, and the single user environment variable file is: ~/. bash_profile.
JDK environment configuration (system environment variables)
Unzip and place / opt/ Java Under the road
cd /homw/wxl/Downloads
tar -zxf jdk-8u92-linux-x64.tar.gz
sudo mv jdk1.8.0_92 /opt/java
Configuring system variables
sudo vim /etc/profile.d/java.sh
#add to the content
export JAVA_HOME=/opt/java
export JRE_HOME=${JAVA_HOME}/jre
export CLASSPATH=.:${JAVA_HOME}/lib:${JRE_HOME}/lib
export PATH=${JAVA_HOME}/bin:$PATH
The source variable takes effect under the current terminal
source /etc/profile
Or logout/user logout.
This allows user variables to take effect under the current user
2.2. Scala environment configuration
Unzip and move to / opt
cd /home/wxl/Downloads
tar -zxf scala-2.11.8.tgz

sudo mv scala-2.11.8 /opt/scala
scala environment variable configuration
sudo vim /etc/profile.d/scala.sh

#add to the content
export SCALA_HOME=/opt/scala
export PATH=${SCALA_HOME}/bin:$PATH
The source variable takes effect under the current terminal
source /etc/profileView scala-version
2.3. Install Intellj IDEA
tar -zxf ideaIU-2016.2.tar.gz
sudo mv idea-IU-162.1121.32 idea
Start the installation script in the / bin directory
./idea.shStart installing through the interface
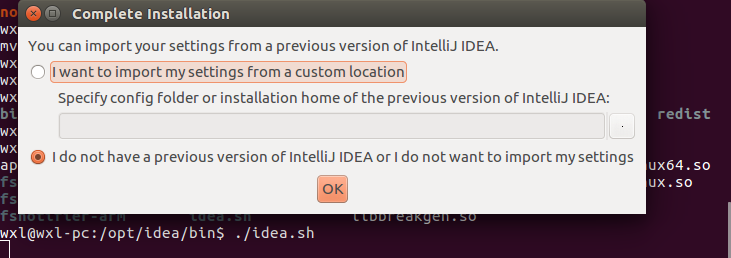
Select Online Activation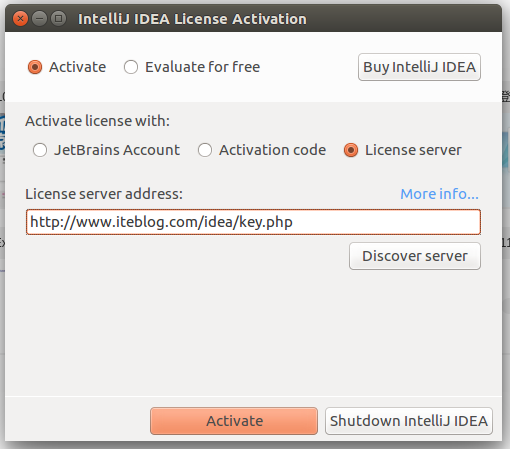
Add Open Icon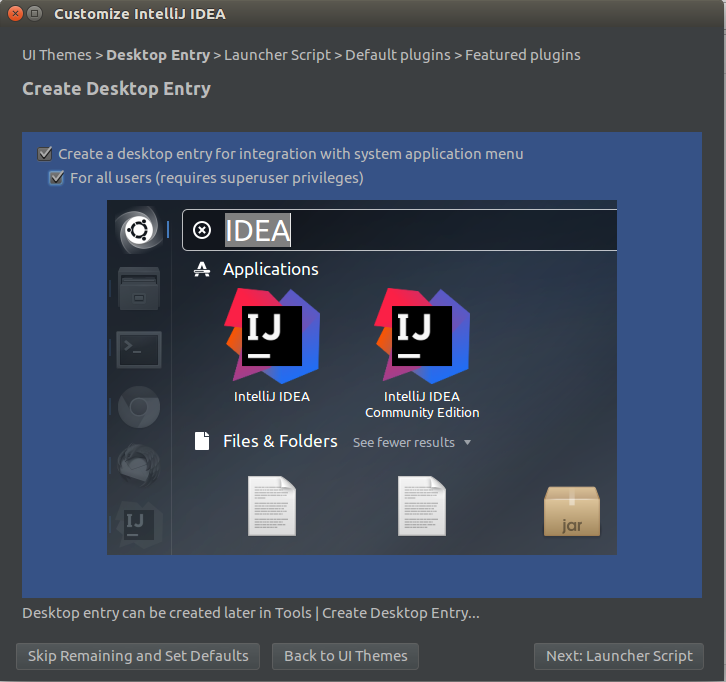
Choose to install plug-ins that support scala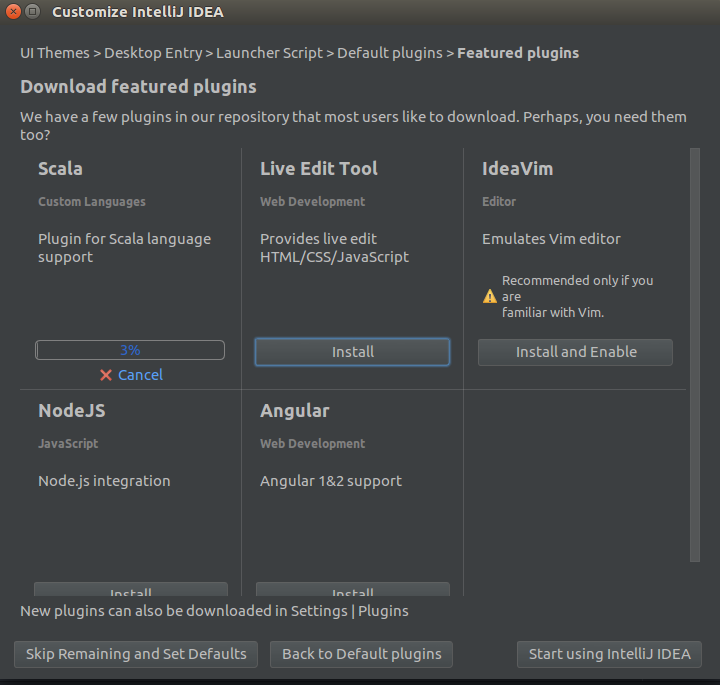
Installation requires permission at the end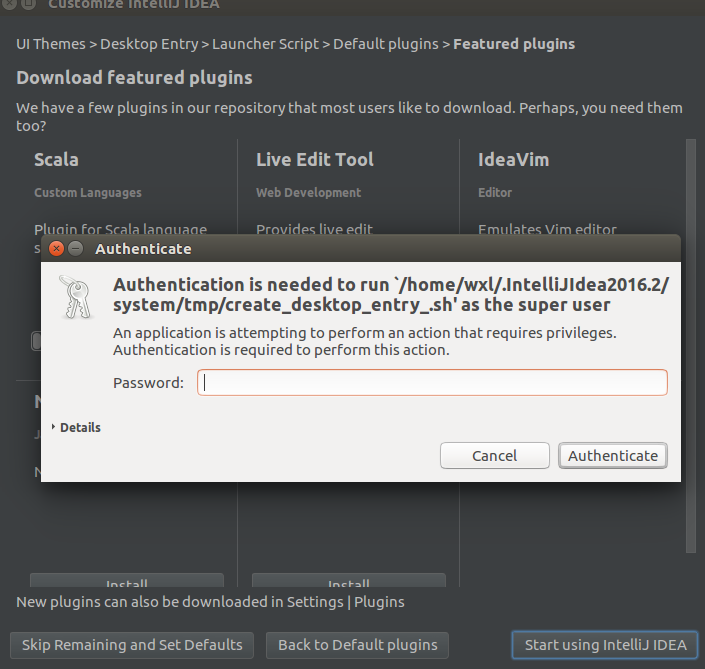
Installation completed
2.4. Install nodejs
Download the latest version of nodejs
Unzip and place it in the / opt path
tar -xf node-v6.3.0-linux-x64.tar.xz- 1
- 1
sudo mv node-v6.3.0-linux-x64 /opt/nodejs- 1
- 1
Configuration variables
wxl@wxl-pc:~$ sudo vim /etc/profile.d/nodejs.sh
//add to the content
export NODE_HOME=/opt/nodejs
export PATH=$PATH:$NODE_HOME/bin
export NODE_PATH=$NODE_HOME/lib/node_modules- 1
- 2
- 3
- 4
- 5
- 1
- 2
- 3
- 4
- 5
Make the variable valid, and when the machine is restarted or the user logs out, the user automatically takes effect/views the version status.
source /etc/profile
node -v- 1
- 2
- 1
- 2

2.5. Configuration of pyton data science development environment
Ubuntu 16.04 itself comes with pyton 2.7.12 (input pyton for viewing) and 3.5.1 + (input Python 3 for viewing)
5.5.1. Configure Python 2
Install pip
sudo apt install python-pip- 1
- 1
View python packages installed in the current environment
pip list- 1
- 1
Update pip
pip install --upgrade pip- 1
- 1
2.5.2 Configure pyhton3
sudo apt install python3-pip- 1
- 1
View python packages installed in the current environment
pip3 list- 1
- 1
Update pip3
pip3 install --upgrade pip- 1
- 1
Tip:/usr/share/python-wheels
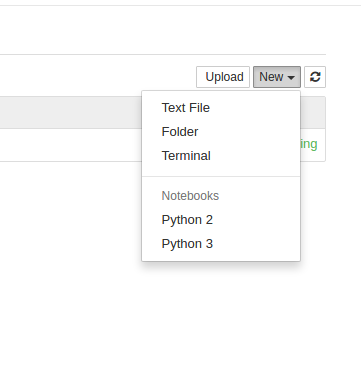
2.6. Jupyter notebook installation/
Jupyter notebook is a convenient web-based development tool that can be browsed and adjusted in time.
2.6.1. Install jupyter notebook for Python 2
sudo pip install jupyter- 1
- 1
They only install one, otherwise the latter overrides the former, and if Python 2 and python 3 are required to use jupyter notebook together. Please look at 6.
2.6.2. Install jupyter notebook for Python 3
sudo pip3 install jupyter- 1
- 1
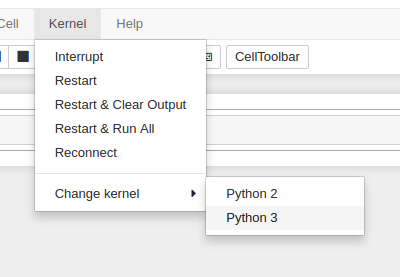
2.7. Jupyter notebook supports both Python 2 and python 3.
If you're like me, because work requires both Python 2 and python 3 to work together, here's how to make two different versions of Python coexist.
If you have installed jupyter notebook for Python 2, you want to be able to use the python 3 kernel at the same time when you open notebook.
python3 -m pip install ipykernel
python3 -m ipykernel install --user- 1
- 2
- 1
- 2
If the jupyter notebook of Python 3 is installed in advance, replace the command part 3 with 2.