Linear Gradient Linear Gradient Gradient Render
Linear Gradient is translated into Chinese to mean linear gradient. Linear gradient is commonly used to set a color value such as faf84d at the beginning and CC423C at the end, and then draw in an area. The color of the image will present a very beautiful effect. The color will transit from the starting color to the end color. Give me a picture, let's feel it intuitively.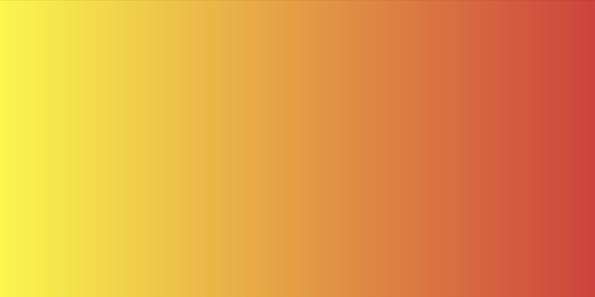
Looking at the API of Linear Gradient, we find that it has only two constructions, which are very simple.
LinearGradient (float x0,
                float y0,
                float x1,
                float y1,
                int color0,
                int color1,
                Shader.TileMode tile)

//x0 and y0 are the starting coordinates of color gradient.
//x1 and y1 are terminal coordinates of color gradient.
//color0 is the starting color value
//color0 is the end-point color value.
//tile is the TileMode type parameter, which we talked about in the last article.
Use of Linear Gradient.
//1   Establish LinearGradient Object, and set its starting point coordinates, end point coordinates, starting point color values, end point color values, and then set TileMode
mShader = new LinearGradient(0,0,w,0,Color.parseColor("#faf84d"),
                Color.parseColor("#CC423C"), Shader.TileMode.CLAMP);

//2  take Shader Assign to Paint Object.
mPaint.setShader(mShader);

//3  Drawing graphics
canvas.drawRect(0,0,w,h/2,mPaint);
The usage is very simple.
LinearGradient also has a construction method.
LinearGradient (float x0,
                float y0,
                float x1,
                float y1,
                int[] colors,
                float[] positions,
                Shader.TileMode tile)
Note that there are int[] colors and float[] positions, what do they mean?
In fact, Linear Gradient can specify many intermediate color values in addition to starting and ending color values. It's like a rainbow. The colors [] array stores such a combination of color values. If you look at the code and the image effect, you may feel it intuitively.
//Gradient is a sequence of colors(#faf84d,#003449,#808080,#cc423c)
mShader = new LinearGradient(0,0,w,0,new int[]{Color.parseColor("#faf84d"),Color.parseColor("#003449"),
        Color.parseColor("#808080"),
        Color.parseColor("#CC423C")},null,Shader.TileMode.CLAMP);
mPaint.setShader(mShader);
canvas.drawRect(0,0,w,h/2,mPaint);
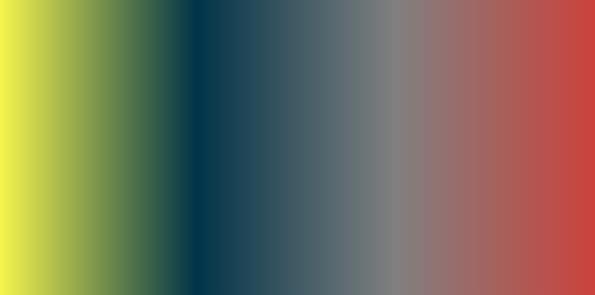
Is it rich in colour? The color transits from one color to another until it reaches the end.
Did you notice that I set float[] positon in the code above to null, and what does it represent? It corresponds to the colors array and represents the positions of each color value. The values in the positions array range from 0.0 to 1.0, 0.0 represents the starting position and 1.0 represents the ending position. If the array is empty, the colors are evenly distributed. What if the array is not empty? Let's talk about it in terms of code effects.
mShader = new LinearGradient(0,0,w,0,new int[]{Color.parseColor("#faf84d"),Color.parseColor("#003449"),
        Color.parseColor("#808080"),
        Color.parseColor("#CC423C")},new float[]{0.0f,0.6f,0.8f,1.0f},Shader.TileMode.CLAMP);
mPaint.setShader(mShader);
canvas.drawRect(0,0,w,h/2,mPaint);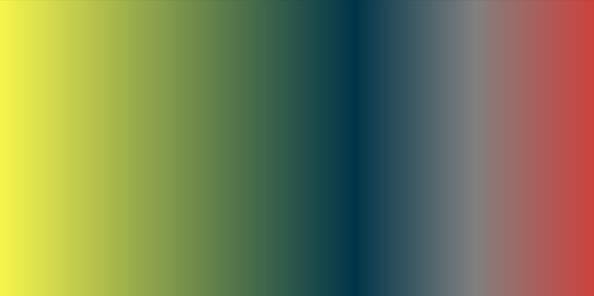
colors [] in the code hasn't changed, just positon [], but the effect is different.
new int[]{Color.parseColor("#faf84d"),Color.parseColor("#003449"),
        Color.parseColor("#808080"),
        Color.parseColor("#CC423C")}

new float[]{0.0f,0.6f,0.8f,1.0f}

// # The position value corresponding to faf84d is 0.0, so it is the starting point.
// # 003449 corresponds to 0.6, so this color is at the 0.6 ratio between the beginning and the end.
// # 808080 corresponds to 0.8 where the color is at a ratio of 0.8
// # cc423c corresponds to 1.0. This color is the color at the end.
It's important to note that arrays in position [] arrays are best from small to large. Why? It does not support 0.8 and then to 0.6 and so on. Look at the code.
mShader = new LinearGradient(0,0,w,0,new int[]{Color.parseColor("#faf84d"),Color.parseColor("#003449"),
        Color.parseColor("#808080"),
        Color.parseColor("#CC423C")},new float[]{0.6f,0.8f,0.2f,0.0f},Shader.TileMode.CLAMP);
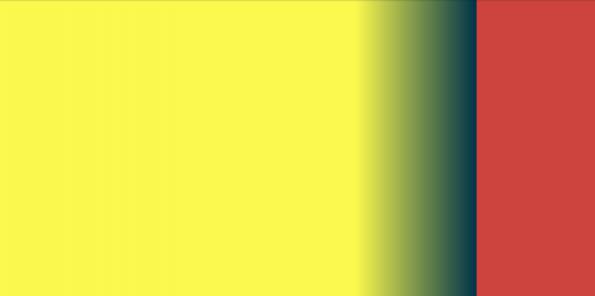
You can see that the color can transit from 0.6 to 0.8, and the latter does not work.
Radial Gradient Loop Render
I like to call it radial gradient, because there is a concept of radial gradient in PHOTOSHOP.
Radial gradient, the so-called radial radiation, radiation from the center to the surrounding.
Radial gradient has only two construction methods, the basic usage is similar to linear gradient.
RadialGradient (float centerX,
                float centerY,
                float radius,
                int centerColor,
                int edgeColor,
                Shader.TileMode tileMode)

//X-coordinates of the center X of a circle
//Y-coordinates of center Y
//Radius circle radius
//Center Color Center Color
//Edge Color Edge Color
//TieMode is not introduced, is it?
Upper code.
mShader = new RadialGradient(w/2,h/2,w/2,Color.parseColor("#faf84d"),
                Color.parseColor("#CC423C"), Shader.TileMode.CLAMP);
mPaint.setShader(mShader);
canvas.drawRect(0,0,w,h,mPaint);
Effect: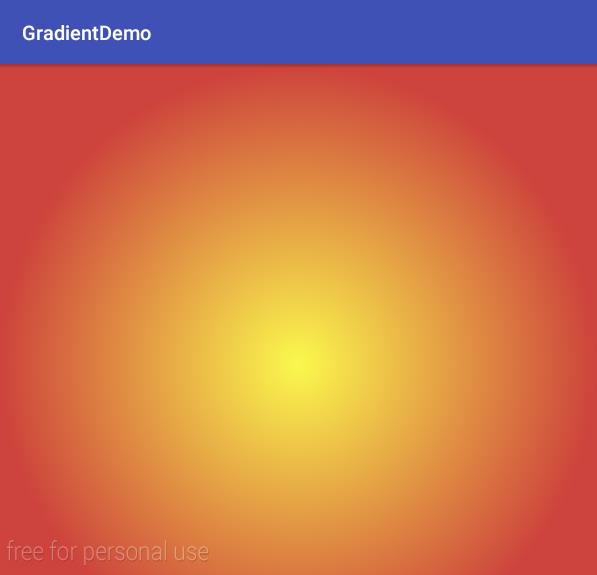
RadialGradient (float centerX,
                float centerY,
                float radius,
                int[] colors,
                float[] stops,
                Shader.TileMode tileMode)
Like Linear Gradient, there is also an array of colors and positions, which means the same thing. stop [] can also be null. If null, the color [] array will be evenly distributed among regions. Otherwise, the corresponding color will be filled proportionally.
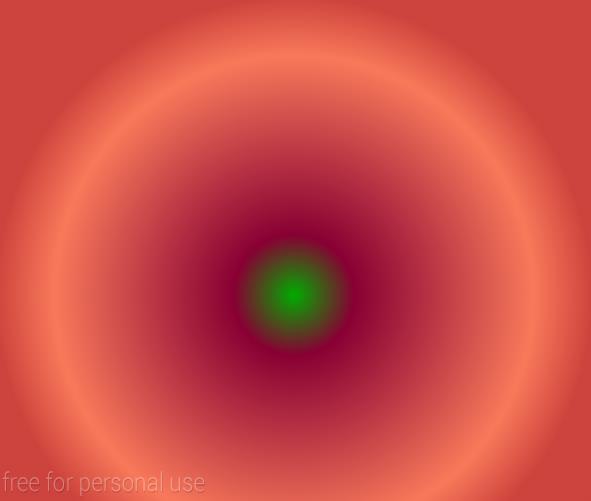
mShader = new RadialGradient(w/2,h/2,w/2,new int[]{Color.parseColor("#00aa00"),Color.parseColor("#880033"),
        Color.parseColor("#F8795A"),
        Color.parseColor("#CC423C")},new float[]{0.0f,0.2f,0.8f,1.0f}, Shader.TileMode.CLAMP);
mPaint.setShader(mShader);
canvas.drawRect(0,0,w,h,mPaint);
SweepGradient Gradient Gradient Gradient Render
Gradient gradient, or scan gradient. I think scanning is more suitable. It means starting from the x-axis, taking the reverse clock as the direction, and scanning the 360-degree area for color conversion.
SweepGradient (float cx,
                float cy,
                int color0,
                int color1)
//color0 is the starting color
//color1 is the termination color
Code example:
mShader = new SweepGradient(w/2,h/2,Color.RED,Color.BLUE);
mPaint.setShader(mShader);
canvas.drawRect(0,0,w,h,mPaint);
Effect: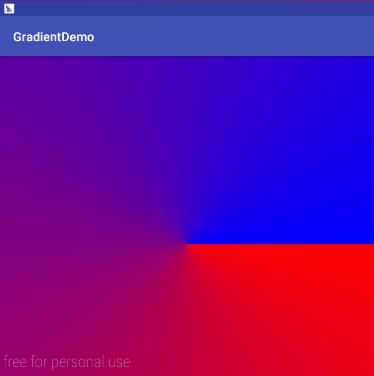
SweepGradient (float cx,
                float cy,
                int[] colors,
                float[] positions)
You should also understand the meaning of each parameter in this method.
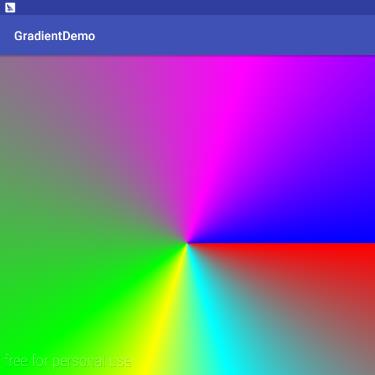
mShader = new SweepGradient(w/2,h/2,new int[]{Color.RED,Color.CYAN,Color.YELLOW,
                Color.GREEN,Color.MAGENTA,Color.BLUE},new float[]{0.0f,0.2f,0.3f,0.4f,0.8f,1.0f});
mPaint.setShader(mShader);
canvas.drawRect(0,0,w,h,mPaint);
We enriched the color, originally wanted to make red orange, yellow, green, blue and purple, but because of laziness, we randomly made some, the effect is as follows:
ComposeShader Composite Render
Mixed rendering, here I begin to call Shader Rendering, because ComposeShader is not only used for color, it can mix two Shader objects with Xfermode rules.
A picture on the Internet: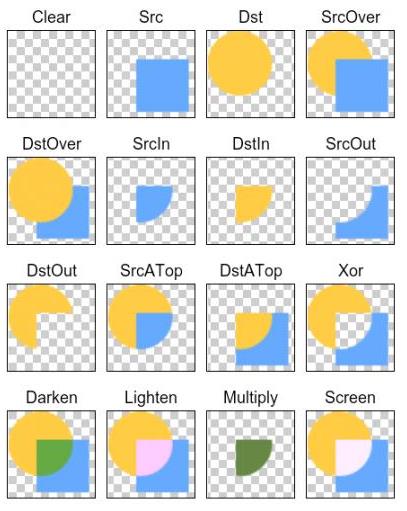
This picture explains in detail the combination effect of the mixed mode, and I have the opportunity to write a related blog.
Look at the two constructions of ComposeShader.
ComposeShader (Shader shaderA,
                Shader shaderB,
                Xfermode mode)


ComposeShader (Shader shaderA,
                Shader shaderB,
                PorterDuff.Mode mode)
Next, let's write code to verify it.
Actual combat 1
- Write a BitmapShader.
- Write a Radias Gradient.
- Mix them to produce a new Shader.
- Draw a circle with the new Shader.
public class CircleView extends View {
    private Paint mPaint;
    private Shader mShader;

    public CircleView(Context context) {
        this(context,null);
    }

    public CircleView(Context context, AttributeSet attrs) {
        this(context, attrs,0);
    }

    public CircleView(Context context, AttributeSet attrs, int defStyleAttr) {
        super(context, attrs, defStyleAttr);
        mPaint = new Paint();
        mPaint.setAntiAlias(true);
    }

    @Override
    protected void onMeasure(int widthMeasureSpec, int heightMeasureSpec) {
        super.onMeasure(widthMeasureSpec, heightMeasureSpec);
        //For the convenience of demonstration, the size is fixed to 400*400.
        setMeasuredDimension(400,400);
    }

    @Override
    protected void onDraw(Canvas canvas) {
        super.onDraw(canvas);
        int w = getWidth();
        int h = getHeight();
        int radius = w <= h ? w/2 : h/2;


        Bitmap bmp = BitmapFactory.decodeResource(getResources(),R.drawable.repeat);
        Bitmap result = Bitmap.createScaledBitmap(bmp,w,h,false);
        //1. Write a BitmapShader.
        BitmapShader bitmapShader = new BitmapShader(result, Shader.TileMode.REPEAT, Shader.TileMode.REPEAT);

        //2. Write a Radias Gradient.
        RadialGradient radialGradient = new RadialGradient(radius,radius,radius,Color.BLACK,Color.TRANSPARENT, Shader.TileMode.CLAMP);
        //3. Mix them to produce a new Shader.
        ComposeShader composeShader = new ComposeShader(bitmapShader,radialGradient,new PorterDuffXfermode(PorterDuff.Mode.DST_IN));

        mPaint.setShader(composeShader);
        //4. Draw a circle with a new Shader.
        canvas.drawCircle(w/2,h/2,radius,mPaint);

    }
}
Let's see how the mixing works.

Wow, a fantastic dog.
Actual Warfare 2 Reflection Function
I just started learning before. Android At that time, reflection is used in the project. At that time, I couldn't write it. Fortunately, there are ready-made codes on the Internet that can be copied. Now we can use ComposeShader to implement such a View.
requirement analysis
- The ratio of reflection to original image is 1:4.
- There is a gap of 5px between the reflection and the original image.
- The lower edge of the reflection should not be too flat. It should be consistent with the reality as far as possible.
Well, to save space, I just paste the code in onDraw().
protected void onDraw(Canvas canvas) {
        super.onDraw(canvas);
        //Define various lengths and heights
        int bmpWidth = 200;
        int bmpHeight = 200;
        int gap = 5;
        int reflectionHeight = bmpHeight / 4;

        //Original drawing
        Bitmap bmp = BitmapFactory.decodeResource(getResources(),R.drawable.repeat);
        Bitmap result = Bitmap.createScaledBitmap(bmp,bmpWidth,bmpHeight,false);
        canvas.drawBitmap(result,0,0,null);

        canvas.save();
        //Move downward to prepare a reflection below the original image.
        canvas.translate(0,bmpHeight+gap);
        Matrix m = new Matrix();
        m.postScale(-1f,1f);
        m.postRotate(-180);
        //Turn the original map horizontally
        Bitmap texture = Bitmap.createBitmap(result,0,0,result.getWidth(),result.getHeight(),m,false);
        //Create BitmapShader and LinearShader.
        BitmapShader bitmapShader = new BitmapShader(texture, Shader.TileMode.REPEAT, Shader.TileMode.REPEAT);
        LinearGradient linearGradient = new LinearGradient(0,0,0,reflectionHeight,Color.BLACK,Color.TRANSPARENT, Shader.TileMode.CLAMP);
        ComposeShader composeShader = new ComposeShader(bitmapShader,linearGradient,new PorterDuffXfermode(PorterDuff.Mode.DST_IN));
        mPaint.setShader(composeShader);
        //The reflection effect can be obtained by drawing rectangular area in mixed mode.
        canvas.drawRect(0,0,bmpWidth,reflectionHeight,mPaint);

        canvas.restore();

}
Effect:
The reflection came out.
Android Drawing Canvas 18 Weapons Shader Detailed Explanation and Practical Warfare Chapter (Part I)