I. Environmental preparation
CentOS 7 + Apache 2.4.6 + PHP +Mariadb5.5.60
Apache and Mariadb are installed directly by yum, and PHP is installed by binary source code.
Pre-installation preparation
1. System Update # Note Use Centos 7.5 for Minimizing Installation here
yum -y install epel-release

yum update -y
2. Install Apache 2.4.6 with yum
yum install -y httpd httpd-devel
3. Use yum to install Mariadb 5.5.60
yum install -y mariadb mariadb-server
4. Source install PHP 7.2 and configure Apache support
Installing PHP Dependent Environment
yum install -y make gcc openssl readline-devel openssl-devel libxslt-devel gmp-devel bzip2-devel freetype-devel libjpeg-devel php-mcrypt libmcrypt libmcrypt-devel autoconf freetype gd jpegsrc libmcrypt libpng libpng-devel libjpeg libxml2 libxml2-devel zlib curl curl-devel
Download the PHP installation package and unzip it
cd /home
wget http://cn2.php.net/get/php-7.2.3.tar.gz/from/this/mirror
tar zxvf mirror
Compilation and installation
cd php-7.2.3

./configure --prefix=/usr/local/php7.2.3 --with-config-file-path=/etc --enable-fpm --with-fpm-user=nginx --with-fpm-group=nginx --enable-inline-optimization --disable-debug --disable-rpath --enable-shared --enable-soap --with-apxs2=/usr/bin/apxs --with-libxml-dir --with-xmlrpc --with-openssl --with-mcrypt --with-mhash --with-pcre-regex --with-sqlite3 --with-zlib --enable-bcmath --with-iconv --with-bz2 --enable-calendar --with-curl --with-cdb --enable-dom --enable-exif --enable-fileinfo --enable-filter --with-pcre-dir --enable-ftp --with-gd --with-openssl-dir --with-jpeg-dir --with-png-dir --with-zlib-dir --with-freetype-dir --enable-gd-native-ttf --enable-gd-jis-conv --with-gettext --with-gmp --with-mhash --enable-json --enable-mbstring --enable-mbregex --enable-mbregex-backtrack --with-libmbfl --with-onig --enable-pdo --with-mysqli=mysqlnd --with-pdo-mysql=mysqlnd --with-zlib-dir --with-pdo-sqlite --with-readline --enable-session --enable-shmop --enable-simplexml --enable-sockets --enable-sysvmsg --enable-sysvsem --enable-sysvshm --enable-wddx --with-libxml-dir --with-xsl --enable-zip --enable-mysqlnd-compression-support --with-pear --enable-opcache
Installation can begin after checking for no errors
make && make install
Configure environment variables after compilation and installation
vim /etc/profile
Add at the bottom
PATH=$PATH:/usr/local/php7.2.3/bin
export PATH
Make configuration effective
source /etc/profile
Configure php-fpm
cd /home/php-7.2.3
cp php.ini-production /etc/php.ini
cp /usr/local/php7.2.3/etc/php-fpm.conf.default /usr/local/php7.2.3/etc/php-fpm.conf
cp /usr/local/php7.2.3/etc/php-fpm.d/www.conf.default /usr/local/php7.2.3/etc/php-fpm.d/www.conf
cp sapi/fpm/init.d.php-fpm /etc/init.d/php-fpm
chmod +x /etc/init.d/php-fpm
Start php-fpm
service php-fpm start
View Open State

Modify the httpd.conf file
vim /etc/httpd/conf/httpd.conf
Add the following line after AddType application*
AddType application/x-httpd-php .php .phtml
Add index.php to DirectoryIndex. index.html
DirectoryIndex index.php index.html
Make sure that the httd.conf file contains the following fields, and if not, add them
LoadModule php7_module /usr/lib64/httpd/modules/libphp7.so
Restart httpd service
service httpd restart
Verify HP support for httpd
echo "<?php phpinfo(); ?>" >> /var/www/html/index.php
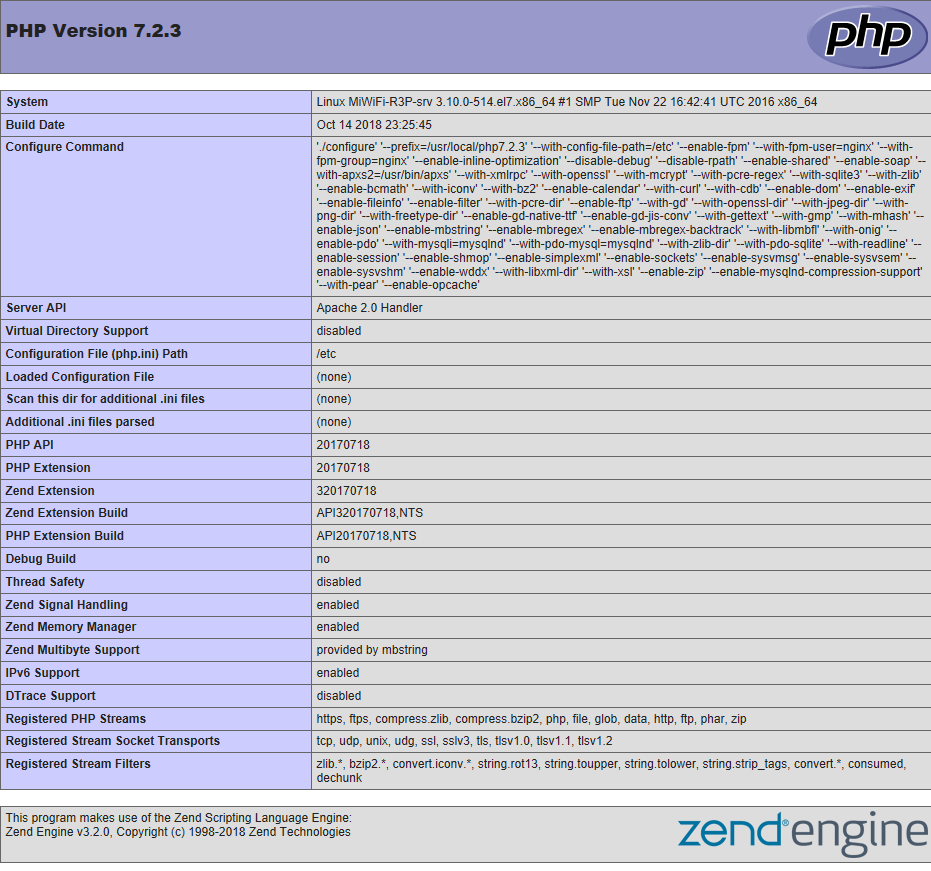
Restart the httpd service, add firewall exceptions and visit the web page to see if there are the following picture information
service httpd restart
firewall-cmd --permanent --zone=public --add-port=80/tcp
systemctl restart firewalld.service

Installation of snipeit
1. Initialize and create snipeit database
service mariadb start
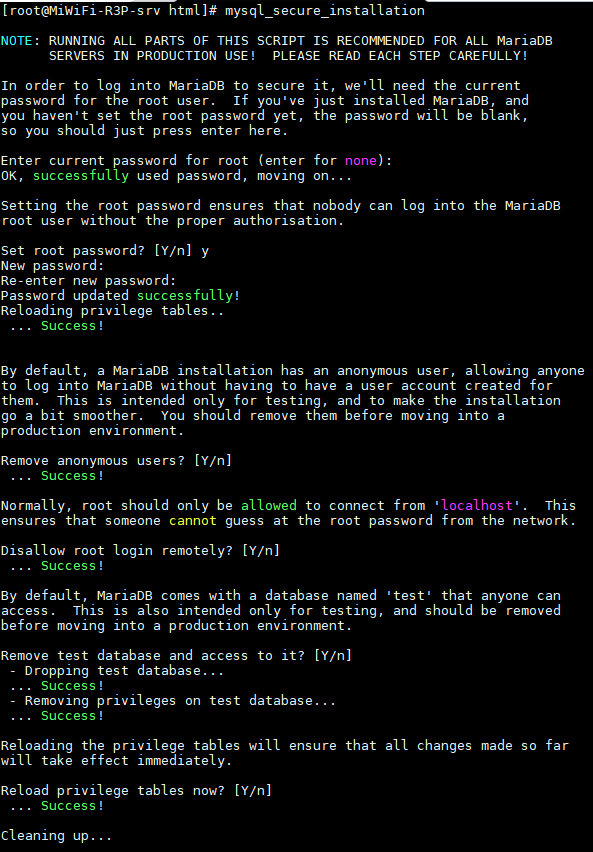
mysql_secure_installation


Log on to the database and create corresponding users and databases
mysql -u root -p

mysql> create database snipeit;
mysql> grant all on snipeit.* to 'snipeit'@'%' identified by '324215';
mysql> flush privileges;
mysql> exit
2. Install composer
Composer is a dependency manager for PHP
cd
curl -sS https://getcomposer.org/installer | php
mv /root/composer.phar /usr/bin/composer
3. Install snipeit
cd /var/www
yum install -y git
git clone https://github.com/snipe/snipe-it snipe-it
Editing configuration files
cd /var/www/snipe-it
sudo cp .env.example .env
vim .env


APP_URL=192.168.201.102 #Fill in Address
 APP_TIMEZONE='Asia/Shanghai'# Fill in the Country Address

DB_DATABASE=snipeit # database name
 DB_USERNAME=snipeit # database username
 DB_PASSWORD=324215 Database password

among
APP_DEBUG=false
 Change to true when debugging
Change directory permissions
chown -R apache:apache storage public/uploads
chmod -R 755 storage
chmod -R 755 public/uploads
Installing PHP dependencies
composer install --no-dev --prefer-source
If the installation time is too long, you can modify the source and try to reinstall it later.
composer config -g repo.packagist composer https://packagist.phpcomposer.com
Generate app_key
php artisan key:generate
4. Modify Apache configuration files to create virtual hosts
vim /etc/httpd/conf.d/snipeit.example.com.conf

<VirtualHost *:80>
    ServerName snipeit.example.com
    DocumentRoot /var/www/snipe-it/public
    <Directory /var/www/snipe-it/public>
        Options Indexes FollowSymLinks MultiViews
        AllowOverride All
        Order allow,deny
        allow from all
    </Directory>
</VirtualHost>
Restart Apache Service
service httpd restart
At this point, Snipe-IT installation is completed, and then error checking and pre-installation configuration checking are carried out.
IV. Elimination and Problems
1. Close selinux on this machine if you still cannot access it after the configuration has been completed.
setenforce 0 # Temporarily close selinux

vim /etc/sysconfig/selinux
 Change SELINUX=enforcing to SELINUX=disabled # Permanently close selinux
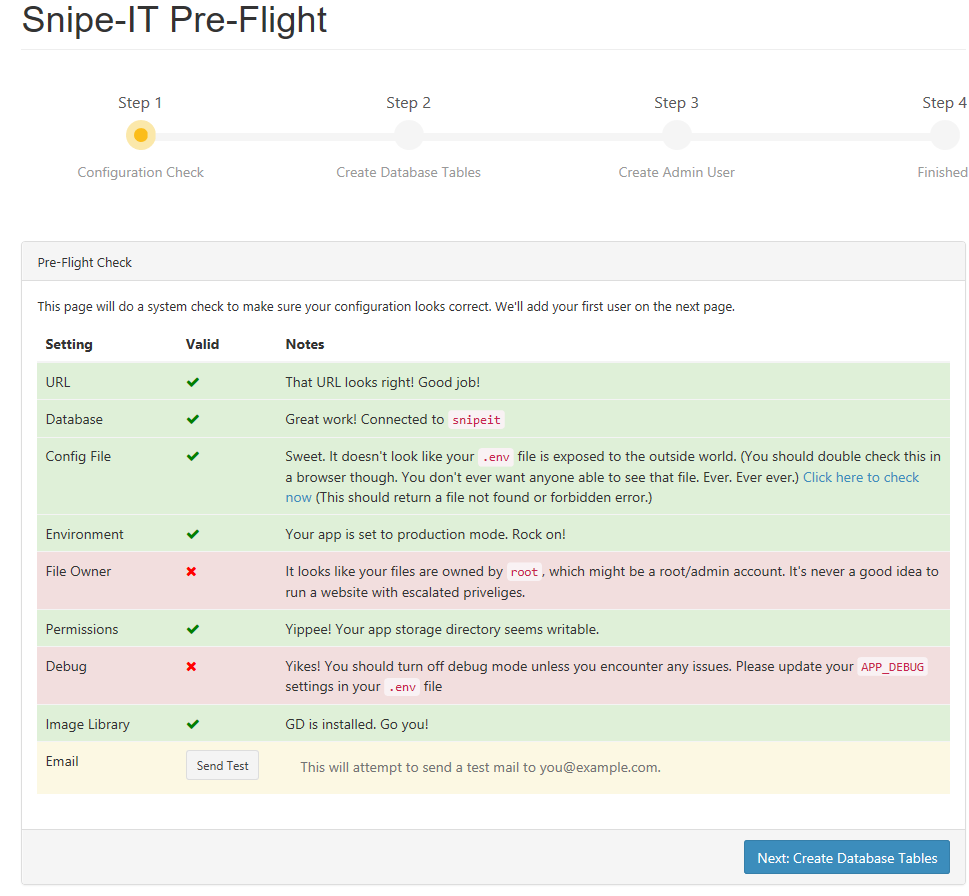
2. Check and report errors before installation

Before installation, check for the following error. file owner error means that the permission of the current file is root.
The debug option in the debug. env file is set to open, and you don't have to pay attention to it.