In Winform development, we can use form control to input data directly, but rarely seen on the Web. In fact, we can also use dataTable object to process table row data directly. This can improve the convenience of data entry, especially in some simple business details, it seems more convenient and higher than pop-up window entry. A little bigger. This article mainly introduces how to use dataTable to input table row data directly in Bootstrap development framework.
1. Interface Review of Direct Data Entry and Winform Based on Tables
Before we start to input table row data directly from Web interface, let's first look at the processing of Winform interface. For example, in process management, I use the following interface for data processing with master-slave detailed reimbursement business table.
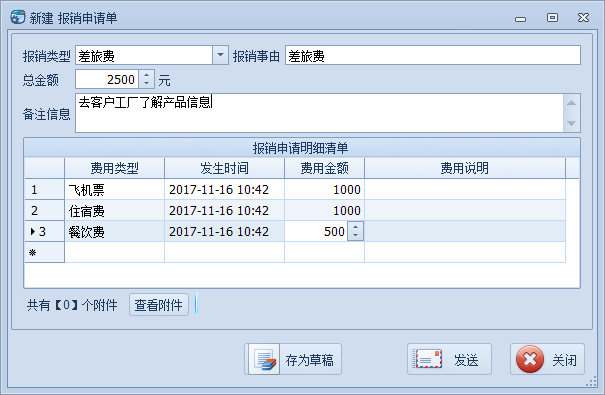
This detailed form can be added and edited directly on the form control Griview.
For the Web interface, if we want to keep it similar to this layout, we can also use dataTable to input table row data directly.
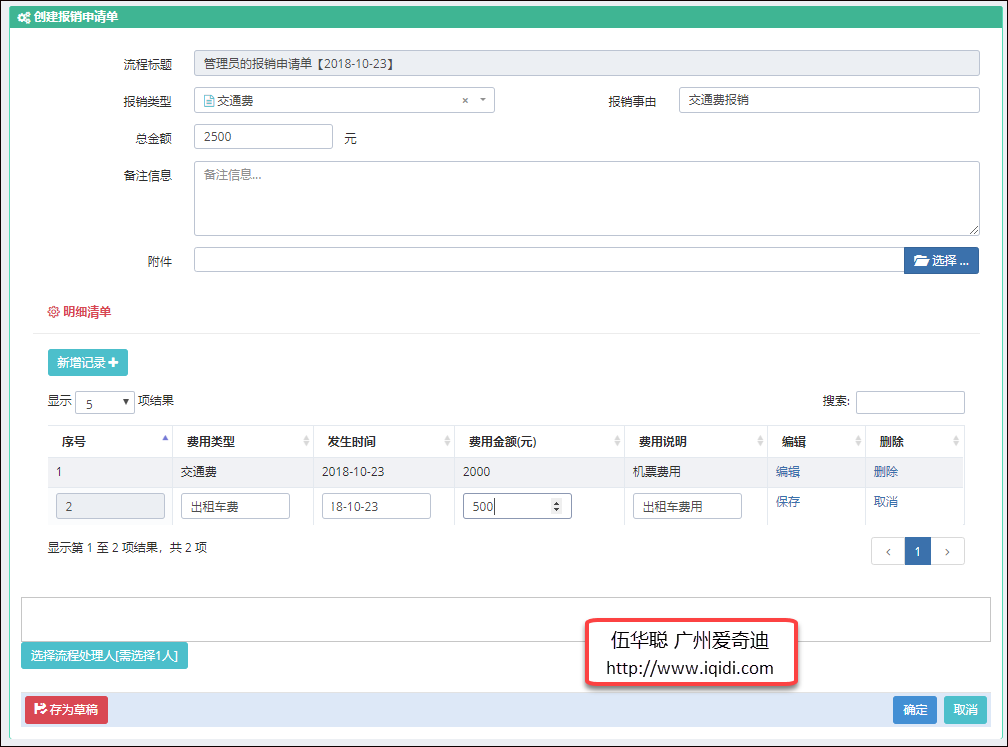
When dealing with detailed data, the above interface can directly use new records, input data directly in the input box, and save it. After saving, the data will become read-only. If you need to modify, you can also click the Edit button to modify it.
These detailed data only exist in the object of JS, and have not been saved in the background database. We can get all the added data and submit it it in the final save (such as the confirmation button of the upper interface).
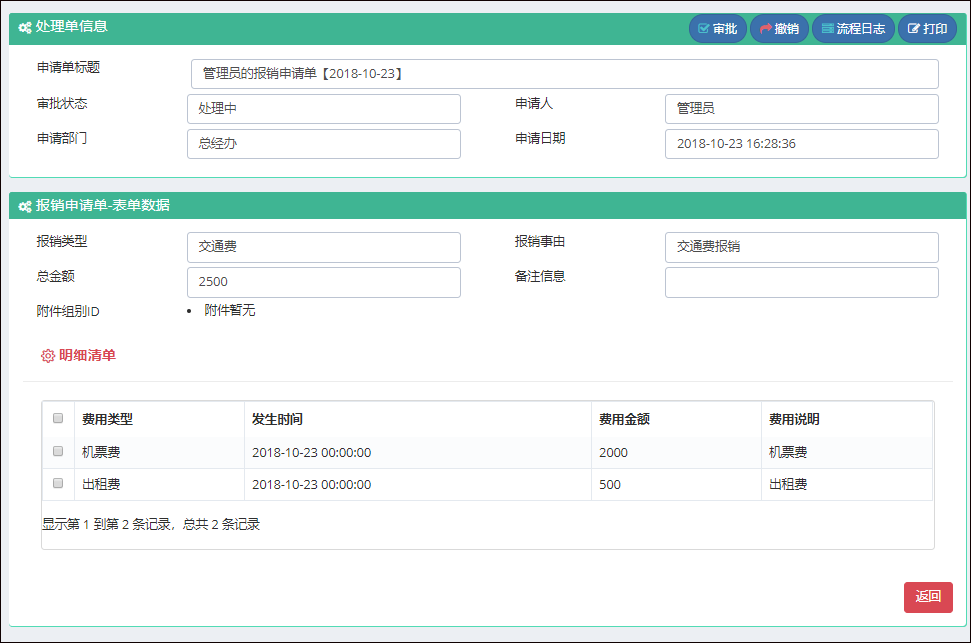
After submitting these data, we can display the data by Bootstrap Table plug-in in the viewing interface.
2. Implementing Data Table to Enter Table and Line Data directly on the Web
The above interface shows how to use dataTable to input table row data and display data directly on the Web. Here we begin to introduce their interface and real-time code.
The interface part is mainly this detailed processing.
The HTML code for the interface view is shown below.
<div class="portlet light portlet-fit ">
    <div class="portlet-title">
        <div class="caption">
            <i class="icon-settings font-red"></i>
            <span class="caption-subject font-red sbold uppercase">detailed list </span>
        </div>
    </div>
    <div class="portlet-body">
        <div class="table-toolbar">
            <div class="row">
                <div class="col-md-6">
                    <div class="btn-group">
                        <button id="detail_editable_1_new" class="btn green">
                            adding record
                            <i class="fa fa-plus"></i>
                        </button>
                    </div>
                </div>
            </div>
        </div>
        <table class="table table-striped table-hover table-bordered" id="detail_editable_1">
            <thead>
                <tr>
                    < th > serial number </th >
                    <th>Cost Type </th>
                    The occurrence time of < th > < / th >
                    <th>Expense amount (yuan)</th>
                    <th>Expense Statement </th>
                    < th > Editor </th >
                    <th>Delete </th>
                </tr>
            </thead>
            <tbody>
                @*<tr>
                    <td> 1 </td>
                    < td > transportation </td >
                    <td> 2018-10-01 </td>
                    <td> 2000 </td>
                    < td > Note information </td >
                    <td>
                        <a class= "edit" href= "javascript:;">edit</a>
                    </td>
                    <td>
                        <a class="delete" href="javascript:;">Delete</a>
                    </td>
                </tr>*@
            </tbody>
        </table>
    </div>
</div>
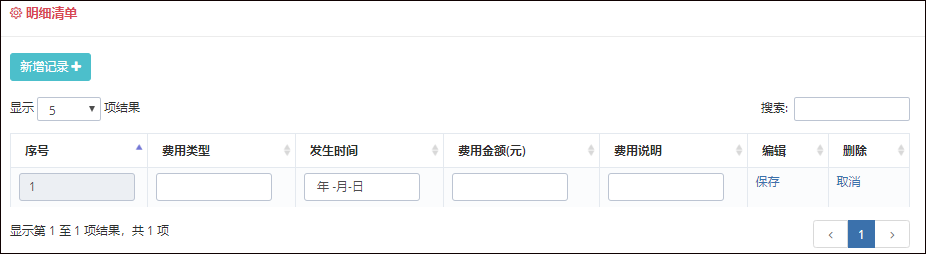
Among them, the ID is the mark of detail_editable_1, which is the table carrying detailed information. We can define the header information we need, and the content of the input box can be added dynamically through the object of the dataTable plug-in.
            //Definition dataTable object
            var table = $('#detail_editable_1');
            var oTable = table.dataTable({
                "lengthMenu": [
                    [5, 15, 20, -1],
                    [5, 15, 20, "All"] // Change the number of rows per page
                ],

                // Use Sinicization
                "language": {
                    url: '//cdn.datatables.net/plug-ins/3cfcc339e89/i18n/Chinese.json'
                },

                //Initialization
                "pageLength": 5,
                "columnDefs": [{ // Setting default column settings
                    'orderable': true,
                    'targets': [0]
                }, {
                    "searchable": true,
                    "targets": [0]
                }],
                "order": [
                    [0, "asc"]
                ] // Set the first column to asc Default sort
            });
Editing row records means adding some Input controls dynamically so that users can input data, as shown in the following code.
                //Editorial line
                function editRow(oTable, nRow) {
                    var aData = oTable.fnGetData(nRow);
                    var jqTds = $('>td', nRow);
                    jqTds[0].innerHTML = '<input type="text" class="form-control input-small" value="' + aData[0] + '" readonly>';
                    jqTds[1].innerHTML = '<input type="text" class="form-control input-small" value="' + aData[1] + '">';
                    jqTds[2].innerHTML = '<input type="date" class="form-control input-small" value="' + aData[2] + '">';
                    jqTds[3].innerHTML = '<input type="number" class="form-control input-small" value="' + aData[3] + '">';
                    jqTds[4].innerHTML = '<input type="text" class="form-control input-small" value="' + aData[4] + '">';
                    jqTds[5].innerHTML = '<a class="edit" href="">Preservation</a>';
                    jqTds[6].innerHTML = '<a class="cancel" href="">cancel</a>';
                }
After saving the data, update the record to the corresponding TD object, as shown below.
                //Expense Type, Occurrence Time, Expense Amount and Expense Description
                var objList = [];
                //Save row data and switch to normal mode
                function saveRow(oTable, nRow) {
                    var jqInputs = $('input', nRow);
                    //Update each of the rows input Value of
                    oTable.fnUpdate(jqInputs[0].value, nRow, 0, false);
                    oTable.fnUpdate(jqInputs[1].value, nRow, 1, false);
                    oTable.fnUpdate(jqInputs[2].value, nRow, 2, false);
                    oTable.fnUpdate(jqInputs[3].value, nRow, 3, false);
                    oTable.fnUpdate(jqInputs[4].value, nRow, 4, false);
                    oTable.fnUpdate('<a class="edit" href="">edit</a>', nRow, 5, false);
                    oTable.fnUpdate('<a class="delete" href="">delete</a>', nRow, 6, false);
                    oTable.fnDraw();
                }
Several action buttons on the interface, such as add, edit, save, delete and so on, handle events as follows.
                var addRow = 1;
                $('#detail_editable_1_new').click(function (e) {
                    e.preventDefault();

                    if (nNew && nEditing) {
                        if (confirm("The previous record is not saved. Do you need to save it??")) {
                            saveRow(oTable, nEditing);
                            //$(nEditing).find("td:first").html("Unsaved");
                            nEditing = null;
                            nNew = false;
                        } else {
                            oTable.fnDeleteRow(nEditing); // cancel
                            nEditing = null;
                            nNew = false;
                            return;
                        }
                    }

                    //Add a new record
                    var aiNew = oTable.fnAddData([addRow++, '', '', '', '', '', '']);
                    var nRow = oTable.fnGetNodes(aiNew[0]);
                    editRow(oTable, nRow);
                    nEditing = nRow;
                    nNew = true;
                });
                //Delete operation
                table.on('click', '.delete', function (e) {
                    e.preventDefault();
                    if (confirm("Are you sure you want to delete the row record??") == false) {
                        return;
                    }
                    //Acquisition of superior level tr Row data
                    var nRow = $(this).parents('tr')[0];
                    var aData = oTable.fnGetData(nRow);

                    var found = false;
                    $.each(objList, function (i, item) {
                        if (item["seq"] == aData[0]) {
                            found = true;
                            objList.splice(i, 1);
                        }
                    });
                    oTable.fnDeleteRow(nRow);
                });
                //Cancel operation
                table.on('click', '.cancel', function (e) {
                    e.preventDefault();
                    if (nNew) {
                        oTable.fnDeleteRow(nEditing);
                        nEditing = null;
                        nNew = false;
                    } else {
                        restoreRow(oTable, nEditing);
                        nEditing = null;
                    }
                });
                //Editing operation
                table.on('click', '.edit', function (e) {
                    e.preventDefault();
                    nNew = false;

                    /*Gets the row object of the hit connection*/
                    var nRow = $(this).parents('tr')[0];

                    if (nEditing !== null && nEditing != nRow) {
                        /* Currently editing - but not this trip - restore the old edition before continuing with editing mode */
                        restoreRow(oTable, nEditing);
                        editRow(oTable, nRow);
                        nEditing = nRow;
                    } else if (nEditing == nRow && this.innerHTML == "Preservation") {
                        /* Edit the line and prepare to save the record */
                        saveRow(oTable, nEditing);
                        nEditing = null;

                    } else {
                        /* No edit in progress - let's start one */
                        editRow(oTable, nRow);
                        nEditing = nRow;
                    }
                });
            }
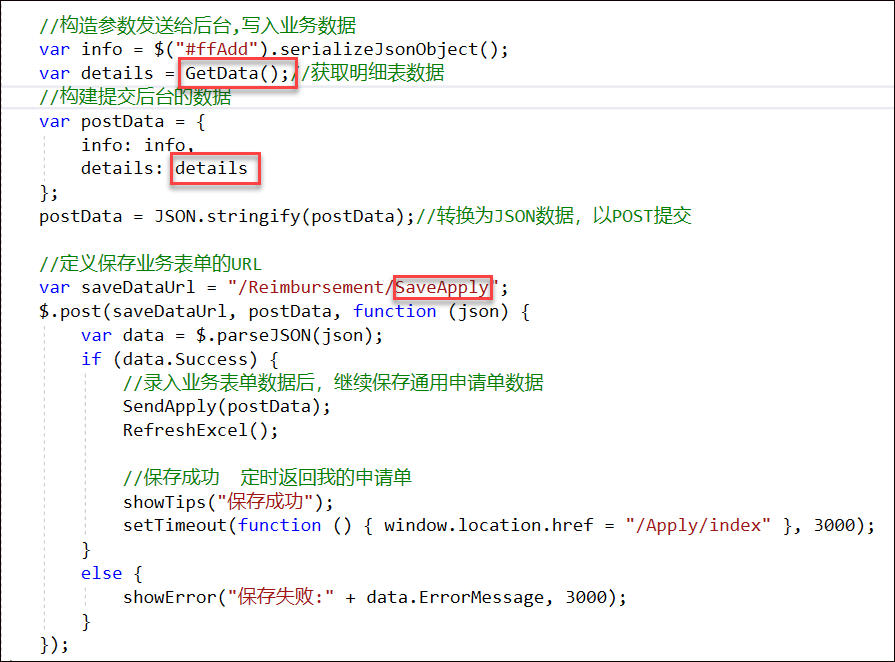
In the last step, when we submit the data, we traverse the entire table, get the data of each row, and put them in the list of JSON objects, then submit them to the background for input. Here is the JS code to get the list data.
            //Get the table's data and return the list of objects
            function GetData() {
                var list = [];
                var trs = table.fnGetNodes();
                for (var i = 0; i < trs.length; i++) {
                    var data = table.fnGetData(trs[i]);//Get the data for the specified row

                    var obj = {};
                    //obj["seq"] = data[0];//Serial number
                    obj["FeeType"] = data[1];
                    obj["OccurTime"] = data[2];
                    obj["FeeAmount"] = data[3];
                    obj["FeeDescription"] = data[4];
                    list.push(obj);
                }
                return list;
            };
After getting the detailed data of the form, we decide how to submit it to the MVC background interface for processing. Here is the JS code about the detailed data submission to the MVC background in the business.
The C # processing logic code of the background MVC controller is shown below.
        /// <summary>
        /// Save the master-slave table data of the application form
        /// </summary>
        /// <returns></returns>
        [HttpPost]
        public ActionResult SaveApply(JObject param)
        {
            dynamic obj = param;
            if (obj != null)
            {
                var result = new CommonResult();

                if (obj.info != null)
                {
                    //Getting Master Information
                    var info = (JObject.FromObject(obj.info)).ToObject<ReimbursementInfo>();

                    //Converting to detailed information
                    List<ReimbursementDetailInfo> details = null;
                    if (obj.details != null)
                    {
                        details = (JArray.FromObject(obj.details)).ToObject<List<ReimbursementDetailInfo>>();
                    }

                    if (info != null)
                    {
                        //Modify some information
                        OnBeforeInsert(info);
                        bool succeed = BLLFactory<Reimbursement>.Instance.Insert(info);
                        if (succeed)
                        {
                            if (details != null)
                            {
                                foreach (var detailInfo in details)
                                {
                                    //Setting up key information
                                    detailInfo.Apply_ID = info.Apply_ID;
                                    detailInfo.Header_ID = info.ID;
                                    BLLFactory<ReimbursementDetail>.Instance.InsertUpdate(detailInfo, detailInfo.ID);
                                }
                            }
                            result.Success = succeed;
                        }
                    }
                }
                return ToJsonContent(result);
            }
            else
            {
                throw new MyApiException("Passing parameter error");
            }
        }
For the submitted data, object information is transformed by JObject, while for the list of details, JArray.FromObject is used to transform. The other part is how to save the interface between main table and detail table.
The above processing logic and code are the foreground acquisition, submission processing and interface processing of the backstage. The whole process is mainly used to introduce the use of dataTable to directly input table row data in Bootstrap development framework. -