Retrofit 2.0, easy to understand learning posture, Retrofit 2.0 + OkHttp3 + Gson + RxJava
Retrofit, because of its simple and excellent performance, is also favored by many people, but he is still a little different from the previous communication framework, but rest assured, because he himself is very simple, all I believe you read this article, the basic request is no problem, in fact, there are many articles like this online, well, let's drive directly. Now!
I. Relevant information
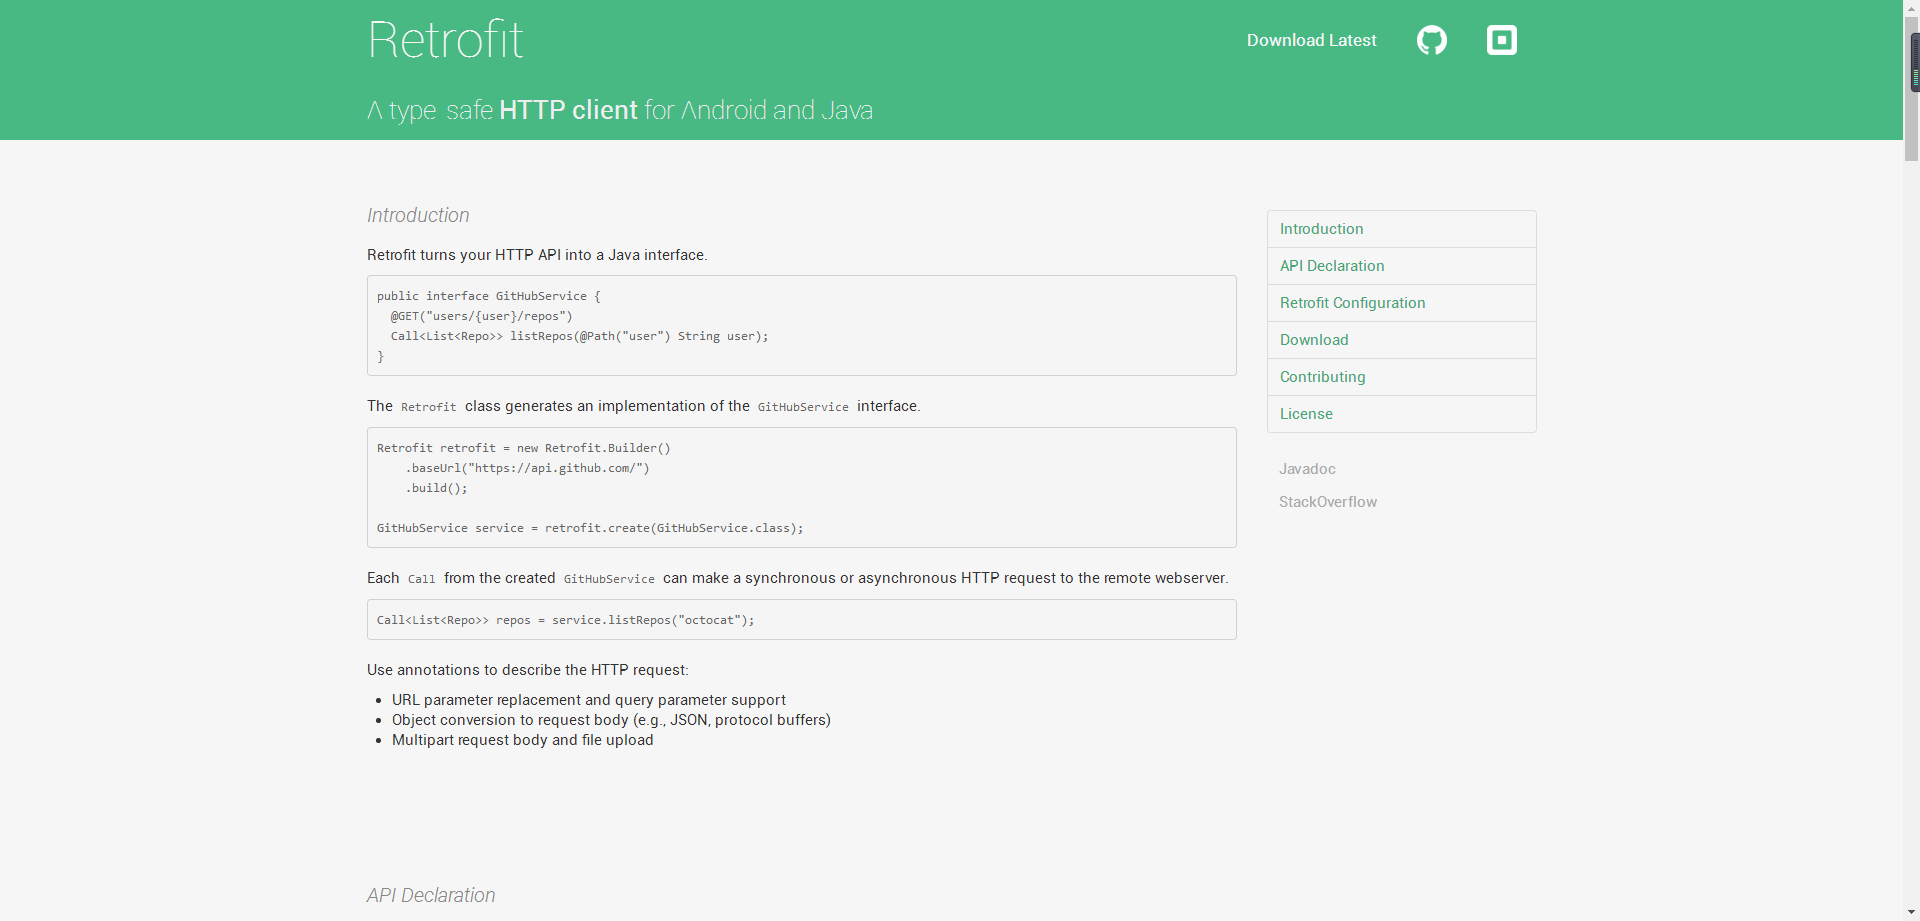
Official Documents: http://square.github.io/retrofit/
Two.square
square is an open source company that has many very good projects, all of which come out to express an open source spirit to their group of engineers.
With respect, for example, there are these projects:
More projects can go to their organizations on their own: https://github.com/square
3. Preparations
If we want to use Retrofit 2.0, we must integrate it first and build a new project like Retrofit Sample. Then we look at his Github and support three ways of using it. It's unnecessary to say that you can add it as you like.
Jar: Click me to download
Maven:
<dependency>
  <groupId>com.squareup.retrofit2</groupId>
  <artifactId>retrofit</artifactId>
  <version>2.1.0</version>
</dependency>
- 1
- 2
- 3
- 4
- 5
- 6
- Gradle:
compile 'com.squareup.retrofit2:retrofit:2.1.0'
- 1
- 2
Here we use Gradle directly to configure, after all, this is the simplest, of course, we cooperate with OkHttp3 more useful, so add the source.
compile 'com.squareup.okhttp3:okhttp:3.3.1'- 1
Don't forget to add network privileges here!
<uses-permission android:name="android.permission.INTERNET"/>- 1
IV. Defining interfaces
If we want to learn how to use it, the best choice is to read official documents. The first sentence is
"Retrofit turns your HTTP API into a Java interface"
We need to define an interface. Okay, let's write an interface according to the gourd. Here we must remember that oh, this interface is written in a certain standard. Let's look at the interface first.
This is Gank's interface, so how should we write our local interface? This is our Json.
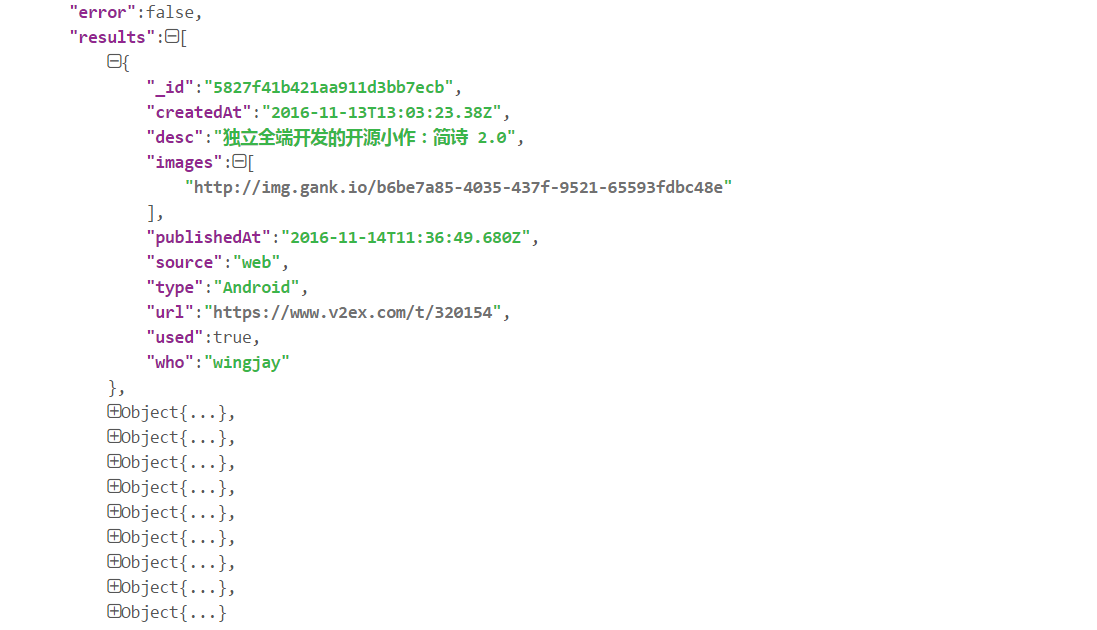
Let's define our interface class. We call it GnakApi.
import okhttp3.ResponseBody;
import retrofit2.Call;
import retrofit2.http.GET;

public interface GnakApi {

    @GET("api/data/Android/10/1")
    Call<ResponseBody> getAndroidInfo();
}- 1
- 2
- 3
- 4
- 5
- 6
- 7
- 8
- 9
Careful analysis of the definition of this interface, in fact, this interface can be split up in this way

The first baseUrl is defined directly. The second one is defined interface. I don't need to return value now. So I send a ResponseBody directly. On the other hand, I request api/data/Android/10/1 directly with GET request, so that we can join our baseUrl. If we want to change the parameters of the latter, the interface method will be passed on. Let's wait and see the interface definition in our document.
public interface GitHubService {
  @GET("users/{user}/repos")
  Call<List<Repo>> listRepos(@Path("user") String user);
}- 1
- 2
- 3
- 4
This is an example provided in the document. We can find that he is also a GET request, but his return value is a List, the type is repo, repo is his entity class, passing a path is a parameter, user's parameter, so it can also be spliced with his baseUrl what is his baseUrl, let's talk about it later.
V. Simple requests
Once the interface is defined, I begin to request. Here I write a button in the layout to do click events, and a textview to render the returned results.
    <Button
        android:id="@+id/btn_requet"
        android:layout_width="match_parent"
        android:layout_height="wrap_content"
        android:background="@drawable/button_bg"
        android:text="request"
        android:textAllCaps="false"
        android:textColor="@android:color/white"/>

    <TextView
        android:id="@+id/tv_result"
        android:layout_width="match_parent"
android:layout_height="wrap_content"/>- 1
- 2
- 3
- 4
- 5
- 6
- 7
- 8
- 9
- 10
- 11
- 12
- 13
Okay, so what are we going to do? Keep reading the document
The Retrofit class generates an implementation of the GitHubService interface.
This is to say that retrofit's interface is transformed into a class directly. What do you need to do? First, we need to create a Retrofit
Retrofit retrofit = new Retrofit.Builder()
                .baseUrl("http://gank.io/")
.build();- 1
- 2
- 3
Here you can see our baseUrl, which is the prefix of our Gank interface. We now have retrofit, through which we can create our interface objects.
GnakApi api = retrofit.create(GnakApi.class);- 1
Although it returns a GnakApi, we know from the source code that the creation here is actually obtained by proxy, you can see.
  public <T> T create(final Class<T> service) {
    Utils.validateServiceInterface(service);
    if (validateEagerly) {
      eagerlyValidateMethods(service);
    }
    return (T) Proxy.newProxyInstance(service.getClassLoader(), new Class<?>[] { service },
        new InvocationHandler() {
          private final Platform platform = Platform.get();

          @Override public Object invoke(Object proxy, Method method, Object... args)
              throws Throwable {
            // If the method is a method from Object then defer to normal invocation.
            if (method.getDeclaringClass() == Object.class) {
              return method.invoke(this, args);
            }
            if (platform.isDefaultMethod(method)) {
              return platform.invokeDefaultMethod(method, service, proxy, args);
            }
            ServiceMethod serviceMethod = loadServiceMethod(method);
            OkHttpCall okHttpCall = new OkHttpCall<>(serviceMethod, args);
            return serviceMethod.callAdapter.adapt(okHttpCall);
          }
        });
}- 1
- 2
- 3
- 4
- 5
- 6
- 7
- 8
- 9
- 10
- 11
- 12
- 13
- 14
- 15
- 16
- 17
- 18
- 19
- 20
- 21
- 22
- 23
- 24
Of course, without further understanding, we will call our interface method directly now, and he returns a Call.
Call<ResponseBody> call = api.getAndroidInfo();- 1
Here, you will be very strange, I go, how and okHttp so similar ah, if a simple request from the point of view, there is indeed a loss of image, but don't worry, Retrofit is not so simple, we call after the direct request, generally we are asynchronous requests.
call.enqueue(new Callback<ResponseBody>() {
    @Override
    public void onResponse(Call<ResponseBody> call, Response<ResponseBody> response) {
        try {
              String result = response.body().string();
              Log.i(TAG, result);
              tv_result.setText(result);
            } catch (IOException e) {
              e.printStackTrace();
        }
    }
              @Override
              public void onFailure(Call<ResponseBody> call, Throwable t) {

              }
});- 1
- 2
- 3
- 4
- 5
- 6
- 7
- 8
- 9
- 10
- 11
- 12
- 13
- 14
- 15
- 16
Let's go straight ahead and run it.
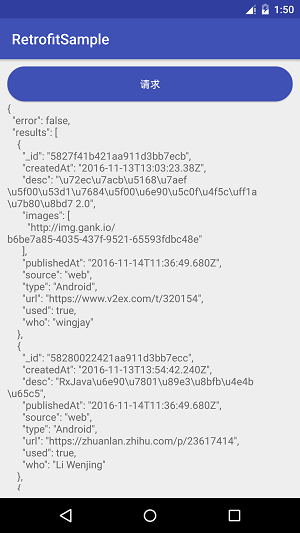
Well, as you can see, the successful request is the result. This is the simple request of Retrofit. But here we can do some more articles. Retrofit + OkHttp + Gson is more suitable. After we add Gson's Jar, we write an entity class, which is the Java Bean of our interface. The parsing plug-in I use here is Gsonformat.
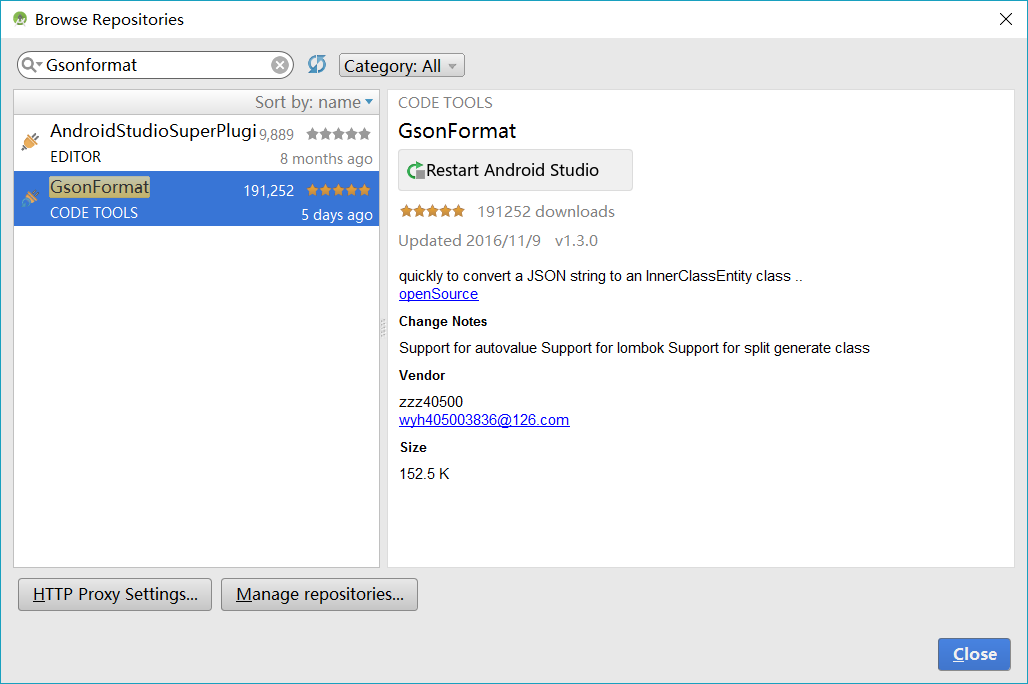
GankBean
import java.util.List;

public class GankBean {

    private boolean error;
    private List<ResultsBean> results;

    public boolean isError() {
        return error;
    }

    public void setError(boolean error) {
        this.error = error;
    }

    public List<ResultsBean> getResults() {
        return results;
    }

    public void setResults(List<ResultsBean> results) {
        this.results = results;
    }

    public static class ResultsBean {
        /**
         * _id : 5827f41b421aa911d3bb7ecb
         * createdAt : 2016-11-13T13:03:23.38Z
         * desc : Open Source Works Developed Independently and Whole End: Jane Poetry 2.0
         * images : ["http://img.gank.io/b6be7a85-4035-437f-9521-65593fdbc48e"]
         * publishedAt : 2016-11-14T11:36:49.680Z
         * source : web
         * type : Android
         * url : https://www.v2ex.com/t/320154
         * used : true
         * who : wingjay
         */

        private String _id;
        private String createdAt;
        private String desc;
        private String publishedAt;
        private String source;
        private String type;
        private String url;
        private boolean used;
        private String who;
        private List<String> images;

        public String get_id() {
            return _id;
        }

        public void set_id(String _id) {
            this._id = _id;
        }

        public String getCreatedAt() {
            return createdAt;
        }

        public void setCreatedAt(String createdAt) {
            this.createdAt = createdAt;
        }

        public String getDesc() {
            return desc;
        }

        public void setDesc(String desc) {
            this.desc = desc;
        }

        public String getPublishedAt() {
            return publishedAt;
        }

        public void setPublishedAt(String publishedAt) {
            this.publishedAt = publishedAt;
        }

        public String getSource() {
            return source;
        }

        public void setSource(String source) {
            this.source = source;
        }

        public String getType() {
            return type;
        }

        public void setType(String type) {
            this.type = type;
        }

        public String getUrl() {
            return url;
        }

        public void setUrl(String url) {
            this.url = url;
        }

        public boolean isUsed() {
            return used;
        }

        public void setUsed(boolean used) {
            this.used = used;
        }

        public String getWho() {
            return who;
        }

        public void setWho(String who) {
            this.who = who;
        }

        public List<String> getImages() {
            return images;
        }

        public void setImages(List<String> images) {
            this.images = images;
        }
    }
}
- 1
- 2
- 3
- 4
- 5
- 6
- 7
- 8
- 9
- 10
- 11
- 12
- 13
- 14
- 15
- 16
- 17
- 18
- 19
- 20
- 21
- 22
- 23
- 24
- 25
- 26
- 27
- 28
- 29
- 30
- 31
- 32
- 33
- 34
- 35
- 36
- 37
- 38
- 39
- 40
- 41
- 42
- 43
- 44
- 45
- 46
- 47
- 48
- 49
- 50
- 51
- 52
- 53
- 54
- 55
- 56
- 57
- 58
- 59
- 60
- 61
- 62
- 63
- 64
- 65
- 66
- 67
- 68
- 69
- 70
- 71
- 72
- 73
- 74
- 75
- 76
- 77
- 78
- 79
- 80
- 81
- 82
- 83
- 84
- 85
- 86
- 87
- 88
- 89
- 90
- 91
- 92
- 93
- 94
- 95
- 96
- 97
- 98
- 99
- 100
- 101
- 102
- 103
- 104
- 105
- 106
- 107
- 108
- 109
- 110
- 111
- 112
- 113
- 114
- 115
- 116
- 117
- 118
- 119
- 120
- 121
- 122
- 123
- 124
- 125
- 126
- 127
- 128
- 129
- 130
- 131
Gson is generated by one key, so it's still very convenient.
VI. Normal requests
Let's do an example like the official website. The entity class GankBean already exists, so let's modify the interface and let him return to the entity class.
import retrofit2.Call;
import retrofit2.http.GET;

public interface GnakApi {

    @GET("api/data/Android/10/1")
    Call<GankBean> getAndroidInfo();
}- 1
- 2
- 3
- 4
- 5
- 6
- 7
- 8
There was no change before, just the return of the entity class.
Call<GankBean> call = api.getAndroidInfo();- 1
So if we're asynchronous, it's easy.
//asynchronous
call.enqueue(new Callback<GankBean>() {
    @Override
    public void onResponse(Call<GankBean> call, Response<GankBean> response) {
        GankBean.ResultsBean bean = response.body().getResults().get(0);
        tv_result.setText(
                "_id:" + bean.get_id() + "\n"
                        + "createdAt: " + bean.getCreatedAt() + "\n"
                        + "desc: " + bean.getDesc() + "\n"
                        + "images:" + bean.getImages() + "\n"
                        + "publishedAt:" + bean.getPublishedAt() + "\n"
                        + "source" + bean.getSource() + "\n"
                        + "type:" + bean.getType() + "\n"
                        + "url: " + bean.getUrl() + "\n"
                        + "who:" + bean.getWho());
    }

    @Override
    public void onFailure(Call<GankBean> call, Throwable t) {

    }
});- 1
- 2
- 3
- 4
- 5
- 6
- 7
- 8
- 9
- 10
- 11
- 12
- 13
- 14
- 15
- 16
- 17
- 18
- 19
- 20
- 21
- 22
Can we get the value we want directly here? The answer is No. We can see this line of error when we run it.
IllegalArgumentException: Unable to create converter for class com.liuguilin.retrofitsample.GankBean- 1
Here's a more important piece of information
Could not locate ResponseBody converter for class com.liuguilin.retrofitsample.GankBean.- 1
Here is a very intuitive explanation, can not create a converter, I wipe, then how to do? By looking at the documentation, we know that we need to configure a Gson, not our google.gson. We add the source.
compile 'com.squareup.retrofit2:converter-gson:2.1.0'- 1
The reason for this mistake is that many of my students have encountered it, so I'll mention it here, and then we'll configure a line.
Retrofit retrofit = new Retrofit.Builder()
                .baseUrl("http://gank.io/")
                .addConverterFactory(GsonConverterFactory.create())
.build();- 1
- 2
- 3
- 4
It's OK to run now.
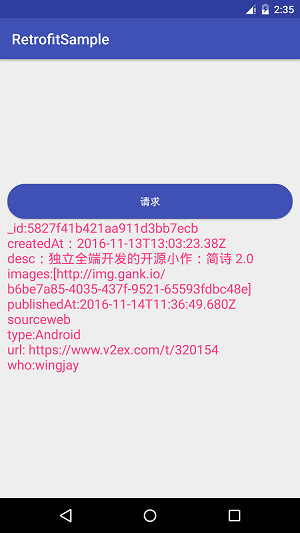
Well, here, our basic request is like this. Is it simple? As long as we configure it well in advance and define the interface according to the api, the rest will become very convenient. With Gson, we can get the value directly after the request is finished. With the hot Dagger2 annotations, the representative will become very touching, concise and efficient. uuuuuuuuuuu
As a matter of fact, we already know him well. Now we are going to follow the documentation and talk about some of his features.
VII. Dynamic parameters of Get
As you all know, most of our URLs are mosaic, just like our weather query interface, it must be dynamic transmission of the name of a city, right, here we change an interface, we use the weather interface.
- Official website: https://www.juhe.cn/docs/api/id/73
From the official website, we can know that our interface is like this.
- http://op.juhe.cn/onebox/weather/query?cityname= Shenzhen & key = KEY you applied for
Here we do a simple case, default cityname is Shenzhen, we will go to splice our key, then how to define our interface, we write a Weather Api:
import retrofit2.Call;
import retrofit2.http.GET;
import retrofit2.http.Query;

public interface WeatherApi {

    @GET("onebox/weather/query?cityname=Shenzhen")
    Call<WeatherDataBean> getWeather(@Query("key") String key);
}
- 1
- 2
- 3
- 4
- 5
- 6
- 7
- 8
- 9
- 10
Here we can see that we Get in the second half of our connection, but there is a key at the end of the splicing, so add Query to the front of the parameter. If you want two parameters and one city, you add one more parameter. Let's initialize it now.
Retrofit retrofit = new Retrofit.Builder()
                .baseUrl("http://op.juhe.cn/")
                .addConverterFactory(GsonConverterFactory.create())
                .build();
api = retrofit.create(WeatherApi.class);- 1
- 2
- 3
- 4
- 5
Okay, let's get our interface object and use it.
Call<WeatherDataBean> call = api.getWeather("4ea58de8a7573377cec0046f5e2469d5");
//asynchronous
call.enqueue(new Callback<WeatherDataBean>() {
    @Override
    public void onResponse(Call<WeatherDataBean> call, Response<WeatherDataBean> response) {
        String info = response.body().getResult().getData().getRealtime().getWeather().getInfo();
        tv_result.setText("Shenzhen Weather:" + info);
    }

    @Override
    public void onFailure(Call<WeatherDataBean> call, Throwable t) {

    }
});- 1
- 2
- 3
- 4
- 5
- 6
- 7
- 8
- 9
- 10
- 11
- 12
- 13
- 14
The Weather Data Bean here is really too much data, so I did not show it, if necessary, I will provide Sample at the end of this article. Here we request too much data, I directly request one to see the results after running:
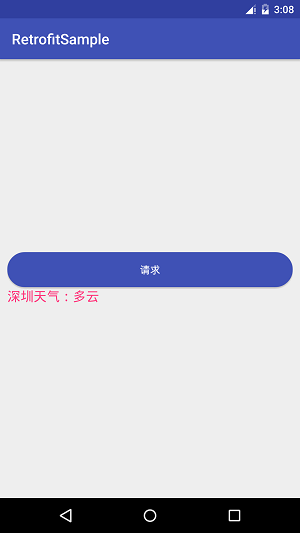
VIII. Get parameter request
The Get method above does this with the general interface, but some requests are problematic, such as our top interface.
He didn't have names like cityname or key, but passed them directly. In fact, the meaning of his parameters is
 // The following three parameters
 //Android Acceptable Parameter | Android | iOS | Rest Video | Welfare | Front End | App
 //count max. 50
 //page is the number of pages
- 1
- 2
- 3
- 4
How do we define interfaces of this type? Let's transform Gank Api and I'll just upload page s here.
import retrofit2.Call;
import retrofit2.http.GET;
import retrofit2.http.Path;

public interface GnakApi {

    @GET("api/data/Android/10/{page}")
    Call<GankBean> getAndroidInfo(@Path("page") int page);
}- 1
- 2
- 3
- 4
- 5
- 6
- 7
- 8
- 9
As you can see, here we use curly braces as placeholders, and then use the path keyword, which must correspond to oh, the rest is almost the same, and then we request.
Retrofit retrofit = new Retrofit.Builder()
        .baseUrl("http://gank.io/")
        .addConverterFactory(GsonConverterFactory.create())
        .build();
api = retrofit.create(GankApi.class);- 1
- 2
- 3
- 4
- 5
So we get our interface object and request it directly.
api.getAndroidInfo(1).enqueue(new Callback<GankBean>() {
    @Override
    public void onResponse(Call<GankBean> call, Response<GankBean> response) {
        tv_result.setText(response.body().getResults().get(0).getDesc());
    }

    @Override
    public void onFailure(Call<GankBean> call, Throwable t) {

    }
});- 1
- 2
- 3
- 4
- 5
- 6
- 7
- 8
- 9
- 10
- 11
You can see that we can still get the value we want, which shows that we can do this as well.
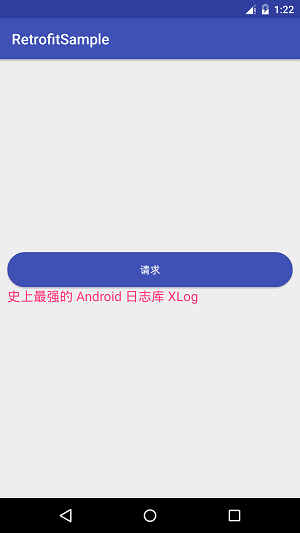
9. Get parameter splicing
What's this? Let's change the weather api and you'll see.
import java.util.Map;

import retrofit2.Call;
import retrofit2.http.GET;
import retrofit2.http.QueryMap;

public interface WeatherApi {

    @GET("onebox/weather/query?")
    Call<WeatherDataBean> getWeather(@QueryMap Map<String, String> params);
}- 1
- 2
- 3
- 4
- 5
- 6
- 7
- 8
- 9
- 10
- 11
Look carefully at the parameters I passed after GET here, but I have a QueryMap, which passes key-value pairs. So how do we use it? This can be done:
Retrofit retrofit = new Retrofit.Builder()
                .baseUrl("http://op.juhe.cn/")
                .addConverterFactory(GsonConverterFactory.create())
                .build();
api = retrofit.create(WeatherApi.class);- 1
- 2
- 3
- 4
- 5
Nothing has changed here. We mainly look at the objects passed by the interface:
Map<String, String> params = new HashMap<>();
params.put("cityname", "Shenzhen");
params.put("key", "4ea58de8a7573377cec0046f5e2469d5");
api.getWeather(params).enqueue(new Callback<WeatherDataBean>() {
    @Override
    public void onResponse(Call<WeatherDataBean> call, Response<WeatherDataBean> response) {

    }

    @Override
    public void onFailure(Call<WeatherDataBean> call, Throwable t) {

    }
});- 1
- 2
- 3
- 4
- 5
- 6
- 7
- 8
- 9
- 10
- 11
- 12
- 13
- 14
Here we can see that the map is passed, and then the map is put, so the url of the final request is
- http://op.juhe.cn/onebox/weather/query?cityname= Shenzhen & key = KEY you applied for
Ten.Post
POST requests, because there is no interface, so I'll say it briefly, I also believe that, as you see here, get knows posts and the corresponding points, but don't worry, we will be very detailed.
import retrofit2.Call;
import retrofit2.http.Body;
import retrofit2.http.POST;

public interface PostApi {

    @POST("user/new")
    Call<Result> postUser(@Body User user);
}- 1
- 2
- 3
- 4
- 5
- 6
- 7
- 8
- 9
Here the POST address is the same as the previous get. Here we return a Result which is the result of our own definition. Body is the parameter. I need a User, and our User is
public class User {

    private int id;
    private String name;

    public int getId() {
        return id;
    }

    public void setId(int id) {
        this.id = id;
    }

    public String getName() {
        return name;
    }

    public void setName(String name) {
        this.name = name;
    }
}
- 1
- 2
- 3
- 4
- 5
- 6
- 7
- 8
- 9
- 10
- 11
- 12
- 13
- 14
- 15
- 16
- 17
- 18
- 19
- 20
- 21
- 22
And our Result:
public class Result {

    private int yes;
    private int no;

    public int getYes() {
        return yes;
    }

    public void setYes(int yes) {
        this.yes = yes;
    }

    public int getNo() {
        return no;
    }

    public void setNo(int no) {
        this.no = no;
    }
}
- 1
- 2
- 3
- 4
- 5
- 6
- 7
- 8
- 9
- 10
- 11
- 12
- 13
- 14
- 15
- 16
- 17
- 18
- 19
- 20
- 21
- 22
There's nothing to do with both of them, and then we can go straight to see how to call them.
User user = new User();
    user.setId(1);
    user.setName("lgl");
    api.postUser(user).enqueue(new Callback<Result>() {
        @Override
        public void onResponse(Call<Result> call, Response<Result> response) {
            if (response.body().getYes() == 0) {
                Toast.makeText(MainActivity.this, "Success", Toast.LENGTH_SHORT).show();
            }
        }

        @Override
        public void onFailure(Call<Result> call, Throwable t) {

        }
});- 1
- 2
- 3
- 4
- 5
- 6
- 7
- 8
- 9
- 10
- 11
- 12
- 13
- 14
- 15
- 16
I sent a user in here. The details are id and name. If the request succeeds, it returns 0. Failure is 1. Here is the definition of the server, so we have POST completed.
XI. Post submits forms
According to the example on the official website, there is another way to update users, which is to submit forms.
@POST("user/edit")
Call<Result> editUser(@Field("id") int id, @Field("name") String name);- 1
- 2
OK, the keyword we use is Field, which defines it, and then calls the method directly.
api.editUser(1, "liuguilin").enqueue(new Callback<Result>() {
        @Override
        public void onResponse(Call<Result> call, Response<Result> response) {
            if (response.body().getYes() == 0) {
                Toast.makeText(MainActivity.this, "Success", Toast.LENGTH_SHORT).show();
            }
        }

        @Override
        public void onFailure(Call<Result> call, Throwable t) {

        }
});- 1
- 2
- 3
- 4
- 5
- 6
- 7
- 8
- 9
- 10
- 11
- 12
- 13
Is it convenient to submit the form?
Finally, there is a PUT, which uploads various file types, such as files, pictures, here you can refer to the official documents.
Of course, there are also changes to our Headers. This is very simple. Look at the examples.
@Headers("Cache-Control: max-age=640000")
@GET("widget/list")
Call<List<Widget>> widgetList();- 1
- 2
- 3
This is an example of the official website, but you only need to add the Headers parameter to wear, and because his parameter is an array, you can wear more than one.
It's finished by reason. I'm going to give you a little example of RxJava, because I'm not very familiar with it myself, so I'll just talk about the piece I know.
Twelve Retrofit 2.0 + RxJava
RxJava will make our code simpler and more efficient. What kind of passion will he have with Retrofit 2.0? Welcome to see today's man and nature... Forehead... Going off the subject, let's make some preparations first. What's the main thing? According to the official website, we need to add it.
    //Adapter
    compile 'com.squareup.retrofit2:adapter-rxjava:2.1.0'
    //RxJava
    compile 'io.reactivex:rxjava:1.1.6'
    //RxAndroid
compile 'io.reactivex:rxandroid:1.2.1'- 1
- 2
- 3
- 4
- 5
- 6
address
- RxJava:https://github.com/ReactiveX/RxJava
- RxAndroid: https://github.com/ReactiveX/RxAndroid
Here I will give you one of the most common examples to illustrate. That's login. After successful login, we get user_id, and then request user information. There should be two requests, right? Let's write the interface first. Here we use the usual method to get:
    @POST("user/login")
    Call<User> login(@Field("username") String user, @Field("password") String password);

    @GET("user/info")
Call<User> getUser(@Query("id") String id);- 1
- 2
- 3
- 4
- 5
There are two interfaces, one is login, the other is reference user name and password, and the other is using id to find user information, so let's continue.
Retrofit retrofit = new Retrofit.Builder()
                .baseUrl("baseUrl")
                .addConverterFactory(GsonConverterFactory.create())
                .addCallAdapterFactory(RxJavaCallAdapterFactory.create())
                .build();
api = retrofit.create(PostApi.class);- 1
- 2
- 3
- 4
- 5
- 6
Here we need to add addCallAdapterFactory to prepare for our next Rx, and then we call it twice.
api.login("liuguilin", "748778890").enqueue(new Callback<User>() {
    @Override
    public void onResponse(Call<User> call, Response<User> response) {
        if (response.isSuccessful()) {
            String id = response.body().getUser_id();
            api.getUser(id).enqueue(new Callback<User>() {
                @Override
                public void onResponse(Call<User> call, Response<User> response) {

                    Toast.makeText(MainActivity.this, "id:" +
                                    response.body().getId()
                                    + "name:" + response.body().getName(),
                            Toast.LENGTH_SHORT).show();
                }

                @Override
                public void onFailure(Call<User> call, Throwable t) {

                }
            });
        }
    }

    @Override
    public void onFailure(Call<User> call, Throwable t) {

    }
});- 1
- 2
- 3
- 4
- 5
- 6
- 7
- 8
- 9
- 10
- 11
- 12
- 13
- 14
- 15
- 16
- 17
- 18
- 19
- 20
- 21
- 22
- 23
- 24
- 25
- 26
- 27
- 28
Is it a bit bloated to write code like this? Don't worry. Let's see how RxJava is written. We need to redefine two interfaces here.
    @POST("user/login")
    rx.Observable<User> loginForRX(@Body User user);

    @GET("user/info")
rx.Observable<User> getUserForRX(@Query("id") String id);- 1
- 2
- 3
- 4
- 5
Here are all pseudo-codes, pay attention to how to use them.
api.loginForRX(new User("liuguilin", "748778890")).flatMap(new Func1<User, Observable<User>>() {
    @Override
    public Observable<User> call(User user) {
        return api.getUser(user.getUser_id());
    }
}).subscribe(new Action1<User>() {
    @Override
    public void call(User user) {
        Toast.makeText(MainActivity.this, "name:" + user.getName(), Toast.LENGTH_SHORT).show();
    }
});- 1
- 2
- 3
- 4
- 5
- 6
- 7
- 8
- 9
- 10
- 11
This is a more concise way of writing, RxJava as a chain expression, the response operation is still very good, I will continue to in-depth analysis of the blog behind me, here do not do too in-depth understanding, because I feel that I have not arrived at home, so just mention, well, here is Ok, your Retrofit 2.0 learned?
Group: 555974449
Sample: http://download.csdn.net/detail/qq_26787115/9683939
Change from: http://blog.csdn.net/qq_26787115/article/details/53034267