1. Installing node environment
Please refer to the specific installation tutorial. http://nodejs.cn/
2. Tower Construction Vue Front End Project
Using vue-cli scaffolding provided by Vue official website vue-cli command-line tool
# Global Installation vue-cli
$ npm install --global vue-cli
# Create a new project based on Web pack template
$ vue init webpack nevem
# Installation Dependency, Go You
$ cd nevem
$ npm install
$ npm run dev
Be careful:
-
npm install --global vue-cli
Global installation of vue-cli.
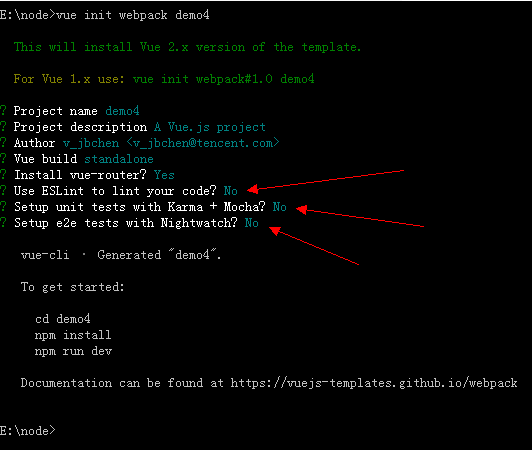
vue init webpack nevem
Create a new project based on the web pack template. In this step, the following unit testing and code validation tools recommend filling in no, otherwise it will increase the size of the project and cause a lot of errors when writing code because of irregularities.
cd nevem
Install vue-resource and element-ui dependencies: After cd nevem enters the front-end project, find the corresponding place of package.json file and make sure that the following code is added:
"dependencies": {
    "element-ui": "^1.3.2",
    "vue": "^2.2.6",
    "vue-resource": "^1.0.3",
    "vue-router": "^2.3.1"
  },
npm install
Install all dependencies, including elementUI and vue-resource from the previous step.
The installation time of npm install will be longer, so it is recommended to use Taobao cnpm image (self-google), the company's network has been wall, please ignore.
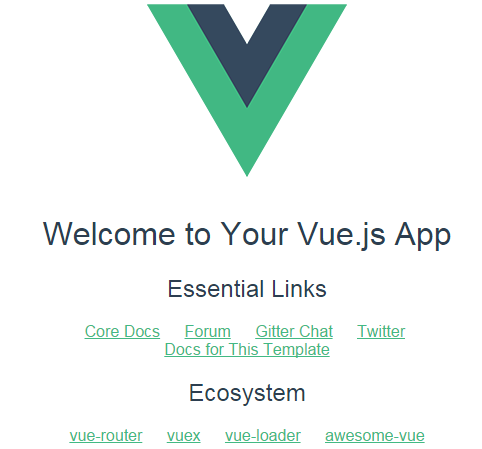
Page automatically pops up after npm run dev http://localhost:8080/#/ This page shows that the vue project based on webpack was successfully created.
3. Introducing Element Components
Modify src/main.js to include element s and resource s
import Vue from 'vue'
import App from './App'
import router from './router'
import VueResource from 'vue-resource'
import ElementUI from 'element-ui'
import 'element-ui/lib/theme-default/index.css'

Vue.config.productionTip = false
Vue.use(VueResource)
Vue.use(ElementUI)
/* eslint-disable no-new */
new Vue({
  el: '#app',
  router,
  template: '<App/>',
  components: { App },
  render:h => h(App)
})
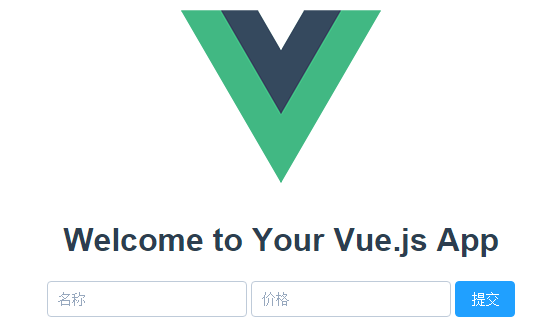
Modify the src/components Hello.vue file to the following code to adjust the content of the home page
<template>
  <div class="hello">
    <h1>{{ msg }}</h1>
    <p>{{el}}</p>
    <form>
        <el-input v-model="name" placeholder="Name" style="width:200px"></el-input>
        <el-input v-model="price" placeholder="Price" style="width:200px"></el-input>
        <el-button type="primary" @click="addUser">Submission</el-button>
    </form>
  </div>
</template>

<script>
export default {
  name: 'hello',
  data () {
    return {
      msg: 'Welcome to Your Vue.js App',
      name: '',
      price: '',
      el:''
    }
  },
  methods: {
    addUser() {
      var name = this.name;
      var price = this.price;
      this.$http.post('/api/user/addUser', {
        name: name,
        price: price
      },{}).then((response) => {
        console.log(response);
      })
    },
    aaa(){
      this.el="Successful introduction element";
    }
  }
}
</script>
After saving the above files, run npm run dev again in the nevem directory, and the page becomes as follows, which indicates the successful introduction of element components.
4. Install Mysql
There are many ways to install mysql. Here I use Wamp Server to build a database. If you install and use mysql, you can still use your own google.
-
Here I add a new Database named mbvr_live, and then create a table goods in the Database and insert two records. The specific sql code is as follows:
CREATE TABLE IF NOT EXISTS `goods` (
  `id` int(11) NOT NULL AUTO_INCREMENT,
  `name` varchar(100) NOT NULL,
  `price` float(10,2) NOT NULL,
  `creat_time` timestamp NOT NULL DEFAULT CURRENT_TIMESTAMP ON UPDATE CURRENT_TIMESTAMP,
  PRIMARY KEY (`id`),
  UNIQUE KEY `id` (`id`)
) ENGINE=InnoDB  DEFAULT CHARSET=latin1 AUTO_INCREMENT=6 ;

INSERT INTO `goods` (`id`, `name`, `price`, `creat_time`) VALUES
(1, 'apple', 5.00, '2017-05-11 00:22:10'),
(2, 'banner', 5.00, '2017-05-11 01:37:37');
5. Installing Express
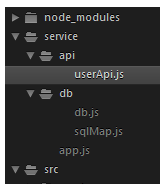
Create a new file service under the directory nevem to serve as a server. Create the following four files in it, the structure is as follows:
-
db.js to configure mysql connection data:
module.exports = {
    mysql: {
        host: 'localhost',
        user: 'root',
        password: '',
        database:'mbvr_live'
    }
}
-
app.js, Express Server Entry File:
// node Backend Server Entry
const userApi = require('./api/userApi');
const fs = require('fs');
const path = require('path');
const bodyParser = require('body-parser');
const express = require('express');
const app = express();

app.use(bodyParser.json());
app.use(bodyParser.urlencoded({extended: false}));

//Registered api routing
app.use('/api/user', userApi);

// Monitor port
app.listen(3000);
console.log('success listen at port:3000......');
-
sqlMap.js, the SQL statement mapping file for api logic calls:
// sql statement
var sqlMap = {
    // user
    user: {
        add: 'insert into goods(id, name, price) values (0, ?, ?)'
    }
}
module.exports = sqlMap;
-
userApi.js, test example:
var models = require('../db/db');
var express = require('express');
var router = express.Router();
var mysql = require('mysql');
var $sql = require('../db/sqlMap');

// Connect to the database
var conn = mysql.createConnection(models.mysql);

conn.connect();
var jsonWrite = function(res, ret) {
    if(typeof ret === 'undefined') {
        res.json({
            code: '1',
            msg: 'operation failed'
        });
    } else {
        res.json(ret);
    }
};

// Adding User Interface
router.post('/addUser', (req, res) => {
    var sql = $sql.user.add;
    var params = req.body;
    console.log(params);
    conn.query(sql, [params.name, params.price], function(err, result) {
        if (err) {
            console.log(err);
        }
        if (result) {
            jsonWrite(res, result);
        }
    })
});
// Adding User Interface
router.get('/addUser', (req, res) => {
     res.send('retrunJson');
});

module.exports = router;
After writing, you can install the related dependency npm install express mysql body-parser under the service project.
At this time, the node app is executed under the service folder. If you see successful listen at port: 3000, the server starts successfully.
6, test
At this point, return http://localhost:8080/#/ Enter the name and price on the page and submit it the Discovery Newspaper. http://localhost:8080/api/use... Error 404, because the back end 8080 and front end 3000 are two different ports, cross-domain. At this point, find the file configindex.js, and the content of the address mapping table proxyTable in the development configuration dev is empty. Here, modify it as follows:
proxyTable: {
        '/api': {
            target: 'http://127.0.0.1:3000/api/', //Do not write localhost
            changeOrigin: true,//true allows cross-domain
            pathRewrite: {
                '^/api': ''  //Rewrite rewrite is required, and if processing is done on the server side, it can be avoided
            }
        }
    },
End.