As a little whitewash who just used Mac to learn programming, the biggest pain is that other students have teachers'installation packages, and I can only find software on the Internet by myself. After installing the software, I find that the configuration process is different from them, alas (covering my face). Fortunately, it's not hard work, I finally successfully matched all my software. Therefore, in order not to allow the majority of Mac compatriots to complete the software configuration without suffering, I hereby write a more article on how to modify MySQL's default character set as utf-8 under Mac, and especially in the absence of so-called. cnf format files!!!
Let's get down to the main topic:
1. Download MySQL
Download on MySQL official website. https://dev.mysql.com/downloads/mysql/
Select any click download 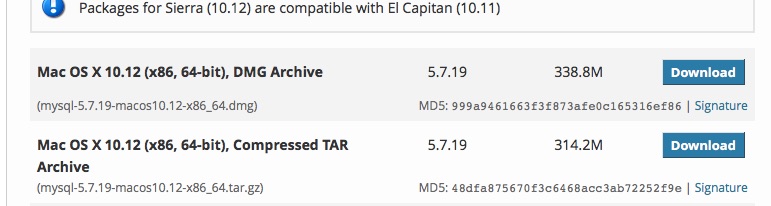
2. Install MySQL
Find the file to install under the download path, double-click the pkg file, double-click the file, and start the installation. 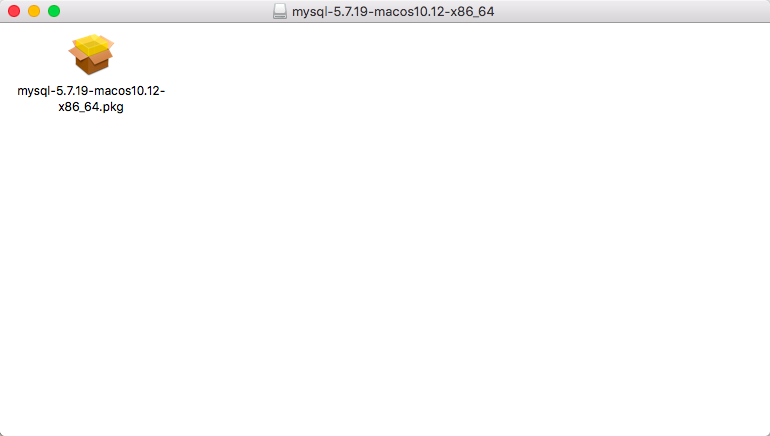
Stupid installation, continue all the way, will jump out of a bullet window halfway, choose to agree, and finally complete the installation. 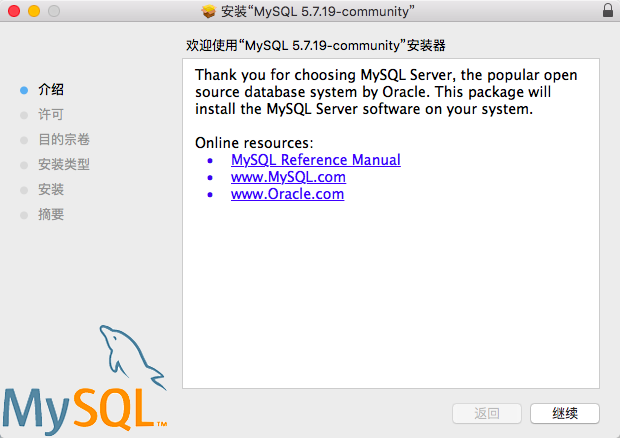
3. View MySQL
Installed MySQL in System Preference Settings 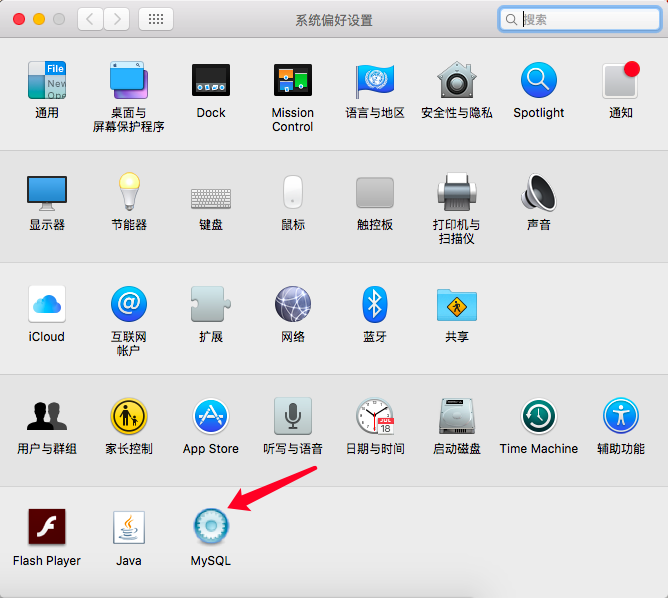
Click on the MySQL icon to see the running status of MySQL. Running indicates that MySQL is running. To close the database service, click the stop MySQL Server button on the right. 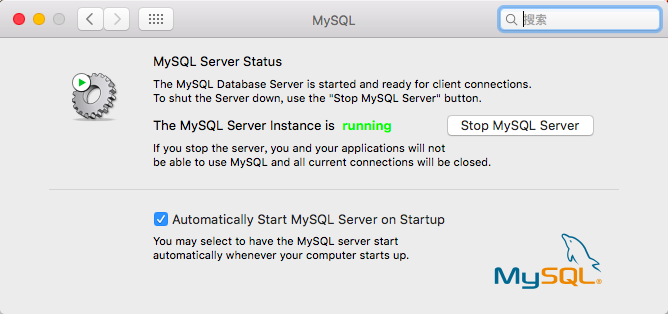
4. Setting Password
Now I'm going to get to the point. Most of the online tutorials tell you that you will pop up a box in the process of installation. There is the initial password of MySQL in that box, but there is no one in my box!!! Not at all!!! So I started the process of changing the password:
step1:
Apple - > System Preferences - > bottom point mysql closes mysql service in pop-up page (click stop mysql server) 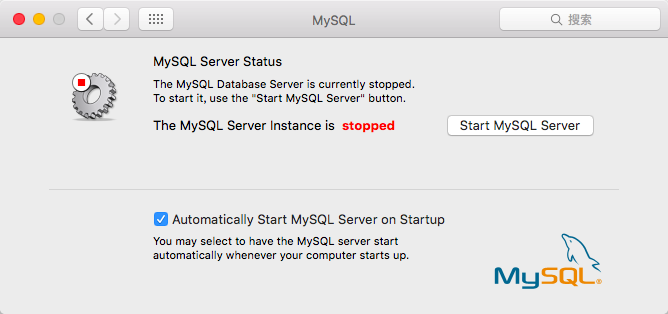
step2:
Enter terminal input: cd/usr/local/mysql/bin/
Login administrator permission sudo su after return
Enter the following command to disable mysql validation. / mysqld_safe-skip-grant-tables &
mysql will restart automatically after return (the status of mysql in preference settings will become running)
(Starting with the fourth sentence, please ignore the mistakes made by the young woman in the previous lines.) 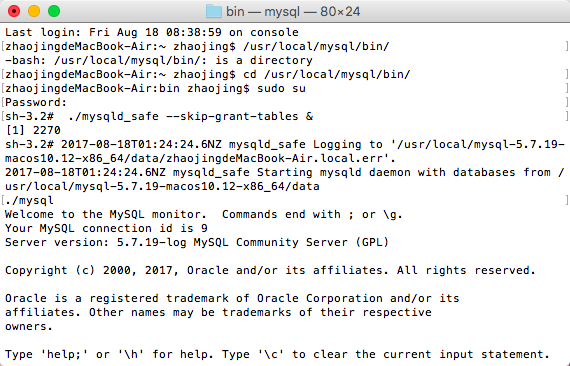
step3.
Enter the command. / mysql
After returning, enter the command FLUSH PRIVILEGES.
Enter the command set password for'root'@'localhost'= PASSWORD('your new password'); for example, if you want to set the password to root, the statement is: set password for'root' @'localhost'='root'; 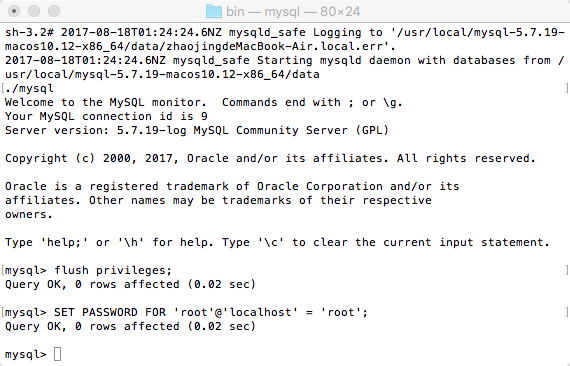
5. After the password was set up, I finally started a happy journey of learning with my classmates, but when I wanted to insert Chinese into the table, the trouble came again, the character set coding did not match! So the teacher led the other students to change the code, and I... Baidu has started to cover its face again. However, it may be a system version problem. The online tutorials did not solve my problem, but under the operation of Oba, it succeeded in yielding. So now is the time to modify the character set encoding:
step1:
First enter the database and enter show variables like'% char%'; you can see that the unmodified character set encod ing is like this. Sorry, I stole this picture because my code has been changed. 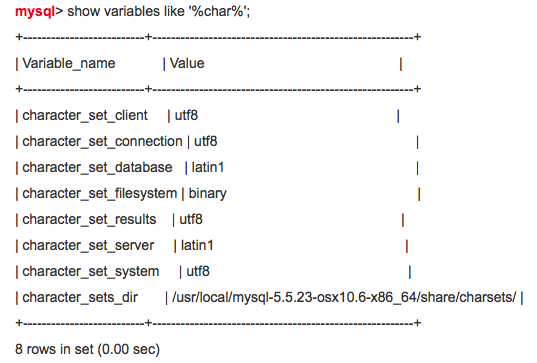
step2:
As before the password is set, the database service is also closed for this operation, and the graph is not available.
step3:
cd /usr/local/mysql/support-files / enters the path, and ls looks at the files under that path. (There are no files ending with. cnf suffix under my path) 
The first method of modification is:
If you have a file that ends with A. cnf suffix, you can modify the mysql configuration file / etc/my.cnf
sudo cp /usr/local/mysql/support-files/my-medium.cnf /etc/my.cnf
sudo vi /etc/my.cnf
[client] add:
default-character-set=utf8
[mysqld] add:
character-set-server=utf8
Start mysql after modification
I guess you've already seen that I don't have. cnf files, so naturally there are.
The second way of modification is:
Cd/etc enters this path
sudo mkdir my.cnf creates new files
sudo vi my.cnf opens the file
i enter editing mode, and then copy all the text at the end of the article into the file, remember, a symbol can not be less!
esc exits editing mode
wq! Mandatory save exit
step4:
Many people have successfully modified it in the last step. At this point, reopen the database service, then enter the database and re-enter show variables like'% char%'; you can present the following state: 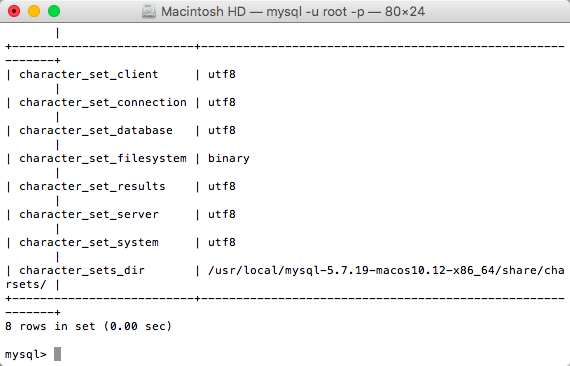
However, many people have modified my.cnf configuration but it still does not work! What's the matter? Specifically as follows:
Reason:
We noticed that only my.cnf modifications were mentioned here, and it was not clear which file the absolute path was. That is to say, my.cnf file may not be modified in the correct path.
In MySQL, multiple my. CNF configuration files are allowed, some of which can affect the whole system environment, such as: / etc/my.cnf. Others can only affect individual users, such as: ~/.my.cnf.
MySQL reads my.cnf configuration files in the following order:
/etc/my.cnf
/etc/mysql/my.cnf
/usr/local/mysql/etc/my.cnf
~/.my.cnf
Solution: Copy my.cnf file to every path you need to read, that is
sudo cp /etc/my.cnf /etc/mysql/my.cnf;
sudo cp/etc/my.cnf /usr/local/mysql/etc/my.cnf;
sudo cp/etc/my.cnf ~/.my.cnf;
That's how it works! As above, open the database service, and then show variables like'% char%'; you can modify successfully ~
Text:
# Example MySQL config file for medium systems.
#
# This is for a system with little memory (32M - 64M) where MySQL plays
# an important part, or systems up to 128M where MySQL is used together with
# other programs (such as a web server)
#
# MySQL programs look for option files in a set of
# locations which depend on the deployment platform.
# You can copy this option file to one of those
# locations. For information about these locations, see:
# http://dev.mysql.com/doc/mysql/en/option-files.html
#
# In this file, you can use all long options that a program supports.
# If you want to know which options a program supports, run the program
# with the "--help" option.
# The following options will be passed to all MySQL clients
[client]
default-character-set=utf8
#password = your_password
port = 3306
socket = /tmp/mysql.sock
# Here follows entries for some specific programs
# The MySQL server
[mysqld]
character-set-server=utf8
init_connect='SET NAMES utf8
port = 3306
socket = /tmp/mysql.sock
skip-external-locking
key_buffer_size = 16M
max_allowed_packet = 1M
table_open_cache = 64
sort_buffer_size = 512K
net_buffer_length = 8K
read_buffer_size = 256K
read_rnd_buffer_size = 512K
myisam_sort_buffer_size = 8M
character-set-server=utf8
init_connect='SET NAMES utf8'
# Don't listen on a TCP/IP port at all. This can be a security enhancement,
# if all processes that need to connect to mysqld run on the same host.
# All interaction with mysqld must be made via Unix sockets or named pipes.
# Note that using this option without enabling named pipes on Windows
# (via the "enable-named-pipe" option) will render mysqld useless!
#
#skip-networking

# Replication Master Server (default)
# binary logging is required for replication
log-bin=mysql-bin

# binary logging format - mixed recommended
binlog_format=mixed

# required unique id between 1 and 2^32 - 1
# defaults to 1 if master-host is not set
# but will not function as a master if omitted
server-id = 1

# Replication Slave (comment out master section to use this)
#
# To configure this host as a replication slave, you can choose between
# two methods :
#
# 1) Use the CHANGE MASTER TO command (fully described in our manual) -
# the syntax is:
#
# CHANGE MASTER TO MASTER_HOST=<host>, MASTER_PORT=<port>,
# MASTER_USER=<user>, MASTER_PASSWORD=<password> ;
#
# where you replace <host>, <user>, <password> by quoted strings and
# <port> by the master's port number (3306 by default).
#
# Example:
#
# CHANGE MASTER TO MASTER_HOST='125.564.12.1', MASTER_PORT=3306,
# MASTER_USER='joe', MASTER_PASSWORD='secret';
#
# OR
#
# 2) Set the variables below. However, in case you choose this method, then
# start replication for the first time (even unsuccessfully, for example
# if you mistyped the password in master-password and the slave fails to
# connect), the slave will create a master.info file, and any later
# change in this file to the variables' values below will be ignored and
# overridden by the content of the master.info file, unless you shutdown
# the slave server, delete master.info and restart the slaver server.
# For that reason, you may want to leave the lines below untouched
# (commented) and instead use CHANGE MASTER TO (see above)
#
# required unique id between 2 and 2^32 - 1
# (and different from the master)
# defaults to 2 if master-host is set
# but will not function as a slave if omitted
#server-id = 2
#
# The replication master for this slave - required
#master-host = <hostname>
#
# The username the slave will use for authentication when connecting
# to the master - required
#master-user = <username>
#
# The password the slave will authenticate with when connecting to
# the master - required
#master-password = <password>
#
# The port the master is listening on.
# optional - defaults to 3306
#master-port = <port>
#
# binary logging - not required for slaves, but recommended
#log-bin=mysql-bin

# Uncomment the following if you are using InnoDB tables
#innodb_data_home_dir = /usr/local/mysql/data
#innodb_data_file_path = ibdata1:10M:autoextend
#innodb_log_group_home_dir = /usr/local/mysql/data
# You can set .._buffer_pool_size up to 50 - 80 %
# of RAM but beware of setting memory usage too high
#innodb_buffer_pool_size = 16M
#innodb_additional_mem_pool_size = 2M
# Set .._log_file_size to 25 % of buffer pool size
#innodb_log_file_size = 5M
#innodb_log_buffer_size = 8M
#innodb_flush_log_at_trx_commit = 1
#innodb_lock_wait_timeout = 50

[mysqldump]
quick
max_allowed_packet = 16M

[mysql]
no-auto-rehash
# Remove the next comment character if you are not familiar with SQL
#safe-updates
default-character-set=utf8

[myisamchk]
key_buffer_size = 20M
sort_buffer_size = 20M
read_buffer = 2M
write_buffer = 2M

[mysqlhotcopy]
interactive-timeout