If you have not installed the Dynamsoft Camera SDK framework in the Xcode project, please refer to the following configuration:
1. If you haven't downloaded Dynamsoft Camera SDK iOS version for 30 days for free trial, please Here Download.
2. Create a new Xcode project.
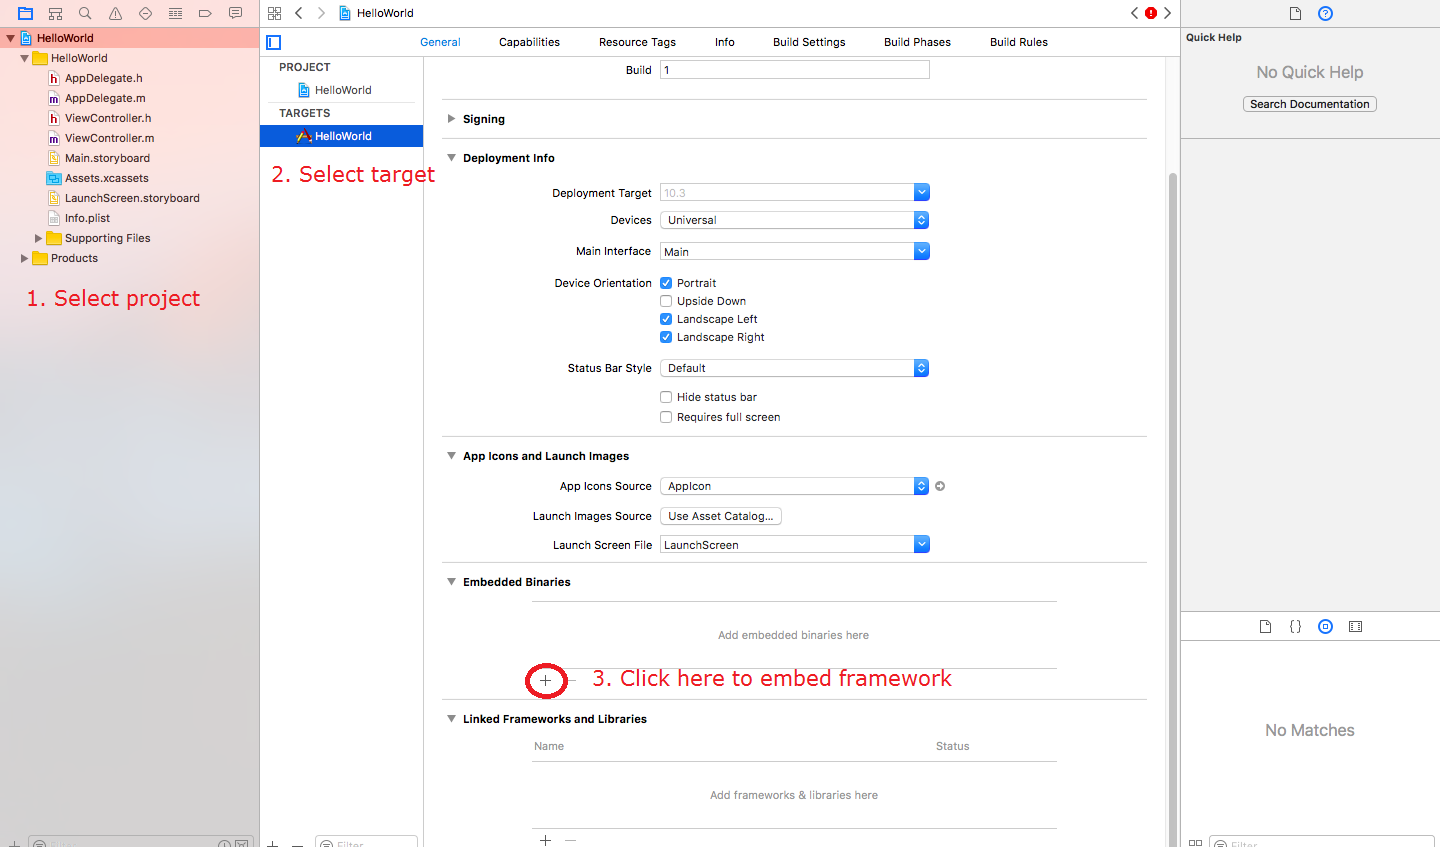
2.1 Find the General tab, under the Embedded Binaries section, click the + button to add the embedded framework.
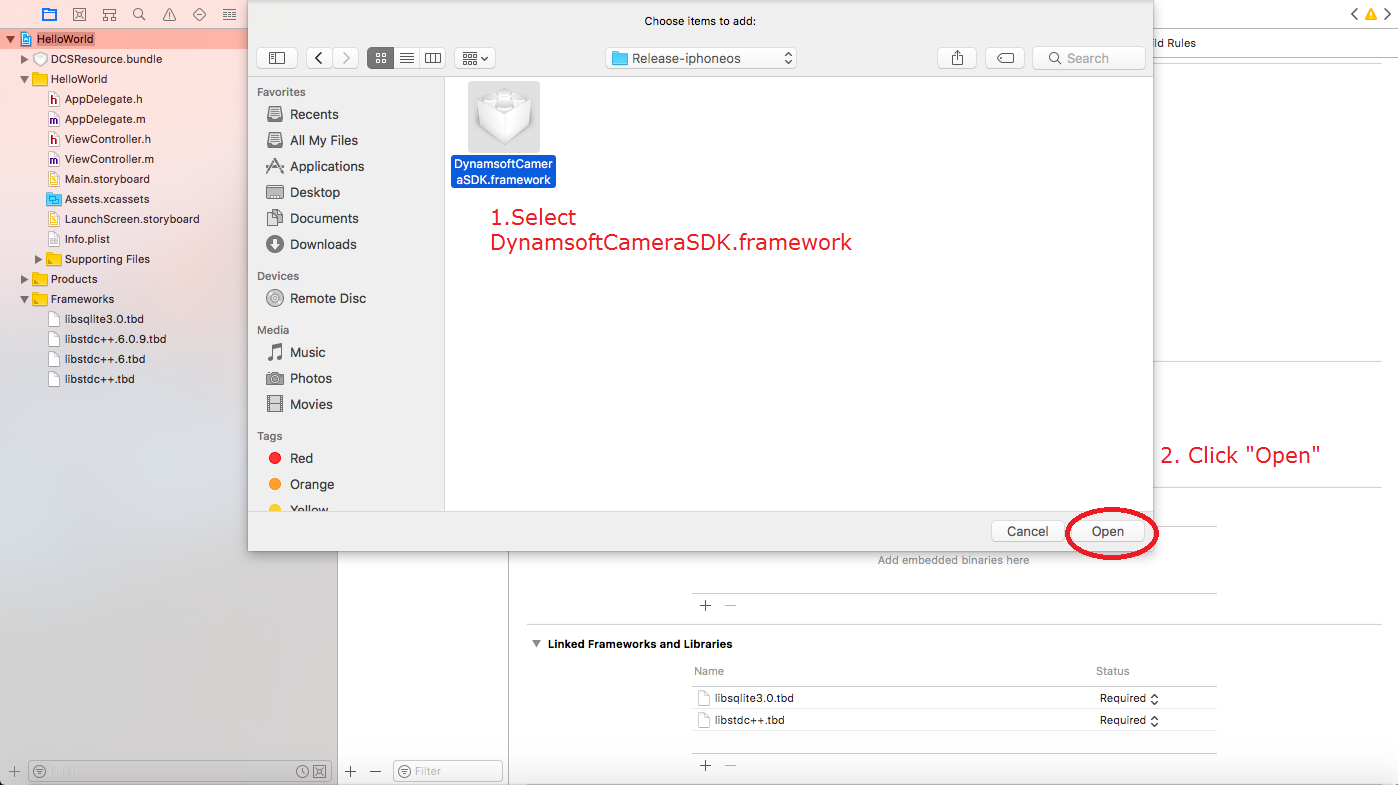
2.2 Choose'Add Other...'.

2.3 Find and select Dynams of Camera SDK. framework.
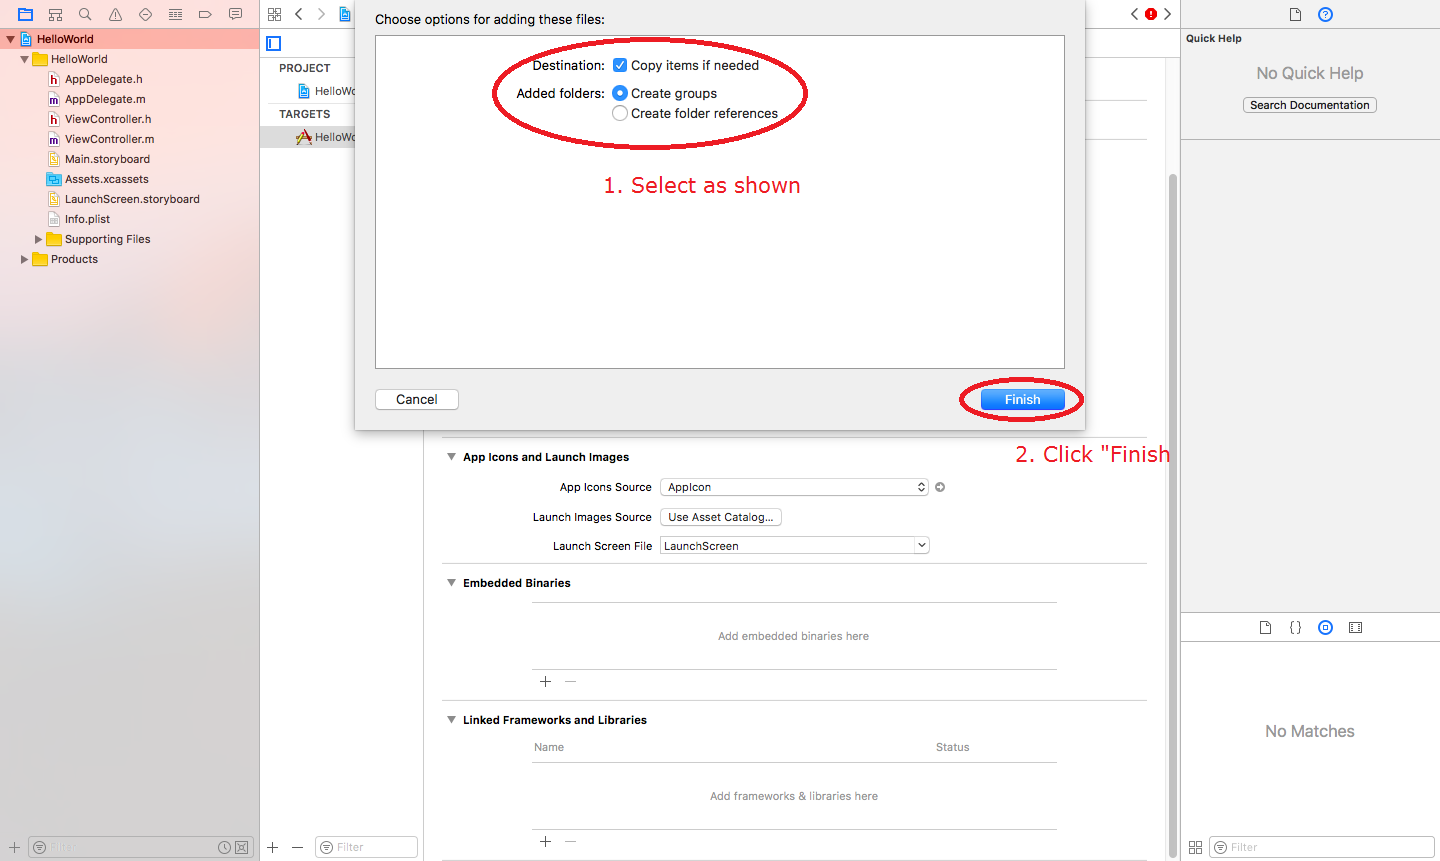
2.4 Check'Copy items if needed'and'Create groups' and click'Finish'.
3. Add the required. tbd file to the project.
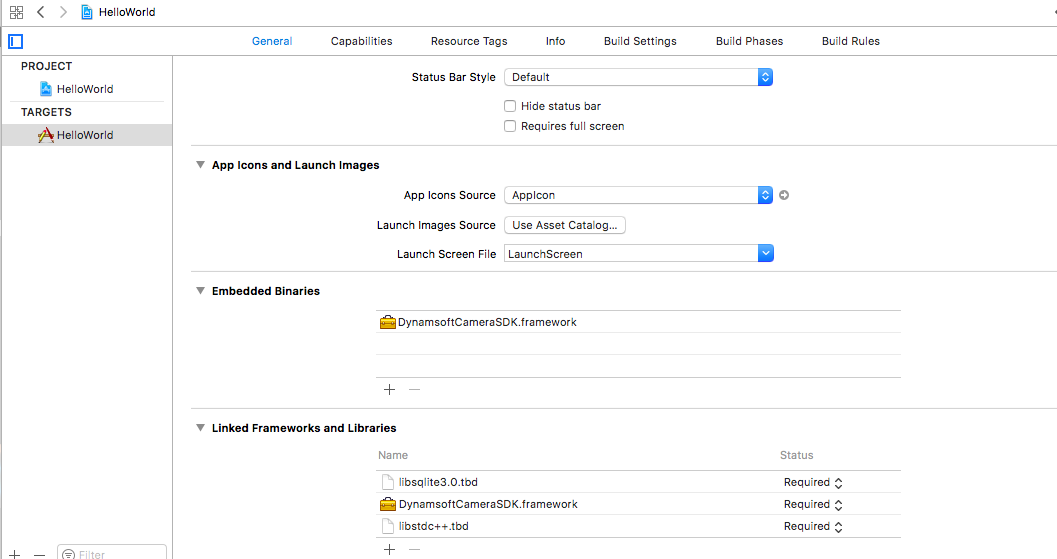
3.1 To the "General" tab of the Xcode project, under "Linked Frameworks and Libraries", click the "+" button.

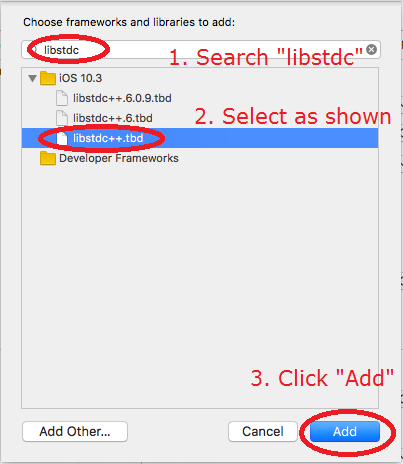
3.2 Search the libstdc ++.tbd file, select it and click the Add button. Then the file will be copied to your project.
3.3 Search libsqlite3.0.tbd, select it and click the Add button. Then the file will be copied to your project.
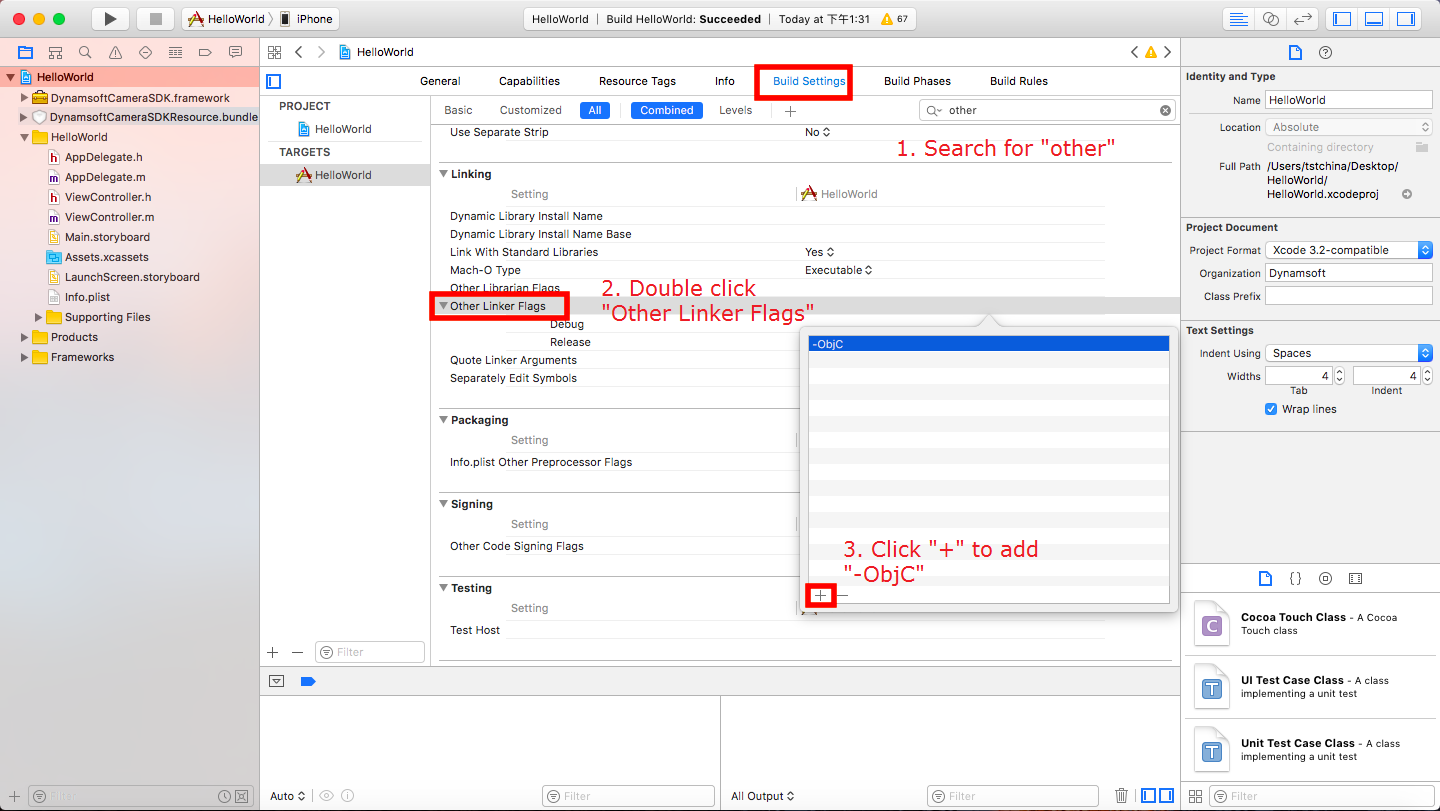
4. Find "Other Linker Flags" and add the value "-ObjC".
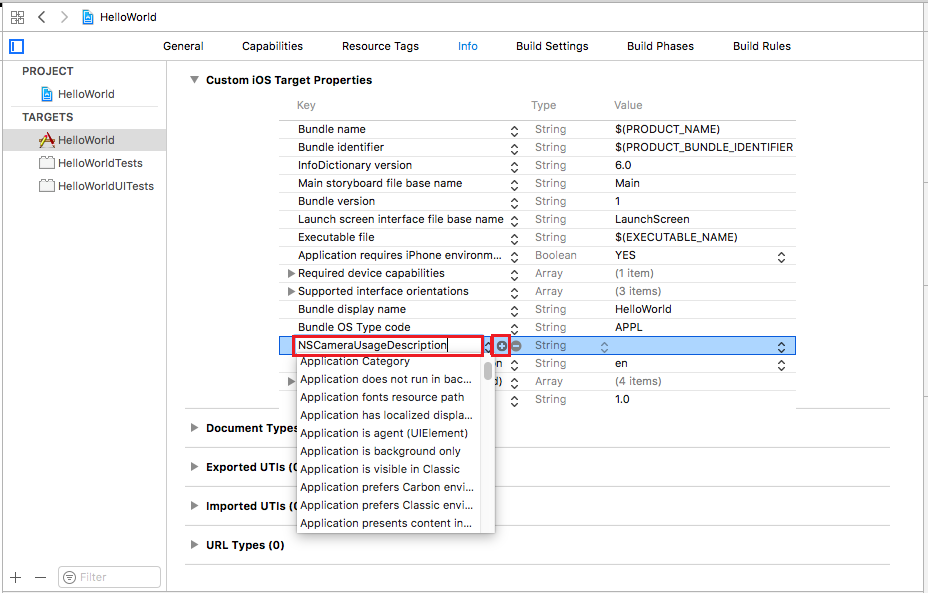
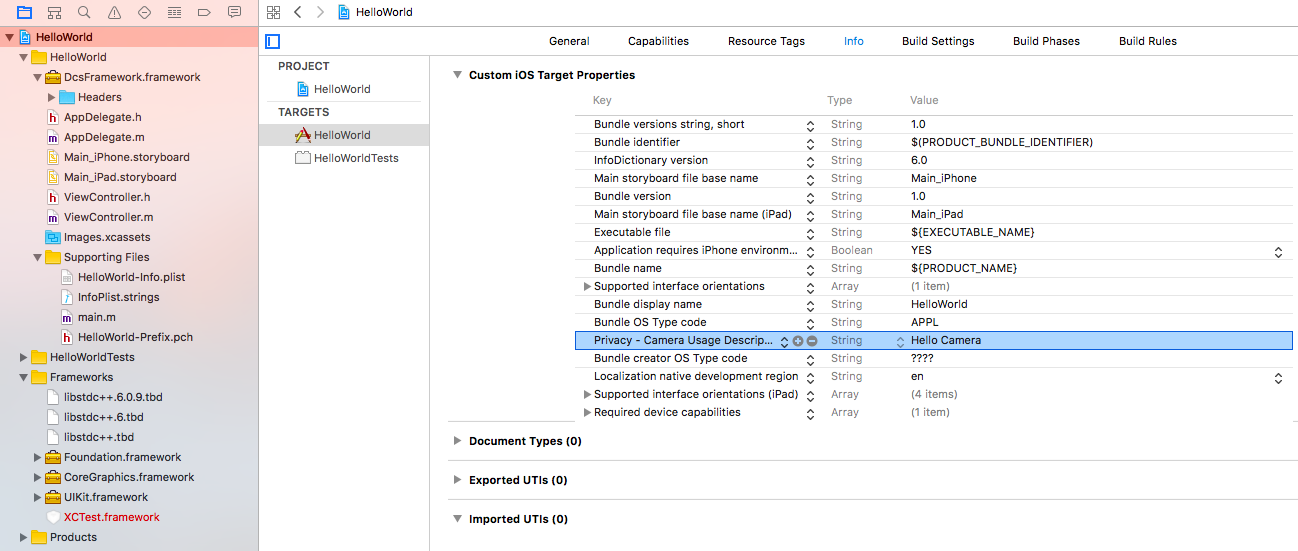
Note: For iOS 10 and later, go to the Info tab of the project, under Custom iOS Target Properties, click +, enter "NSCamera Usage Description" and press the "enter" button, then set the value "Privacy - Camera Usage Description".
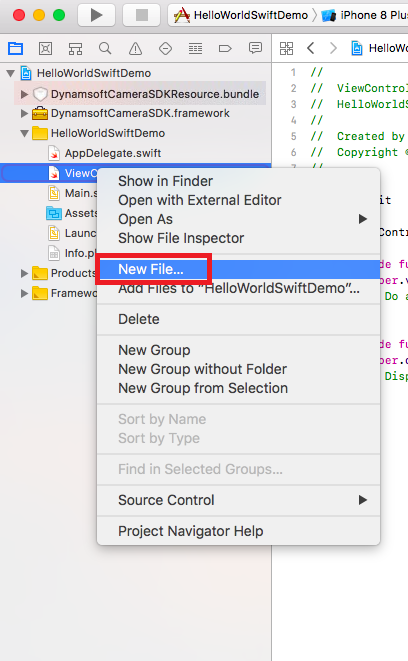
5. Add bridge joint files to your application
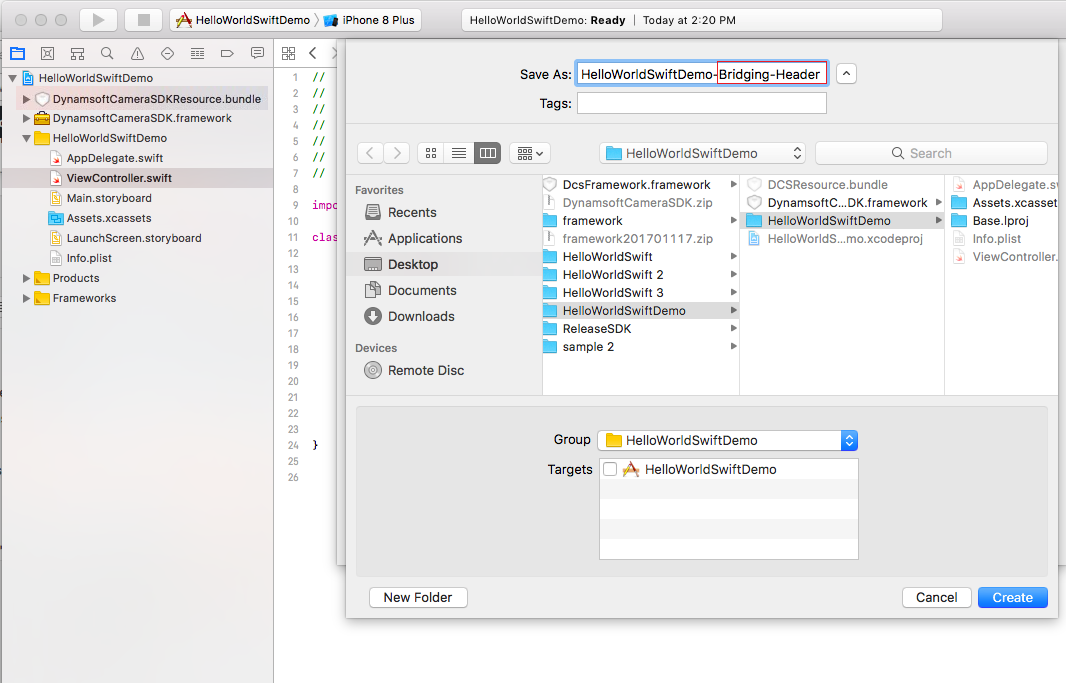
5.1 Adding a new header file to your application
Make sure to name it "** - bridging-header.h", as follows:
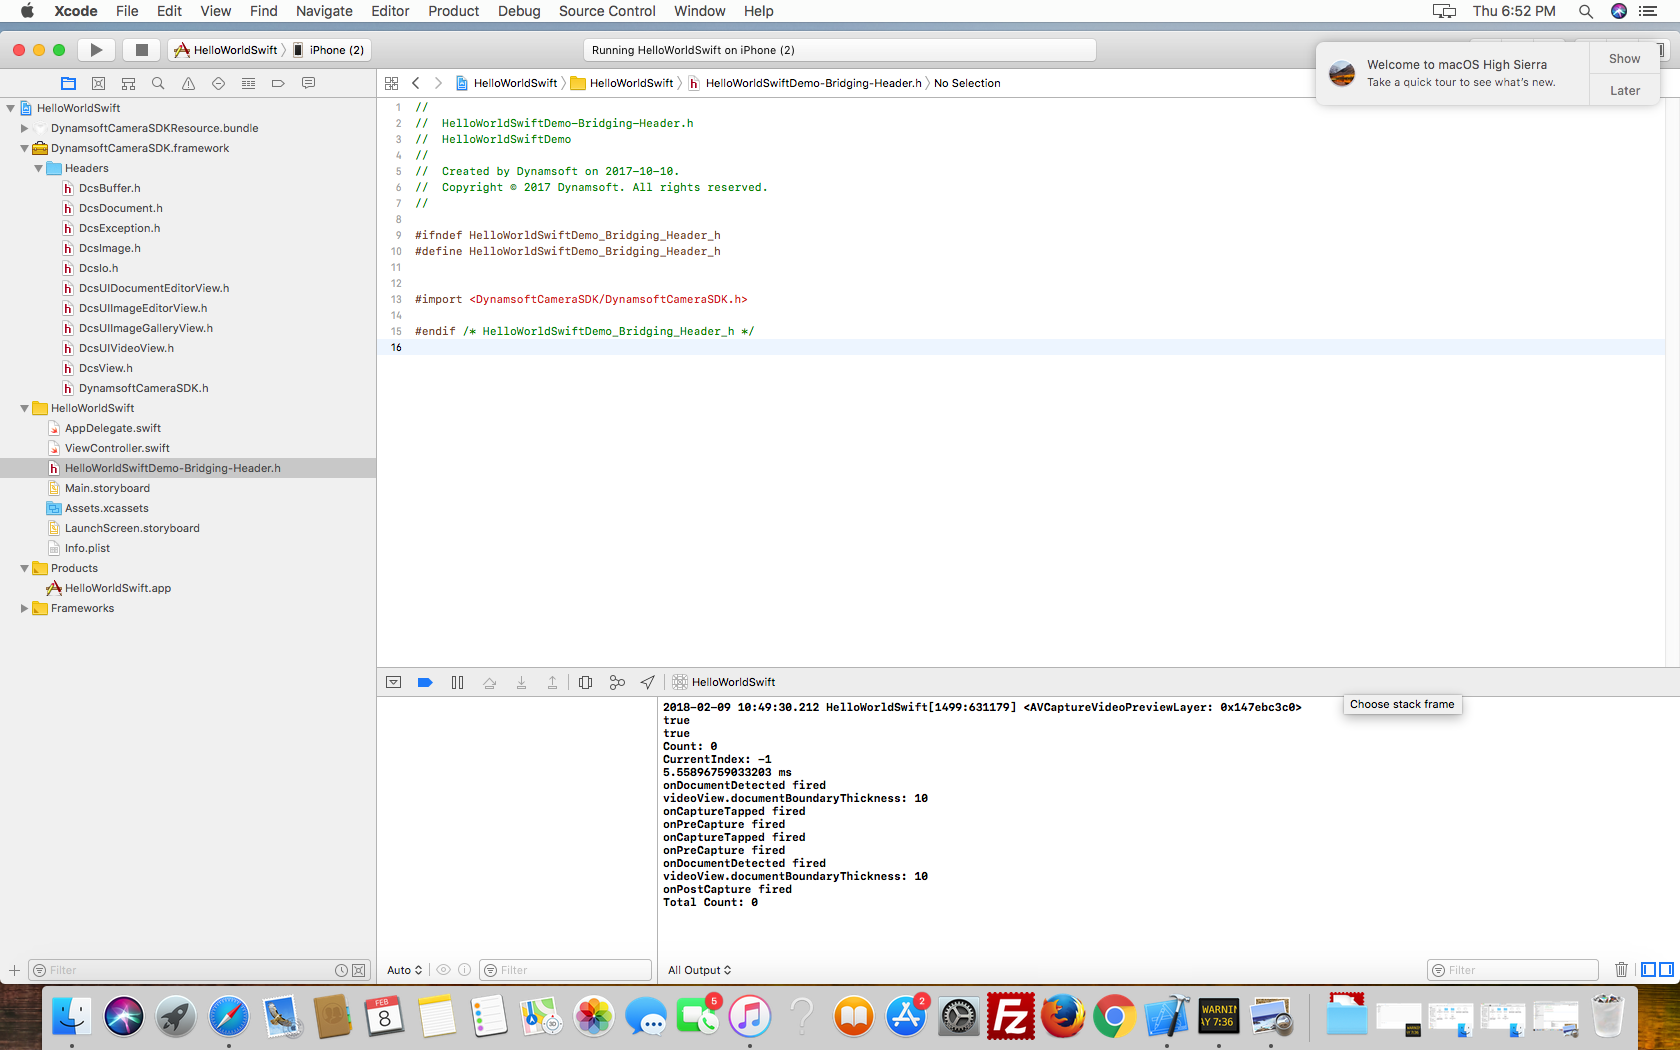
5.2 Add the following code to the newly created header file
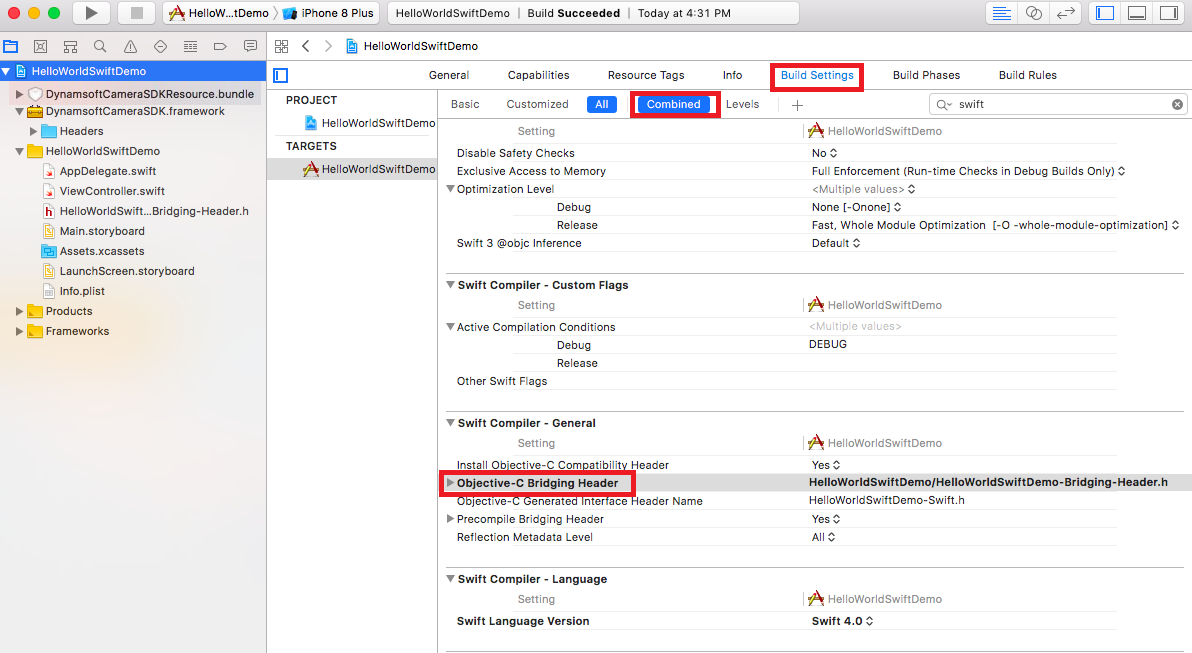
5.3 Change Build Settings accordingly
Navigate to the "Build Settings" of the application, search for "swift" and copy the bridge connection related file path to Objective-C Bridging Header in "Swift Compiler-General", as follows:
6. Next, you can add code to implement image capture in your project, taking Swift as an example.
6.1 Open the ViewController.swift file
6.2 Modify ViewController
class ViewController: UIViewController {
    var openVideoViewButton:UIButton!
    var dcsView:DcsView!

    override func viewDidLoad() {
        super.viewDidLoad()
        // Do any additional setup after loading the view, typically from a nib.
        dcsView = DcsView.self.init(frame:CGRect.init(x: 0, y: 0, width: self.view.frame.size.width, height: self.view.frame.size.height));

        //Show VideoView when DcsView is loaded
        dcsView.currentView=DVE_VIDEOVIEW

        ///////////////////video view settting//////////////////
        //Set the videoview capture mode to document mode
        dcsView.videoView.mode = DME_DOCUMENT

        //Set the next view after the cancel or capture button is clicked.
        dcsView.videoView.nextViewAfterCancel = DVE_IMAGEGALLERYVIEW
        dcsView.videoView.nextViewAfterCapture = DVE_EDITORVIEW

        view.addSubview(dcsView)

        openVideoViewButton = UIButton(frame:CGRect(x:self.view.center.x-100, y:self.view.center.y-20, width: 200, height: 40))
        openVideoViewButton.setTitle("Back to Camera", for: .normal)
        openVideoViewButton.setTitleColor(UIColor.blue, for: .normal)
        openVideoViewButton.addTarget(self, action:#selector(onClick), for:UIControlEvents.touchUpInside);
        dcsView.imageGalleryView.addSubview(openVideoViewButton)

    }

    override func didReceiveMemoryWarning() {
        super.didReceiveMemoryWarning()
        // Dispose of any resources that can be recreated.
    }

    @objc func onClick(){
        dcsView.currentView=DVE_VIDEOVIEW
    }
}
7. Connect to the iPhone (need 5S or higher) to see how it works.
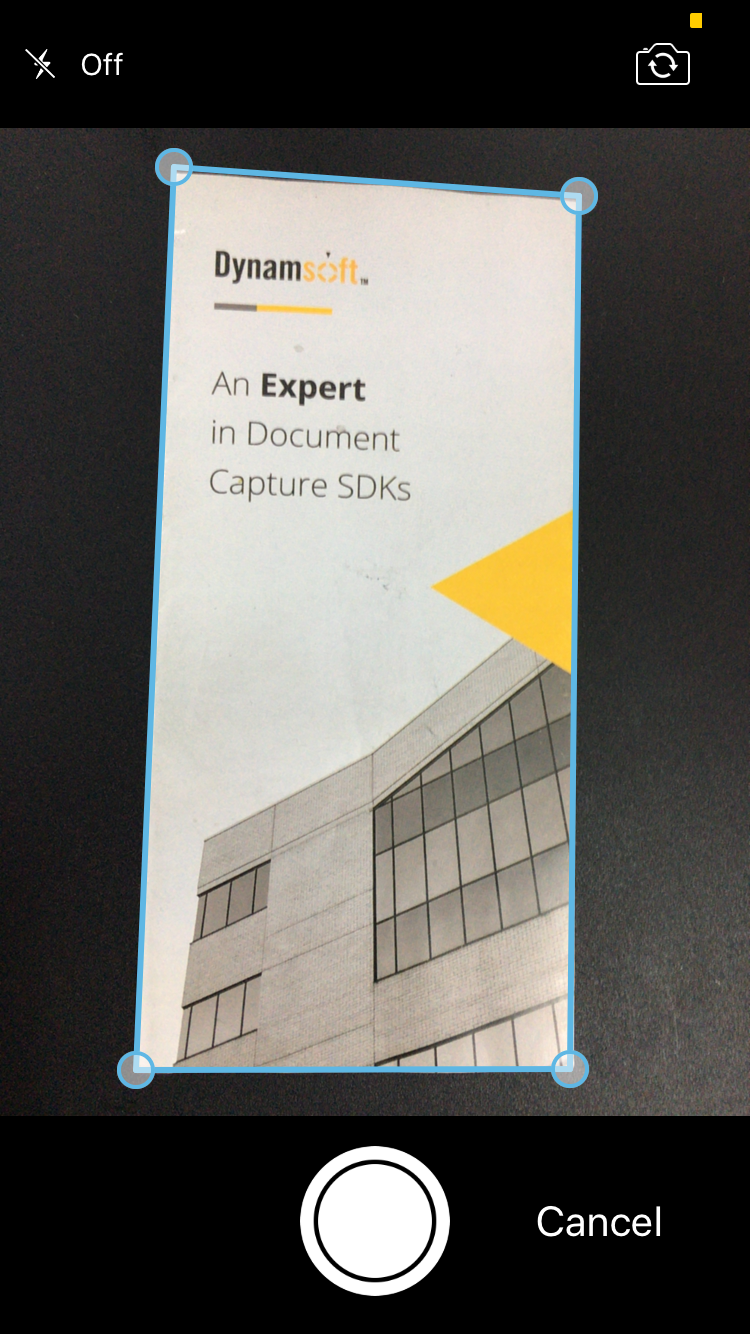
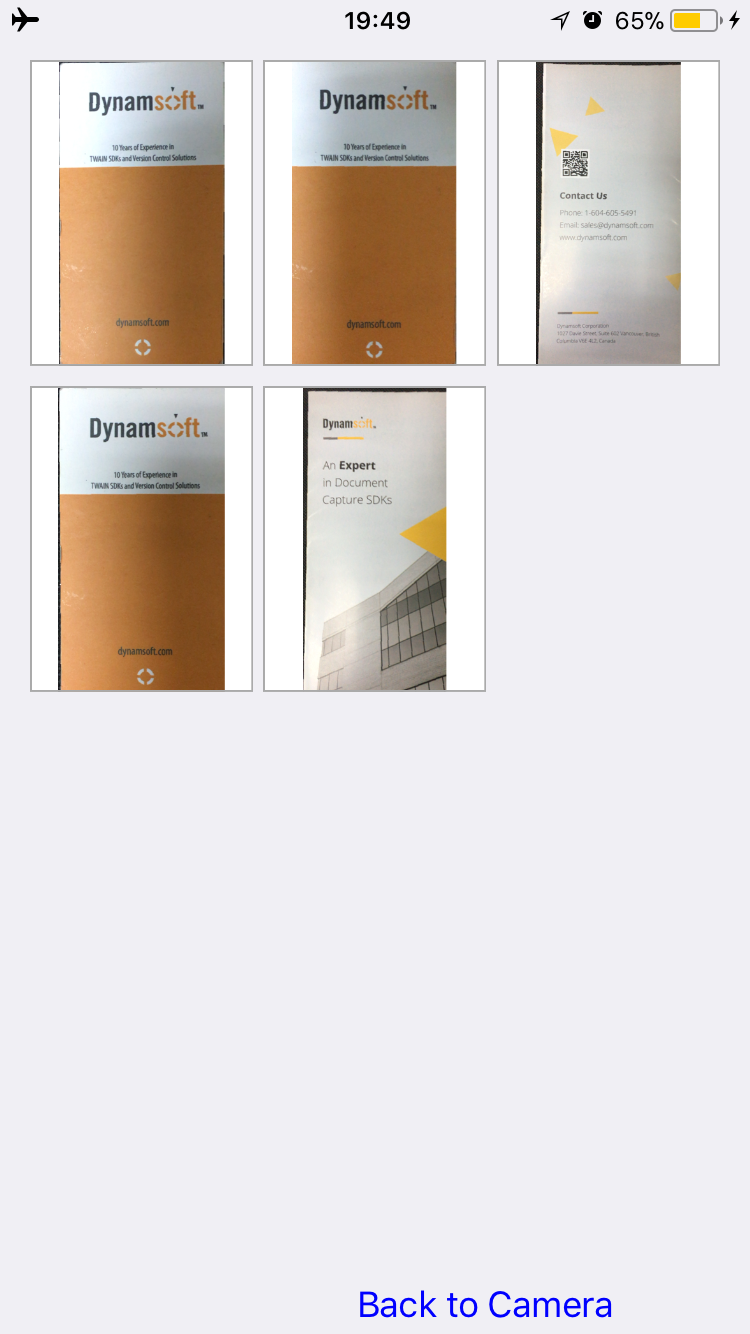
After clicking the capture button, the captured document will be displayed in the built-in document editor view:
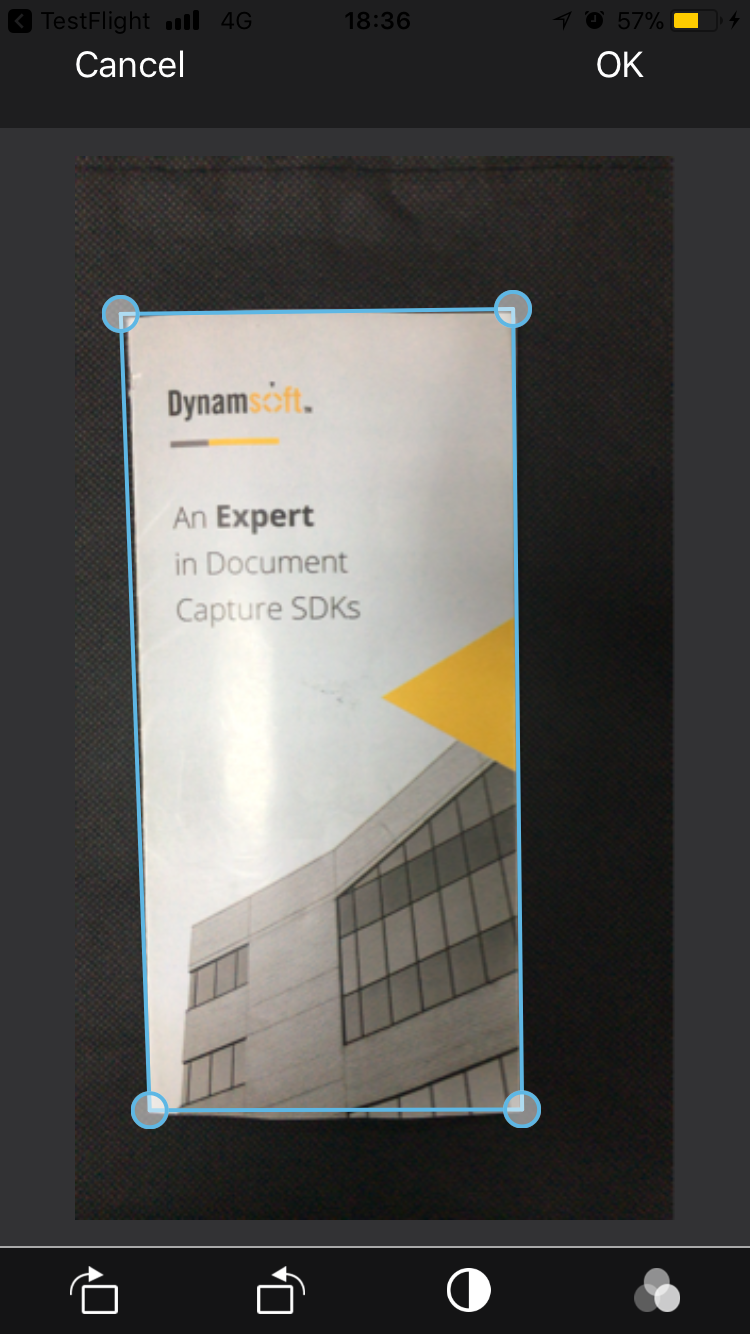
After editing, you can click "OK" to see the edited document in the library view: