0. Directory
1,JDBC
JDBC (Java DataBase Connection) is to access the database through JAVA
So we need to have a basic understanding and application of the database
2. Import the jar package of MySQL JDBC for the project
Third party classes are needed to access MySQL database. These third party classes are all compressed in a file called Jar.
In order for the code to use third-party classes, you need to import mysql's special Jar package for the project.
The package mysql-connector-java-5.0.8-bin.jar You can download it on the right
Generally, the jar packages used in the project will be placed in the lib directory of the project. In this case, they will be placed in the
E:\project\j2se\lib this location
Then import the jar package into eclipse
Package import steps: right click Project - > Property - > java build path - > Libraries - > add external jars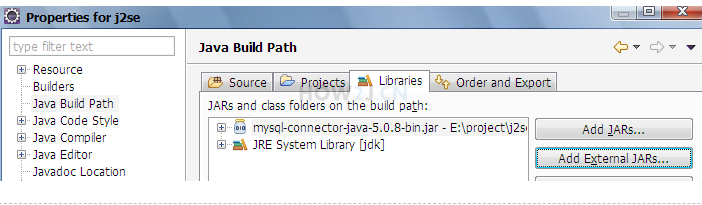
3. Initialize driver
adopt Class.forName(“ com.mysql.jdbc.Driver”);
Initialize driver class com.mysql.jdbc.Driver
Just in mysql-connector-java-5.0.8-bin.jar in
If you forget the package of the first step, ClassNotFoundException will be thrown
Class.forName When loading this class into the JVM, the static initialization block will be executed to complete the initialization of the driver.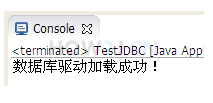
package jdbc;

public class TestJDBC {
    public static void main(String[] args) {

        //Initialize driver
        try {
            //Driver class com.mysql.jdbc.Driver
            //Just in mysql-connector-java-5.0.8-bin.jar in
            //If you forget the package of the first step, ClassNotFoundException will be thrown
            Class.forName("com.mysql.jdbc.Driver");

            System.out.println("Database driver loaded successfully!");

        } catch (ClassNotFoundException e) {
            // TODO Auto-generated catch block
            e.printStackTrace();
        }

    }
}
4. Establish a connection to the database
Establish a Connection to the database
Here we need to provide:
IP of the database: 127.0.0.1 (local)
Port number of database: 3306 (mysql special port number)
Database name how2java
Encoding mode UTF-8
Account root
Password admin
Note: to successfully execute this step, it must be based on the database how2java in mysql. If not, click create database to see how to create the database.
package jdbc;

import java.sql.Connection;
import java.sql.DriverManager;
import java.sql.SQLException;

public class TestJDBC {
    public static void main(String[] args) {

        try {
            Class.forName("com.mysql.jdbc.Driver");

            // Establish a Connection to the database
            // Here we need to provide:
            // IP of the database: 127.0.0.1 (local)
            // Port number of database: 3306 (mysql special port number)
            // Database name how2java
            // Encoding mode UTF-8
            // Account root
            // Password admin

            Connection c = DriverManager
                    .getConnection(
                            "jdbc:mysql://127.0.0.1:3306/how2java?characterEncoding=UTF-8",
                            "root", "admin");

            System.out.println("Connection succeeded, get connection object: " + c);

        } catch (ClassNotFoundException e) {
            // TODO Auto-generated catch block
            e.printStackTrace();
        } catch (SQLException e) {
            // TODO Auto-generated catch block
            e.printStackTrace();
        }

    }
}
5. Create Statement
Statement is used to execute SQL statements, such as adding and deleting
package jdbc;
import java.sql.Connection;
import java.sql.DriverManager;
import java.sql.SQLException;
import java.sql.Statement;
public class TestJDBC {
public static void main(String[] args) {
try {
Class.forName("com.mysql.jdbc.Driver");
Connection c = DriverManager
.getConnection(
"jdbc:mysql://127.0.0.1:3306/how2java?characterEncoding=UTF-8",
"root", "admin");
// Note: use java.sql.Statement
// Do not use it carelessly: com.mysql.jdbc.Statement;
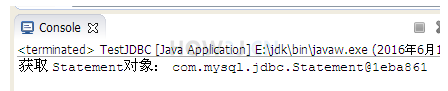
Statement s = c.createStatement();
System.out.println("obtain Statement Object: " + s);
} catch (ClassNotFoundException e) {
// TODO Auto-generated catch block
e.printStackTrace();
} catch (SQLException e) {
// TODO Auto-generated catch block
e.printStackTrace();
}
}
}
6. Execute SQL statement
s.execute execute execute sql statement
After the execution is successful, use MySQL front to check and confirm that the insertion is successful
Before executing the SQL statement, make sure that there is a table hero in the database how2java. If not, create the table in advance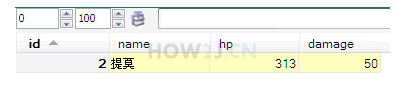
package jdbc;

import java.sql.Connection;
import java.sql.DriverManager;
import java.sql.SQLException;
import java.sql.Statement;

public class TestJDBC {
    public static void main(String[] args) {

        try {
            Class.forName("com.mysql.jdbc.Driver");

            Connection c = DriverManager
                    .getConnection(
                            "jdbc:mysql://127.0.0.1:3306/how2java?characterEncoding=UTF-8",
                            "root", "admin");

            Statement s = c.createStatement();

            // Prepare sql statement
            // Note: use single quotation mark for string '
            String sql = "insert into hero values(null,"+"'Timo'"+","+313.0f+","+50+")";
            s.execute(sql);

            System.out.println("Insert statement executed successfully");

        } catch (ClassNotFoundException e) {
            // TODO Auto-generated catch block
            e.printStackTrace();
        } catch (SQLException e) {
            // TODO Auto-generated catch block
            e.printStackTrace();
        }

    }
}
7. Close connection
The connection of the database is limited resources. After the relevant operation, form a good habit of closing the database
Close Statement first
Close Connection after
package jdbc;

import java.sql.Connection;
import java.sql.DriverManager;
import java.sql.SQLException;
import java.sql.Statement;

public class TestJDBC {
    public static void main(String[] args) {

        Connection c = null;
        Statement s = null;
        try {
            Class.forName("com.mysql.jdbc.Driver");

            c = DriverManager.getConnection("jdbc:mysql://127.0.0.1:3306/how2java?characterEncoding=UTF-8", "root",
                    "admin");

            s = c.createStatement();

            String sql = "insert into hero values(null," + "'Timo'" + "," + 313.0f + "," + 50 + ")";

            s.execute(sql);

        } catch (ClassNotFoundException e) {
            // TODO Auto-generated catch block
            e.printStackTrace();
        } catch (SQLException e) {
            // TODO Auto-generated catch block
            e.printStackTrace();
        } finally {
            // The connection of the database is limited in resources. After the relevant operation, form a good habit of closing the database
            // Close Statement first
            if (s != null)
                try {
                    s.close();
                } catch (SQLException e) {
                    // TODO Auto-generated catch block
                    e.printStackTrace();
                }
            // Close Connection after
            if (c != null)
                try {
                    c.close();
                } catch (SQLException e) {
                    // TODO Auto-generated catch block
                    e.printStackTrace();
                }

        }

    }
}
8. Use try with resource to automatically close the connection
If you think the previous method of closing the Connection is troublesome, you can refer to the method of closing the flow. Use try with resource to close the Connection automatically, because Connection and Statement both implement the autocolosable interface
package jdbc;

import java.sql.Connection;
import java.sql.DriverManager;
import java.sql.SQLException;
import java.sql.Statement;

public class TestJDBC {
    public static void main(String[] args) {

        try {
            Class.forName("com.mysql.jdbc.Driver");
        } catch (ClassNotFoundException e) {
            e.printStackTrace();
        }

        try (
            Connection c = DriverManager.getConnection("jdbc:mysql://127.0.0.1:3306/how2java?characterEncoding=UTF-8",
                "root", "admin");
            Statement s = c.createStatement();
        )
        {
            String sql = "insert into hero values(null," + "'Timo'" + "," + 313.0f + "," + 50 + ")";
            s.execute(sql);

        } catch (SQLException e) {
            // TODO Auto-generated catch block
            e.printStackTrace();
        }
    }
}