2.10.1 Network Parameter Configuration
1. Configure Static Host Name
-Profile/etc/hostname
- Fixed saved host name, valid for this machine
- Permanently configure host name
[root@localhost03 ~]# echo svr7.tedu.cn > /etc/hostname
[root@localhost03 ~]# cat /etc/hostname  #Do not affect the current hostname, need to restart the computer
svr7.tedu.cn

[root@localhost03 ~]# hostname svr7.tedu.cn #Modify the current hostname
[root@localhost03 ~]# exit #Turn off terminal reentry
2. Modify Network Card Naming Rules
[root@svr7 ~]# vim /etc/default/grub
GRUB_CMDLINE_LINUX="crashkernel=auto rhgb quiet net.ifnames=0 biosdevname=0"
:wq
 Explain:
 net.ifnames=0 biosdevname=0 Modify the network card naming rules, using the most basic naming rules, numbering from 0

[root@svr7 ~]# grub2-mkconfig -o /boot/grub2/grub.cfg  #Rebuild grub configuration file
[root@svr7 ~]# reboot #Restart your computer for the grub profile to take effect
[root@svr7 ~]# ifconfig | head -2 #Check if grub is valid
eth0: flags=4163<UP,BROADCAST,RUNNING,MULTICAST>  mtu 1500
        inet 192.168.4.7  netmask 255.255.255.0  broadcast 192.168.4.255
3. Delete networks that are misidentified
[root@svr7 ~]# nmcli connection show #List network connections currently identified by the system
NAME    UUID                                  TYPE      DEVICE
eth0    6ed83b04-c1a3-4ee9-8d94-8a262bdb29ab  ethernet  eth0
virbr0  f249c4c3-387e-409d-9c2e-8d58c662e2d0  bridge    virbr0
Explain:
NAME: Name for Name
DEVICE: Represents the device name

[root@svr7 ~]# nmcli connection delete ens33  #Remove deprecated ens33 network card

[root@svr7 ~]# nmcli connection show #Check if ens33 network card is deleted
NAME    UUID                                  TYPE      DEVICE
eth0    6ed83b04-c1a3-4ee9-8d94-8a262bdb29ab  ethernet  eth0
virbr0  f249c4c3-387e-409d-9c2e-8d58c662e2d0  bridge    virbr0

[root@srv7 ~]# nmcli connection delete Wired\ connection\ 1 #Delete limited connection network cards for fear of being unrecognized and recreate recognized network card devices
4. Add a new network card configuration
[root@srv7 ~]# nmcli connection add type ethernet ifname eth0 con-name eth0 #Add a new network configuration
 Explain:
add: Add to
type: Device type
ethernet: Ethernet Device
ifname: Network Card Device Name
 First eth0: Device Name
con-name: Profile Name
 The second eth0: Name the device and the resulting profile
/etc/sysconfig/network-scripts/ifcfg-eth0 : Generated Network Card Profile Path

[root@srv7 ~]# nmcli connection show #Check to see if the device was added
NAME    UUID                                  TYPE      DEVICE
eth0    6ed83b04-c1a3-4ee9-8d94-8a262bdb29ab  ethernet  eth0
5. Modify network connection configuration
[root@srv7 ~]# nmcli connection modify eth0 ipv4.method manual ipv4.addresses 192.168.4.7/24 ipv4.gateway 192.168.4.2 connection.autoconnect yes

[root@srv7 ~]# nmcli connection up eth0  #Activate network connection
[root@srv7 ~]# nmcli connection down eth0  #Disable Network Connection

[root@srv7 ~]# ifconfig | head -2 #Check if connection parameters are successfully configured
eth0: flags=4163<UP,BROADCAST,RUNNING,MULTICAST>  mtu 1500
        inet 192.168.4.7  netmask 255.255.255.0  broadcast 192.168.4.255

[root@srv7 ~]# route -n #View the routing table or the gateway
Kernel IP routing table
Destination     Gateway         Genmask         Flags Metric Ref    Use Iface
0.0.0.0         192.168.4.2     0.0.0.0         UG    100    0        0 eth0
192.168.1.0     0.0.0.0         255.255.255.0   U     100    0        0 eth0
192.168.122.0   0.0.0.0         255.255.255.0   U     0      0        0 virbr0
6. Specify a local DNS server
DNS Server: Resolve domain name to corresponding IP address
Configuration file: /etc/resolv.conf Modifications complete and take effect immediately
Key record nameserver DNS server address
[root@srv7 ~]# vim /etc/resolv.conf #Edit DNS Profile
nameserver 192.168.4.2
:wq
7. Common Network Tools
1. View IP address
[root@svr7 ~]# ip address show
2: eth0: <BROADCAST,MULTICAST,UP,LOWER_UP> mtu 1500 qdisc pfifo_fast state UP qlen 1000
    link/ether 00:0c:29:be:87:eb brd ff:ff:ff:ff:ff:ff
    inet 192.168.1.3/24 brd 192.168.1.255 scope global dynamic eth0
2. Add IP Address
[root@svr7 ~]# ip address add 192.168.1.5/24 dev eth0 #Add an IP address to the eth0 network card and fail after system restart
[root@svr7 ~]# ip address show  #Check if the IP address was successfully added
2: eth0: <BROADCAST,MULTICAST,UP,LOWER_UP> mtu 1500 qdisc pfifo_fast state UP qlen 1000
    link/ether 00:0c:29:be:87:eb brd ff:ff:ff:ff:ff:ff
    inet 192.168.4.7/24 brd 192.168.1.255 scope global dynamic eth0
       valid_lft 1730sec preferred_lft 1730sec
    inet 192.168.1.5/24 scope global secondary eth0
       valid_lft forever preferred_lft forever
    inet6 fe80::3fe1:994c:ef14:8b21/64 scope link
       valid_lft forever preferred_lft forever
3.ping command tests network connection
-c: Number of outgoing packages
[root@svr7 ~]# ping -c 2  192.168.1.1 #ping twice 192.168.4.207
PING 192.168.4.207 (192.168.4.207) 56(84) bytes of data.
64 bytes from 192.168.1.1: icmp_seq=1 ttl=128 time=0.799 ms
64 bytes from 192.168.1.1: icmp_seq=2 ttl=128 time=0.285 ms
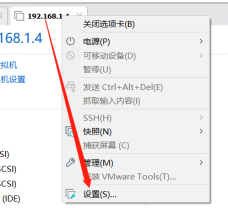
2.10.2 Remote management of Linux hosts
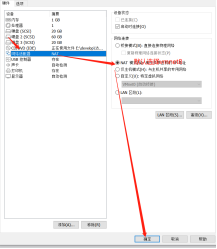
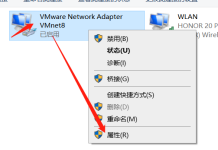
1. Communication between physical and virtual machines
1. Virtual machine selection wmnet8 switch
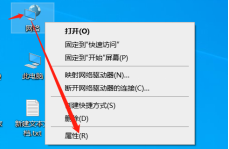
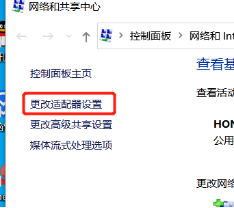
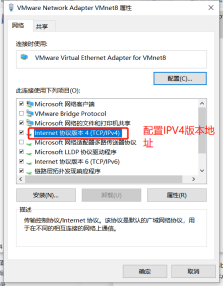
2. Configure the IP address of vmnet8
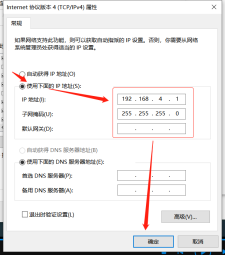
3. Test communication
win+r->cmd->ping 192.168.4.7
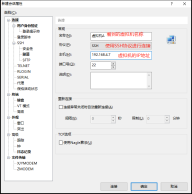
2. Physical machines use xshell
1. Write information to connect the virtual machine
2.ALT+.Shortcuts
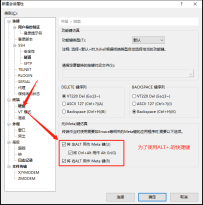
3. Keyboard is available for setting xshell
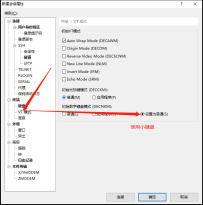
4. Adjust color scheme
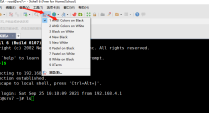
5. Connect virtual machines

6.Windows transfers data to the remote management host
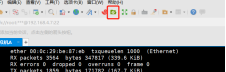
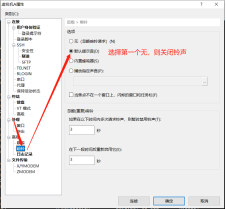
7. Turn off TAB ringtones
3. Virtual Machine Build Yum Warehouse
[root@svr7 ~]# mkdir /mydvd #Create mount point
[root@svr7 ~]# Mount/dev/cdrom/mydvd/mount/dev/cdrom driver
[root@svr7 ~]# rm -rf /etc/yum.repos.d/*  #Delete previous repo files
[root@svr7 ~]# vim /etc/yum.repos.d/mydvd.repo #Rewrite yum repository file
[mydvd]
name=centos7
baseurl=file:///mydvd
enabled=1
gpgcheck=0
:wq

[root@svr7 ~]# yum -y install httpd #Install packages to test for success
[root@svr7 ~]# blkid /dev/cdrom #View cdrom file types
/dev/cdrom: UUID="2018-05-07-12-53-47-00" LABEL="CentOS 7 x86_64" TYPE="iso9660" PTTYPE="dos"
[root@svr7 ~]# vim /etc/fstab  #Write automount file
/dev/cdrom /mydvd iso9660 defaults 0 0
:wq

[root@svr7 ~]# umount /mydvd/ #Uninstall yum repository
[root@svr7 ~]# mount -a #Verify automount was successful
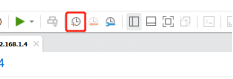
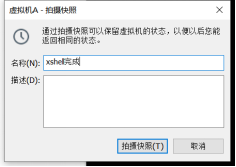
4. Virtual Machine Snapshots
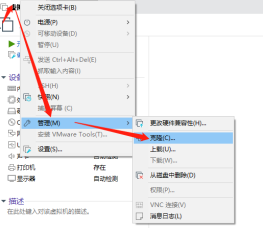
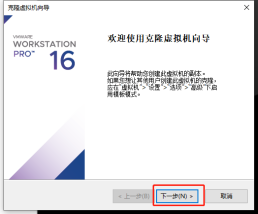
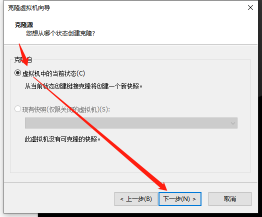
V. Cloning Virtual Machines
[root@svr7 ~]# vim /etc/fstab #Modify Automatically/boot Startup Item UUID by/dev/sda1 #Before cloning a new host, change the UUID mounted by boot to the block device path to prevent future problems
/dev/sda1  /boot                   xfs     defaults        0 0

[root@svr7 ~]#poweroff #turn off your computer
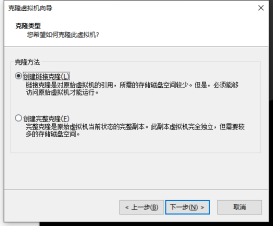
Explain:
Create Link Clone: Low resource consumption, fast cloning speed, common resources with template virtual machine, can not be used in case of template virtual machine error
Create a full clone: High resource consumption, slow cloning, independent of the template virtual machine, template virtual machine error, will not be affected
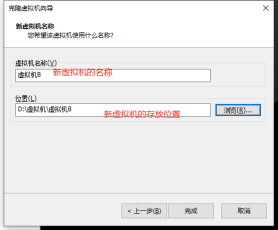
6. Configure new virtual machines
[root@localhost04 ~]# echo pc207.tedu.cn > /etc/hostname #Permanently set the hostname of the new virtual machine, effective after restart
[root@localhost04 ~]# hostname pc207.tedu.cn #Temporarily set hostname for immediate effect

#Configure gateway with IP address 192.168.4.207/24: 192.168.4.2 DNS=192.168.4.2
#Take a snapshot of Virtual Machine B as well, named xshell Complete when finished
7. Introduction of ssh
1.SSH protocol, Secure Shell
- Provide a secure Shell environment for clients
-Default port: TCP 22
2.OpenSSH services
-Service name: sshd
-Main program: /usr/sbin/sshd, /usr/bin/ssh
-Profile: /etc/ssh/sshd_config, /etc/ssh/ssh_config
3. Remote login tool ssh
[root@srv7 ~]# ssh root@192.168.4.207 #Manage 192.168.4.207 remotely as root
root@192.168.4.207's password: #Enter password validation, if it is the first time you log on, you will be prompted to record the information of virtual machine B, select yes, or you will not be able to enter password validation
[root@pc207 ~]# exit #Exit Remote Management
4. Common Options
-X (upper case): Run the other party's graphics program while remotely managing
5. Password-free authentication for remote management
[root@srv7 ~]# ssh-keygen  #Generate key pair
Generating public/private rsa key pair.
Enter file in which to save the key (/root/.ssh/id_rsa): #Storage location of key, default return
Enter passphrase (empty for no passphrase): #Whether to set the password for the key pair, not by default
Enter same passphrase again: #Confirm password to complete key pair generation

[root@srv7 ~]# ls  /root/.ssh/ #View generated files
id_rsa(Private Key)  id_rsa.pub(Public Key)  known_hosts(Record previously remotely managed machines)

[root@srv7 ~]# ssh-copy-id root@192.168.4.207 #Pass the public key on virtual machine A to virtual machine B
root@192.168.4.207's password: #Enter the password for virtual machine B to complete deployment

[root@pc207 ~]# ls /root/.ssh/ #Check to see if there is a public key passed over on virtual machine B, delete this file, and the secret login will be cancelled
authorized_keys

[root@srv7 ~]# ssh root@192.168.4.207 #Verify passwordless login
8. Using scp remote replication tools
Secure Replication Tool scp [remote management based on ssh]
-scp [-r] username@server: path local path
-scp [-r] local path username@server: path
[root@srv7 ~]# scp /etc/passwd 192.168.4.207:/root/ #Upload operation
The authenticity of host '192.168.4.207 (192.168.4.207)' can't be established.
ECDSA key fingerprint is SHA256:jhrhrYRQonKB8DryzNJ1+6fXREJE1CJV7ItToBqb624.
ECDSA key fingerprint is MD5:da:ee:cf:70:64:1d:30:0b:5b:86:08:c2:46:70:7e:97.
Are you sure you want to continue connecting (yes/no)? yes #Enter yes
Warning: Permanently added '192.168.4.207' (ECDSA) to the list of known hosts.
root@192.168.4.207's password: #Enter the password of the other party

[root@pc207 ~]# ls /root/  #Enter Virtual Machine B to see if the file was passed to the past

[root@srv7 ~]# scp root@192.168.4.207:/etc/yum.repos.d/mydvd.repo /root/ #Download the mydvd file on 192.168.4.207 to the local/root directory