Site Integration QQ Third Party Authorized Login
Author: Shao Fa
Official website: http://afanihao.cn/java
This is the official accompanying document for the Java Learning Guide series.
The content describes how to integrate QQ's third-party authorized login function in the website and demonstrates the project's development environment based on Java8 + Tomcat8 + Spring5.Third-party authentication login is OAuth (Open Authorization Open Certification). Common QQ login, Weibo login and so on are third-party authentication.
1. QQ login process demonstration
Click here Watch the login demo .Under the login page, place a button link for QQ login.
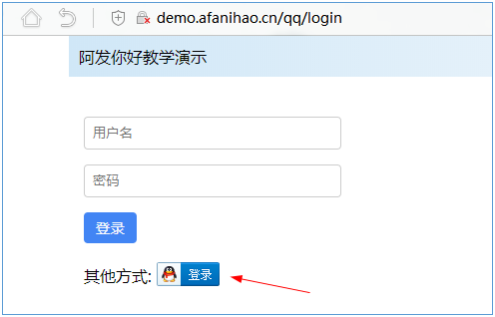
Click this button and the browser will jump to the official authorization page for qq.com.
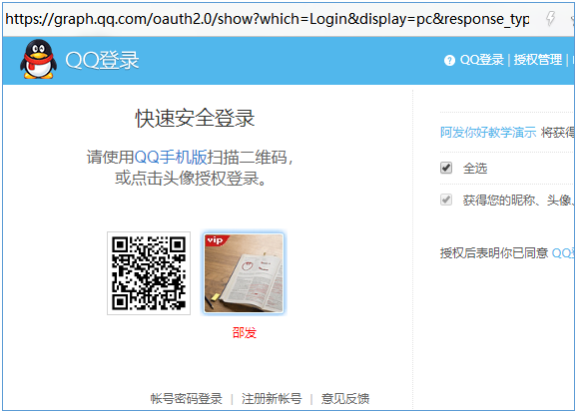
Note that the address bar at this time is graph.qq.com.Users enter their QQ number on this page. After successful login, the browser jumps to our own website demo.afanihao.cn again.
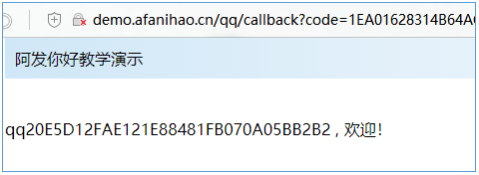
This is a demonstration of the standard process of QQ tripartite login.
2. Qualification review
Now I'll show you how to add this feature to your website.To achieve this login process, an official audit of qq.com is required.
Click to enter QQ Application Application Page, log in with your QQ number, and follow its prompt to create a web application.An example diagram is shown.
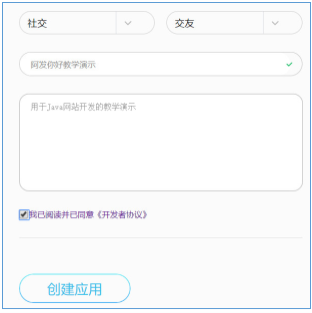
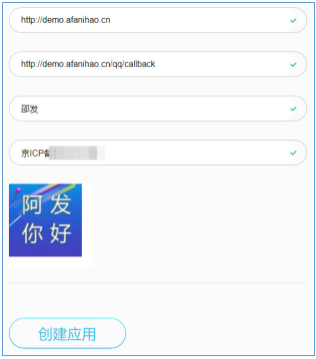
When filling in the application data, you need to fill in the domain name, interface address and filing number of your website, which means you must have a normal website (the domain name has been filed) to pass this review.
Example:
Domain name: http://demo.afanihao.cn
Callback interface: http://demo.afanihao.cn/qq/callback
After filling in as required, submit for review, generally within 1 or 2 working days can pass the review.
3. Application Development
Once the application review is complete, you can integrate QQ logins into your own website.In the code demonstrations below, demo.afanihao.cn is used to represent the domain name of the sample site, and you should replace it with your own when you develop it.
3.1 Front End, add a QQ login Icon
When you click this button, open http://demo.afanihao.cn/qq/useOauth
3.2 Background, implementing /qq/useOauth
Background implements the /qq/useOauth service, implements a Redirect, and controls the browser to jump to graph.qq.com for page authorization.
@GetMapping("/qq/useOAuth")
public String useOAuth(HttpSession session) throws Exception
{
	//Generate a random code to identify the security of callbacks
	int rand = 10000 + new Random().nextInt(10000);
	String qqState = String.valueOf(rand);
	session.setAttribute("qqState", qqState);

	String qqAuthUrl = "https://graph.qq.com/oauth2.0/authorize"
		+"?response_type=code"
		+"&client_id=" + appID
		+"&state=" + qqState
		+"&redirect_uri=" + callbackUrl
	;

	return "redirect:" + qqAuthUrl;
}
After successful page authorization, the browser jumps back to the http://demo.afanihao.cn/qq/callback address with a code parameter attached.
3.3 Background, implementing/qq/callback service
Implement/qq/callback, continue interacting with graph.qq.com using authorization code to get user information.Note that background indirect port calls are used here.
@GetMapping("/qq/callback")
public String callback(HttpSession session
		, HttpServletRequest request
		, HttpServletResponse response
		, String code
		, String state) throws Exception
{
	/* Interact with the QQ background to get AccessToken.*/
	String url2 = "https://graph.qq.com/oauth2.0/token"
		+"?grant_type=authorization_code"
		+"&client_id=" + appID
		+"&client_secret=" + appSecret
		+"&code=" + code
		+"&redirect_uri=http://user.afanihao.cn/qqcallback"
		;

	HTTP http = new HTTP();
	System.out.println("Obtain AccessToken: " + url2);
	String reply2 = http.get(url2, null);
	System.out.println("reply2: " + reply2);

	String accessToken = parseAccessToken(reply2);
	if(accessToken == null || accessToken.length()==0)
		throw new Exception("Unable to resolve accessToken,Answer as: " + reply2);


	/* Get the user's OpenID */
	String url3 = "https://graph.qq.com/oauth2.0/me"
		+ "?access_token=" + accessToken;
	String reply3 = http.get(url3, null);
	System.out.println("reply3: " + reply3);
	String openid = parseOpenID( reply3);
	System.out.println("User's OpenID=" + openid);

	. . . . . . . .
So far, the openid of the current user has been obtained, which corresponds to a globally unique account ID of the QQ user.Next, you just need to use this openid to process the database on this site.
It's also easy to handle: if you don't have this account in your system, create a new one; if you have this account in your system, take out the account information.The following code is just an illustration.
// Use openid as a query to see if there is no such user in the system
User user = UserDB.i.queryByQQ(openid);
if( user == null)
{
	user = new User();
	user.name = "qq" + openid;
	user.qqid = openid;
	UserDB.i.insert(user);
}
In fact, you can also get more information about the current user's QQ avatar, nickname, etc. See the example for details Project Source.
Finally, after verification is complete, the user's information is placed in Session and the login is complete.